· Todd Martin · Home Improvement · 22 min read
How To Refinish Wood Patio Furniture
How To Refinish Wood Patio Furniture: A Complete Guide
Your wood patio furniture brings warmth and natural beauty to your outdoor space. However, constant exposure to sun, rain, and temperature changes takes a toll. Over time, the wood fades, cracks, or peels, losing its initial charm. I know the feeling of looking at a once-beautiful piece now appearing worn out.
Learning how to refinish wood patio furniture is a rewarding project. It saves you money compared to buying new sets. More importantly, it breathes new life into your beloved pieces. This guide provides clear steps to restore your outdoor wood furniture. You will learn about preparation, sanding, finishing, and ongoing maintenance. Let’s make your patio furniture look brand new again.
Takeaway
Refinishing wood patio furniture effectively restores its beauty and extends its lifespan. The key steps include:
- Assess and Prepare: Clean the furniture thoroughly and make any necessary repairs.
- Strip Old Finish: Remove existing paint or stain to create a clean surface.
- Sand Properly: Smooth the wood grain for optimal finish adhesion.
- Apply New Finish: Choose and apply an appropriate outdoor-grade stain or sealer.
- Maintain Regularly: Clean and reapply protective layers as needed to preserve the finish.
To refinish wood patio furniture, thoroughly clean, repair, and sand the wood to remove old finishes and smooth the surface. Apply new outdoor-grade stain or sealer for protection and renewed appearance. Regular maintenance helps preserve its condition. This process restores beauty and extends the life of your outdoor pieces.
Understanding Your Wood Patio Furniture
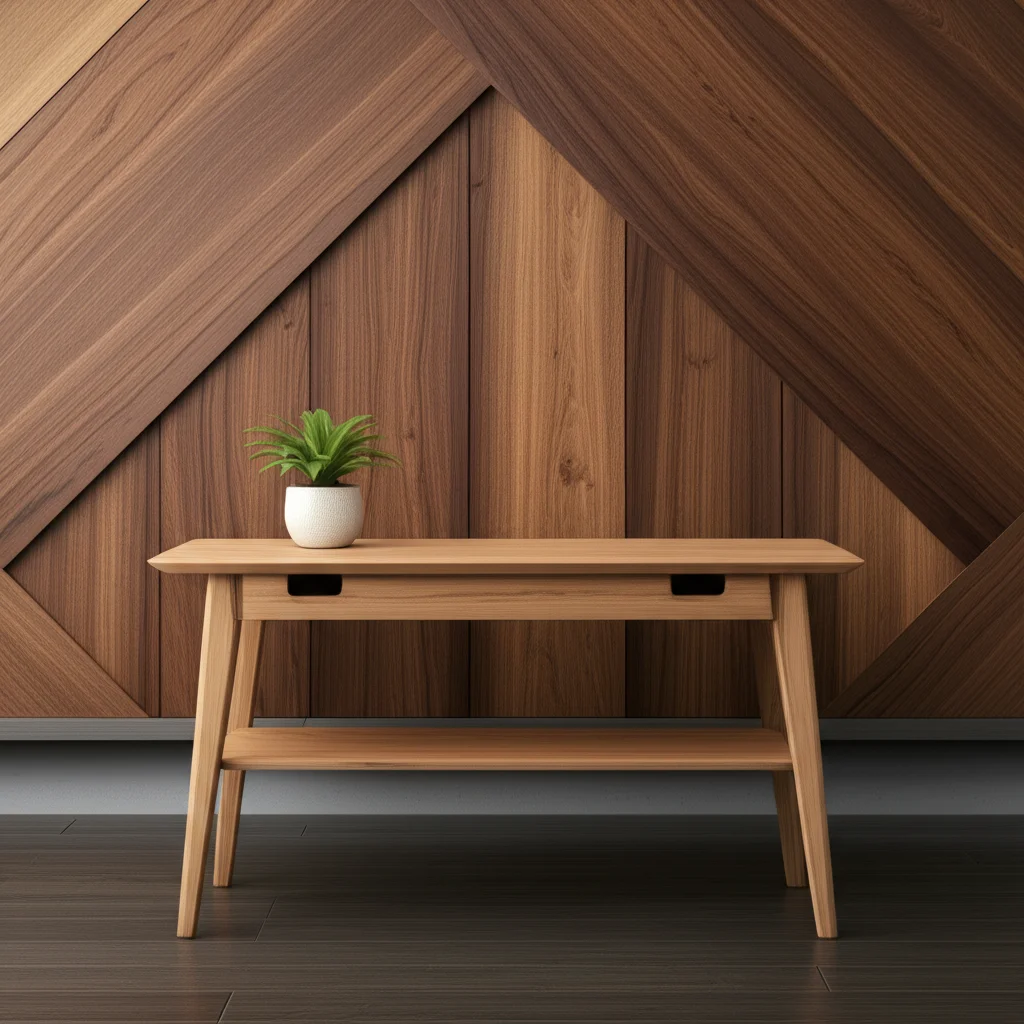
Before you start any work, it helps to understand your furniture’s material. Different types of wood react differently to outdoor elements. They also require specific finishing products. Common woods for patio furniture include teak, acacia, cedar, cypress, and treated pine. Each has unique characteristics.
Teak wood is naturally rich in oils, making it resistant to rot and insects. This wood often turns a silvery-gray patina if left untreated. Acacia is a dense, durable hardwood. It offers excellent resistance to weather. Cedar and cypress are softer woods but contain natural preservatives. These preservatives help them resist decay. Treated pine is often chemically processed for outdoor use. Understanding your wood type guides your product choices. It ensures the best results for your refinishing project.
Different Types of Wood and Their Properties
Let’s explore some common wood types found in patio furniture. Knowing your wood helps you choose the right refinishing approach. This choice is vital for successful restoration. Each wood type has its own strengths and weaknesses when exposed to the elements.
- Teak: Teak is a premium hardwood. It is famous for its natural durability and weather resistance. Teak wood contains high levels of natural oils. These oils repel water and prevent rot. Untreated teak develops a beautiful silvery-gray patina over time. You can restore its golden color with specific teak cleaners and sealers. Refinishing teak furniture requires products designed for oily woods. You can learn more about specific approaches to how to refinish a teak dining table or how to refinish teak indoor furniture for related information on this durable wood.
- Acacia: Acacia wood is another popular choice for outdoor furniture. It is dense and strong, making it very durable. Acacia is resistant to moisture and pests. It often comes with a rich, dark finish. Regular cleaning and reapplication of oil or sealer keep its luster. Understanding how to clean acacia wood outdoor furniture can help maintain its beauty between refinishing cycles.
- Cedar: Cedar is a softwood. It has a distinctive aroma. This wood is naturally resistant to decay and insects. It is lighter in weight than hardwoods. Cedar often comes in a lighter, reddish hue. It takes stains and paints well. You need to protect cedar from splintering with proper sanding and finishing.
- Cypress: Cypress wood shares many properties with cedar. It is also a softwood with natural resistance to decay. Cypress is stable and less prone to warping. It has a beautiful grain pattern. Like cedar, it accepts finishes easily.
- Treated Pine: Pine is a common, affordable wood. It is chemically treated for outdoor use. This treatment protects it from rot and insects. Treated pine often has a greenish tint when new. It can be painted or stained any color. It requires consistent maintenance to prevent splintering and fading.
Assessing the Damage to Your Furniture
Before you pick up any tools, inspect your furniture closely. Look for signs of wear and tear. This assessment helps determine the best refinishing strategy. It also helps you gather the right materials.
- Fading and Discoloration: Sun exposure often causes wood to lose its original color. It can become dull or gray. This is usually surface-level damage.
- Cracks and Splitting: Extreme temperature changes or improper drying can cause wood to crack. Small cracks might be fixable with wood filler. Larger splits may require more significant repair.
- Peeling or Flaking Finish: If your furniture was painted or heavily stained, the old finish might be peeling. This means it has lost its adhesion. You must remove this old finish completely.
- Mold or Mildew: Damp conditions can lead to mold or mildew growth. This appears as black or green spots. You must clean these off thoroughly before refinishing. For severe cases, consider specific techniques for how to clean mold off of wood furniture.
- Loose Joints or Hardware: Check if any parts of the furniture are wobbly. Tighten screws or re-glue joints as needed. Address these structural issues first.
Essential Tools and Materials for Refinishing
Having the right tools and materials makes the refinishing process smoother. It also ensures a professional-looking finish. I always gather everything before I start. This prevents interruptions and makes the work efficient. Don’t skimp on quality, especially for safety gear and finishing products.
Safety Gear You’ll Need
Your safety is important when working with chemicals and power tools. Always protect yourself during the refinishing process. I wear these items every time.
- Safety Glasses: Protect your eyes from dust and chemical splashes.
- Gloves: Chemical-resistant gloves are essential when handling strippers, stains, and sealers. Work gloves protect your hands during sanding.
- Dust Mask or Respirator: Fine wood dust and chemical fumes can harm your lungs. A dust mask is good for sanding. A respirator is better for strong fumes.
- Old Clothes: Wear clothes you don’t mind getting dirty or stained.
Cleaning and Preparation Supplies
Proper preparation is the foundation of a good refinish. These items help you get the wood clean and ready. A clean surface ensures the new finish adheres well.
- Stiff Bristle Brush: For scrubbing away dirt and loose debris.
- Garden Hose or Pressure Washer (low setting): For rinsing. Be careful with high pressure as it can damage wood.
- Wood Cleaner or Mild Detergent: A specific wood cleaner is ideal. Alternatively, mix a small amount of dish soap with water.
- Bucket: For mixing cleaning solutions.
- Rags or Sponges: For wiping and applying cleaners.
- Wood Filler (if needed): For filling small cracks and holes.
- Putty Knife: For applying wood filler.
Stripping and Sanding Equipment
Removing the old finish and smoothing the wood is crucial. These tools do most of the hard work. They help expose the bare wood for a fresh start.
- Paint Scraper: For removing loose, peeling finish.
- Chemical Stripper (optional): If the old finish is stubborn. Always follow product instructions carefully.
- Coarse, Medium, and Fine Grit Sandpaper (80, 120, 220 grit): You need various grits for different stages of sanding.
- Orbital Sander or Detail Sander: These tools make sanding much faster. Hand sanding is possible for small pieces.
- Sanding Blocks: For hand sanding, these give you better grip and even pressure.
- Wire Brush (for textured areas or deep cleaning): Use carefully to avoid damaging the wood.
Finishing Products
This is where your furniture gets its new look and protection. Choosing the right finish is vital for outdoor durability. I always research the best options for my specific wood type.
- Outdoor Wood Stain: Choose a stain that suits your desired color. Some stains offer UV protection.
- Outdoor Wood Sealer or Varnish: This provides a protective layer against moisture and UV rays. Options include spar varnish, polyurethane specifically for outdoor use, or penetrating oils.
- Paint Brushes or Foam Applicators: High-quality brushes give a smoother finish.
- Clean Cloths or Tack Cloths: For wiping away dust before applying finish.
- Paint Stirrer: To mix stains and sealers thoroughly.
Step-by-Step Guide to Refinishing Wood Patio Furniture
Refinishing wood patio furniture might seem daunting, but it is manageable. By breaking down the process into clear steps, you can achieve fantastic results. I have found following a methodical approach leads to success. Let’s walk through it together.
Step 1: Cleaning and Initial Preparation
This first step is crucial for good adhesion of your new finish. A clean surface is a must. I always start here.
Disassemble the Furniture (if possible): If your furniture comes apart easily, do so. This allows you to reach all surfaces. It also makes sanding and finishing easier. Keep all hardware organized in a bag.
Clean the Wood Thoroughly:
- Use a stiff brush to remove loose dirt, cobwebs, and debris.
- Mix your wood cleaner or mild detergent with water according to instructions.
- Apply the cleaning solution to the wood. Scrub with the brush. Pay attention to dirty or moldy areas.
- For stubborn mold, a solution of 1 part bleach to 4 parts water can be used carefully. Rinse thoroughly afterward. You can find more tips on how to clean outdoor wood furniture.
- Rinse the furniture completely with a garden hose. Ensure all cleaning solution is gone.
- Let the furniture dry completely. This might take 24-48 hours, depending on humidity. Make sure the wood is bone dry before moving on.
Inspect and Repair:
- Once dry, inspect for cracks, splinters, or loose joints.
- Fill small cracks with exterior-grade wood filler. Apply with a putty knife. Smooth it flush with the wood surface. Let it dry completely according to product instructions.
- Tighten any loose screws or re-glue wobbly joints. Use waterproof wood glue for outdoor furniture. Clamp joints if necessary while the glue dries.
Step 2: Stripping the Old Finish
This step is essential if your furniture has an old, failing paint or stain. Removing it creates a clean canvas for your new finish. If your furniture is bare wood or just faded, you might skip this and go straight to sanding.
- Consider Chemical Stripper (if needed):
- If the old finish is extensive or difficult to sand, a chemical stripper helps.
- Apply the stripper according to the manufacturer’s instructions. Work in a well-ventilated area. Wear safety glasses and chemical-resistant gloves.
- Allow the stripper to work for the recommended time. You will see the old finish bubble or soften.
- Use a plastic scraper or putty knife to gently remove the softened finish. Avoid digging into the wood.
- Wipe away residue with a clean cloth. Follow the stripper’s instructions for neutralizing the wood.
- Proceed to Sanding: Once the old finish is mostly removed, you are ready for sanding.
Step 3: Sanding for a Smooth Surface
Sanding is perhaps the most critical step for a beautiful finish. It smooths the wood and helps the new finish adhere evenly. I start with a coarser grit and move to finer grits for a silky smooth feel.
- Start with Coarse Grit (80-100 grit):
- Attach 80-grit sandpaper to your orbital sander.
- Sand all surfaces of the furniture. Move the sander with the wood grain.
- Apply even pressure. Do not press too hard.
- This step removes stubborn old finish, deep scratches, and prepares the wood.
- For intricate areas or curves, use a detail sander or sand by hand with a sanding block.
- Move to Medium Grit (120-150 grit):
- Switch to 120-grit sandpaper.
- Sand all surfaces again. This removes the scratch marks left by the coarser grit.
- Continue sanding until the surface looks uniformly smooth.
- Finish with Fine Grit (180-220 grit):
- Use 180 or 220-grit sandpaper for the final pass.
- This step refines the surface. It makes it incredibly smooth to the touch.
- Remove all sanding dust. Use a vacuum, then wipe with a tack cloth or a damp cloth. Make sure the wood is dust-free before applying any finish. A clean surface is vital.
- If you are going to paint your furniture white, similar preparation applies, as discussed in guides for how to paint wood furniture white. Also, preparing wood is critical for painting any furniture, as noted in how to clean wood furniture before painting.
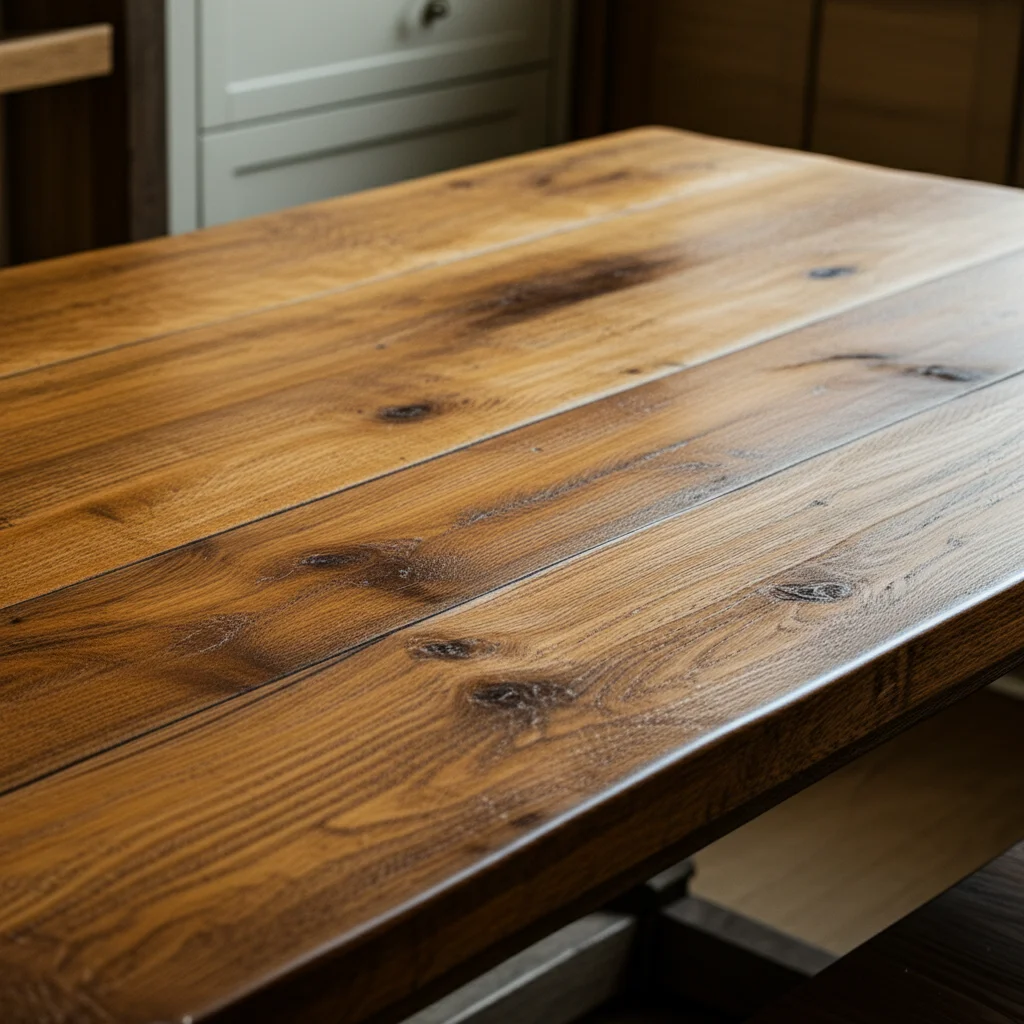
Step 4: Applying Stain or Sealer
Now comes the fun part: adding color and protection. The type of finish you choose depends on the look you want and the wood type. I typically prefer stains for color and a separate sealer for durability.
- Choose Your Finish:
- Stain: Penetrates the wood to add color. Outdoor stains often have UV inhibitors.
- Oil Finish: Penetrates deeply, enhances natural wood grain, and provides good water repellency (e.g., teak oil, penetrating outdoor wood oil). Requires reapplication more frequently.
- Sealer/Varnish: Forms a protective film on the surface. Spar varnish is flexible and designed for outdoor use. Outdoor polyurethane offers good protection.
- Paint: Provides opaque color and durable protection. Requires proper primer.
- Apply Stain (if desired):
- Stir the stain well. Do not shake.
- Apply stain with a brush or foam applicator, following the wood grain.
- Apply a thin, even coat.
- Allow the stain to penetrate for the recommended time (check product instructions).
- Wipe off excess stain with a clean, lint-free cloth. Do this before it dries.
- Allow the stain to dry completely before applying additional coats or a topcoat. This usually takes 24-48 hours.
- Apply Sealer/Varnish/Paint:
- Once the stain is dry (or if you are not staining), apply your chosen topcoat.
- Stir the product gently. Avoid creating bubbles.
- Apply thin, even coats with a quality brush. Work with the wood grain.
- Allow each coat to dry completely. Drying times vary, so check product labels.
- Lightly sand between coats with 220-grit sandpaper. This creates better adhesion.
- Wipe away dust with a tack cloth.
- Apply 2-3 coats for best protection. More coats mean more durability.
- Ensure the final coat dries completely before using the furniture. This can take several days.
Choosing the Right Outdoor Wood Finish
Selecting the correct finish is critical for the longevity and appearance of your refinished furniture. Different finishes offer various levels of protection and aesthetic appeal. I always consider the exposure level of my furniture to sun and rain.
Stains vs. Sealers vs. Oils
Each type of finish has distinct advantages. Understanding these differences helps you make an informed choice. Your selection will impact how often you need to re-apply the finish.
- Outdoor Stains: These products add color to the wood while allowing the natural grain to show through. Many outdoor stains contain UV inhibitors. These agents protect the wood from sun damage and fading. Stains penetrate the wood fibers. They do not form a thick surface film. They provide good resistance against moisture. Look for oil-based or water-based exterior stains.
- Wood Sealers/Varnishes: Sealers and varnishes form a protective film on the wood surface. This film acts as a barrier against moisture, UV rays, and abrasion. Spar varnish is specifically designed for marine use. It is flexible and highly durable for outdoor conditions. Outdoor polyurethanes also offer excellent protection. These finishes typically last longer than oils or stains alone. However, they can chip or peel over time.
- Penetrating Oils: Oils like teak oil or specific outdoor wood oils soak into the wood. They nourish the fibers and enhance the natural color. Oils provide a more natural look and feel to the wood. They are easy to reapply as they do not chip. However, they offer less UV protection than varnishes. They require more frequent reapplication, often annually. For specific wood types like ipe, protecting the wood with oil is important, as seen in guides like how to protect ipe wood patio furniture.
Considerations for UV Protection and Weather Resistance
Outdoor furniture faces harsh conditions. Sun, rain, and temperature fluctuations constantly attack the finish. Choosing a finish with good UV protection is important. It prevents the wood from fading and turning gray. Weather-resistant properties ensure the finish holds up against moisture and prevents rot.
- UV Protection: Look for “UV resistant” or “UV inhibitors” on the product label. This feature is crucial for furniture exposed to direct sunlight. It helps maintain the wood’s color.
- Water Repellency: The finish must repel water. This prevents moisture from penetrating the wood. Water damage leads to swelling, cracking, and rot. Oil-based finishes and spar varnishes are excellent for water resistance.
- Flexibility: Wood naturally expands and contracts with temperature and humidity changes. A flexible finish can move with the wood. This prevents cracking and peeling of the topcoat. Spar varnishes are known for their flexibility.
Common Problems and Troubleshooting During Refinishing
Even with careful planning, issues can arise during refinishing. Knowing how to address them saves time and frustration. I have faced many of these myself. It is part of the learning process.
Uneven Stain Application
Sometimes, the stain can look blotchy or streaky. This usually happens for a few reasons.
- Improper Sanding: If the wood was not sanded evenly, some areas might absorb more stain. This creates darker spots. Ensure thorough and consistent sanding.
- Not Wiping Excess Stain: Leaving too much stain on the surface allows it to dry unevenly. Always wipe off excess stain within the recommended time.
- Applying to Damp Wood: Stain applied to damp wood will not penetrate correctly. Always ensure the wood is completely dry.
- Solution: If the stain is still wet, quickly wipe off the excess. For dried uneven spots, you may need to lightly re-sand the area. Then reapply the stain carefully. For significant issues, you might need to strip and re-stain.
Peeling or Blistering Finish
If your new finish starts to peel or blister, it is frustrating. This indicates a problem with adhesion.
- Poor Surface Preparation: The most common cause is not cleaning or sanding the wood enough. Old finish, dirt, or grease left on the surface prevent proper adhesion. Ensure the wood is impeccably clean and smooth before applying any finish.
- Moisture in Wood: Applying finish to wood that is not fully dry will cause peeling. The trapped moisture tries to escape, pushing the finish off. Let the wood dry for several days after cleaning.
- Incompatible Products: Mixing incompatible stain and topcoat types can cause issues. For example, some water-based finishes do not adhere well over oil-based stains if not fully cured. Always check product compatibility.
- Applying Too Thick: Applying the finish too thickly can cause blistering. Thin coats are better.
- Solution: You must sand off the peeling or blistering finish. Clean and sand the wood thoroughly again. Then reapply the finish in thin, even coats. Ensure the wood is completely dry.
Mold or Mildew Growth
Mold or mildew can reappear if not properly addressed during cleaning. This is common in damp outdoor environments.
- Incomplete Cleaning: If mold spores were not fully removed, they can grow back. Use a dedicated mold and mildew cleaner or a bleach solution during cleaning.
- Insufficient Drying: Trapped moisture promotes mold growth. Ensure the wood is fully dry before finishing.
- Poor Ventilation: Furniture in perpetually damp, shaded areas is more prone to mold. Try to move furniture to sunnier spots when possible.
- Solution: Clean the affected area with a mold cleaner or a diluted bleach solution. For severe cases, you can use specialized products. Rinse thoroughly and allow to dry. For general tips on cleaning mold from wood, similar advice applies to how to clean mold off of wood furniture. You may need to lightly sand and reapply finish to that specific area.
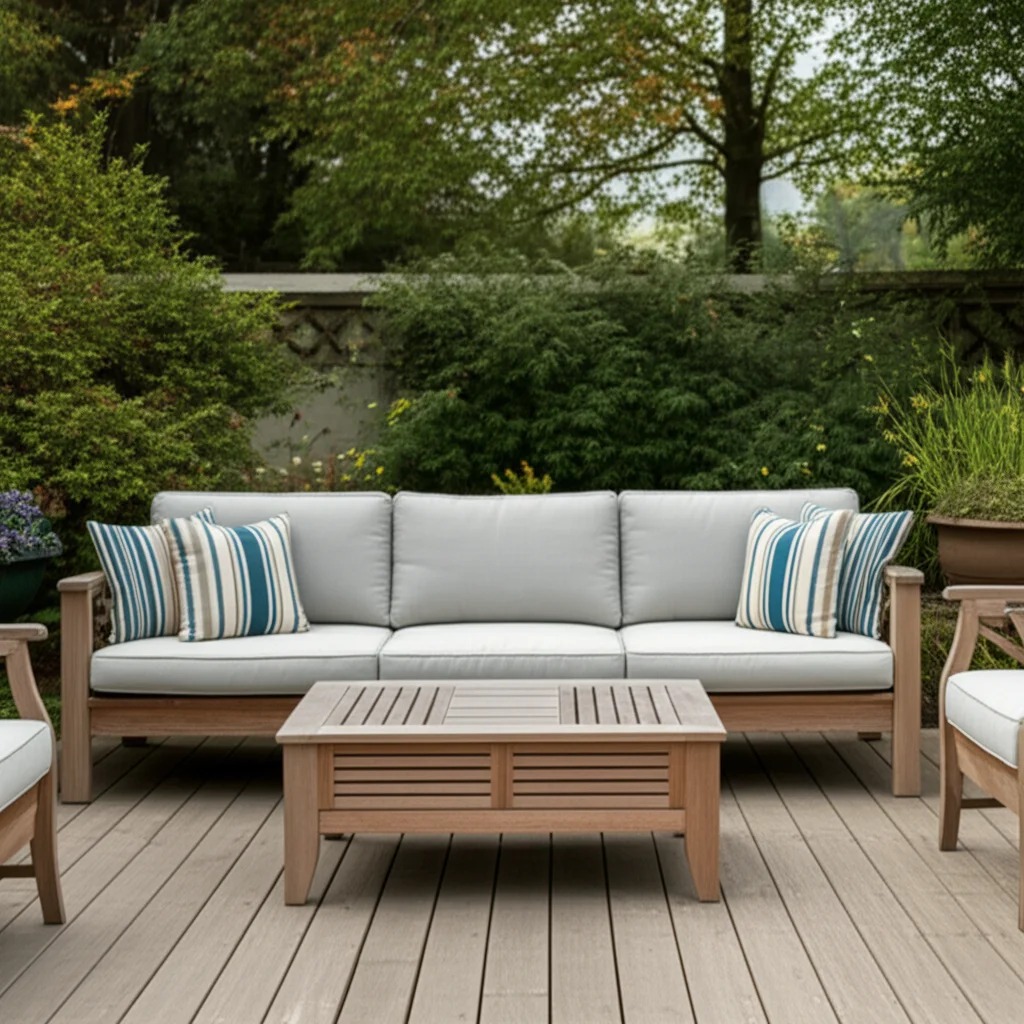
Maintenance and Care for Refinished Furniture
Refinishing is a significant project. Proper ongoing maintenance protects your investment. It keeps your wood patio furniture looking good for years. I find that regular, simple care prevents major problems later.
Regular Cleaning Routine
Keeping your furniture clean prevents dirt buildup. It also helps you spot any issues early. This is an easy habit to adopt.
- Weekly Dusting: Use a soft cloth or a brush to remove loose dust and pollen. Pollen can be stubborn, so consider techniques like those for how to keep pollen off patio furniture.
- Monthly Wipe-Down: Wipe down surfaces with a damp cloth and mild soap. Rinse with a clean damp cloth. Avoid harsh chemicals.
- Address Spills Immediately: Clean food and drink spills right away. This prevents stains from setting into the finish.
Protecting Against the Elements
Even with a good finish, external factors can shorten your furniture’s life. Taking extra protective measures makes a big difference. I try to implement these whenever possible.
- Use Furniture Covers: Invest in breathable, waterproof furniture covers. Use them during inclement weather or when the furniture is not in use. Covers offer excellent protection from rain, sun, and dirt. They also help prevent excessive moisture absorption.
- Store During Off-Season: If possible, store your wood patio furniture indoors during harsh winter months. A garage or shed is ideal. This protects it from extreme cold, snow, and ice. When storing, consider methods like those for how to store patio furniture in garage or even how to store patio furniture outside in winter if indoor storage is not an option.
- Relocate in Extreme Sun: Move furniture to shaded areas during peak sun hours if possible. This minimizes UV exposure and helps the finish last longer.
- Elevate from Ground: If your furniture sits directly on wet ground, moisture can wick up. Use furniture glides or small blocks to elevate legs slightly. This improves airflow and reduces moisture contact.
Reapplication of Finish
No finish lasts forever, especially outdoors. Regular reapplication is key to continuous protection. This is often simpler than the initial refinishing project.
- Monitor the Finish: Check your furniture annually. Look for signs of wear, fading, or water absorption. If water no longer beads on the surface, it’s time to reapply.
- Light Sanding: If the existing finish is still mostly intact, you might only need a light sanding with fine-grit sandpaper (220 grit). This provides a good “tooth” for the new coat.
- Clean and Reapply: Clean the furniture thoroughly as described in Step 1. Allow it to dry completely. Then apply one or two fresh coats of your chosen stain or sealer. This touch-up process rejuvenates the protection. It helps avoid a full refinish for many years.
Advanced Techniques and Tips for Wood Refinishing
Once you master the basics, you might explore more advanced techniques. These can help you achieve even better results or tackle specific challenges. I sometimes use these for older, more damaged pieces.
Repairing Deeper Damage
Sometimes, furniture has more than just surface wear. Deeper issues require specific solutions.
- Splits and Cracks: For larger cracks that wood filler cannot fix, consider using epoxy or wood glue with sawdust. Mix wood glue with fine sawdust from the same type of wood. This creates a strong filler that matches the wood’s color. Force it into the crack, then clamp and let dry.
- Dents: Minor dents can sometimes be raised by applying moisture and heat. Place a damp cloth over the dent. Iron the cloth with a hot iron. The steam can cause the wood fibers to swell. Repeat carefully.
- Replacing Damaged Sections: For severely damaged parts, replacement might be the only option. If it’s a simple board, you can cut and fit a new piece of the same wood. Then integrate it into the structure. This often requires woodworking skills.
Achieving Specific Finishes
You might want a particular look beyond simple staining. Understanding how different products interact can help.
- Liming or Whitewashing: This technique gives wood a light, distressed look. Apply a thinned white paint or a specialized liming wax. Wipe off the excess to let the grain show through.
- Distressing: Create an aged or antique look by gently damaging the wood. Use chains, hammers, or other tools to create nicks and dents before finishing. Then, apply stain or paint.
- High Gloss vs. Matte: The sheen of your topcoat impacts the final look. Spar varnishes often come in gloss, satin, or matte finishes. Choose based on your preference. High gloss shows imperfections more. Matte hides them better.
Best Practices for Long-Lasting Results
Adopting certain habits ensures your hard work stands the test of time. These are the details that make a difference.
- Work in Ideal Conditions: Refinish outdoors on a dry, calm day. Avoid direct sunlight, extreme heat, or high humidity. These conditions can affect drying times and finish quality.
- Read Product Labels: Always read instructions for every product you use. Drying times, application methods, and safety precautions vary.
- Test on an Inconspicuous Area: Before applying any stain or finish to the entire piece, test it on a hidden spot. This ensures you like the color and finish.
- Apply Thin Coats: Multiple thin coats are always better than one thick coat. Thin coats dry faster, adhere better, and are less prone to issues like blistering.
- Proper Curing Time: Drying time means the finish is dry to the touch. Curing time means the finish has fully hardened. Allow the full curing time before heavy use. This often takes days or weeks.
FAQ Section
Q1: How often should I refinish my wood patio furniture?
You should typically refinish your wood patio furniture every 2-3 years. This frequency depends on the type of wood, the finish used, and how much exposure it gets to sun and rain. Regularly check for fading, peeling, or water absorption. If water no longer beads on the surface, it’s a good sign it needs a fresh coat of protection.
Q2: Can I paint wood patio furniture instead of staining it?
Yes, you can absolutely paint wood patio furniture instead of staining it. Painting provides a solid color, which can be a great way to refresh its look. Ensure you use exterior-grade paint and primer for durability. Proper surface preparation, including thorough cleaning and sanding, is crucial for paint adhesion and a long-lasting finish.
Q3: What is the best type of finish for outdoor wood furniture?
The best type of finish for outdoor wood furniture depends on your desired look and maintenance commitment. Spar varnish provides excellent, long-lasting film protection against UV and moisture. Penetrating oils offer a natural look and are easy to reapply but require more frequent maintenance. Exterior stains provide color and some protection.
Q4: How do I remove mold and mildew from wood patio furniture before refinishing?
To remove mold and mildew, first scrub the furniture with a stiff brush and a solution of mild detergent and water. For stubborn mold,
- wood patio furniture
- furniture restoration
- outdoor furniture care
- wood finishing
- DIY furniture

Todd Martin
Senior Writer
With over 15 years of experience in home renovation and design, I started HEG to share what I’ve learned with homeowners who want to create spaces that are both beautiful and functional. I’ve always believed in a hands-on approach, and over the years, I’ve picked up practical solutions that actually work. Through HEG, I aim to make home improvement more approachable, sharing real tips that help you create a home you truly love.