· Todd Martin · Kitchen Appliances · 16 min read
How To Remove Bread Pan From Hamilton Beach Bread Maker
Safely Remove Your Hamilton Beach Bread Pan
Imagine the aroma of freshly baked bread filling your kitchen. It is one of life’s simple pleasures, made easy with a Hamilton Beach bread maker. But once that golden loaf is baked, a common question arises: how do you remove the bread pan? Getting the pan out correctly is key to enjoying your bread and keeping your appliance in top condition.
Many new bread maker owners face a moment of confusion. They stand there, looking at their warm, fragrant bread, unsure how to proceed. I know I did when I first started using mine. Proper bread pan removal is not just about getting the bread out. It is also about protecting your non-stick pan and the machine itself. This guide will walk you through the simple steps. It will also offer solutions for common issues, like a stuck pan. We will cover essential cleaning and maintenance tips too. By the end, you will feel confident managing your Hamilton Beach bread maker. You will enjoy perfect loaves every time.
Takeaway
- Always unplug the bread maker and allow the pan to cool before removal.
- Twist the pan counter-clockwise, then lift it straight up to release it.
- If the pan is stuck, try gentle rocking or allow it to cool completely.
- Clean the pan immediately after use with warm, soapy water; avoid harsh abrasives.
- Regular maintenance ensures easy pan removal and extends your bread maker’s life.
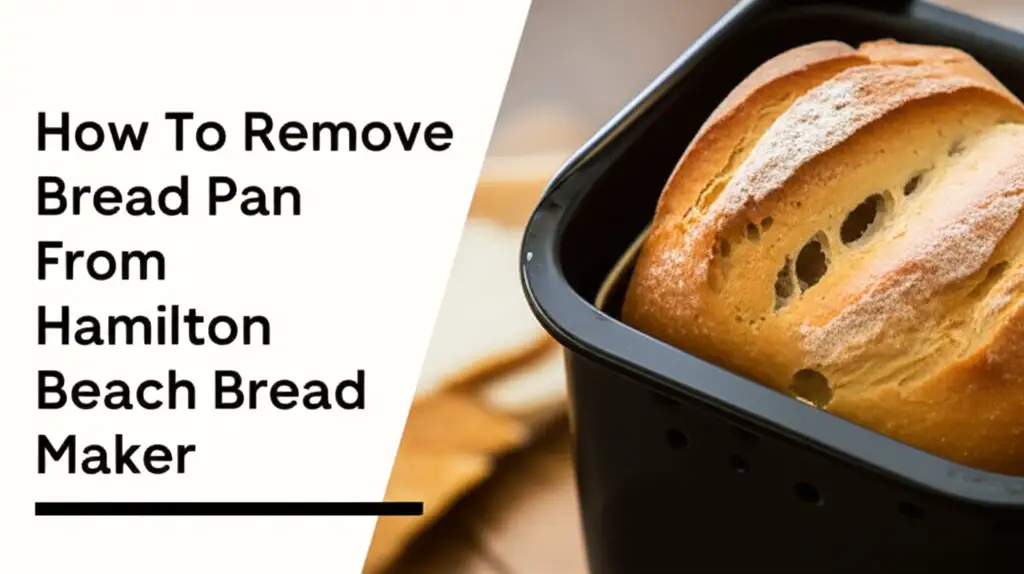
To remove the bread pan from your Hamilton Beach bread maker, first ensure the machine is unplugged and cool. Then, grasp the pan handle, twist it counter-clockwise about a quarter turn to unlock it from the base, and lift the pan straight up and out of the baking chamber.
Understanding Your Hamilton Beach Bread Maker Design
Hamilton Beach bread makers are popular for their ease of use and consistent results. Each model has a specific design for its bread pan. Knowing this design helps with easy removal. The bread pan sits in a baking chamber inside the main unit. A special locking mechanism holds it in place. This mechanism is usually at the bottom of the pan. It connects to the machine’s drive shaft. This shaft rotates the kneading paddle.
The pan often has a non-stick coating. This coating prevents bread from sticking. It also makes cleanup easier. The handle on top of the pan helps with lifting. You use this handle to secure and remove the pan. Different Hamilton Beach models may have slight variations in their locking system. Most use a simple twist-and-lock method. This design ensures the pan stays stable during the mixing and baking cycles. It prevents spills and ensures proper kneading. I always check my specific model’s manual if I am unsure about any part of the design. This helps me understand the parts better.
Before you even think about removal, understand what holds the pan in place. Below the pan, inside the bread maker, you will see a small post or two. These posts fit into slots on the bottom of the bread pan. A simple twist action engages or disengages these slots. This is how the pan locks or unlocks. Learning how these parts fit together makes pan removal straightforward. It removes any guesswork. It helps prevent damage to both the pan and the machine. Always approach pan removal with care. This respects the engineering of the appliance.
Safety First: Preparing Your Bread Maker for Pan Removal
Safety is paramount when working with kitchen appliances. Before attempting to remove the bread pan, ensure your Hamilton Beach bread maker is completely safe to handle. The pan and the machine’s interior get very hot during the baking process. Touching hot surfaces can cause burns. Therefore, patience is a key ingredient here. I always make sure the machine has cooled down. This protects my hands and the pan.
First, unplug the bread maker from the wall outlet. This cuts off all power to the appliance. It eliminates any risk of electric shock. It also prevents the machine from accidentally starting a cycle. Next, allow the bread maker to cool down. Bread makers produce intense heat to bake bread. The pan and the surrounding chamber can remain hot for a long time. Some models have a “keep warm” cycle. Even after this cycle finishes, the pan stays very warm. I typically wait at least 30 minutes to an hour after the machine beeps. For a quicker cool-down, you can open the lid. This lets some heat escape. However, be careful as steam can still be present.
Using oven mitts or heat-resistant gloves is a smart step. Even if you think the pan has cooled, some residual heat might remain. Mitts provide an extra layer of protection. They give you a better grip on the pan handle. I always keep a pair handy right next to my bread maker. This ensures I am ready for safe pan removal every time. Proper preparation reduces the risk of accidents. It makes the entire process smoother. It ensures you can enjoy your fresh bread without any worry.
The Standard Process: How to Lift and Twist the Pan
Once your Hamilton Beach bread maker is cool and unplugged, you are ready to remove the bread pan. This process is usually quick and simple. It involves a specific twisting and lifting motion. I find it becomes second nature after a few tries. Start by opening the lid of your bread maker. Look at the bread pan sitting inside the baking chamber. You will see its handle sticking up.
Grasp the handle of the bread pan firmly. You can use one hand for this. Some people find two hands give better control. Ensure you have a good, stable grip. Next, twist the bread pan counter-clockwise. You will only need to turn it a quarter turn or so. You should feel a slight click or release as the pan unlocks from its base. Do not force it if it feels stuck at this point. A gentle twist is all that is usually needed. This action disengages the locking mechanism at the bottom of the pan. It frees the pan from the machine’s internal posts.
After twisting, lift the pan straight up and out of the bread maker. Be careful not to tilt the pan too much, especially if it still contains bread. Tilting can make the loaf slide out unexpectedly. It can also cause any crumbs or residue to fall back into the machine. Once the pan is out, place it on a heat-resistant surface. A wire rack is ideal for cooling the bread further. This method works for most Hamilton Beach models. Following these steps ensures a smooth and safe pan removal every time. It prepares you to enjoy your delicious homemade bread.
Handling the Kneading Paddle
After removing the bread pan, you will notice the kneading paddle. This small paddle is usually stuck inside the baked loaf, or it might be at the bottom of the pan. It rotates during the mixing and kneading cycles. The paddle is typically made of metal with a non-stick coating. It plays a crucial role in bread making.
To remove the paddle from your bread loaf, carefully pull the bread out of the pan. Sometimes, the paddle comes out with the bread. Other times, it stays in the pan. If it is in the bread, gently wiggle it free. Be careful not to tear the bread too much. If the paddle remains in the pan, simply pull it up. It usually slides off its shaft easily. Remember, the paddle can still be hot, even if the pan has cooled. Use a utensil or wear a glove if needed.
Cleaning the kneading paddle is important. Dough and crumbs can stick to it. I always clean it right away to prevent food from hardening. Wash it with warm, soapy water. Avoid abrasive scrubbers. These can damage the non-stick coating. A small brush can help remove any stuck bits. Ensure it is completely dry before storing it. Proper care of the paddle ensures it performs well for many loaves to come.
When It’s Stubborn: Troubleshooting a Stuck Bread Pan
Sometimes, a bread pan does not come out easily. This can be frustrating, especially when you are eager to get your fresh bread. A stuck pan is a common issue for many bread maker users. Residue build-up or a slightly warped pan are often the culprits. I have dealt with a stuck pan a few times myself. But do not worry; there are gentle ways to fix it. Never force the pan. Applying too much force can damage the locking mechanism of your Hamilton Beach bread maker. It can also harm the pan itself.
First, double-check that the bread maker is unplugged and fully cool. This is the most crucial step for safety. Once cooled, try the twist-and-lift motion again. Apply gentle pressure. Sometimes, a slight change in the angle of your hand can help. If it still does not budge, try gently rocking the pan back and forth. Do this while twisting counter-clockwise. This gentle motion can loosen any stuck residue. It can also help align the locking mechanism. I often find a subtle wiggle does the trick.
If the pan remains stubborn, consider that dough or flour might have spilled into the baking chamber during a previous cycle. This can create a sticky bond around the pan’s base. Try dampening a cloth with warm water. Wring out excess water, then carefully wipe around the base of the bread pan where it meets the machine. The moisture can help dissolve any dried dough. Let it sit for a few minutes. Then, attempt the twist and lift again. This approach is effective and prevents damage. It is important to address a stuck pan with care. This ensures your bread maker continues to function properly for years.
Beyond Removal: Cleaning and Caring for Your Bread Pan
Removing the bread pan is just the first step. Proper cleaning and care of your Hamilton Beach bread pan are essential. It extends the life of the pan. It also ensures the non-stick coating remains effective. A clean pan means better baking results and easier future removals. I always clean my pan right after use. This prevents food from hardening on the surface. Dried dough and crumbs are much harder to remove later.
Most Hamilton Beach bread pans feature a non-stick coating. This coating is delicate. It requires gentle handling. Avoid using abrasive cleaners, steel wool, or metal utensils. These can scratch or damage the non-stick surface. Once scratched, food is more likely to stick. This makes future pan removal and cleaning much more difficult. Instead, use a soft sponge or cloth. Mild dish soap and warm water are all you need for effective cleaning. I often let my pan soak for a few minutes if there are stubborn bits of dough.
Hand washing is generally recommended for bread maker pans. While some models might claim to be dishwasher safe, the high heat and harsh detergents in dishwashers can degrade the non-stick coating over time. Washing by hand preserves the pan’s integrity. After washing, rinse the pan thoroughly. Make sure no soap residue remains. Then, dry the pan completely before storing it. Any moisture left on the pan can lead to rust or affect future baking. Store the pan in a dry place. This comprehensive care routine ensures your bread pan is always ready for its next baking adventure. For tips on cleaning other types of cookware, you can learn how to clean an aluminum pan or even how to clean a pan that is burnt. These general pan cleaning techniques share similar principles of gentle care.
Maintaining the Bread Machine’s Interior
Beyond the pan, the interior of your Hamilton Beach bread maker also needs attention. Bits of flour or dough can sometimes fall into the baking chamber. Over time, this can lead to issues. It can affect the machine’s performance. It can also make pan removal harder. A clean interior prevents these problems.
After removing the pan, I use a soft, damp cloth to wipe down the inside of the machine. Pay attention to the area where the pan sits. Look for any spilled ingredients or residue. Make sure to clean around the drive shaft and heating element. Do not use excessive water. You do not want water to get into the electrical components. A slightly damp cloth is enough. Avoid spraying cleaners directly into the machine.
Sometimes, flour dust can accumulate around the vents or within crevices. A small brush or even a vacuum cleaner hose attachment can help remove this. Keeping the interior clean ensures the machine operates efficiently. It also extends the lifespan of your appliance. A well-maintained bread maker provides perfect loaves consistently.
Preventative Measures for Easy Pan Removal
Making pan removal easy starts before you even bake. Incorporating a few simple habits into your bread-making routine can prevent future struggles. These preventative measures ensure that your Hamilton Beach bread maker continues to be a joy to use. I have found that a little foresight saves a lot of hassle. Prevention is always better than troubleshooting.
First, always ensure the bread pan is clean and dry before you place it back into the machine. Any residue or moisture can cause it to stick during the next baking cycle. I make sure there are no crumbs on the outside of the pan. I also check the inside of the machine’s chamber. A clean fit means an easy release. Second, avoid overfilling the pan with ingredients. When bread rises too much, it can sometimes stick to the top edges of the bread maker itself. This makes pan removal tricky. Follow your recipe’s ingredient measurements carefully. This prevents overflow.
Proper placement of the pan is also crucial. When you insert the pan into the bread maker, make sure it clicks into place securely. Give it a gentle twist clockwise to lock it firmly. If the pan is not properly seated, it might bake unevenly. It might also become more difficult to remove later. I always give mine a small tug to confirm it is locked in. These small steps make a big difference. They ensure that every time you finish baking, your bread pan comes out smoothly. This saves you time and frustration. It keeps your bread maker in excellent working condition.
Common Mistakes to Avoid During Bread Pan Handling
Handling your Hamilton Beach bread pan seems simple, but common mistakes can lead to issues. Knowing what to avoid helps protect your pan and your bread maker. It ensures a smooth baking experience. I have made some of these mistakes myself in the past. Learning from them helps me now.
One major mistake is trying to remove the pan when it is still hot. As discussed, this can cause burns. It can also make the pan harder to twist and lift. The metal expands with heat. Always allow enough cooling time. Another mistake is using metal utensils inside the bread pan. Metal spoons, spatulas, or knives can scratch the non-stick coating. Once the coating is damaged, bread will stick. This makes both removal and cleaning very difficult. Use silicone or wooden utensils instead.
Forcing a stuck pan is also a common error. Applying excessive force can bend the pan. It can also damage the machine’s internal locking mechanism. If the pan does not twist easily, stop. Re-evaluate the situation. Use the gentle troubleshooting methods we discussed. Never hit or bang the pan. Lastly, neglecting proper cleaning is a significant mistake. Leaving dried dough or residue on the pan or inside the machine can cause sticking over time. It can also lead to mold growth. Always clean your pan and machine after each use. These simple avoidances will keep your Hamilton Beach bread maker functioning perfectly. They will allow you to enjoy hassle-free bread baking.
FAQ Section
Why is my Hamilton Beach bread pan stuck?
A Hamilton Beach bread pan often gets stuck due to dried dough or flour residue around its base or on the machine’s internal posts. Heat expansion can also make it tighter right after baking. Ensure the machine is cool and unplugged. Try a gentle twist and rocking motion. You can also wipe around the base with a damp cloth to loosen any sticky bits.
Can I put my Hamilton Beach bread pan in the dishwasher?
Hamilton Beach generally recommends hand washing bread pans. Dishwashers use high heat and strong detergents. These can degrade the non-stick coating over time. The coating helps bread release easily and protects the pan. Hand washing with warm, soapy water and a soft sponge is best for maintaining pan quality and extending its life.
How often should I clean my bread maker pan?
You should clean your bread maker pan after every single use. This prevents dough and crumbs from hardening. Immediate cleaning makes the process much easier. It also helps preserve the non-stick coating. Regular cleaning ensures the pan is always ready for your next baking cycle.
What is the kneading paddle for, and how do I remove it?
The kneading paddle mixes and kneads the dough during the bread-making cycle. It sits on a shaft at the bottom of the pan. To remove it, simply pull it off the shaft. It often comes out with the baked bread. If it stays in the pan, just lift it out. Remember it might be hot.
My Hamilton Beach bread pan is scratched; is it still safe to use?
A scratched bread pan is generally safe to use, but its non-stick performance will be reduced. Bread might stick more, making removal and cleaning harder. Continued use might also lead to flaking of the coating, which is not ideal for consumption. Consider replacing the pan if scratches are significant.
Conclusion
Successfully removing the bread pan from your Hamilton Beach bread maker is a simple skill that boosts your bread-making confidence. We have explored the simple twist-and-lift motion that releases the pan. We also covered what to do if the pan becomes stubborn. Understanding how to handle stuck pans with gentle care prevents damage to your appliance. Cleaning and maintaining your pan and the bread maker’s interior are crucial steps too. These steps ensure long-term performance and easy future pan removals.
Remember, a little patience and gentle handling go a long way. Always prioritize safety by unplugging the machine and allowing it to cool. By following these straightforward tips, you will continue to enjoy the delicious reward of homemade bread without any frustration. Your Hamilton Beach bread maker will serve you well for many years, producing perfect loaves every time. Now go ahead, bake another loaf, and enjoy the process from start to finish!
- Hamilton Beach Bread Maker
- Bread Pan Removal
- Bread Machine Maintenance
- Appliance Care


