· Todd Martin · Home Cleaning Tips · 18 min read
How To Remove Lint From Bed
How To Remove Lint From Your Bed for a Spotless Sleep
Waking up to a bed covered in lint, dust, or pet hair is not pleasant. Lint can make your bed look messy. It can also affect the freshness of your sleep environment. Knowing how to remove lint from your bed helps keep your bedroom clean. It also contributes to a more restful night’s sleep. I understand the frustration of stubborn lint. It often clings to sheets, duvets, and even mattresses.
This article provides easy, practical steps. We explore various tools and techniques. You will learn manual removal methods. We also cover vacuuming strategies. Effective laundry practices are key. We will also discuss preventing lint buildup. Get ready to transform your bed. Achieve a consistently clean and inviting space.
Takeaway:
- Regularly remove lint using tools like lint rollers, tape, or a vacuum.
- Adopt proper laundry habits to minimize lint creation and transfer.
- Implement preventative measures to keep your bed consistently lint-free.
To effectively remove lint from your bed, use a sticky lint roller, packing tape, or a damp rubber glove for quick fixes. For deeper cleaning, vacuum your bedding and mattress using upholstery attachments. Wash sheets and blankets separately, shaking them before drying to reduce lint.
Understanding Lint: What It Is and Why It Clings to Beds
Lint is a common household nuisance. It consists of small fibers. These fibers separate from fabric. They often cling to surfaces. You see lint on clothes, furniture, and especially beds. Lint is not just unsightly. It can gather dust and allergens. This impacts your sleep quality.
Most lint comes from natural fibers. Cotton, wool, and linen are common sources. Synthetic fabrics like polyester also shed. Over time, these fibers break down. They become loose particles. These particles then stick to other surfaces. Your bed sheets are a prime target. The friction of movement against fabrics releases these fibers.
Common Sources of Bed Lint
Many things contribute to lint on your bed. Bedding itself is a main source. Sheets, blankets, and duvet covers shed fibers. Your pajamas or sleepwear also contribute. Pet hair mixes with fabric lint. It makes the problem worse. Dust from the environment settles too. This dust combines with fabric fibers.
New bedding often sheds more lint. This happens during the first few washes. Towels and other laundry items can transfer lint. Washing them together with bedding is a mistake. Clothes worn in the bedroom also drop fibers. Always consider all potential sources.
Why Lint Sticks to Bed Fabrics
Lint clings to bed fabrics due to static electricity. Friction creates static charges. These charges attract the loose fibers. Certain fabrics are more prone to this. Flannel and fleece are examples. Their fuzzy surfaces hold onto lint well. The weave of the fabric also matters. Tightly woven fabrics trap less lint. Looser weaves can collect more.
Moisture in the air plays a role. It can reduce static cling. However, dry environments make lint problems worse. My bed often gets lint because of my dog. Her hair clings to the cotton sheets. Understanding these reasons helps you tackle lint better. It allows you to choose proper cleaning methods.
Essential Tools for Effective Lint Removal from Bedding
Having the right tools makes lint removal much easier. You do not need expensive gadgets. Many simple items work well. Knowing what to use saves time. It also gives better results. I always keep my lint roller handy. It is a quick solution for immediate lint problems.
A combination of tools is often best. Some tools work for quick clean-ups. Others are for deeper cleaning. Consider the type of lint you have. Think about the fabric of your bedding. Different tools suit different needs. This section will list essential items. It will explain how each one helps.
Manual Lint Removal Tools
Manual tools are great for daily maintenance. They are portable and easy to use.
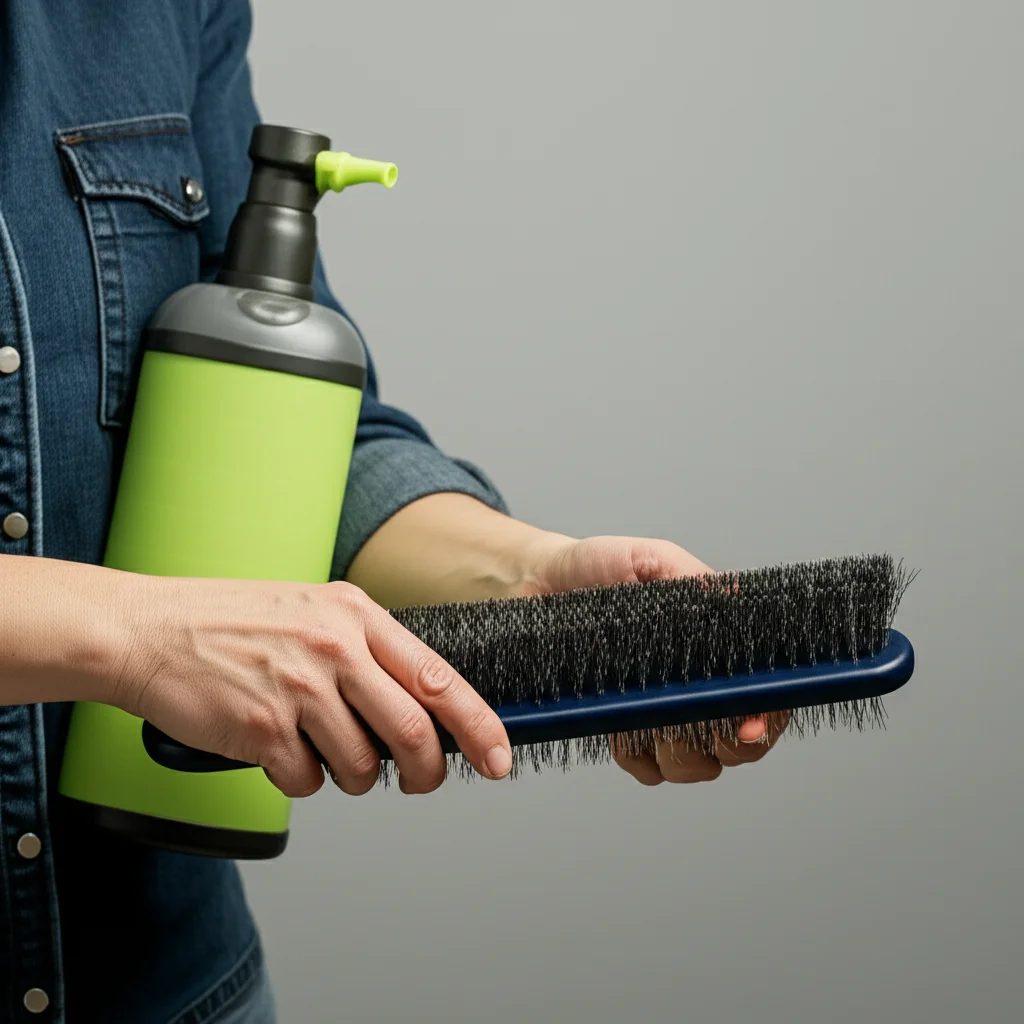
- Lint Rollers: These are sticky paper rolls on a handle. You roll them over the fabric. The sticky surface picks up lint and hair. They are very effective for quick fixes. You can buy refill rolls easily.
- Fabric Brushes: These brushes have directional bristles. They grab lint when brushed in one direction. Some brushes have two sides for different fabrics. They are reusable and eco-friendly.
- Rubber Gloves: A simple rubber dishwashing glove works wonders. Put one on your hand. Slightly dampen it. Rub it over the bed surface. The rubber creates friction. It collects lint into balls. This method works especially well for pet hair.
- Pumice Stones or Lint Shavers: These are for pilling, which is a type of lint. Pilling involves small balls of fibers. These tools carefully shave off the pills. Use them with care on delicate fabrics. They rejuvenate older bedding.
You can learn how to clean a lint brush to keep it effective for longer. Regularly cleaning your tools ensures they perform well. This prevents spreading lint around instead of removing it.
Vacuum Cleaners and Attachments
A vacuum cleaner is a powerful tool. It handles large areas of lint. It works for deeper cleaning.
- Handheld Vacuum: These are lightweight and cordless. They are perfect for quick clean-ups on beds. They easily reach corners and crevices.
- Upright or Canister Vacuum with Upholstery Attachment: Most full-sized vacuums have attachments. The upholstery tool is key here. It has a flat, wide head. It also often has a brush. This attachment effectively sucks up lint and dust. Ensure your vacuum has strong suction power.
- Crevice Tool: This narrow attachment reaches tight spots. Use it along mattress seams. It also works in the gaps of your bed frame.
- Small Brush Attachment: This tool gently agitates fibers. It loosens stubborn lint. It is good for delicate fabrics.
Regularly cleaning your vacuum’s lint filter is important. A dirty filter reduces suction. It makes your vacuum less effective. You can find out how to clean a lint filter to keep your vacuum running smoothly.
Step-by-Step Manual Methods to Remove Bed Lint
Manual methods are fast and effective. They are good for everyday lint problems. I often use these methods between washes. They keep my bed looking neat. These techniques do not require much effort. You can do them quickly before making your bed.
Choose the method that suits your immediate need. A lint roller is great for quick passes. Tape works well if you do not have a roller. Rubber gloves are surprisingly effective for pet hair. Let’s look at each method in detail.
Using a Lint Roller
Lint rollers are very simple to use. They are a must-have for quick lint removal.
- Prepare the Bed: First, straighten your sheets and duvet cover. Make the surface as flat as possible. This allows for better contact.
- Roll in One Direction: Start at one end of the bed. Roll the lint roller across the fabric. Apply firm, even pressure. Move in a single, consistent direction.
- Lift and Repeat: When the roller segment is full, peel it off. Discard the used sheet. This exposes a fresh sticky surface. Continue rolling until all visible lint is gone.
- Check All Surfaces: Do not forget pillows and the duvet cover. Lint clings to all parts of the bed.
For larger areas, you might need several sheets. Lint rollers are very efficient for surface lint. They are less effective for deeply embedded fibers.
The Sticky Tape Trick
No lint roller? No problem. Regular household tape can be a great substitute. Packing tape works best due to its width and stickiness.
- Wrap Tape Around Hand: Take a strip of tape. Wrap it around your hand. Ensure the sticky side faces outwards. You can also wrap it around a rolling pin.
- Press and Lift: Press the tape firmly onto the linty area. Press it down. Then quickly pull it up. The lint sticks to the tape.
- Replace Tape: When the tape loses its stickiness, use a new piece. Repeat this process.
- Work in Sections: Work in small, manageable sections. This ensures you cover the entire area.
This method is surprisingly effective. It picks up small fibers and pet hair. It is a good emergency solution.
Rubber Gloves and Damp Cloths
This method is excellent for pet hair and general lint. The rubber creates static. This static attracts fibers.
- Dampen a Rubber Glove: Slightly wet a clean rubber dishwashing glove. It should be damp, not dripping.
- Rub the Surface: Put the glove on. Rub your hand across the bed surface. Use firm, sweeping motions. The lint and hair will ball up.
- Collect Lint: Collect the lint balls that form. Discard them. Rinse the glove as needed. Repeat until the bed is clean.
- Use a Damp Cloth: For a lint-free finish, wipe the bed with a clean, damp microfiber cloth. This picks up any remaining loose fibers.
This method is especially useful for materials that attract a lot of static. I have used this on my sofa too. It is similar to how to get lint balls off a sofa. The principle of static attraction works wonders on various fabrics.
Vacuuming Your Bed: Techniques for Deep Lint Cleaning
Vacuuming offers a deeper clean. It removes lint that manual methods might miss. This includes lint embedded in the fabric. It also helps with dust mites. Regular vacuuming improves overall bed hygiene. I find this method best for weekly or bi-weekly cleaning.
Using the right attachments is key. They allow the vacuum to work efficiently. They also protect your bedding. Always check your vacuum’s suction. Ensure it is strong enough for the job.
Preparing Your Bed for Vacuuming
Proper preparation makes vacuuming more effective. It also prevents damage to your bedding.
- Strip the Bed: Remove all sheets, duvet covers, and pillowcases. These items will be laundered separately. This exposes the mattress and any mattress covers. You can learn how to effectively clean bed sheets in your laundry routine.
- Clear the Area: Remove any pillows or decorative throws. Clear the bedside tables if they obstruct access. Make sure you can move freely around the bed.
- Choose the Right Attachment: Select your vacuum’s upholstery attachment. This tool is designed for fabrics. It has gentle brushes. It prevents snagging delicate materials. For crevices, use the crevice tool.
Effective Vacuuming Strokes
The way you vacuum matters. It ensures maximum lint removal.
- Start with the Mattress: Begin by vacuuming the mattress surface. Use slow, overlapping strokes. Move the upholstery attachment back and forth. Cover the entire top surface.
- Vacuum the Sides and Seams: Use the crevice tool. Go along the sides of the mattress. Get into all the seams and edges. Lint and dust love to settle there. You might also want to explore how to get lint off a mattress for specific mattress issues.
- Address the Box Spring/Foundation: If your bed has a box spring, vacuum it too. Dust and lint can accumulate on its surface. Ensure you use the same gentle, thorough strokes.
- Pillows and Duvets (if not washing): For items you are not washing, vacuum them too. Place them flat on a clean surface. Use the upholstery attachment gently.
Remember to empty your vacuum canister or change the bag frequently. A full vacuum loses suction. This reduces its effectiveness.
Don’t Forget the Mattress and Box Spring
Lint can settle deep within the mattress fibers. It also gathers under the bed.
- Mattress Deep Clean: Beyond surface lint, mattresses can hold much more. Vacuuming removes surface lint, dust, and allergens. It is a good practice for general mattress hygiene.
- Box Spring Attention: Many people overlook the box spring. It collects a surprising amount of dust and lint. Lift the mattress if you can. Vacuum the box spring thoroughly.
- Under the Bed: While you are at it, consider cleaning under the bed. Dust bunnies and lint often collect there. Regularly cleaning under the bed helps reduce lint re-depositing on your bedding. This comprehensive approach ensures a truly lint-free sleep area.
Sometimes mattresses develop fuzz balls. These are similar to lint. They form from friction. You can also learn how to remove fuzz balls from a mattress to keep your sleep surface smooth.
Laundry Strategies to Prevent and Remove Lint from Bed Sheets
Washing your bedding correctly is crucial. It prevents lint buildup. It also removes existing lint. Many lint problems start in the laundry room. My laundry routine focuses on minimizing lint. This saves me time on dry lint removal later.
Proper sorting and machine practices are important. The drying process also plays a big role. Follow these steps for cleaner, lint-free bedding.
Sorting Laundry by Fabric Type
Mixing fabrics can cause lint transfer. Some fabrics are heavy lint producers.
- Separate Bedding: Always wash sheets, duvet covers, and pillowcases separately. Do not mix them with towels. Towels are major lint shedder. They can transfer fibers to your bedding.
- Categorize by Color and Fabric: Wash similar colors together. This prevents dye transfer. Group similar fabric types. For example, wash cotton bedding separately from flannel. Flannel sheds more.
- Check Pockets: Before washing, check all pockets. Tissues or paper can break down. They create massive amounts of lint.
This simple sorting step makes a big difference. It reduces the amount of loose lint in your washer.
Proper Washing Machine Practices
Your washing machine technique affects lint. These tips help reduce lint during the wash cycle.
- Don’t Overload: An overloaded washing machine cannot clean effectively. It also creates more friction between fabrics. This leads to more lint shedding. Wash bedding in smaller loads.
- Use Cold Water: Cold water is gentler on fabrics. It helps preserve their fibers. This reduces shedding. Hot water can sometimes break down fibers faster.
- Use Less Detergent: Too much detergent can leave residue. This residue can attract lint. Use the recommended amount of detergent.
- Consider a Lint Trapper: Some washing machines have lint filters. Clean yours regularly. If yours does not, consider a reusable lint trapper ball. These collect lint during the wash cycle.
- Add White Vinegar: A half cup of white vinegar to the rinse cycle helps. It acts as a natural fabric softener. It also helps to rinse away lint.
Remember to clean your washing machine regularly. Build-up inside can also cause lint issues.
Drying to Minimize Lint Transfer
Drying is another critical stage for lint control. The dryer’s heat and tumbling action can create lint.
- Shake Out Bedding: Before putting bedding in the dryer, shake each item. This removes loose lint. It also helps prevent tangling.
- Clean the Lint Trap: This is perhaps the most important step. Always clean your dryer’s lint trap before each load. A clogged trap reduces efficiency. It also increases fire risk. You should know how to clean a lint trap in a dryer properly.
- Use a Lower Heat Setting: High heat can damage fabric fibers. It makes them more prone to shedding. Use a medium or low heat setting.
- Avoid Over-Drying: Over-drying makes fabrics brittle. This increases lint production. Remove bedding as soon as it is dry.
- Use Dryer Balls: Wool dryer balls help reduce static. They also shorten drying time. They can prevent lint from clinging. They are a good alternative to dryer sheets. Dryer sheets can sometimes leave residue that attracts lint.
By following these laundry steps, you will notice a significant reduction in lint. Your bed sheets will feel cleaner and look crisper.
Addressing Stubborn Lint, Pet Hair, and Pilling on Bed Fabrics
Sometimes lint is more than just loose fibers. It can be stubborn pet hair. Or it can be fabric pills, also known as fuzz balls. These require specific approaches. My bed gets a lot of dog hair. So, I have learned specialized methods. These methods tackle tougher lint challenges effectively.
Do not despair if your regular lint roller is not enough. There are tools and techniques for these persistent issues.
Dealing with Pet Hair
Pet hair is often a big component of bed lint. It weaves into fabrics stubbornly.
- Damp Rubber Glove: As mentioned earlier, a slightly damp rubber glove is excellent. The static and friction pull pet hair into clumps.
- Pet Hair Vacuums: Some vacuum cleaners are designed for pet hair. They have special brush rolls. These are effective on upholstery and bedding.
- Lint Brushes with Electrostatic Properties: These brushes are reusable. They generate a static charge. This attracts pet hair. Brush in one direction to collect the hair.
- Fabric Softener Spray: Mix water and a small amount of fabric softener. Lightly mist the bed surface. Let it dry slightly. Then, use a lint roller or damp cloth. The softener helps loosen the hair.
For pet owners, keeping the bed clean with dogs can be a constant battle. Regularly grooming your pets helps reduce shedding. Also, consider specific pet bedding. This can limit where pet hair accumulates. Learn more about how to keep a bed clean with dogs for comprehensive tips.
Removing Fabric Pills (Fuzz Balls)
Pilling occurs when fibers break. They then knot together into tiny balls. This is common on older or well-used bedding.
- Fabric Shaver/Lint Shaver: This is the most effective tool. It is a small electric device. It carefully shaves off the pills. Move it gently over the pilled area. Be careful not to press too hard. This could damage the fabric.
- Pumice Stone: A small pumice stone can work too. Rub it lightly over the pills in one direction. The rough surface catches the pills. This is good for thicker, durable fabrics.
- Sharp Razor: For very stubborn, isolated pills, a sharp razor can be used. Hold the fabric taut. Carefully shave the pills off the surface. This method requires extreme caution. I only use this as a last resort. It can easily damage the fabric.
Removing pills not only makes your bedding look better. It also makes it feel smoother. It prevents further lint accumulation.
Specialty Tools for Tough Lint
Beyond basic tools, some specialty items help with unique lint issues.
- Wet/Dry Vacuums: For very heavy lint or wet accidents, a wet/dry vacuum can be powerful. Ensure it is clean. Use it with appropriate attachments.
- Strong Adhesives: For certain industrial or thick fabrics, stronger adhesive rollers exist. These are not common for household beds. But they show the range of lint removal options.
- Professional Cleaning: If your bedding is valuable or very delicate, consider professional cleaning. They have specialized equipment and knowledge. They can remove lint safely. This is often for duvet inserts or mattress protectors.
Remember, a combination of tools and patience yields the best results. Do not be afraid to try different methods. You can restore your bedding to its lint-free glory. If your dog bed also gets linty, apply similar techniques. Knowing how to clean a dog bed is also very helpful.
Preventative Measures for a Consistently Lint-Free Bed
Removing lint is one part of the battle. Preventing it from building up is even better. A proactive approach saves time. It keeps your bedroom looking fresh always. I have integrated several preventative habits into my routine. They drastically reduce the amount of lint on my bed.
These measures involve choosing the right fabrics. They also include maintaining your home environment. Consistent care makes a big difference.
Regular Bed Maintenance Schedule
Consistency is key to a lint-free bed. A routine helps keep fibers at bay.
- Daily Shake: Each morning, give your duvet or top sheet a good shake. This dislodges loose fibers. It prevents them from settling.
- Weekly Lint Roll: Quickly run a lint roller over your sheets and pillows weekly. This picks up surface lint before it accumulates. It is a few seconds that save much effort.
- Bi-Weekly Vacuum: Vacuum your mattress and box spring every two weeks. Use the upholstery attachment. This removes deeper lint and dust. This is also good for general hygiene.
- Regular Washing: Wash your sheets every one to two weeks. Follow the laundry tips discussed earlier. This removes lint and refreshes the bedding. How to clean bed stains might also be useful if you encounter other marks.
A consistent schedule makes lint removal part of your routine. It prevents the problem from becoming overwhelming.
Choosing Lint-Resistant Fabrics
Some fabrics naturally shed less lint. Others attract it more easily. Making smart choices helps prevent future lint issues.
- Tightly Woven Cotton: High-thread-count cotton sheets (like percale) tend to shed less. Their tight weave traps fibers better. They also feel smooth.
- Silk or Satin: These fabrics are very smooth. They have a natural sheen. Lint and pet hair do not cling to them easily. They are a good choice if lint is a major concern.
- Microfiber (with caution): Good quality microfiber can be lint-resistant. However, cheaper microfiber can sometimes shed or pill. Read reviews before buying.
- Avoid Fleece and Flannel for Inner Layers: While cozy, fleece and flannel are lint magnets. Use them as outer layers. Or wash them separately. Avoid them directly against other bedding.
- Consider Duvet Covers: A duvet cover protects your comforter. It is easier to wash. Choose lint-resistant materials for the cover.
When buying new bedding, check fabric composition. This small detail can save you much lint-removal effort later.
Maintaining Your Home Environment
The overall cleanliness of your bedroom impacts lint. Dust and pet dander contribute to lint.
- Regular Dusting: Dust surfaces in your bedroom often. Use a damp cloth to trap dust. This prevents dust from settling on your bed.
- Vacuum Floors Regularly: Vacuum carpets and rugs frequently. This removes dust and pet hair. It prevents these particles from becoming airborne. They could then settle on your bed.
- Air Purifiers: An air purifier can help. It filters airborne particles. This includes dust, pet dander, and loose fibers. It improves overall air quality. It also reduces lint on surfaces.
- Keep Pets Off the Bed (if possible): If pet hair is a major source of lint, consider limiting pets on the bed. Or use a dedicated pet blanket for them. This creates a barrier.
- Clean Vents and Filters: HVAC vents can blow dust. Clean them regularly. Change air filters in your home system. This improves air circulation. It also reduces airborne particles.
By combining these preventative steps, you can significantly reduce lint. Your bed will remain cleaner. Your sleep environment will be fresher. It truly makes a noticeable difference. You will spend less time on removal and more time enjoying your clean bed. Don’t forget to wash your bed pillows too. How to clean bed pillows can ensure the entire bed ensemble is fresh and lint-
- lint removal
- bed cleaning
- fabric care
- bedroom maintenance
- cleaning tips

Todd Martin
Senior Writer
With over 15 years of experience in home renovation and design, I started HEG to share what I’ve learned with homeowners who want to create spaces that are both beautiful and functional. I’ve always believed in a hands-on approach, and over the years, I’ve picked up practical solutions that actually work. Through HEG, I aim to make home improvement more approachable, sharing real tips that help you create a home you truly love.