· Davia Murnell · Home Appliances · 21 min read
How To Remove Maytag Refrigerator Light Bulb Cover Whirlpool
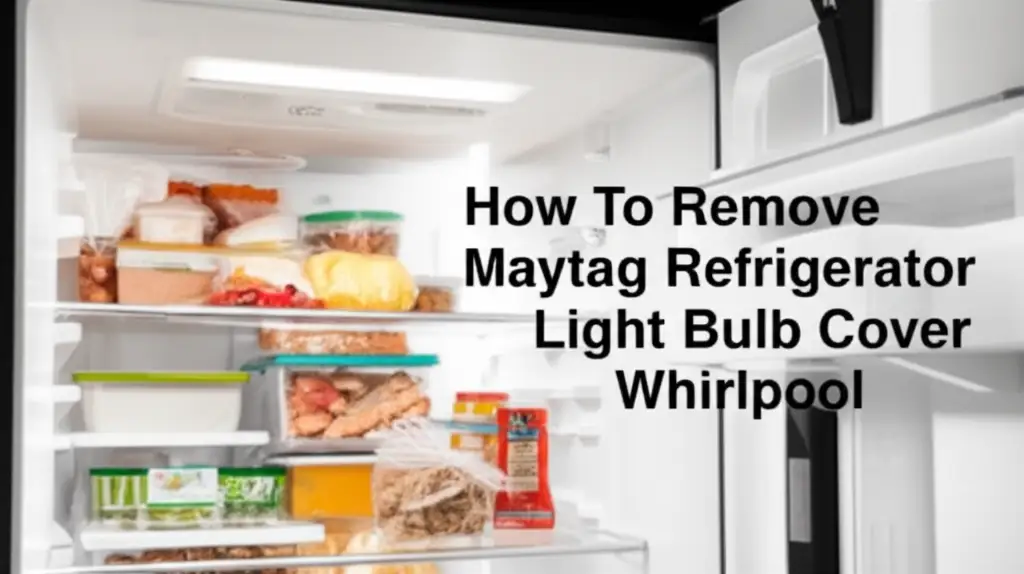
Easily Remove Maytag Refrigerator Light Bulb Cover
Have you ever opened your refrigerator, only to find the interior light no longer shines? It is a common issue. You need to replace the bulb. But first, you must remove the light bulb cover. Many people feel uncertain about how to do this without causing damage. I understand this concern. This task can seem tricky. However, it is a straightforward process when you know the right steps. This guide helps you remove the Maytag or Whirlpool refrigerator light bulb cover safely. Both brands often use similar designs since Whirlpool Corporation owns Maytag. We will cover necessary tools, safety tips, and step-by-step instructions. You will learn how to access the bulb, replace it, and put the cover back. Get ready to illuminate your refrigerator once again.
Takeaway:
- Always unplug the refrigerator before starting any work.
- Identify your refrigerator’s light cover type (clip, screw, tab).
- Use gentle, steady pressure; avoid excessive force.
- A flathead screwdriver or putty knife can help with clips/tabs.
- Refer to your appliance manual for model-specific instructions.
To remove a Maytag or Whirlpool refrigerator light bulb cover, first unplug the appliance for safety. Next, identify if the cover uses clips, tabs, or screws. Gently pry off clip-on or tabbed covers with a flathead screwdriver or putty knife. Unscrew covers that are held by screws. Always apply even pressure to avoid damaging the plastic.
Prioritizing Safety Before You Start
Before you touch any part of your refrigerator’s electrical system, safety is the most important step. Electricity can cause serious harm. You must protect yourself from potential shock. This means completely disconnecting power to the appliance.
Unplugging the Refrigerator
Locate the refrigerator’s power cord. It usually plugs into a wall outlet behind the unit or sometimes nearby. Simply pull the plug from the outlet. Do not just turn the refrigerator off from its control panel. Turning it off from the control panel does not fully cut the electrical supply to the light socket. A full power disconnection ensures no electricity flows to the light bulb area while you work. This simple step prevents electrical shock. It also protects the refrigerator’s internal components from short circuits. Taking a moment to unplug saves you from serious risks.
Emptying the Refrigerator Compartment
While not always strictly necessary for light bulb replacement, emptying the immediate area around the light can be helpful. Food items or shelves can get in your way. They might also block your view. You could accidentally drop tools or parts onto food. Clearing the space gives you better access. It also prevents any accidental damage to your food or refrigerator interior. You can temporarily place items in a cooler if you plan to take a longer time. This step prepares your workspace for efficiency and cleanliness. Remember to clean the refrigerator regularly to keep it hygienic. You can learn more about general refrigerator cleaning here: how to clean the refrigerator.
Gathering the Right Tools
Having the correct tools on hand makes the job easier and safer. You do not want to stop halfway through because you lack a specific tool. Most light bulb cover removals require minimal tools.
- Flathead Screwdriver: This tool is often useful for prying open covers held by clips or tabs. Choose one with a relatively thin, sturdy blade.
- Phillips Head Screwdriver: Some covers are secured with screws. A Phillips head screwdriver matches these types of screws.
- Putty Knife (Optional): A thin putty knife can offer a wider, less damaging prying surface than a screwdriver, especially on softer plastic covers.
- New Light Bulb: Make sure you have the correct type and wattage for your refrigerator. Check the existing bulb or your appliance manual.
- Work Gloves (Optional): These can improve your grip and protect your hands from sharp edges or dirt.
- Flashlight or Headlamp: The refrigerator will be dark once unplugged. A light source helps you see the cover’s attachment points clearly.
- Soft Cloth or Towel: This can be useful for wiping down the cover or protecting surfaces.
Gathering these items beforehand ensures a smooth process. You avoid frustrating interruptions. This preparation helps you complete the task quickly and correctly.
Identifying Your Refrigerator Light Bulb Cover Type
Refrigerator light bulb covers are not universal. Different models and brands use various attachment methods. Identifying the type of cover on your Maytag or Whirlpool refrigerator is crucial. This step dictates how you proceed with removal. For example, some models might have a simple snap-on cover. Others could use small screws. Knowing the cover type prevents damage to the plastic or the refrigerator itself.
Clip-On or Snap-Fit Covers
Many modern Maytag and Whirlpool refrigerators feature clip-on or snap-fit light covers. These covers are typically made of plastic. They often have small tabs or clips that fit into corresponding slots. You will not see any visible screws on these types of covers. They rely on tension and a secure fit to stay in place.
- How to Identify: Look closely at the edges of the cover. You will not find any screw heads. The cover often has a seam where it meets the refrigerator’s interior. You might see small indentations or finger grips along the edges.
- Common Locations: These covers are common in the fresh food compartment ceiling or on the side walls. Some models also use them in the freezer compartment.
- Removal Principle: The key is to release the clips or tabs without breaking them. This usually involves gentle prying.
Screw-Secured Covers
Older models, or some specific contemporary designs, use screws to hold the light bulb cover in place. These covers provide a very secure fit. The screws are usually small and often blend in with the surrounding plastic. You might need to look closely to spot them.
- How to Identify: Look for visible screw heads around the perimeter of the light cover. They can be Phillips head or flathead screws. Sometimes, the screws might be hidden behind small plastic caps.
- Common Locations: These are less common in very sleek modern designs. However, they are still found in various Maytag and Whirlpool models, especially older side-by-side units. For guidance on other refrigerator parts, you might find information on removing larger components helpful, such as how to remove KitchenAid side-by-side refrigerator door.
- Removal Principle: You simply unscrew the fasteners. Make sure to keep track of the screws.
Sliding or Tab-and-Slot Covers
Some light covers use a sliding mechanism or a combination of tabs and slots. These are a variation of the clip-on design. Instead of simply pulling outwards, you might need to slide the cover in a specific direction.
- How to Identify: You might see small arrows indicating the direction to slide. There could be visible slots on one side and tabs on the opposite side. It feels like the cover needs to move laterally before detaching.
- Common Locations: These are common in narrow spaces or on covers that need a very flush fit.
- Removal Principle: You push or slide the cover in the direction indicated. This releases the tabs from their slots.
Always check your refrigerator’s user manual if you are unsure. The manual provides model-specific diagrams and instructions. This ensures you do not damage your specific refrigerator’s light cover.
Step-by-Step Removal for Clip-On Covers
Clip-on or snap-fit light bulb covers are common on Maytag and Whirlpool refrigerators. They look seamless. Removing them requires a careful approach. You must apply pressure in the right places. This method relies on releasing hidden clips or tabs.
Gently Prying the Edges
Once you have identified your cover as a clip-on type, you can begin the removal. Take your flathead screwdriver or putty knife. Locate a seam where the plastic cover meets the refrigerator’s interior. Choose an edge that seems slightly loose or has a small gap. Insert the tip of your tool into this gap. Apply very gentle, upward or outward pressure. You are trying to create a tiny opening. Do not use excessive force. Plastic can crack easily. Wiggle the tool slightly. You might hear a small click as a clip releases.
Releasing the Clips or Tabs
Work your way around the edges of the cover. Move your tool along the seam, continuing to apply gentle pressure. Most clip-on covers have multiple clips. These clips are usually spaced evenly around the perimeter. As one clip releases, the cover will become slightly looser. Continue this process. You are slowly releasing each clip one by one. If you encounter resistance, stop and try a different spot. Do not force it. Pushing too hard can break the plastic clips. A broken clip means the cover might not sit flush again. This could lead to condensation or dirt buildup inside. Take your time with each clip.
Detaching the Cover
After releasing all the clips, the cover should feel loose. You can now gently pull it away from the refrigerator. Some covers might have small hooks on one side and clips on the other. In this case, you would release the clips first. Then, pivot the cover downwards or outwards to unhook it from the remaining side. Hold the cover firmly as you remove it. This prevents it from falling and breaking. Place the cover somewhere safe and clean. You will need it again for reinstallation. This entire process takes patience. It is often faster than it sounds.
Step-by-Step Removal for Screw-Secured Covers
Some Maytag and Whirlpool refrigerator models use screws to secure the light bulb cover. This method provides a very stable attachment. Removing these covers is generally more straightforward than clip-on types. However, it still requires care. You do not want to strip the screw heads or drop the screws into hard-to-reach places.
Locating and Unscrewing Fasteners
First, locate all the screws holding the light bulb cover in place. They are usually small. They are often positioned around the perimeter of the cover. Sometimes, they might be slightly recessed. Use your flashlight if needed to get a clear view. Once found, select the correct screwdriver. This will usually be a Phillips head. Insert the screwdriver tip firmly into the screw head. Turn counter-clockwise to loosen the screw. Apply steady pressure. This prevents the screwdriver from slipping and stripping the screw head. If a screw feels stuck, do not force it. You can try a small amount of penetrating oil if the screw is metal, but this is rare in refrigerator plastics. Usually, they just need firm, even pressure.
Removing All Screws
Continue unscrewing each fastener until they are all loose. As you remove each screw, place it in a safe, visible spot. A small bowl or a magnetic dish works well. Losing even one screw can be a hassle. It can make reinstallation difficult or impossible. Count the screws as you remove them. This helps you ensure you have accounted for all of them when it is time to put the cover back on. Some covers might have only two screws. Others could have four or more. Be thorough in your search.
Carefully Detaching the Cover
Once all screws are removed, the light bulb cover should come away easily. Gently pull it straight off. It might have a slight friction fit. There might also be a small lip or groove that helps it stay aligned. Just pull it evenly from all sides. Avoid bending or twisting the plastic. Plastic can become brittle over time, especially in a cold environment. Place the cover on a clean, soft surface. This protects it from scratches or breaks. Now you have full access to the light bulb. You can proceed with the bulb replacement.
Addressing Common Obstacles and Variations
Removing a refrigerator light bulb cover is usually simple. However, sometimes you might encounter specific challenges. Different Maytag and Whirlpool refrigerator models have unique designs. This can lead to variations in the removal process. Understanding these common obstacles helps you prepare. It ensures a smoother repair experience.
Hidden Tabs or Latch Mechanisms
Some Maytag and Whirlpool models use hidden tabs or more complex latch mechanisms. These are not always obvious. You might not see visible clips or screws. Instead, the cover might have small, recessed areas where a tab needs to be pressed. Or, it could have a latch that engages with a specific push-and-slide motion.
- Solution: Check the edges of the cover very carefully. Use your flashlight to look into any small gaps or indentations. Sometimes, a tiny symbol or arrow indicates where to press or slide. Refer to your refrigerator’s user manual. It often provides detailed diagrams for accessing internal components. You can usually find the manual online using your refrigerator’s model number. A gentle exploration of these areas can reveal the hidden release point.
Brittle or Stuck Plastic
Refrigerator plastic can become brittle over time. The cold environment can make it less flexible. This increases the risk of cracking or breaking the cover during removal. If the plastic feels very stiff or if the cover seems stuck, do not force it.
- Solution: Apply gentle, consistent pressure rather than sudden force. If the cover feels stuck due to grime, try gently cleaning around the edges with a soft cloth and a mild cleaner (ensure the refrigerator is unplugged). If it’s just old and brittle, proceed with extreme caution. You might need to warm the area slightly with a hairdryer on a very low setting, held far away, for a few seconds. This can make the plastic a little more pliable. However, this is a last resort and must be done with extreme care to avoid overheating or damaging components. It’s often safer to accept a minor cosmetic crack than to cause further internal damage.
Reaching Tight Spaces
Some refrigerator light bulbs are in very tight or awkward spaces. This is especially true for smaller compartments or specific freezer models. Your hands might not fit comfortably. You might struggle to get a good angle with your tools.
- Solution: Use thinner tools if available. A longer, thinner flathead screwdriver or even a sturdy plastic pry tool can reach into tight spots better. Consider using a headlamp instead of a flashlight. This keeps your hands free. If the space is extremely tight, you might need to temporarily remove a shelf or drawer to gain better access. Always ensure you can reassemble anything you remove. Keep track of all parts. For general refrigerator cleaning and access, you might find tips on how to clean under a refrigerator helpful as well: how to clean under a refrigerator.
Incorrect Bulb Type or Wattage
After removing the cover, you need to replace the bulb. Using the wrong bulb type or wattage is a common mistake. This can cause issues with your refrigerator’s electrical system. It can also lead to the new bulb burning out quickly.
- Solution: Always check the old bulb’s specifications. The wattage is usually printed on the bulb itself. If not, refer to your refrigerator’s user manual or the label near the light socket. Most refrigerators use a specific type of appliance bulb. These are designed to withstand refrigerator temperatures and vibrations. Common types include incandescent and increasingly, LED bulbs. LEDs are more energy-efficient and last longer. Ensure the new bulb matches the voltage and wattage requirements. Using a bulb with too high wattage can overheat the socket or wiring.
Replacing the Light Bulb and Reinstalling the Cover
Once you have successfully removed the light bulb cover, the next step is replacing the old bulb. This process is usually quick and simple. However, proper care ensures the new bulb works correctly and lasts longer. Then, you must reinstall the light cover. Correct reinstallation is essential for proper function and safety.
Removing the Old Bulb
The light bulb will likely be a standard screw-in type or a push-in type.
- Screw-in bulbs: Grasp the old bulb firmly. Turn it counter-clockwise to unscrew it from the socket. It should come out easily. If it feels stuck, apply firm, steady pressure. Do not twist too hard, or the bulb might break.
- Push-in bulbs: These bulbs often have two prongs that push into a socket. Gently pull the bulb straight out from its base. Some smaller bulbs might require a slight wiggle while pulling.
Dispose of the old bulb properly. If it is an incandescent bulb, you can throw it in the regular trash. If it is an LED bulb, check local recycling guidelines.
Installing the New Bulb
Take your new refrigerator light bulb. Make sure it matches the specifications of the old one.
- Screw-in bulbs: Carefully align the base of the new bulb with the socket. Turn it clockwise until it is snug. Do not overtighten it. Overtightening can crack the socket or the bulb.
- Push-in bulbs: Align the prongs with the holes in the socket. Gently push the bulb straight into the socket until it is fully seated. It should feel secure.
Once the new bulb is in place, you can plug the refrigerator back in temporarily. This allows you to test if the new bulb works. Open the refrigerator door to activate the light switch. If the bulb lights up, you have installed it correctly. Unplug the refrigerator again before proceeding with the cover reinstallation.
Reinstalling Screw-Secured Covers
If your Maytag or Whirlpool refrigerator light cover uses screws, reinstallation is the reverse of removal.
- Position the cover correctly over the light bulb and the screw holes. Ensure it sits flush against the refrigerator interior.
- Insert the screws into their respective holes.
- Use your Phillips head or flathead screwdriver to turn them clockwise.
- Tighten each screw until it is snug. Do not overtighten. Overtightening can strip the plastic threads or crack the cover. Tighten them just enough so the cover does not wobble.
Reinstalling Clip-On or Snap-Fit Covers
For clip-on or snap-fit covers, reinstallation also mirrors the removal process.
- Align the cover with its designated space.
- If there are hooks or tabs on one side, engage those first. Slide them into their slots.
- Then, gently press the cover firmly into place. Work your way around the edges.
- You should hear satisfying clicks as each clip or tab re-engages.
- Ensure the cover sits flush against the refrigerator’s interior. There should be no gaps.
A properly reinstalled cover protects the bulb and wiring. It also helps maintain the refrigerator’s insulation. Now you can plug your refrigerator back in permanently. Enjoy your brightly lit refrigerator once more. For general appliance upkeep, remember simple maintenance like cleaning coils can prolong your refrigerator’s life: how to clean Whirlpool side-by-side refrigerator coils.
Maintenance Tips for Refrigerator Lights and Covers
Replacing a light bulb is a good opportunity for general maintenance. Proper care of your refrigerator’s light and cover can prevent future issues. It also ensures efficient operation. These tips apply to both Maytag and Whirlpool refrigerators.
Keeping the Cover Clean
The light bulb cover can accumulate dust, crumbs, and even sticky residues. A dirty cover can dim the light output. It can also become harder to remove in the future.
- Cleaning Process: Whenever you remove the cover, take a moment to clean it. Use a soft cloth. Dampen it slightly with mild soap and water. Wipe down both sides of the plastic cover. For stubborn grime, a gentle, non-abrasive cleaner works well. Avoid harsh chemicals or abrasive scrubbers. These can scratch or damage the plastic. Rinse the cover thoroughly. Ensure it is completely dry before reinstalling it. Moisture inside the light compartment can cause issues.
Regular Bulb Checks
Do not wait for your light to completely go out before thinking about it. Periodically check your refrigerator light.
- Inspection: Open the door and observe the light. Does it flicker? Does it seem dimmer than usual? These could be signs that the bulb is nearing the end of its life. If your refrigerator uses incandescent bulbs, consider replacing them with LED equivalents. LEDs last much longer and consume less energy. They also produce less heat, which is a bonus for refrigerator efficiency. Checking the bulb when you do other refrigerator maintenance tasks, like cleaning the interior, is a good habit. General cleaning is crucial for optimal appliance function. For instance, cleaning under a refrigerator can prevent dust buildup affecting performance.
Understanding LED vs. Incandescent
Many older Maytag and Whirlpool refrigerators use incandescent bulbs. Newer models often use LEDs. It is helpful to know the differences.
- Incandescent: These bulbs get hot. They have a filament that burns out. They use more energy.
- LED: These bulbs are much more energy-efficient. They produce very little heat. They last significantly longer. They are more durable. If your refrigerator has an incandescent bulb, and you want an upgrade, make sure to buy an LED bulb specifically designed for appliance use. It should fit the same socket type. Read the packaging to ensure compatibility. This simple upgrade can save energy and reduce how often you need to replace the bulb.
Consulting the User Manual
Your refrigerator’s user manual is a valuable resource. It contains specific information about your model.
- Model-Specific Information: The manual often has diagrams showing how to remove the light cover. It specifies the correct bulb type and wattage. It also provides troubleshooting tips. If you cannot find your physical manual, you can usually download a digital copy. Search online using your refrigerator’s full model number. This number is typically on a sticker inside the refrigerator compartment. Having this specific information helps avoid guesswork. It ensures you perform maintenance correctly. It can also help if your refrigerator faces other issues, like why is my Maytag refrigerator leaking water from the bottom. Similarly, if you experience issues with a Whirlpool refrigerator, understanding its specific components and maintenance needs is important, such as why does my Whirlpool refrigerator have water in the bottom.
By following these maintenance tips, you extend the life of your refrigerator’s lighting system. You also keep your appliance running efficiently.
When to Seek Professional Help
Most Maytag or Whirlpool refrigerator light bulb cover removals and bulb replacements are do-it-yourself tasks. However, there are times when calling a professional appliance technician is the best course of action. Knowing when to seek help can save you from bigger problems. It also protects your appliance from accidental damage.
Persistent Electrical Issues
If replacing the light bulb does not fix the problem, or if you notice other electrical issues, it is time for a professional.
- Symptoms: This includes flickering lights, lights that do not turn off, or a light that burns out almost immediately after replacement. If you smell burning plastic, hear buzzing sounds, or experience circuit breakers tripping when the refrigerator is plugged in, unplug it immediately. These symptoms indicate a deeper electrical problem. They could involve faulty wiring, a malfunctioning light switch, or a problem with the refrigerator’s control board. Do not try to diagnose or fix these yourself. Electrical repairs can be dangerous. They require specialized knowledge and tools.
Damaged or Broken Parts
During the light cover removal or reinstallation, you might accidentally break a part. This could be a plastic clip, a screw mount, or even the cover itself.
- Broken Cover: If the light cover cracks or breaks significantly, it needs replacement. A broken cover leaves the bulb exposed. It can also let moisture or dirt into the light compartment. Finding an exact replacement cover can be challenging. An appliance technician or parts supplier can help you order the correct part.
- Broken Clips/Mounts: If the clips or screw mounts on the refrigerator itself are damaged, the cover might not sit properly. This could affect the seal or cause the cover to fall off. A professional can assess the damage. They might be able to repair the mounting points. In some cases, a new assembly might be required.
Uncertainty or Lack of Confidence
If you feel unsure about any step, it is okay to call for help.
- Hesitation: Appliance repair can be daunting for some. If you are uncomfortable working with tools, or if you fear damaging your refrigerator, a professional can provide peace of mind. It is better to pay for a technician than to risk damaging an expensive appliance. They have the experience and specific tools for the job. They can complete the task quickly and correctly.
Warranty Considerations
Check your refrigerator’s warranty.
- Active Warranty: If your Maytag or Whirlpool refrigerator is still under warranty, performing repairs yourself might void it. Even simple tasks like light bulb replacement can sometimes have specific guidelines under warranty terms. Contact the manufacturer’s customer service or consult your warranty documentation. They can advise whether a DIY fix is acceptable or if you need a factory-authorized service. This ensures you do not lose warranty coverage for future, more significant issues.
A professional technician can quickly diagnose complex issues. They can also ensure proper part replacement. This protects your investment.
Frequently Asked Questions
Q1: How do I know what type of light bulb my Maytag or Whirlpool refrigerator needs?
A1: Check the old bulb. The wattage and type are usually printed on its base or glass. If the bulb is gone, consult your refrigerator’s user manual. It lists the exact specifications. You can also find this information on a sticker near the light socket or by searching your refrigerator’s model number online. Most refrigerators use appliance-specific bulbs, either incandescent or LED.
Q2: Can I use an LED bulb if my refrigerator originally had an incandescent one?
A2: Yes, generally you can. LED bulbs are more energy-efficient
- refrigerator repair
- light bulb replacement
- Maytag refrigerator
- Whirlpool refrigerator
- appliance maintenance

Davia Murnell
Room Cleaning Expert
Before joining HEG, I spent over a decade running my own window cleaning business, where I perfected streak-free techniques and learned the ins and outs of specialty glass care. Now, I bring that expertise to a broader mission—helping homeowners maintain sparkling windows and beautiful outdoor spaces. From skylights and sliding doors to patio glass and outdoor furniture, I believe every surface deserves attention and care. I share practical tips and proven methods that make even the toughest cleaning jobs feel manageable. Whether you're battling pollen on the porch or smudges on high windows, I’m here to help you see your home in a whole new light—literally.