· Todd Martin · Home Care · 19 min read
How To Remove Wax From Chalk Painted Furniture
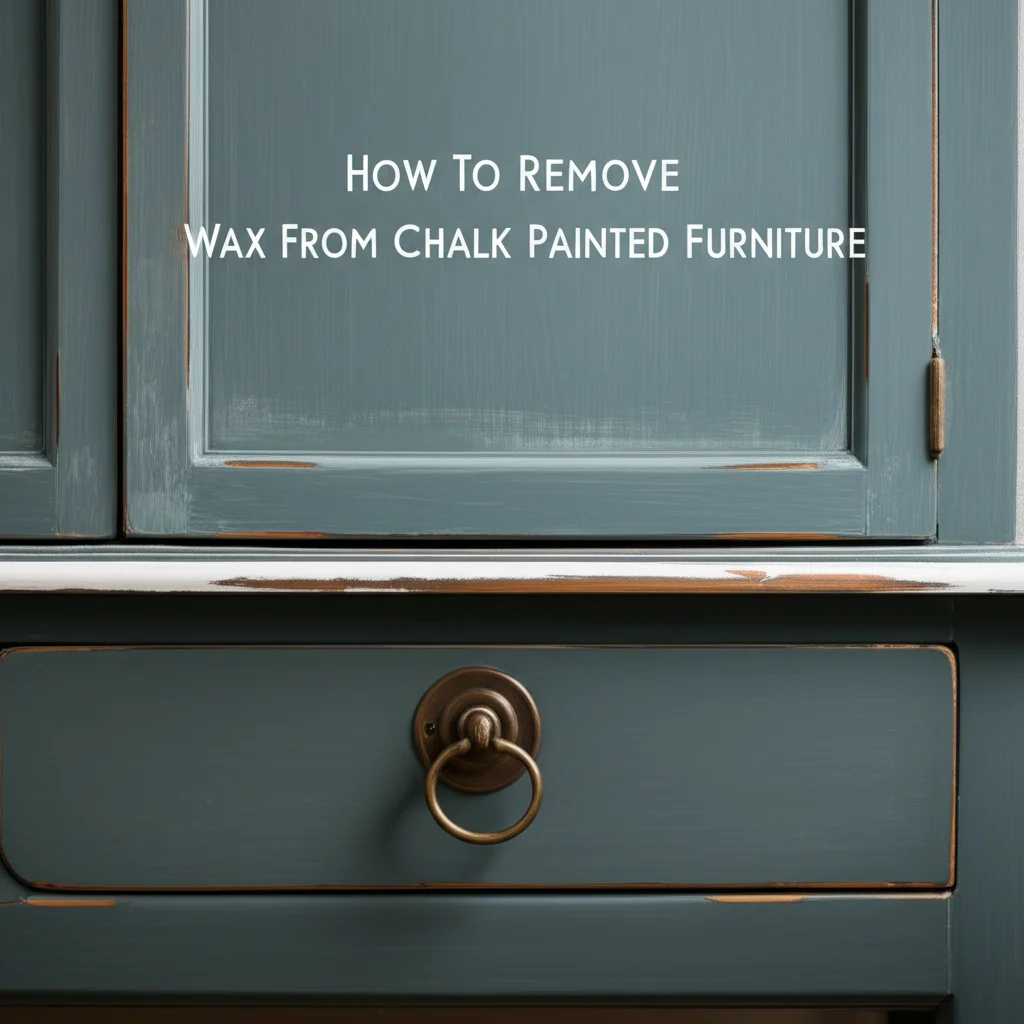
Effortlessly Remove Wax From Chalk Painted Furniture
Chalk painted furniture adds rustic charm and a unique finish to any home. Many people seal these pieces with wax to protect the porous surface and enhance durability. However, sometimes you might apply too much wax, or the wax finish becomes uneven or discolored. You might also want to change the look entirely. Removing this wax layer becomes necessary in these situations.
I understand the frustration of dealing with a wax build-up or an old, dingy wax coat on your beloved furniture. It can feel like a daunting task, but I assure you, it is possible to restore your chalk-painted pieces to their former glory, or prepare them for a fresh new look. This guide provides clear, step-by-step instructions. We cover effective methods, essential tools, and important safety tips. You will learn how to remove wax from chalk painted furniture successfully.
Takeaway
Removing wax from chalk painted furniture requires careful steps. You can use gentle heat, mineral spirits, or a combination of methods. Key steps include:
- Applying gentle heat to soften the wax.
- Blotting softened wax with a clean cloth.
- Using mineral spirits for stubborn residue.
- Cleaning the surface thoroughly afterwards.
- Re-applying a new protective finish if desired.
How do you remove wax from chalk painted furniture?
You remove wax from chalk painted furniture by first applying gentle heat, like from a hairdryer, to soften the wax. Then, blot the melted wax with a clean, absorbent cloth. For any remaining stubborn residue, carefully use mineral spirits on a cloth to dissolve the wax, ensuring you wipe the surface clean afterwards to prepare it for a new finish or touch-up.
Understanding Wax on Chalk Painted Furniture
Chalk paint is known for its matte, velvety finish. People often use wax as a topcoat for protection and to deepen the color. Wax provides a durable, breathable seal. It resists moisture and wear. However, wax can accumulate over time. Old wax might yellow or attract dirt. This affects the furniture’s appearance. You might need to remove old wax. This step prepares the surface for a new coat of wax or paint.
Wax removal is essential for several reasons. You may have applied too much wax initially. This creates a sticky or uneven finish. Old wax can become discolored. It might show dirt or scuffs. Sometimes, you simply want to repaint the piece. Removing the old wax ensures proper adhesion for new paint. Paint does not stick well to wax. Understanding why you need to remove the wax helps you choose the right method. It ensures you protect your furniture.
Different types of wax exist for chalk paint. Clear wax is common. It preserves the paint color. Dark wax adds an aged, distressed look. Black wax creates a more dramatic effect. White wax offers a limed finish. Each wax type has varying hardness. Harder waxes require more effort to remove. Softer waxes might come off more easily. Knowing your wax type helps predict removal difficulty.
The porous nature of chalk paint makes wax removal a delicate process. Chalk paint absorbs wax deeply. This bond makes it challenging to remove fully. Aggressive scrubbing can damage the paint. Harsh chemicals can strip the paint. My approach focuses on gentle, effective methods. These methods protect your paint. They ensure the furniture remains in good condition. You will learn how to handle different wax types. This knowledge helps you achieve a clean surface.
Before you begin, assess your furniture. Check the paint’s condition. Look for chips or damage. This assessment helps prevent further issues during removal. A well-prepared surface reacts better to wax removal methods. Remember, patience is key. You are working with a delicate finish. Rushing the process can cause damage. Careful work ensures a smooth result. This prepares your piece for its next transformation.
Essential Tools and Materials for Wax Removal
Removing wax from chalk painted furniture requires specific tools. Having these items ready saves time. It ensures the process is efficient. You will need a few common household items. Some specialized cleaning agents are also necessary. Gather everything before you start. This preparation makes the task smoother. It helps you focus on the job.
First, you need soft, clean cloths. Microfiber cloths work well. They are absorbent. They do not scratch surfaces. You will use many cloths. Wax transfers onto them. Have plenty available. Old towels or t-shirts also work. Just make sure they are clean. Lint-free cloths are best for the final wipe.
Second, a hairdryer is crucial. This provides gentle heat. It softens the wax. A heat gun is too strong. It can damage the paint. A standard hairdryer on a low or medium setting is perfect. This tool helps melt the wax. It makes blotting easier.
Third, mineral spirits are essential for dissolving wax. This product is a petroleum-based solvent. It breaks down wax effectively. Ensure good ventilation when using it. Mineral spirits evaporate cleanly. They leave no greasy residue. You can often find it at hardware stores. It is a key chemical cleaner. You might also consider specific how to clean dry wax products.
You will also need a plastic scraper or old credit card. Do not use metal scrapers. Metal can scratch the paint. Plastic is gentle yet firm enough. It helps lift softened wax. Use it carefully. It helps with thicker wax layers.
For safety, rubber gloves are important. Mineral spirits can irritate skin. Gloves protect your hands. Ensure good ventilation in your work area. Open windows or use a fan. This disperses fumes. Safety first ensures a good experience.
Finally, have some clean water and a mild soap. You will use these for a final wipe-down. This removes any mineral spirit residue. It prepares the surface for re-waxing or painting. A clean surface is key for proper adhesion. Consider how you typically clean furniture before painting to understand the importance of a pristine surface.
Here is a quick list of what you need:
- Soft, clean cloths (microfiber recommended)
- Hairdryer
- Mineral spirits
- Plastic scraper or old credit card
- Rubber gloves
- Bucket of clean water
- Mild soap
Having these items ready makes the wax removal process simple. You can proceed confidently. Each tool plays a specific role. They work together for a clean result.
The Gentle Heat Method: Safely Melting Away Wax
The gentle heat method is a primary way to remove wax from chalk painted furniture. It works by softening the wax layer. This allows you to blot it away. This method is effective and safer for the paint surface than harsh scraping. It is my preferred first step for wax removal. This technique helps you manage the wax without damaging the underlying paint.
Begin by setting up your workspace. Ensure good lighting. Place old newspapers or a drop cloth under your furniture. This protects your floor from melted wax. You want to keep the area clean. Have all your soft, clean cloths ready. You will use many of them.
Turn on your hairdryer to a low or medium heat setting. Hold the hairdryer about 6-8 inches away from the furniture surface. Move it slowly over a small section. You do not want to overheat one spot. The goal is to warm the wax. Watch for the wax to appear glossy or slightly melted. This shows it is ready. This is similar to how you might clean melted wax from other surfaces.
Once the wax looks soft, immediately press a clean, absorbent cloth onto the area. Blot the wax. Do not rub. Rubbing can spread the wax around. It can also push wax deeper into the paint pores. Blotting lifts the wax directly off the surface. You will see the wax transfer onto the cloth. Use a fresh section of the cloth for each blot. This prevents re-depositing wax.
Repeat this process across the entire waxed surface. Work in small sections. This gives you control. It ensures you address all areas. You might need to go over some spots multiple times. Especially thick or old wax might require more passes. Be patient. Gentle, repeated applications are better than aggressive heat.
For areas with thicker wax, you might use a plastic scraper. Once the wax is softened by the hairdryer, gently push the scraper along the surface. This helps lift the bulk of the wax. Scrape in one direction. Immediately blot away the lifted wax. Always be very careful not to dig into the chalk paint. The plastic scraper reduces the risk of scratches.
After removing the visible wax, the surface might still feel a bit sticky or waxy. This is normal. The heat method primarily removes the bulk of the wax. You will need to follow up with another cleaning step. This prepares the surface for mineral spirits. The goal here is to get rid of as much physical wax as possible. A clean surface makes the next step more effective.
Dissolving Stubborn Wax with Mineral Spirits
After using the gentle heat method, you might still find some wax residue. This residue can feel sticky. It might look dull. Mineral spirits are excellent for dissolving these stubborn wax traces. This step ensures a truly clean surface. It prepares your chalk-painted furniture for a new finish. This approach is effective for how to clean hard wax and dry wax that remains.
Always work in a well-ventilated area when using mineral spirits. Open windows and doors. Use a fan to create airflow. Wear rubber gloves to protect your hands. Mineral spirits can dry out or irritate skin. Safety measures are very important. This ensures a comfortable and safe working environment.
Pour a small amount of mineral spirits onto a clean, soft cloth. Do not soak the cloth. You want it damp, not dripping. Too much solvent can oversaturate the paint. A damp cloth allows controlled application. It prevents excess liquid from sitting on the surface.
Gently wipe the chalk-painted surface with the damp cloth. Work in small sections. Use light, even pressure. You will see the remaining wax dissolve and transfer onto the cloth. Wipe in straight lines or small circles. Avoid harsh scrubbing. The goal is to lift the wax, not abrade the paint.
As the cloth picks up wax, fold it to a clean section. Continue wiping with fresh parts of the cloth. This prevents re-depositing wax onto your furniture. Change to an entirely new cloth once your current one becomes too saturated with wax. You will likely use several cloths during this process.
After wiping a section with mineral spirits, immediately wipe it again with a new, clean, dry cloth. This second wipe removes any mineral spirit residue and dissolved wax. This is crucial for a clean finish. Leaving mineral spirits on the surface can affect the paint. It might leave a slight film.
Inspect your furniture closely. Look for any sticky spots or dull areas. If you find any, repeat the mineral spirits application on those specific areas. Be patient. Some stubborn spots might need multiple light applications. The goal is a smooth, non-greasy feel. The surface should feel clean and dry to the touch.
Once you complete the mineral spirits step, your chalk-painted furniture is clean. It is now ready for its next phase. You might choose to re-wax it. You might decide to paint over it. The clean surface ensures proper adhesion for any new finish. This is a critical step for a successful furniture project.
Alternative Wax Removal Techniques and Considerations
While the heat and mineral spirits methods are most effective, other techniques exist. Some situations might call for slightly different approaches. Always proceed with caution. The goal remains protecting your chalk paint finish. I want to share these additional considerations. They help you handle unique challenges.
For very light wax layers, simple dish soap and warm water can sometimes work. Mix a few drops of mild dish soap into warm water. Dampen a clean cloth. Gently wipe the surface. This method is the least invasive. It might remove minimal wax buildup. However, it is usually not strong enough for well-cured or thick wax layers. If you’re wondering how to clean chalk paint furniture for regular maintenance, this method is more suitable for general cleaning than full wax removal.
Denatured alcohol is another option. It is a stronger solvent than mineral spirits. Use it with extreme caution. Denatured alcohol can be harsh on paint. Test it in an inconspicuous area first. Apply it sparingly to a clean cloth. Wipe very gently. Immediately follow with a clean, damp cloth and then a dry cloth. I reserve this for extremely stubborn spots. It carries a higher risk of paint damage. I generally prefer mineral spirits because they are less aggressive.
Fine-grade steel wool (0000 or finer) can sometimes help. Use it very gently with mineral spirits. This technique is highly abrasive. It can scratch the chalk paint. I do not recommend this for beginners. It is best for very old, caked-on wax that no other method touches. Always use it with extreme lightness. Test it in a hidden area first. The risk of damaging the paint is high.
Consider the age and condition of your chalk paint. Older paint might be more brittle. It can be more prone to damage. Newer paint might be more resilient. Adjust your pressure and technique accordingly. A delicate touch is always best. This preserves the integrity of your furniture.
What if the wax is deeply embedded? Sometimes, wax soaks far into the porous chalk paint. Full removal might be impossible without stripping the paint. In such cases, you might consider repainting the entire piece. Paint designed for wax-sealed surfaces can be an option. Some brands offer primers that block wax. This provides a clean surface for new paint.
Before repainting, always clean the surface as much as possible. Even if some wax remains, minimizing it is key. This helps new paint adhere better. A thorough cleaning increases the success of your next paint project. Remember, these alternative methods are for specific, difficult scenarios. Always prioritize the gentler methods first.
Restoring and Protecting Your Chalk Painted Surface
After you successfully remove wax from chalk painted furniture, the surface needs attention. It might feel dry. It might look dull. You need to restore its finish. You also need to protect it again. This step is crucial for the longevity and appearance of your furniture.
First, ensure the surface is completely clean. Wipe it down with a cloth dampened with plain water. This removes any lingering mineral spirit residue. Let the furniture air dry completely. A clean, dry surface is ready for finishing. This preparation ensures good adhesion for new wax or sealant. This final cleaning prepares the surface, much like cleaning painted wood surfaces after a deep clean.
Now, decide how to re-seal your chalk-painted furniture. The most common choice is re-applying furniture wax. This restores the protective layer. It also brings back the beautiful, soft sheen. Apply a thin, even coat of clear furniture wax. Use a wax brush or a lint-free cloth. Work the wax into the paint. Cover the entire surface.
After applying wax, allow it to cure for about 10-20 minutes. This allows the wax to penetrate the paint. Then, buff the surface with a clean, dry cloth. Buff in gentle, circular motions. This creates a smooth finish. It also enhances the sheen. You can apply a second thin coat if you desire more protection or shine. Always buff between coats.
Alternatively, you can choose a different type of topcoat. A water-based polycrylic sealer offers stronger protection. It is more durable than wax. Polycrylic is good for high-traffic pieces. It resists scratches and moisture better. Apply polycrylic in thin coats. Use a brush or roller. Allow each coat to dry fully before applying the next. Follow the product’s specific instructions for drying and curing times.
Choosing between wax and polycrylic depends on your needs. Wax provides a softer, more traditional chalk paint look. It is easy to reapply or touch up. Polycrylic offers superior durability. It gives a slightly different finish, often more satin or matte depending on the product. Consider the furniture’s use. A dining table might benefit from polycrylic. A decorative side table might be fine with wax.
Proper curing is vital for any new finish. Wax takes several days to fully harden. Polycrylic can take weeks to reach its maximum hardness. During this curing period, treat your furniture gently. Avoid placing heavy objects on it. Do not expose it to moisture. Proper curing ensures the finish lasts. This protects your hard work.
Finally, establish a routine for future maintenance. Regular dusting keeps your chalk-painted furniture looking fresh. You can gently wipe it with a damp cloth if needed. This prevents excessive dirt buildup. It also helps preserve your newly applied protective layer.
Preventing Future Wax Buildup and Mistakes
After all the effort to remove wax from chalk painted furniture, you want to avoid repeat issues. Preventing future wax buildup is easier than removing it. Proper application and ongoing care are key. I want to share my best tips to help you maintain your beautiful furniture pieces.
First, apply wax sparingly. Many people use too much wax. A common mistake is thinking more wax means more protection. This is not true. Too much wax creates a sticky surface. It attracts dirt and dust. It can also become uneven. Apply very thin coats. Use a dedicated wax brush or a lint-free cloth. Work the wax into the chalk paint. You want a light, even layer.
Buffing is crucial. After applying wax, allow it to cure for a short period. Then, buff the surface thoroughly with a clean, dry, lint-free cloth. This removes excess wax. It also brings out a beautiful sheen. If you skip buffing, wax residue remains on the surface. This leads to stickiness and buildup. Buffing creates a smooth, durable finish.
Consider the type of wax you use. Hard waxes offer more durability. Soft waxes are easier to apply. Choose a wax appropriate for your furniture’s use. For high-traffic areas, a harder wax might be better. Always use waxes specifically designed for furniture. This ensures compatibility with chalk paint.
Reapply wax only when needed. Wax does not need frequent reapplication. For most pieces, re-waxing once a year is plenty. Some pieces might need it every two years. Only reapply when the surface feels dry or loses its luster. Excessive reapplication leads to layers of buildup. This creates a dull, heavy look.
Clean your furniture regularly. Dust your chalk-painted furniture with a soft cloth. For minor dirt, wipe with a slightly damp cloth. Avoid harsh cleaners. They can strip the wax. Regular, gentle cleaning prevents dirt from becoming embedded in the wax. This keeps the finish looking fresh longer.
Avoid direct sunlight and heat sources. High temperatures can soften wax. This makes it more prone to damage. It can also cause yellowing over time. Place chalk-painted furniture away from direct sunlight. Keep it away from heat vents or radiators. This protects the wax finish.
Use coasters and placemats. For tables or surfaces that hold drinks, use coasters. This protects the wax from moisture rings. Placemats protect against heat and scratches. These simple habits significantly extend the life of your wax finish. They prevent the need for frequent wax removal.
Understand the environment. Humidity and temperature affect wax. Extreme fluctuations can cause issues. Maintain a stable indoor environment. This helps preserve your furniture’s finish. A consistent environment reduces stress on the wax.
By following these tips, you can extend the life of your wax finish. You can minimize the need for extensive wax removal. Proper care saves you time and effort. It keeps your chalk-painted furniture looking its best for years to come.
Frequently Asked Questions
Can I use vinegar to remove wax from chalk painted furniture?
Vinegar is an acid. It can damage or strip chalk paint. I do not recommend using vinegar for wax removal. Mineral spirits are a safer and more effective solvent. Always use products designed for furniture wax removal. This protects your painted surfaces.
Will mineral spirits damage my chalk paint?
Mineral spirits are generally safe for chalk paint when used correctly. They dissolve wax without harming the paint itself. Apply them sparingly on a cloth. Wipe gently. Do not let the spirits sit on the surface. Ensure proper ventilation. This prevents damage.
How do I know if all the wax is gone?
The surface should feel completely smooth and dry. It should not be sticky or greasy. Any remaining wax will feel tacky. You can also wipe a clean, dry cloth over the surface. If no residue transfers to the cloth, the wax is likely gone.
How can I protect the furniture after wax removal?
After removing wax, you can re-wax the furniture with a fresh, thin coat of clear wax. Alternatively, use a water-based polycrylic topcoat for more durability. This step protects the paint. It restores the desired finish. Choose based on your furniture’s use.
Why is wax applied to chalk paint in the first place?
Wax provides a protective layer for porous chalk paint. It seals the surface against moisture and dirt. Wax also deepens the color and gives a soft, velvety feel. It enhances the paint’s durability. It also creates a beautiful, subtle sheen.
Can I paint over waxed chalk paint without removing the wax?
Painting directly over wax is not recommended. New paint will not adhere properly to the waxy surface. It might peel or chip quickly. Always remove the wax thoroughly before applying a new coat of paint. This ensures good adhesion.
Conclusion
Removing wax from chalk painted furniture might seem like a big job. However, it is a manageable task. You can restore your beloved pieces with the right tools and techniques. We covered effective methods from gentle heat to mineral spirits. These steps help you achieve a clean surface. Your furniture will look fresh again.
I hope this guide gives you confidence. You can tackle wax removal projects with ease. Remember to work patiently. Use proper safety measures. The key is applying gentle methods. This protects your beautiful chalk paint finish.
Do you have a piece of chalk-painted furniture needing a refresh? Now you know how to remove wax from chalk painted furniture successfully. Take the first step today. Gather your supplies. Start transforming your furniture. Your efforts will result in a beautifully restored piece. It will be ready for its next chapter.
- chalk paint
- furniture care
- wax removal
- DIY furniture
- painted furniture

Todd Martin
Senior Writer
With over 15 years of experience in home renovation and design, I started HEG to share what I’ve learned with homeowners who want to create spaces that are both beautiful and functional. I’ve always believed in a hands-on approach, and over the years, I’ve picked up practical solutions that actually work. Through HEG, I aim to make home improvement more approachable, sharing real tips that help you create a home you truly love.