· Todd Martin · Appliance Repair · 20 min read
How To Replace Beko Washing Machine Door Seal
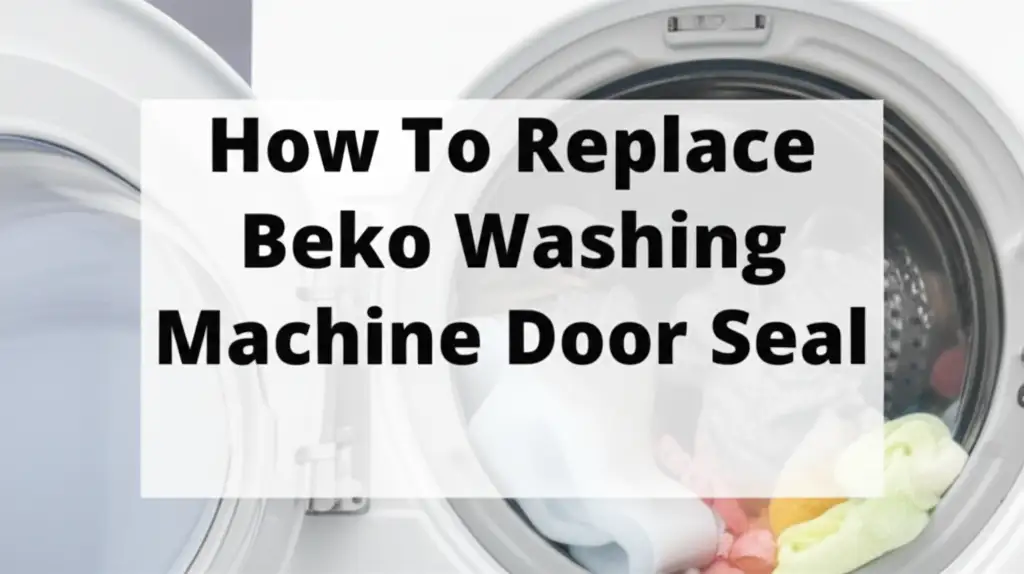
How to Replace Your Beko Washing Machine Door Seal
Is your Beko washing machine leaking water? Do you see mold or tears on the rubber seal around the door? A damaged door seal is a common problem. It leads to annoying puddles and poor washing performance. Replacing the Beko washing machine door seal might seem like a big job. However, it is a straightforward DIY task. You can complete it with basic tools and patience. This guide helps you restore your washer to top condition. You will learn each step, from preparation to testing. This avoids costly professional repairs.
Takeaway:
- Replacing a Beko washing machine door seal prevents leaks and improves machine hygiene.
- Gather necessary tools and prioritize safety by disconnecting power and water.
- Follow specific steps to remove the old seal and install the new one correctly.
- Test the machine thoroughly after replacement to ensure proper function.
- Troubleshoot any remaining issues to complete the repair.
You can replace a Beko washing machine door seal by first disconnecting power and water, then carefully removing the outer and inner retaining bands. Pull the old seal from the drum and outer tub. Clean the area. Finally, fit the new seal around the drum lip and outer tub, securing it with the bands.
Why Your Beko Washing Machine Door Seal Needs Replacing
The door seal, also known as a door boot or gasket, is vital for your washing machine. It creates a watertight seal between the drum and the machine’s outer casing. This seal keeps water inside during cycles. Over time, this rubber component wears out. It can develop cracks, tears, or mold buildup. When this happens, leaks occur. It affects your machine’s performance and can damage your laundry room floor.
Common Signs of a Damaged Seal
You will notice clear signs when a Beko washing machine door seal is failing. The most obvious sign is water leaking from the front of the machine. This usually happens during wash or rinse cycles. Look closely at the seal itself. You might see visible cracks or tears in the rubber. These imperfections break the watertight barrier.
Another common issue is mold or mildew growth. This appears as black spots on the seal. Mold happens because of moisture trapped in the folds. It can lead to unpleasant smells inside your washing machine. This smell can transfer to your clean clothes. If your clothes sometimes come out with strange marks, the seal might be dirty. These marks are often from mold or grime. Ignoring these signs can lead to bigger problems. Early detection saves you money and trouble.
Causes of Seal Wear and Tear
Several factors contribute to the wear of your Beko washing machine door seal. Regular use is the primary cause. The constant flexing and exposure to water, detergent, and high temperatures degrade the rubber over time. Harsh detergents or excessive use of bleach can also accelerate this degradation. They break down the rubber’s integrity. Foreign objects often cause damage. Small items like coins, keys, or even pet hair can get trapped in the seal’s folds. During a spin cycle, these objects can rub against or tear the rubber. This creates small punctures or rips.
Lack of proper maintenance also plays a role. Not cleaning the seal regularly allows mold and grime to build up. This buildup can make the rubber stiff and brittle. Once the seal hardens, it becomes more prone to cracking. Keeping the door slightly ajar after a wash helps dry the seal. This prevents moisture buildup and mold growth. Proper care extends the life of your seal. Sometimes, even the best care cannot prevent eventual wear. For general Beko issues, understanding common problems can help, such as why your machine might not turn on. If your washing machine is not turning on, you can find help on Why is my Beko washing machine not turning on?. Proper care for the door seal is also important. Knowing how to clean washing machine rubber seals helps prevent future damage. You can get tips on How to clean Miele washing machine rubber seal.
Essential Tools and Safety Precautions for Beko Seal Replacement
Before you start any repair on your Beko washing machine, gathering the right tools is important. This ensures a smooth and efficient replacement process. Having everything at hand prevents delays. Safety is even more important than tools. Working with electrical appliances and water requires careful steps. Always put your safety first.
Required Tools Checklist
You do not need many specialized tools for this job. Most items are common household tools. Here is a list of what you will likely need:
- Screwdrivers: You will need both Phillips head and flathead screwdrivers. These are useful for removing screws that hold panels or clamps.
- Pliers: A pair of needle-nose pliers or regular pliers helps with gripping small parts. They also aid in manipulating spring clamps.
- Spring Clamp Pliers (optional but recommended): Some washing machine seals use a specialized spring clamp. These pliers make removal and installation much easier. If you do not have them, regular pliers can often work, but it will be harder.
- New Beko Washing Machine Door Seal: Ensure you have the correct replacement part for your specific Beko model. Check your machine’s model number. Buy an OEM (Original Equipment Manufacturer) part for best fit and durability.
- Gloves: Work gloves protect your hands. The old seal might be dirty or sharp from wear.
- Towel or Rags: Keep these handy for wiping up any residual water. They are also useful for cleaning the area around the seal.
- Bucket: A small bucket can catch any water that might spill when disconnecting hoses.
- Flashlight or Headlamp: This helps illuminate tight spaces inside the machine.
- Multimeter (optional): A multimeter can be used to confirm power is off, though visually unplugging is usually sufficient.
Crucial Safety Steps
Safety is the top priority when working on any appliance. Neglecting safety steps can lead to electric shock or water damage. Follow these precautions:
- Disconnect Power: Always unplug your Beko washing machine from the wall outlet. Do this before touching any internal components. This prevents electric shock. Do not just turn it off at the power button. The machine must be completely disconnected.
- Turn Off Water Supply: Close both the hot and cold water supply valves connected to your washing machine. These valves are usually located behind the machine. This prevents water from flowing out when hoses are disconnected.
- Drain Residual Water: There might be some water left in the hoses or drain pump. Place a bucket under the drain hose if you plan to disconnect it. This catches any water.
- Wear Protective Gear: Use work gloves to protect your hands from sharp edges or dirty components. Safety glasses are also advisable.
- Work in a Well-Lit Area: Good lighting helps you see what you are doing. This reduces the risk of making mistakes.
- Get Help if Needed: If the machine needs to be moved, ask for help. Washing machines are heavy. Lifting them alone can cause injury.
By following these guidelines, you create a safe working environment. This allows you to focus on the repair task. This will help you replace your Beko washing machine door seal successfully.
Disconnecting and Preparing Your Beko Washing Machine
Before you start dismantling anything, proper preparation of your Beko washing machine is key. This involves disconnecting it from all utilities. It also includes positioning it correctly for easy access. Taking these steps ensures a safe and clean working environment. It makes the actual seal replacement process much smoother.
Power and Water Disconnection
The very first step for any appliance repair is to cut off its power source. You must unplug the Beko washing machine from the electrical outlet. Do not just turn the machine off at the control panel. Pull the plug directly from the wall socket. This eliminates any risk of electrical shock during the repair.
Next, you need to turn off the water supply. Look behind your washing machine. You will find two hoses connected to water valves on the wall. One is for hot water, and one is for cold water. Turn both valves clockwise until they are fully closed. This stops water flow into the machine. After closing the valves, it is a good idea to disconnect the water hoses from the machine’s back. Place a towel or a small bucket underneath as some residual water might drip out. These hoses can sometimes be stiff or have mineral buildup. A pair of pliers might help loosen them if needed. Once disconnected, ensure the machine is completely free from any external connections.
Gaining Access to the Door Seal
Now that the machine is disconnected, you need to gain proper access to the door seal. The seal is located at the front of the machine, around the door opening. To work on it comfortably, you might need to pull the washing machine away from the wall. This creates enough space behind it. You need room to move around the sides too.
For Beko washing machines, the door seal is usually accessible from the front. You do not always need to remove the top panel or side panels. However, some models might require you to remove the front fascia. This fascia can sometimes hide screws or clips that hold the door seal in place. Look for visible screws around the door opening. These might secure the plastic trim or control panel. Carefully remove these screws. Gently pull the trim away to see if it gives you better access to the seal’s retaining bands. Be gentle when removing plastic parts. They can break easily. If you have issues with your Beko washer door, such as it not opening, there are guides to help. You might find it useful to learn Why is my Beko washing machine door not opening?. Another useful resource is on How to open Beko washing machine door when locked. These guides can help address any door-related problems you encounter during your repair.
Removing the Old Beko Washing Machine Door Seal
With your Beko washing machine safely disconnected and prepared, the next step is to remove the old, damaged door seal. This part requires a bit of careful prying and manipulation. The goal is to detach the seal without damaging the surrounding components. The seal is typically held in place by two retaining bands or clamps. One is on the outer edge, and one is on the inner edge.
Locating and Detaching the Outer Clamp
The outer clamp is usually the first one you tackle. This clamp holds the seal securely to the front of the washing machine’s outer cabinet. It often looks like a wire ring or a metal band. Sometimes, it might be a spring-loaded metal hoop. Look around the outer rim of the door seal. You will likely find a small spring or a screw that holds the clamp together.
- For Spring-Loaded Clamps: Use a flathead screwdriver or needle-nose pliers. Look for the small spring and hook assembly. Carefully pry the spring apart to release the tension. Once the spring is free, you can pull the entire wire clamp away from the seal. Be careful. The spring can snap back quickly.
- For Screw-Type Clamps: Use the appropriate screwdriver (Phillips or flathead) to loosen and remove the screw. This will loosen the tension on the metal band. Once loose, you can remove the entire band.
Once the outer clamp is off, the front part of the door seal will be loose. You can now pull the outer edge of the seal away from the washing machine’s front panel. This exposes the inner workings and gives you more room to work. Take your time with this step. For some machines, there might be a plastic trim panel that needs to be unclipped or unscrewed before you can access the outer clamp. Always double-check your specific Beko model’s diagram if you are unsure.
Freeing the Seal from the Drum
With the outer clamp removed and the seal pulled back, you now need to detach the inner part of the seal. This part is fitted around the drum opening itself. There is usually an inner retaining band or clamp holding it in place. This inner clamp is often harder to reach. It is usually located deeper inside the machine, between the inner drum and the outer tub.
- Locate the Inner Clamp: Reach inside the drum opening. Feel around the inner lip of the rubber seal where it meets the metal drum. You will feel another wire or metal band. This is the inner clamp.
- Access the Clamp’s Fastener: The inner clamp can be tricky. Sometimes, it has a similar spring mechanism to the outer one. Other times, it might be a simple wire loop that is just stretched into place. Some designs use a bolt and nut, which requires a small wrench or socket.
- Release the Clamp:
- For Spring-Loaded Clamps: Use your spring clamp pliers if you have them. If not, two pairs of regular pliers can sometimes work. Grip the ends of the spring and compress them to release the tension. This lets you pull the clamp off the drum.
- For Wire Clamps: You might need to carefully pry the wire up and over the lip of the drum. A flathead screwdriver can help gently lift sections of the wire until it comes free.
- For Bolt/Nut Clamps: Loosen and remove the nut and bolt.
- Remove the Seal: Once the inner clamp is free, the old door seal can be pulled entirely out of the washing machine. It might be a tight fit. Gently work it out from around the drum and the outer tub opening. Be ready for some residual water inside the folds of the old seal. Have your towels ready.
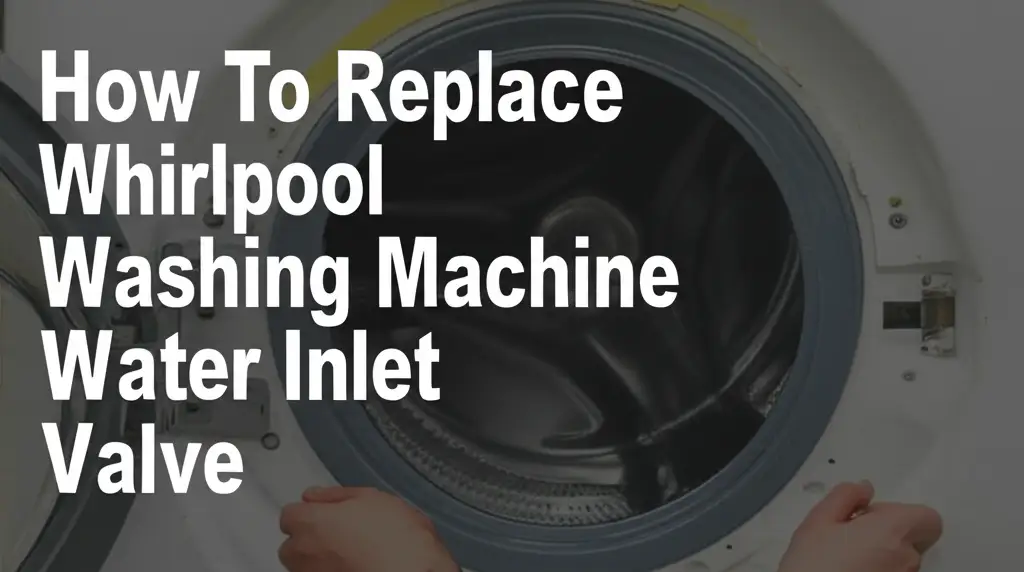
After removing the old seal, inspect the area thoroughly. Clean away any debris, mold, or soap scum from the drum lip and the outer tub opening. This ensures a clean surface for the new seal. This step is important for preventing future mold growth and ensuring a good seal. This process for your Beko washing machine is similar to other brands. For example, replacing a Whirlpool washing machine door boot seal follows similar steps. You can see how other models compare at [How to replace Whirlpool washing machine door boot seal](https://homeessentialsguide.com/how-to-replace-whirlpool-washing machine-door-boot-seal).
Installing the New Beko Washing Machine Door Seal
With the old seal gone and the area cleaned, you are ready to install the new Beko washing machine door seal. This step requires precision and a bit of patience. The goal is to seat the seal correctly and securely, ensuring a watertight fit. Take your time to align everything properly.
Preparing the New Seal and Drum Lip
Before placing the new seal, make sure it is clean and pliable. If the new seal has been stored folded, it might be a bit stiff. You can let it sit at room temperature for a while. This allows it to become more flexible. A slightly warm seal is easier to manipulate.
Inspect the new seal for any defects. Check the alignment marks if your new seal has them. Many seals have small triangles or arrows. These help align the top of the seal with a corresponding mark on the washing machine tub or cabinet. This ensures proper drainage and fit. Next, ensure the drum lip and the outer tub opening are completely clean and dry. Any debris or soap residue can prevent a perfect seal. Use a damp cloth to wipe down the surfaces. Then, dry them thoroughly.
Seating the Seal Correctly
This is the most critical part of the installation. The new seal needs to be fitted snugly around both the inner drum lip and the outer front panel opening.
- Attach the Inner Lip First:
- Start by positioning the new seal. Align any alignment marks on the seal with those on the washing machine tub.
- Carefully push the inner lip of the new seal over the lip of the washing machine’s inner drum. Work your way around the entire circumference.
- This might require some stretching and gentle persuasion. Ensure the seal sits perfectly flat and evenly around the drum. It must be seated deep into the groove designed for it.
- Reattach the Inner Clamp:
- Once the inner lip of the seal is securely in place around the drum, it’s time to reattach the inner retaining clamp.
- If it’s a wire or spring clamp, use your pliers to stretch it around the seal and into its groove. For spring-loaded clamps, this is where specialized spring clamp pliers are very helpful. They allow you to hold the spring open while you position the clamp.
- Ensure the clamp is seated firmly in the groove all the way around. Wiggle the seal to ensure it feels secure and doesn’t easily pop out.
Reattaching the Clamps
After the inner part of the seal is secure, you can focus on the outer part. This involves attaching the seal to the front of the washing machine cabinet.
- Position the Outer Edge: Pull the outer edge of the new seal forward. Fit it over the rim of the washing machine’s front panel opening. Just like the inner part, ensure it sits flush and even all around.
- Reattach the Outer Clamp:
- Take the outer retaining clamp you removed earlier.
- Place it around the outer groove of the new seal.
- If it’s a screw-type clamp, tighten the screw until the band is snug and secure. Do not overtighten.
- If it’s a spring-loaded clamp, use your pliers to reattach the spring mechanism. Ensure the clamp sits in its groove perfectly.
- Final Inspection: Once both clamps are in place, give the seal a gentle tug all around. It should feel firmly attached. Check that there are no bulges or areas where the seal is not fully seated. Make sure the drain holes (small holes at the bottom of the seal) are facing downwards and are not blocked. These holes allow water to drain from the seal’s folds after a wash.
A properly installed seal will look even and tight. It will not have any gaps. This careful installation ensures your Beko washing machine will be leak-free. It will perform optimally for many more cycles.
Testing Your Beko Washing Machine After Seal Replacement
You have successfully replaced the Beko washing machine door seal. Now it is crucial to test your machine. This confirms the new seal is installed correctly and functions as expected. Skipping this step could lead to unexpected leaks. Always take the time to perform a thorough check.
Initial Visual Checks
Before even turning on the power, perform a few visual checks. These checks help catch obvious problems. They ensure everything is back in place.
- Inspect the Seal: Look at the newly installed door seal from all angles. Ensure it is evenly seated around both the inner drum and the outer machine cabinet. There should be no bulges or wrinkles. It should look perfectly smooth.
- Check Clamps: Verify that both the inner and outer retaining clamps are securely in place. They should be tight and fully seated in their respective grooves. Give them a gentle wiggle to confirm they do not move easily.
- Reconnect Utilities: Reconnect the water supply hoses to the back of the washing machine. Turn the water supply valves back on (counter-clockwise). Check for any immediate leaks at the hose connections. Then, plug the washing machine back into the electrical outlet.
- Close the Door: Close the washing machine door. It should close smoothly and latch securely. The door should not feel stiff or misaligned.
These visual steps ensure that the machine is ready for a test run. They help prevent any immediate issues.
Running a Test Cycle
The best way to confirm your repair is to run a test cycle. This mimics normal operation and reveals any leaks under pressure.
- Select a Short Cycle: Choose a short wash program without any clothes. A quick rinse or a delicate cycle is usually sufficient. A full wash cycle with clothes is not necessary at this stage. You might even use the drum clean function if your Beko machine has one. This function runs water through the drum at high temperatures. It is perfect for testing the seal. If you want to know How to put Beko washing machine on drum clean, you can follow specific instructions.
- Add Minimal Detergent (Optional): You can add a tiny amount of detergent. This helps create some suds, making leaks easier to spot. However, it is not strictly necessary for testing the seal.
- Start the Cycle: Start the selected program.
- Monitor for Leaks: During the entire cycle, stay near the washing machine. Watch the area around the door seal closely. Look for any drips, puddles, or signs of water escaping. Pay attention during the fill, wash, and spin cycles. These are when water pressure is highest. Also, check the floor around and under the machine.
- Check Inside: After the cycle finishes, open the door. Inspect the seal inside. It should be clean. There should be no signs of water escaping into the outer casing.
If the machine runs through the entire cycle without any leaks, congratulations! You have successfully replaced your Beko washing machine door seal. You can now use your washer as usual. However, if you do find leaks, proceed to the troubleshooting section.
Troubleshooting Common Issues After Beko Door Seal Replacement
Even after careful installation, you might face some issues with your Beko washing machine. This is normal. Small adjustments or overlooked steps can cause problems. Do not despair if your first test run is not perfect. Most common issues are easy to fix.
Still Leaking?
Finding water on the floor after replacing the seal is frustrating. But it does not always mean a failed repair. Here are common reasons for continued leaks and how to address them:
- Improper Seating: The most frequent cause is the seal not being perfectly seated.
- Solution: Re-open the machine door and thoroughly inspect the seal. Ensure its lip is fully and evenly tucked into the groove around both the drum and the outer tub. Look for any kinks, twists, or areas where the seal might be bunched up. Adjust it as needed.
- Loose Clamps: The retaining clamps (inner or outer) might not be tight enough.
- Solution: Check the tension on both clamps. If they are screw-type, tighten the screw a bit more. If they are spring-loaded, ensure the spring is fully engaged and providing strong tension. A loose clamp cannot hold the seal firmly.
- Damaged New Seal: Though rare, the new seal could have a manufacturing defect or have been damaged during installation.
- Solution: Carefully inspect the new seal for any small tears, punctures, or deformities. If found, you will need to replace the seal again.
- Drainage Holes Blocked: The small drainage holes at the bottom of the seal might be blocked. These allow residual water to drain back into the tub.
- Solution: Ensure these holes are clear. Use a small tool or brush to clean them out if necessary.
- Other Leak Sources: The leak might not be from the door seal at all. It could be from a loose hose connection or the drain pump.
- Solution: Check all hose connections at the back of the machine. Make sure they are tight. If you suspect the drain pump, you might need further investigation. Issues like the machine not draining are separate problems. For help with that, refer to How to fix Beko washing machine not draining.
Door Not Closing Properly?
If the door does not close, latches, or locks correctly after seal replacement, it is usually an alignment issue.
- Beko washing machine
- door seal replacement
- washing machine repair
- DIY appliance fix
- laundry appliance maintenance

Todd Martin
Senior Writer
With over 15 years of experience in home renovation and design, I started HEG to share what I’ve learned with homeowners who want to create spaces that are both beautiful and functional. I’ve always believed in a hands-on approach, and over the years, I’ve picked up practical solutions that actually work. Through HEG, I aim to make home improvement more approachable, sharing real tips that help you create a home you truly love.