· Todd Martin · Home Improvement · 21 min read
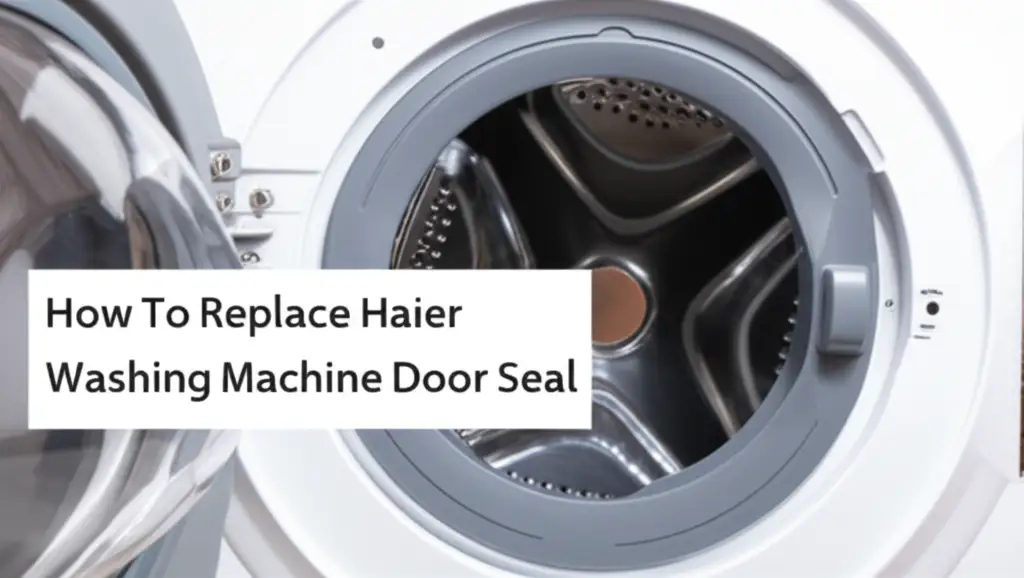
How To Replace Haier Washing Machine Door Seal
Replacing Your Haier Washing Machine Door Seal: A Complete Guide
Is your Haier washing machine leaving puddles on your laundry room floor? A leaky door seal is a common culprit, and it can be frustrating to deal with. The good news is that replacing a Haier washing machine door seal is a job many homeowners can tackle themselves. You do not always need a professional technician.
This guide will walk you through every step of the process. We cover everything from identifying the problem to completing the repair. You will learn what tools you need, crucial safety measures, and how to install the new seal correctly. My goal is to empower you to fix this issue yourself. This helps you save money and restore your washing machine’s proper function.
Takeaway
- Identify door seal issues early to prevent water damage.
- Gather the correct replacement seal and necessary tools.
- Always disconnect power and water before starting work.
- Carefully remove the old seal’s inner and outer clamps.
- Install the new seal by seating it properly and securing both clamps.
- Perform a test cycle to check for leaks after replacement.
- Maintain your new door seal with regular cleaning. This prolongs its lifespan.
To replace a Haier washing machine door seal, first disconnect power and water. Remove the outer retaining spring clamp from around the seal. Then, detach the inner spring clamp that holds the seal to the drum. Carefully pull the old seal off. Install the new seal by fitting its inner lip onto the drum, securing the inner clamp, then fitting the outer lip to the machine’s front panel, and reattaching the outer clamp.
Why Your Haier Washing Machine Door Seal Needs Replacement
A washing machine door seal, also known as a boot gasket, is a critical component. It creates a watertight seal between the washing drum and the machine’s front panel. Over time, this rubber component can degrade. This degradation leads to annoying and potentially damaging leaks. Understanding why your Haier washing machine door seal might need replacement helps you confirm the issue.
Ignoring a damaged seal can lead to more than just puddles. Constant leaks can damage your flooring, cabinetry, and even the washing machine’s internal electronics. A torn seal can also harbor mold and mildew. This creates unpleasant odors that transfer to your clothes. Prompt action saves you money and keeps your laundry fresh.
Identifying Common Symptoms of a Worn Seal
You can usually spot a failing Haier washing machine door seal without much trouble. The most obvious sign is water leaking from the front of the machine during a wash cycle. This leak often appears around the door area. It might be a small drip or a significant puddle.
Beyond visible leaks, other symptoms include unpleasant, musty smells. These smells come from mold or mildew growing within cracks or crevices in the seal. You might also see visible cracks, tears, or black spots on the rubber itself. Sometimes, the seal might feel stiff or sticky to the touch instead of flexible. If your machine is showing symptoms like these, it is a good idea to consider maintenance. For instance, if you are also experiencing issues like poor draining, addressing the door seal is part of a holistic maintenance approach. Why is my Haier washing machine not draining?
Understanding Causes of Seal Damage
Several factors contribute to the wear and tear of your Haier washing machine door seal. One common cause is simply age and frequent use. Over years, the rubber can become brittle, crack, or lose its elasticity. This is a natural process for any rubber component.
Another major factor is the accumulation of detergents, fabric softeners, and lint. These residues can build up on the seal, creating a sticky environment where mold and mildew thrive. Sharp objects accidentally left in pockets, like coins or keys, can also tear the seal during vigorous wash cycles. Even harsh cleaning chemicals can degrade the rubber over time. Taking care of your machine’s components, like regularly cleaning the filter, helps extend the life of all parts. How to clean filter on Haier washing machine is a good starting point for general maintenance.
Essential Tools and Parts for Haier Door Seal Replacement
Before you begin the replacement process for your Haier washing machine door seal, gather all the necessary tools and the correct replacement part. Having everything ready saves time and prevents interruptions. This preparation ensures a smooth and efficient repair. You do not want to be halfway through the job only to discover you are missing a crucial item.
This section covers how to select the right seal. It also lists the specific tools you will need. Having the right tools makes the job easier and safer. It also helps prevent damage to your appliance.
Sourcing the Correct Haier Door Seal
The most important part of this repair is getting the correct replacement Haier washing machine door seal. Washing machine door seals are not universal. Each machine model often requires a specific seal designed for its dimensions. Using the wrong seal will result in continued leaks or an inability to fit the seal at all.
First, locate your Haier washing machine’s model number. This is usually found on a sticker inside the door frame, on the back of the machine, or on the front panel near the bottom. Once you have the model number, search online for “Haier [Your Model Number] washing machine door seal” or “Haier [Your Model Number] door boot gasket.” Purchase a genuine Haier part if possible. Genuine parts ensure the best fit and durability. Alternatively, choose a reputable aftermarket supplier. When tackling DIY projects like this, having specific guides for other appliances can also be helpful. For example, knowing how to replace a Whirlpool washing machine door boot seal shows similar principles apply across brands.
Gathering Your Toolkit
Replacing a Haier washing machine door seal does not require specialized, expensive tools. Most items are common household tools. Here is a list of what you will likely need:
- Screwdrivers: Both Phillips head and flathead screwdrivers are often required. These are for removing various screws and prying small parts.
- Pliers: Needle-nose pliers or regular pliers are essential. They help in gripping and manipulating spring clamps. The internal clamp can be particularly tricky without them.
- Spring Expansion Tool (optional but recommended): This specialized tool makes removing and reattaching the inner spring clamp much easier. If you plan to do similar repairs in the future, it is a worthwhile investment.
- Gloves: Protect your hands from dirt, rust, and sharp edges.
- Towels or Rags: For soaking up any residual water and keeping your work area clean.
- Bucket or Tray: To catch water that might drain when the seal is removed.
- Flashlight or Headlamp: For better visibility inside the machine.
- All-Purpose Cleaner and Cloth: To clean the area before installing the new seal.
- Small Pry Tool or Putty Knife: Useful for gently prying off the outer retaining ring.
Having these tools ready beforehand makes the door seal replacement process much smoother. It also helps you work more efficiently and safely. Embracing the do-it-yourself spirit for your washing machine can save you money. Do It Yourself Washing Machine projects are rewarding.
Safety First: Preparing for Your Haier Washer Repair
Before you start any repair on an appliance, safety must be your top priority. Working with electricity and water carries inherent risks. Taking proper precautions protects you from injury and prevents damage to your Haier washing machine. Do not skip these crucial steps.
A moment of careful preparation can prevent accidents. It ensures a safe working environment for your Haier washer repair. I always take a few extra minutes to make sure everything is disconnected and secure.
Disconnecting Power and Water
This is the most critical safety step. You must completely disconnect your Haier washing machine from all power and water sources. Electrical shock is a serious danger.
Follow these steps precisely:
- Unplug the Washing Machine: Locate the power cord and pull it directly from the wall outlet. Do not just rely on turning the machine off. The physical disconnection is vital.
- Turn Off Water Supply: Find the hot and cold water supply valves connected to the back of your washing machine. These are typically located behind the machine or in a nearby utility sink area. Turn both valves fully clockwise until they are completely closed.
- Drain Residual Water (Optional but Recommended): Some water might remain in the hoses or the machine itself. Place a towel or small bucket behind the machine. Then, carefully disconnect the water supply hoses from the back of the washer. Let any trapped water drain out.
Confirming these disconnections is essential. This removes all immediate hazards. You can now proceed with the repair with peace of mind.
Clearing the Work Area
Once power and water are off, prepare your immediate workspace. A clear, well-lit area allows you to move freely and easily access the machine’s components. This also prevents tripping hazards or accidental damage to other items.
Here is what you should do:
- Move the Machine: If possible, gently pull your Haier washing machine a foot or two away from the wall. This gives you room to work comfortably around the front and sides.
- Clear the Floor: Remove any rugs, laundry baskets, or other items from the immediate vicinity. You want an unobstructed path to the washing machine door.
- Ensure Good Lighting: Use a flashlight or headlamp to illuminate the interior of the machine. This helps you see the small clamps and parts clearly. This is especially important when working inside the drum area.
- Protect the Floor: Place old towels or a large plastic sheet directly in front of the machine. This will catch any water that might spill during the seal removal.
By taking these preparatory steps, you create a safe, efficient environment for replacing your Haier washing machine door seal.
Step-by-Step Guide: Removing the Old Haier Door Seal
With safety precautions in place and tools at hand, you are ready to remove the old, damaged Haier washing machine door seal. This process involves carefully detaching two main retaining clamps. Be patient and work methodically. Rushing can cause damage to the machine or yourself.
The process might seem tricky at first, especially the clamps. But with a clear understanding of each step, you can manage it. My experience with similar repairs shows patience is key.
Detaching the Outer Clamp
The outer clamp is typically a thin wire or spring-loaded band that holds the front edge of the door seal to the outer lip of the washer’s front panel. This is often the easier of the two clamps to remove.
Here is how to remove it:
- Locate the Access Point: Look around the outside edge of the rubber door seal, right where it meets the metal front panel. You will usually find a small spring or a screw on the clamp itself, often at the bottom of the door opening.
- Pry Off the Clamp:
- For a spring-loaded clamp: Use a flathead screwdriver or a small pry tool. Insert it under the visible part of the clamp (often where the spring is) and gently pry it away from the machine. The clamp should pop loose from the groove. You may need to work your way around the seal, carefully pulling the clamp away.
- For a screw-secured clamp: Use a Phillips or flathead screwdriver to loosen and remove the screw. Once the screw is out, the clamp should loosen and can be removed.
- Remove the Outer Lip: Once the outer clamp is off, you can carefully peel back the outer lip of the Haier washing machine door seal from the front panel. This will expose the machine’s inner components and the second clamp.
This step should be done with care. You want to avoid scratching the paintwork or bending the metal panel. The process is similar to how you would approach replacing other machine components, such as a Samsung washing machine rubber seal.
Reaching the Inner Clamp
The inner clamp secures the door seal to the outer tub or drum of the washing machine. This clamp is usually a strong wire ring with a tensioning spring. It is located deeper inside the machine.
Here’s how to access and remove it:
- Open the Door: Fully open the washing machine door.
- Pull Back the Seal: Reach into the washing machine drum. Grab the inner part of the Haier washing machine door seal. Pull it away from the drum opening and into the drum. This action will expose the inner clamp. It typically sits in a groove around the outer edge of the drum opening.
- Locate the Spring Mechanism: Look for the small spring that connects the two ends of the wire clamp. It is often at the top or bottom of the drum opening.
- Remove the Inner Clamp:
- Using pliers: Grab the spring firmly with needle-nose pliers. Pull the spring towards the center of the drum, stretching it enough to dislodge the clamp from its groove. Carefully work the entire wire clamp out. This can be challenging.
- Using a spring expansion tool: If you have this specialized tool, hook it onto the spring. Then, expand the spring to release the tension. This allows you to easily remove the clamp.
This clamp can be stubborn. Do not force it too much. Take your time to avoid bending the metal clamp or damaging the drum. You’ll find similar challenges when you need to replace a Miele washing machine door seal.
Pulling Out the Damaged Seal
Once both the outer and inner clamps are removed, the Haier washing machine door seal is free. You can now gently pull the entire seal out of the machine.
- Inspect the Area: Before installing the new seal, take a moment to inspect the area where the old seal sat. Clean away any lint, dirt, mold, or residue from the drum lip and the front panel. Use an all-purpose cleaner and a cloth. This ensures a clean surface for the new seal. A clean surface helps create a proper seal.
- Note Orientation (Optional): While removing the old seal, briefly note its orientation. Although most Haier washing machine door seals are designed to fit only one way, a quick mental picture helps confirm correct installation of the new one. Look for any drainage holes or alignment marks.
With the old seal removed and the area cleaned, you are now ready for the installation of your new Haier washing machine door seal.
Installing Your New Haier Washing Machine Door Seal
Now that the old, worn-out Haier washing machine door seal is gone and the area is clean, it’s time to install the fresh one. This step is essentially the reverse of removal. Precision and patience are key to ensuring a watertight fit. A correctly installed seal prevents future leaks and ensures your washing machine works as it should.
Take your time with each stage of the installation. Rushing might lead to an improper fit. An improper fit means you will have to repeat the process.
Preparing the New Seal
Before you start fitting the new Haier washing machine door seal, give it a quick check and prepare it.
- Inspect the New Seal: Unpack your new door seal. Make sure it is free from any kinks, tears, or manufacturing defects.
- Check for Alignment Marks: Many new seals have alignment marks, often a small arrow or triangle. This mark indicates the top of the seal. These marks help ensure the seal is installed in the correct orientation. This is especially important for seals with drain holes at the bottom.
- Lubricate (Optional but Recommended): Some technicians recommend applying a thin layer of silicone grease or a small amount of liquid soap to the inner and outer grooves of the new seal. This lubrication helps the rubber slide into place more easily. Use only a very small amount, as too much can make it difficult to get a firm grip and might attract lint.
Proper preparation sets you up for a smoother installation process. It ensures the Haier washing machine door seal seats correctly.
Securing the Inner Lip
The inner lip of the Haier washing machine door seal attaches to the outer tub (drum) of the washing machine. This is typically the more challenging part of the installation.
Follow these steps:
- Position the Seal: Carefully position the new seal around the opening of the washing machine’s outer tub. Ensure any alignment marks on the seal line up with corresponding marks on the tub or the top of the opening. The inner groove of the seal should fit over the lip of the tub.
- Seat the Inner Lip: Begin by pushing a small section of the inner lip into the groove around the drum opening. Work your way around the entire circumference. Push the rubber firmly into the groove. Make sure it is seated evenly and completely. You may need to stretch and manipulate the rubber slightly to get it to fit.
- Install the Inner Clamp:
- Using pliers: Once the inner lip is fully seated, carefully fit the inner wire clamp back into its groove over the seal. This clamp sits around the drum lip, holding the seal firmly in place. Use needle-nose pliers to stretch the spring and connect the two ends of the clamp. This can require significant force and patience.
- Using a spring expansion tool: Hook the tool onto the spring. Expand it. Then, guide the clamp into its groove around the seal and drum. Release the tool. This method is much easier.
- Verify Inner Clamp: Once installed, gently pull on the seal to ensure the inner clamp is securely holding it in place. It should not be able to pull free easily.
This step is critical for preventing leaks from the inner tub. Getting the inner Haier washing machine door seal correctly seated and clamped is essential.
Reattaching the Outer Clamp
With the inner lip and clamp secure, the final step is to attach the outer lip of the Haier washing machine door seal to the front panel of the machine.
Here is how to do it:
- Position the Outer Lip: Pull the outer lip of the new door seal forward. It should extend over the metal edge of the front opening of the washing machine. The outer groove of the seal should fit around this metal flange.
- Seat the Outer Lip: Work your way around the entire circumference of the seal. Push the outer lip firmly into place around the front panel. Ensure it is seated evenly and completely.
- Install the Outer Clamp:
- For a spring-loaded clamp: Carefully place the spring-loaded wire clamp back into the groove around the outer lip of the seal. Start by securing one end, then stretch the spring to bring the other end into place. You might need a flathead screwdriver to help leverage the spring into its final position.
- For a screw-secured clamp: Wrap the clamp around the seal. Then, reinsert and tighten the screw until the clamp is snug.
- Verify Outer Clamp: Once the outer clamp is installed, check that the entire Haier washing machine door seal is flush and securely seated against the front panel. There should be no gaps or bulges.
Congratulations! Your new Haier washing machine door seal is now installed. The hardest part is over. Now, you need to verify your work. This ensures everything is correctly in place and ready for use.
Post-Installation Checks and Testing Your Haier Washer
You have successfully replaced the Haier washing machine door seal. Now it’s time for the final, crucial steps. These steps ensure your repair is effective and your machine is ready to use without leaks. Skipping these checks could lead to discovering a problem too late.
I always recommend thorough testing. It gives you peace of mind that the job is done right. Plus, it confirms your hard work paid off.
Visual Inspection and Wipe Down
Before turning anything back on, take a moment for a detailed visual inspection.
- Check Seal Alignment: Look closely at the entire circumference of the newly installed Haier washing machine door seal. Ensure it is perfectly seated in both the inner and outer grooves. There should be no areas that look twisted, pinched, or bulging.
- Clamp Security: Verify that both the inner and outer clamps are fully engaged and secure. Gently try to pull on parts of the seal. It should feel firmly in place.
- Clean Up: Wipe down any excess lubricant, dirt, or water from the machine’s exterior and the door seal itself. This prevents future buildup and keeps your machine looking clean. Make sure the area around the seal is dry before proceeding.
- Reconnect Hoses: Reconnect the hot and cold water supply hoses to the back of the washing machine. Ensure they are tightened by hand, then give them a quarter-turn with pliers to make sure they are snug. Do not overtighten.
This meticulous check helps catch any small errors before they become big problems.
Running a Test Cycle
This is the moment of truth. A test cycle will confirm if your Haier washing machine door seal replacement was successful and if there are any remaining leaks.
- Restore Power and Water: Plug the washing machine back into the electrical outlet. Slowly open the hot and cold water supply valves. Listen for the sound of water refilling the hoses.
- Run a Short Cycle: Select a short, empty wash cycle on your Haier washing machine. A rinse and spin cycle, or a quick wash with no clothes, is perfect. Do not add any detergent for this initial test.
- Observe for Leaks: During the entire test cycle, pay close attention to the area around the door seal. Look for any drips, trickles, or puddles forming on the floor. Check from the very beginning of the fill cycle through the spin cycle.
- Check Inside Drum: After the cycle finishes, open the door and inspect the inside of the drum and the seal itself for any signs of water where it shouldn’t be.
If the machine completes the cycle without any visible leaks, you have successfully replaced your Haier washing machine door seal! If you find other issues during the test, like excessive noise, check guides like Why is my Haier washing machine so loud?.
Troubleshooting Minor Leaks
Occasionally, a minor leak might appear during the test cycle. Do not panic. It might be an easy fix.
- Small Drips at the Door: If you see only small drips, it is likely the outer clamp or the seal’s outer lip is not perfectly seated.
- Unplug the machine again.
- Carefully check the outer clamp. Ensure it is uniformly positioned in its groove around the entire seal.
- Gently push the outer lip of the seal further into its channel around the front panel. Sometimes, a small section just needs a little more persuasion to seat correctly.
- Repeat the test cycle.
- Persistent Leaks: If the leak is still present or significant, you might need to re-examine the inner clamp and the inner lip seating. This often means removing the outer clamp and peeling back the seal to re-access the inner components. Check if the inner seal is twisted or if the inner clamp slipped out of its groove.
Remember, patience is key. A successful DIY repair like replacing your Haier washing machine door seal saves you money and gives you a sense of accomplishment.
Maintaining Your Haier Washing Machine Door Seal for Longevity
Replacing your Haier washing machine door seal is a significant step in appliance maintenance. But the job is not truly done after installation. To ensure your new seal lasts as long as possible and to prevent future issues, regular maintenance is essential. Simple habits can significantly extend the lifespan of your seal.
I have found that small, consistent efforts pay off. They keep your washing machine running smoothly. They also prevent the need for frequent, costly repairs.
Regular Cleaning Habits
One of the biggest enemies of your Haier washing machine door seal is residue buildup. Detergent, fabric softener, lint, and even body oils from clothes can accumulate on and around the seal. This creates a breeding ground for mold and mildew. This leads to unpleasant odors and can degrade the rubber over time.
- Wipe After Each Use: After every wash cycle, take a clean, dry cloth and wipe down the inside of the door seal. Pay attention to the creases and folds where water and grime tend to collect. This simple step prevents moisture from lingering.
- Monthly Deep Clean: Once a month, perform a more thorough cleaning.
- Mix a solution of equal parts white vinegar and water, or use a washing machine cleaner designed for seals.
- Dampen a cloth with the solution.
- Wipe down all visible parts of the door seal, including lifting the folds to clean underneath.
- For stubborn mold or mildew, you can use a small brush (like an old toothbrush) and a baking soda paste. Gently scrub the affected areas.
- Rinse thoroughly with clean water. Then, dry completely with a clean towel.
- Leave Door Ajar: After your last load of laundry for the day, leave the Haier washing machine door slightly ajar. This allows air to circulate inside the drum and around the seal. Air circulation helps the seal dry out completely. This prevents mold and mildew growth. This practice is crucial for any front-load washing machine. You can find similar advice for other brands like How to clean Miele washing machine rubber seal.
- Haier washing machine
- door seal replacement
- washing machine repair
- DIY appliance fix
- front load washer
- appliance maintenance

Todd Martin
Senior Writer
With over 15 years of experience in home renovation and design, I started HEG to share what I’ve learned with homeowners who want to create spaces that are both beautiful and functional. I’ve always believed in a hands-on approach, and over the years, I’ve picked up practical solutions that actually work. Through HEG, I aim to make home improvement more approachable, sharing real tips that help you create a home you truly love.