· Todd Martin · Home Improvement · 20 min read
How To Replace Veneer

Transform Your Furniture: How To Replace Veneer
Have you looked at your favorite dresser or cabinet lately and noticed its once beautiful veneer is peeling or damaged? It happens often. Veneer, a thin layer of real wood or decorative material, can show wear over time. Instead of giving up on a piece, you can learn how to replace veneer. This process lets you breathe new life into old items, saving money and preserving beloved furniture. I have restored many pieces myself, and I can tell you it is a rewarding project.
This guide will walk you through everything. We will cover identifying damaged veneer, gathering your tools, and preparing the surface. You will learn the exact steps to apply new veneer. Finally, we will discuss how to finish and care for your newly restored furniture. Get ready to transform your pieces and give them a second chance!
Takeaway
- Assess Damage: Determine if veneer replacement is the best solution for your furniture.
- Prepare Thoroughly: Clean and smooth the underlying surface for optimal adhesion.
- Measure and Cut Precisely: Ensure your new veneer fits perfectly before application.
- Apply Correctly: Use the right adhesive and technique for lasting results.
- Finish with Care: Trim, sand, and seal the new veneer for a professional look and durability.
Replacing veneer involves carefully removing the old, damaged layer, preparing the underlying surface, and then skillfully applying a new veneer sheet using appropriate adhesive and tools to restore the furniture’s appearance. This DIY project can save cherished items from the landfill.
Understanding Veneer Damage and When to Replace It
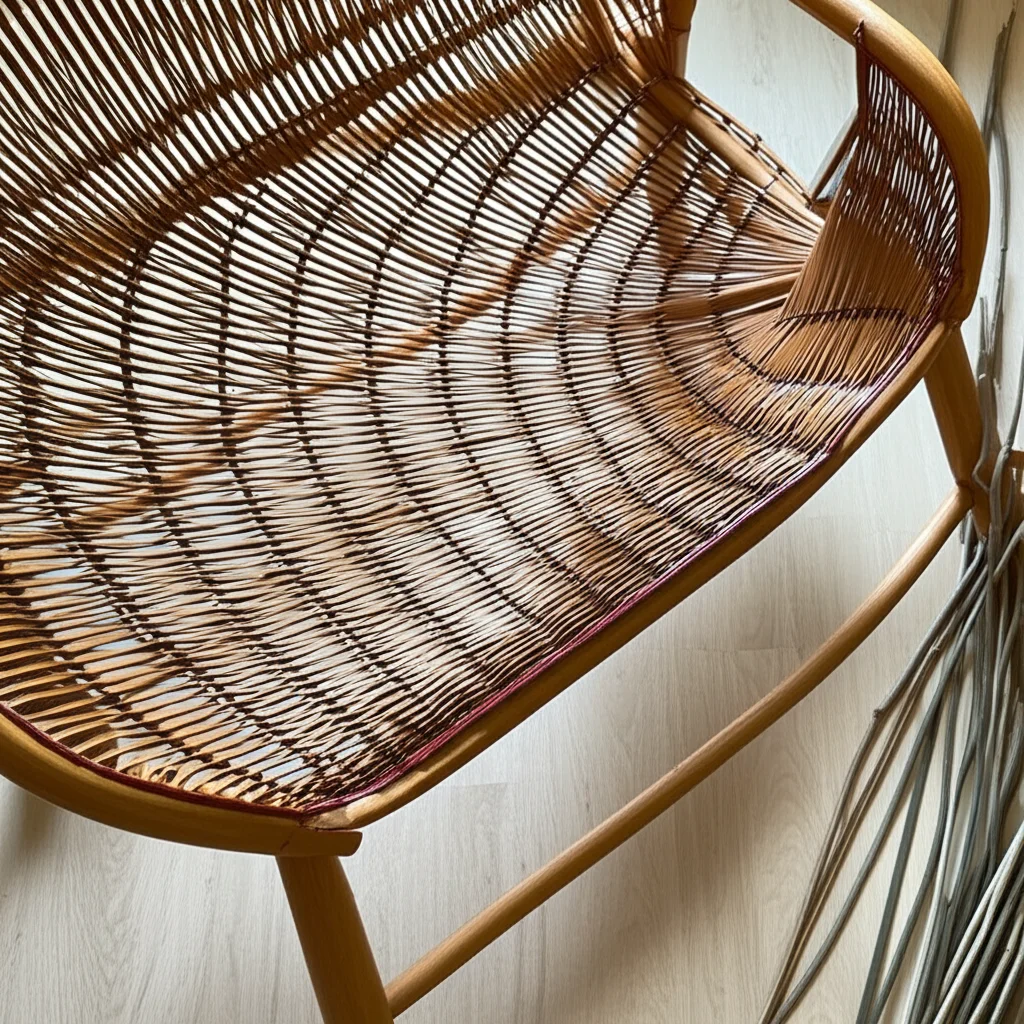
Veneer provides a beautiful, economical way to achieve the look of solid wood. However, it can suffer damage over time. Common issues include peeling, bubbling, cracking, or missing sections. Understanding the type and extent of damage helps you decide if replacement is the right step. Sometimes, a simple repair can fix the problem.
Minor issues like small bubbles or localized peeling might only need spot repairs. You can often re-glue these areas without replacing the entire sheet. For instance, if you have a small bubble on a table top, injecting glue and pressing it down might be enough. I often assess furniture by gently pressing on the veneer to feel for loose areas. If the damage is extensive, such as large sections of veneer missing, widespread cracking, or significant water damage, then replacing the veneer is the best approach. It ensures a consistent, durable finish across the entire surface. You might want to consider learning how to fix warped veneer on furniture if the underlying issue is warping before deciding on full replacement. Replacing veneer also makes sense when you want to change the aesthetic of a piece completely. Maybe you have an old dark cabinet, and you want to use a lighter wood veneer.
The decision to replace also depends on the furniture’s value and your skill level. A cherished antique might warrant professional help for extensive replacement. For most standard furniture, a DIY replacement project is very feasible. This process is more involved than a simple patch, but it yields a complete restoration. Think about how much you love the piece and how much use it will get after the repair.
Gathering Your Tools and Materials for Veneer Replacement
Before you start any project, having all your tools and materials ready saves time and frustration. Replacing veneer requires specific items to ensure a smooth, professional result. I always create a checklist to avoid forgetting anything crucial. You will need a variety of hand tools, some specialized items, and the right type of new veneer.
First, let’s talk about tools for removing the old veneer. A heat gun is essential for softening old glue. A sturdy putty knife or scraper helps lift the veneer without damaging the substrate. For larger pieces, a clothes iron can also work to heat the adhesive. For cleaning and preparing the surface, you will need sandpaper in various grits (from coarse to fine) and a sanding block or orbital sander. I find an orbital sander makes quick work of large flat surfaces.
Next, you will need tools for working with the new veneer. A sharp utility knife and a metal straight edge are vital for precise cuts. A veneer roller or a simple block of wood with a clean cloth wrapped around it provides even pressure for application. You might also need clamps if you are pressing down large areas of veneer. For trimming excess veneer, a router with a flush trim bit can be very handy, but a sharp utility knife and careful handwork are often enough.
For materials, the most important item is the new veneer itself. Veneer comes in various wood species, thicknesses, and backings. Options include raw wood veneer, paper-backed veneer, and pressure-sensitive adhesive (PSA) veneer. Raw veneer requires contact cement or wood glue, while PSA veneer comes with adhesive already applied. You will also need a suitable adhesive, such as contact cement, specialized veneer glue, or wood glue, depending on the veneer type. Finally, stock up on wood filler for any repairs to the substrate and a finish like polyurethane or lacquer to protect the new veneer. Having everything laid out and organized helps the project flow smoothly.
Preparing the Surface: Removing Old Veneer and Substrate Prep
Preparing the surface correctly is perhaps the most critical step in successful veneer replacement. Any old adhesive, loose particles, or unevenness will compromise the bond of your new veneer. I always tell people that good prep makes for a good finish. This stage ensures a clean, stable foundation.
Safely Removing Peeling Veneer
Start by assessing the existing veneer. If it’s already peeling badly, you might be able to lift large sections with a putty knife. For stubborn areas, apply heat using a heat gun or an iron on a medium setting. Move the heat source slowly over the veneer, never holding it in one spot for too long to avoid burning the wood. As the adhesive softens, gently work the putty knife under the veneer, prying it up. Work in small sections, applying more heat as needed. Wear gloves to protect your hands from the heat. This process can be slow, but patience is key to avoid damaging the underlying wood. Sometimes, the old veneer comes off in tiny flakes. In that case, you might need to scrape a lot. For a deeper dive into removal techniques, you can look up how to remove veneer from furniture.
Cleaning and Repairing the Substrate
Once all the old veneer is off, you will see the substrate, which is usually particle board or plywood. This surface needs to be perfectly clean and smooth. Use a scraper to remove any residual glue or veneer fragments. Then, sand the entire surface thoroughly. Start with a medium-grit sandpaper (around 100-120 grit) to remove remaining adhesive and level out any high spots. Follow up with a finer grit (150-180 grit) to smooth the surface further. The goal is a uniform, clean, and slightly textured surface that the new adhesive can grip.
If you find any gouges, holes, or low spots in the substrate, fill them with wood filler. Apply the filler according to the product instructions, usually slightly overfilling the area. Let it dry completely, then sand it flush with the surrounding surface. A perfectly flat substrate is essential for a seamless new veneer application. Dust off the surface thoroughly after sanding using a tack cloth or vacuum cleaner. You want no dust interfering with the new bond.
Measuring and Cutting Your New Veneer
Accurate measurement and precise cutting are essential for a professional-looking veneer replacement. Mistakes here can lead to gaps or misaligned grain patterns. Take your time with these steps. I always measure twice and cut once.
Start by measuring the surface you are veneering. Use a tape measure and note the length and width of the area. Add an extra inch or two to both dimensions for overhang. This excess allows for precise trimming later and accounts for any slight variations in your cutting or application. For example, if your surface is 24 inches by 12 inches, cut your veneer to approximately 26 inches by 14 inches. This small amount of excess is crucial.
When working with wood veneer, pay attention to the grain direction. The grain should ideally run parallel to the longest dimension of your furniture piece, especially if it’s a prominent surface like a tabletop or drawer front. This creates a more natural and aesthetically pleasing look. Lay your veneer sheet flat on a large, clean work surface.
To cut the veneer, use a sharp utility knife and a long, sturdy metal straight edge. Place the straight edge firmly along your measured line. Score the veneer several times with the utility knife, applying consistent pressure. You are not trying to cut through in one pass. Instead, you are scoring a deep groove. For thinner veneers, a few scores might be enough to allow you to gently snap the veneer along the line. For thicker veneers, you might need to make many passes until you cut all the way through. Be patient and keep your knife blade sharp. A dull blade can tear or splinter the veneer, ruining your sheet. Always use a cutting mat underneath to protect your work surface.
If you are veneering multiple surfaces, such as drawer fronts, cut all the pieces at once. Label them if needed to ensure they go on the correct part. Remember to factor in the grain direction for each piece. Precise measurements and clean cuts lay the groundwork for a flawless finish.
Applying New Veneer: Step-by-Step Installation Techniques
Applying new veneer requires careful attention to detail and choosing the right adhesive for your veneer type. The goal is a strong, bubble-free bond. I’ve used different methods, and each has its benefits.
Using Contact Cement for Veneer
Contact cement is a popular choice, especially for paper-backed or raw veneers. This adhesive works by creating a strong bond when two surfaces, both coated with dried cement, are pressed together. Apply a thin, even coat of contact cement to both the substrate and the back of the new veneer using a roller or brush. Allow both surfaces to dry to the touch, which usually takes 20-30 minutes, depending on humidity. They will feel tacky, not wet.
This is the critical part: once dry, carefully align the veneer over the substrate. Contact cement bonds instantly, so precision is vital. Start by aligning one edge, then slowly lay the rest of the veneer down, ensuring no air bubbles are trapped. A good trick is to place dowel rods or pieces of scrap wood across the substrate, lay the veneer on top of them, align it, and then remove the dowels one by one, letting the veneer fall into place. Once the veneer is down, use a veneer roller or a J-roller to apply firm, even pressure across the entire surface. Work from the center outwards to push out any trapped air. This pressure ensures a strong bond.
Iron-On Veneer Application
Iron-on veneer typically has a heat-activated adhesive pre-applied to its back. This method is simpler for many DIYers. Place the veneer on the prepared substrate, ensuring correct alignment and overhang. Use a household iron set to a medium-hot setting, without steam. Place a clean cloth or a piece of brown paper between the iron and the veneer to protect the surface from direct heat.
Slowly move the iron over the veneer, applying firm, even pressure. The heat activates the adhesive, bonding the veneer to the substrate. Work in small sections, moving the iron constantly to avoid scorching. As you iron, use a veneer roller or a smooth block of wood immediately behind the iron to press the veneer firmly down while the adhesive is still warm. This helps ensure a good bond and removes air bubbles. Continue until the entire surface is securely adhered. The adhesive will cool and set, creating a permanent bond. This method works well for smaller pieces or those new to veneering.
Pressure-Sensitive Adhesive (PSA) Veneer
PSA veneer is arguably the easiest to apply. It comes with a peel-and-stick adhesive backing. Simply peel off a portion of the protective paper from the back of the veneer, align it carefully with the substrate, and begin pressing it down. As you go, slowly peel away more of the backing paper, simultaneously pressing the veneer onto the surface with a veneer roller or a clean block of wood.
Work slowly and methodically from one end to the other, pushing out any air bubbles as you go. The adhesive on PSA veneer is very strong, so accurate alignment at the start is crucial as you cannot easily reposition it once it makes contact. This method eliminates the need for liquid glues and drying times, making it fast and relatively mess-free. Regardless of the method you choose, applying consistent pressure is the key to a lasting, beautiful finish.
Finishing Touches: Trimming, Sanding, and Sealing the New Veneer
Once your new veneer is securely bonded, the final steps involve trimming excess, sanding for smoothness, and applying a protective finish. These steps bring your restoration to a beautiful conclusion. I always enjoy this part because the piece really starts to look finished.
Trimming and Edge Finishing
After the adhesive has fully cured (follow adhesive manufacturer’s recommendations for drying times), it’s time to trim the overhang. For straight edges, the most precise method is using a router with a flush trim bit. The bearing on the bit rides along the edge of your furniture, cutting the veneer perfectly flush. Move the router slowly and steadily to avoid chipping the veneer.
If you do not have a router, you can use a very sharp utility knife and a sanding block. Carefully score the veneer along the edge multiple times until you can snap or cut it clean. Then, use a sanding block with fine-grit sandpaper (around 180-220 grit) to gently sand the edges flush with the substrate. Always sand in a downward motion, away from the veneer surface, to prevent splintering the edge. Pay close attention to corners to ensure they are crisp and clean.
Sanding for a Smooth Surface
Even new veneer needs light sanding to prepare it for finishing. Use fine-grit sandpaper (220-grit or higher) for this step. Sand lightly by hand or with an orbital sander on a very low setting. The goal is not to remove material but to create a uniform surface that will accept the finish well. Sand with the grain of the veneer to prevent scratching.
Be very careful not to sand through the veneer, especially if it’s a thin layer. A few gentle passes are usually enough. After sanding, remove all dust using a vacuum cleaner and a tack cloth. A clean surface is vital for good finish adhesion. You can learn more about general sanding techniques on veneer furniture by checking out how to sand veneer furniture.
Applying a Protective Finish
Applying a finish protects the new veneer from moisture, scratches, and everyday wear. Common choices include polyurethane, lacquer, shellac, or even a penetrating oil. Polyurethane is very durable and good for high-traffic surfaces like tabletops. Lacquer dries quickly and provides a beautiful hard finish. Shellac is a good choice for antique reproductions.
Apply your chosen finish according to the product instructions. This usually involves applying thin coats, allowing adequate drying time between coats, and lightly sanding with very fine-grit sandpaper (320-grit or higher) between coats to ensure a smooth, durable build-up. Always apply finish in a well-ventilated area. For most furniture, two to three coats provide excellent protection. Once the final coat is dry, your newly veneered piece is ready to enjoy. For more general advice on finishing, you might find tips in guides like how to refinish veneer furniture or how to refinish veneer table.
Troubleshooting Common Veneer Replacement Issues
Even with careful planning, sometimes things don’t go perfectly. Knowing how to fix common problems can save your project. I’ve encountered many issues over the years, and most have simple solutions.
One frequent issue is air bubbles appearing after the veneer has been applied. If you used contact cement or iron-on veneer, small bubbles can sometimes form as the adhesive dries or cools. For small bubbles, you can often fix them by making a small slit with a sharp utility knife along the grain of the veneer. Then, inject wood glue into the slit using a syringe or a very fine-tipped applicator. Press the bubble down firmly with a veneer roller or a flat block, wiping away any excess glue. Place a heavy weight on the area overnight to ensure a strong bond. For heat-activated veneers, a quick pass with a warm iron (with a protective cloth) and immediate pressure can sometimes re-activate the glue and flatten the bubble.
Another problem can be poor adhesion in certain areas. This often happens if the substrate was not clean enough, or if insufficient pressure was applied during installation. If you notice an area is not sticking well, try to gently lift the edge. If it lifts, you can apply more adhesive (contact cement or wood glue, depending on your original method) to both surfaces and re-press. Use clamps or weights to apply continuous pressure while the new adhesive dries. Make sure the area is completely dry before attempting this fix.
Crooked application is a frustrating issue, especially with instant-bond adhesives like contact cement. If the veneer is significantly crooked and you used contact cement, it’s often best to remove that section and start over. With heat-activated or PSA veneers, sometimes you can gently lift and reposition the veneer immediately after application if the bond hasn’t fully set. However, once cured, full removal and reapplication is usually the only way to correct a severely crooked piece.
Chipping or splintering can occur during trimming or handling. Small chips on the edge can often be filled with wood filler that matches the veneer color. Apply the filler, let it dry, then sand flush and apply your finish. For larger splinters on the surface, you might be able to glue them back down if they are still attached. If a piece is missing, you could try patching with a small piece of matching veneer, though this can be difficult to make seamless. It might be better to re-veneer the entire section if the damage is prominent.
Remember, practice makes perfect. Don’t be afraid to make mistakes; they are part of the learning process. Addressing these common issues promptly helps ensure your veneer replacement project looks professional and lasts a long time.
Long-Term Care and Maintenance for Veneered Surfaces
Once you have successfully replaced veneer on your furniture, taking proper care of it ensures its longevity and beauty. Veneer, while durable, benefits from consistent maintenance. I always advise my clients on simple care routines.
First and foremost, protect your newly veneered surface from moisture and extreme temperature changes. Veneer, being a thin layer of wood, is susceptible to warping or delamination when exposed to water or high humidity. Always wipe up spills immediately. Use coasters under drinks and heat pads under hot dishes, especially on veneered tabletops. Avoid placing furniture directly in front of heat sources like radiators or in direct sunlight, as this can cause the wood to dry out, crack, or fade over time.
Regular cleaning is essential to keep your veneer looking its best. Dust frequently with a soft, dry cloth. For deeper cleaning, lightly dampen a cloth with a mild wood cleaner or a mixture of water and a few drops of dish soap. Wipe the surface, then immediately follow with a dry cloth to remove any moisture. Avoid using harsh chemical cleaners, abrasive pads, or excessive water, as these can damage the finish and the veneer itself. If you’re unsure about cleaning products, a simple damp cloth is usually the safest option. For general cleaning tips, you can refer to how to clean wood veneer.
Protecting the surface from scratches and dents is also vital. Use furniture pads under lamps, decorative items, and anything that might scratch the surface. If you have a desk or dining table, consider a protective tablecloth or placemats during use. For high-traffic areas, applying a durable finish like polyurethane already helps, but extra precautions prolong the life of the veneer.
If you notice any small areas of peeling or bubbling developing over time, address them immediately. Don’t let small issues turn into big ones. Often, a tiny injection of wood glue under the lifted area and some firm pressure can re-adhere the veneer. It’s much easier to fix a minor flaw than to replace a large section again. For a deeper understanding of proactive care, check out tips on how to protect veneer table top.
By following these simple care and maintenance tips, you can ensure your newly veneered furniture remains a beautiful and functional part of your home for many years to come. Your hard work in replacing the veneer will truly pay off.
FAQs About Replacing Veneer
Can I replace veneer myself, or do I need a professional?
You can definitely replace veneer yourself. Many types of veneer, especially paper-backed or PSA, are quite forgiving for DIYers. It requires patience and attention to detail rather than specialized skills. Start with a less visible piece if you are new to it.
What kind of veneer should I use for replacement?
The best veneer depends on your project. Raw wood veneer offers the most authentic look but needs more finishing. Paper-backed veneer is more stable and easier to handle. Pressure-sensitive adhesive (PSA) veneer is the simplest for beginners, as it’s peel-and-stick. Consider the original look and your comfort level.
How do I prevent bubbles when applying new veneer?
Prevent bubbles by ensuring your substrate is perfectly clean and smooth. When applying, use consistent, firm pressure with a veneer roller or a flat block, working from the center outwards. For contact cement, make sure both surfaces are dry to the touch before joining.
Can I put new veneer directly over old, damaged veneer?
No, it is not recommended to put new veneer directly over old, damaged veneer. The old veneer needs to be fully removed. Any bumps, loose areas, or trapped moisture from the old layer will affect the adhesion and longevity of your new veneer. Always start with a clean, stable substrate.
How long does it take to replace veneer?
The time it takes to replace veneer varies greatly by the size and complexity of the piece. A small drawer front might take a few hours. A large tabletop could take a full day or more, factoring in adhesive drying times and multiple coats of finish. Preparation often takes the longest.
What finish is best for newly replaced veneer?
The best finish depends on the desired look and durability. Polyurethane is very popular for its durability and resistance to moisture, making it great for high-use surfaces. Lacquer provides a harder, fast-drying finish. Shellac is good for traditional looks, and penetrating oils offer a natural, hand-rubbed feel.
Conclusion
Replacing veneer on your furniture pieces is a rewarding project that can bring new life to old favorites. We have explored the entire process, from understanding when to replace veneer to the final steps of protection. You now have a clear roadmap. You learned how to prepare the surface by removing old veneer, how to accurately measure and cut your new sheets, and the different methods for applying veneer, like contact cement or iron-on techniques. We also covered essential finishing touches and common troubleshooting tips.
This guide provides you with the knowledge to tackle your own veneer replacement project with confidence. Remember, patience and proper preparation are key to a successful outcome. Don’t let damaged veneer force you to discard a beloved piece. Instead, empower yourself to restore its beauty. Gather your tools, choose your veneer, and transform your furniture. Your home will thank you for the refreshed look and extended life of your cherished items!
- veneer replacement
- furniture repair
- DIY veneer
- wood veneer
- cabinet veneer
- peeling veneer
- veneer restoration

Todd Martin
Senior Writer
With over 15 years of experience in home renovation and design, I started HEG to share what I’ve learned with homeowners who want to create spaces that are both beautiful and functional. I’ve always believed in a hands-on approach, and over the years, I’ve picked up practical solutions that actually work. Through HEG, I aim to make home improvement more approachable, sharing real tips that help you create a home you truly love.