· Todd Martin · Home Appliances · 18 min read
How To Run Deep Clean On Dyson Humidifier
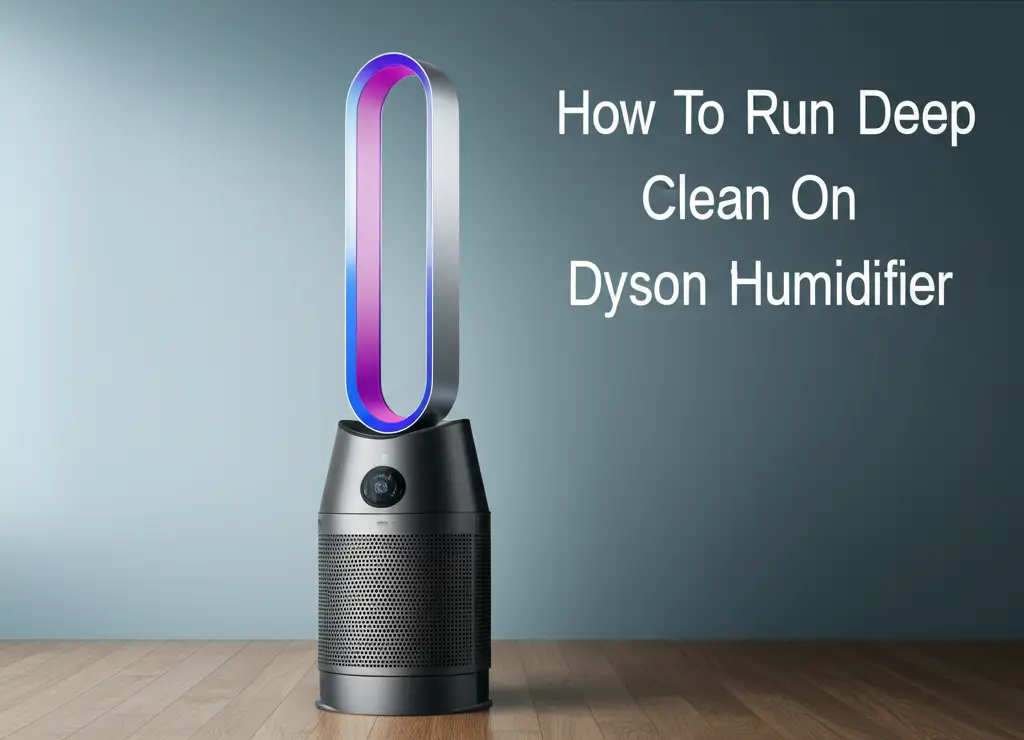
Deep Cleaning Your Dyson Humidifier: A Complete Guide
Maintaining a clean humidifier is vital for your health and the device’s lifespan. If you own a Dyson humidifier, you know it offers advanced air humidification. However, just like any appliance that handles water, it needs regular cleaning. A deep clean prevents mineral buildup, mold, and bacteria growth inside your unit. This guide shows you exactly how to run a deep clean on your Dyson humidifier. I will walk you through each step, ensuring your device stays in top condition.
Keeping your humidifier clean ensures it releases only fresh, pure mist into your home. Neglecting cleaning can lead to poor air quality and reduced machine efficiency. This article covers everything from preparation and required tools to the detailed cleaning process for each part. You will also learn about reassembly, testing, and a regular deep cleaning schedule. Let us make your Dyson humidifier clean and efficient again.
Takeaway
- Deep clean your Dyson humidifier every week for best results. Regular cleaning prevents mold and mineral buildup.
- Gather all tools before you start. You will need a soft cloth, brush, and cleaning solution.
- Follow the disassembly and reassembly steps carefully. This protects your machine.
- Use white vinegar or citric acid for descaling. These agents remove mineral deposits safely.
- Always unplug the unit before cleaning. Safety is the most important step.
To run a deep clean on your Dyson humidifier, first unplug it and disassemble the water tank and loop amplifier. Then, clean all parts with a soft brush and a solution of white vinegar or citric acid to remove mineral deposits and sanitize surfaces. Rinse all components thoroughly and allow them to air dry before reassembly.
Why Deep Clean Your Dyson Humidifier?
Keeping your Dyson humidifier clean is more than just good practice. It directly impacts the air quality in your home. A humidifier that is not regularly cleaned can become a breeding ground for bacteria and mold. These airborne particles can then spread into your living space. This makes deep cleaning a crucial task for your health.
Deep cleaning ensures your humidifier works its best. Mineral deposits from hard water can build up over time. These deposits block water flow and reduce mist output. Cleaning removes these blockages, helping your Dyson run efficiently. It also prolongs the life of your expensive appliance.
Health and Hygiene Benefits
A dirty humidifier can send harmful particles into the air. This includes mold spores and bacteria. Breathing these in can cause respiratory issues or worsen allergies. People with asthma are especially sensitive to these airborne contaminants. Therefore, a clean humidifier protects your family’s health.
My own experience taught me this lesson. I once neglected cleaning my humidifier, and my allergies flared up. After a thorough deep clean, I noticed a huge difference in how I felt. It reminded me that a clean humidifier delivers truly clean, humidified air. This promotes a healthier home environment.
Maintaining Performance
Dyson humidifiers use advanced technology to deliver humidified air. Mineral scale buildup disrupts this technology. It can clog the ultrasonic plate, which creates the mist. When this happens, your machine might produce less mist or stop working correctly. This reduces its humidifying power.
A deep clean removes this scale, allowing all components to function as designed. It helps maintain the humidifier’s optimal performance. This ensures you get the full benefits of your Dyson product. Regular deep cleaning keeps your machine running like new for many years. To understand more about why these devices are important, you can read about how to clean a humidifier. This keeps the air quality in your home high.
Tools and Solutions You Will Need
Before you start the deep cleaning process, gather all necessary tools. Having everything ready saves time and makes the job smoother. You do not need many special items. Most of these are common household products. I always lay out my tools on a clean towel first.
Make sure your cleaning area is well-ventilated. This helps with any vinegar odors. Also, protect your work surface from spills. A large sink or a bathtub works well for rinsing larger parts.
Essential Cleaning Supplies
You will need a few basic items for effective cleaning. A soft cloth is good for wiping surfaces. A small, soft brush, like an old toothbrush, helps scrub tight spots. A microfiber cloth is excellent for polishing. These items help clean without scratching the delicate surfaces of your Dyson.
- Soft cloths: For wiping and drying.
- Small, soft brush: For scrubbing crevices.
- Measuring cup: For accurate solution mixing.
- Small bowl or tray: For soaking smaller parts.
- Safety gloves: To protect your hands from cleaning solutions.
Safe Cleaning Agents
Choosing the right cleaning solution is very important. Dyson recommends citric acid for descaling. White vinegar also works well as a natural descaler and disinfectant. Do not use harsh chemicals, abrasive cleaners, or bleach. These can damage your humidifier’s parts or leave harmful residues.
- Citric Acid: This is often sold as a powder. Mix it with water according to package directions or Dyson’s instructions. It is very effective at dissolving mineral deposits.
- White Vinegar: Use distilled white vinegar. Mix it with an equal amount of water. Vinegar is a good natural cleaner for mineral buildup and can sanitize surfaces. For more details on using vinegar to clean, check out how to clean humidifier with vinegar.
- Warm Water: For rinsing all parts thoroughly after cleaning.
Remember to follow the specific instructions for your Dyson humidifier model. Some models have a built-in deep clean cycle that uses citric acid. Always consult your user manual for exact details and safety warnings. This ensures you clean your specific model correctly.
Preparing Your Dyson Humidifier for Deep Cleaning
Proper preparation is the first step to a successful deep clean. You must ensure the unit is safe to handle and ready for disassembly. This involves unplugging the humidifier and emptying its water tank. Skipping these steps can cause harm to you or the device.
My personal routine always begins with safety first. I make sure the power cord is completely out of the wall outlet. This removes any risk of electric shock. Then, I move the humidifier to a flat, stable surface. This makes disassembly easier and safer.
Unplugging and Disassembly
First, unplug your Dyson humidifier from the power outlet. Never clean a plugged-in appliance. This is a critical safety step. Once unplugged, remove the water tank from the main body. The method for removing the tank may vary slightly by model. Refer to your Dyson manual if you are unsure.
Next, remove the loop amplifier. This is the top part that circulates air. On some models, it lifts straight off. Other models may require a slight twist or latch release. Place all removed parts on a clean towel to keep them organized. Keeping parts organized helps with reassembly later.
Draining the Water Tank
After removing the water tank, empty any remaining water. Pour it out in a sink. Check the tank cap as well. It might have residual water or mineral buildup. Some Dyson models have a small cap on the tank. Remove this cap and set it aside for cleaning.
Shake the tank gently to ensure all water drains out. You might see some slimy residue or hard water spots inside. This is normal and shows why a deep clean is necessary. This step prepares the tank for scrubbing and soaking. Proper draining makes the cleaning process more effective.
Step-by-Step Deep Cleaning Process
Now we get to the core of how to run deep clean on Dyson humidifier. Each part requires specific attention. Follow these steps carefully to ensure a thorough clean. This systematic approach ensures no spot is missed.
I find it helpful to clean parts from largest to smallest. This way, I do not lose track of small pieces. Also, I keep a separate small container for screws or tiny caps if my model has them. My Dyson humidifier deep clean process makes sure every component shines.
Cleaning the Water Tank and Cap
The water tank is often the most soiled part. It holds the water, so mineral deposits and biofilm are common here. First, rinse the tank with warm water. This removes any loose debris. Then, prepare your cleaning solution.
For a Dyson humidifier deep clean, I mix an equal part of white vinegar with warm water. If using citric acid, follow the package instructions for mixing. Pour this solution into the tank. Make sure it fills the tank sufficiently to cover all stained areas. Let it sit for at least 30 minutes, or longer for heavy buildup. You can find more general tips for how to clean a humidifier in other guides.
After soaking, use a soft brush to scrub the inside of the tank. Pay attention to the corners and any textured areas. The brush helps loosen stubborn deposits. Do not use abrasive pads. They can scratch the tank’s surface. Scrub the tank cap thoroughly too. Rinse the tank and cap multiple times with fresh, clean water until the vinegar smell is gone.
Descaling the Loop Amplifier and Base
The loop amplifier and the main base unit also accumulate mineral deposits. The ultrasonic plate, located in the base, is especially prone to scale. This plate produces the mist, so keeping it clear is important. Unplug the humidifier. Disassemble the loop amplifier from the base.
You will need to clean the internal components of the loop amplifier and the water channel in the base. Many Dyson models have a special cleaning cycle that uses citric acid for these parts. If your model has this, follow its specific instructions. Usually, this involves adding citric acid solution to the base and running the cycle.
If your model does not have an automated cycle, you can manually clean these parts. Fill the base with your diluted white vinegar or citric acid solution. Let it soak for 30 minutes. Use a soft brush or a cotton swab to gently clean the ultrasonic plate and other surfaces inside the base. Be very gentle with the plate. Do not scrub hard. For stubborn areas, you may need to apply the solution directly and let it sit longer.
After cleaning, pour out the solution. Rinse the base and loop amplifier thoroughly with fresh water. Make sure no cleaning solution remains. This step is critical for a full Dyson humidifier deep clean. For general Dyson cleaning advice, you might find tips on how to clean a Dyson fan helpful, as many principles apply.
Cleaning the Mist Outlet
The mist outlet is where the humidified air leaves the machine. It can collect dust and some mineral residue. This area needs regular wiping. Use a damp, soft cloth to wipe down the mist outlet grille and the surrounding surfaces.
If you see any visible buildup, you can use a cotton swab dipped in your cleaning solution. Gently wipe the inside edges of the outlet. Be careful not to let any liquid drip into the electronic components. A clean mist outlet ensures air flows freely. This is a small but important part of your deep clean.
Caring for the UV-C Bulb Area
Dyson humidifiers use UV-C light to kill bacteria in the water. The area around the UV-C bulb should also be clean. Mineral buildup can cloud the casing around the bulb, reducing its effectiveness. On some models, you can access this area.
If accessible, gently wipe the UV-C bulb area with a soft, dry cloth. Do not use any cleaning solutions directly on the bulb. If there is visible scale, you might need to use a cotton swab with a tiny amount of diluted vinegar. Be extremely careful not to scratch or damage the bulb. Check your manual for specific instructions on cleaning this sensitive part.
Filter Maintenance
Some Dyson humidifiers, especially those with purifying functions (like the Dyson Pure Humidify+Cool), have filters. While these filters usually just need replacing, their housing might need cleaning during a deep clean. Check your model’s specific instructions.
If your Dyson humidifier has a filter, remove it before cleaning. The filter itself is not cleanable with water or solutions. It needs replacement when indicated by the machine or manual. Wipe the filter housing with a damp cloth to remove dust. Ensure the housing is completely dry before inserting a new filter. For more general Dyson filter care, you can refer to tips on how to clean Dyson air filter.
Reassembling and Testing Your Dyson Humidifier
After cleaning all parts, allow them to air dry completely. This is a crucial step. Assembling wet parts can lead to mildew growth inside the unit. I usually let everything dry for several hours, or even overnight. Patience here prevents future problems.
Once dry, you can begin putting your Dyson humidifier back together. Follow the reverse order of disassembly. Make sure each piece fits securely. Do not force any parts into place.
Careful Reassembly
Start by placing the water tank cap back onto the water tank. Ensure it is tightly sealed. Then, insert the dry water tank back into the main base unit. Make sure it clicks into place if your model has a locking mechanism.
Next, carefully reattach the loop amplifier onto the base. Align the markings or connections correctly. It should slide on smoothly. If it feels stiff, double-check the alignment. Once fully reassembled, your Dyson humidifier should look ready to operate.
Post-Clean Operation Check
Fill the water tank with fresh, distilled water. Using distilled water helps prevent future mineral buildup. Place the filled tank back into the humidifier. Plug the power cord back into the wall outlet.
Turn on the Dyson humidifier. Listen for any unusual sounds. Watch for mist output. The machine might take a few moments to recognize the full tank and start humidifying. Check the display for any error messages. If you encounter issues like the humidifier not using water, you might find help in guides such as why is my Dyson humidifier not using water. If everything runs smoothly, you have successfully completed a deep clean. Enjoy the clean, humidified air.
Deep Cleaning Schedule and Best Practices
A deep clean is not a one-time event. To keep your Dyson humidifier working well and producing healthy mist, you need a regular cleaning schedule. How often you deep clean depends on several factors. These include how often you use it and your local water hardness. I have found that a consistent routine saves me time in the long run.
Following best practices for daily use also reduces the need for frequent deep cleaning. Small habits can make a big difference in maintaining your humidifier’s hygiene. My routine helps me stay on top of appliance maintenance.
Recommended Cleaning Frequency
Dyson generally recommends a full deep clean for its humidifiers monthly. If you live in an area with very hard water, you might need to deep clean every two weeks. Hard water leaves more mineral deposits. If you use your humidifier daily, a weekly wipe-down of accessible parts is also a good idea.
- Weekly: Light cleaning of the water tank. Rinse and wipe down accessible surfaces. Refill with fresh, clean water daily.
- Monthly: Full deep clean using a descaling solution (citric acid or vinegar). Follow all steps outlined in this guide.
- As Needed: If you notice reduced mist output, unusual smells, or visible buildup, perform a deep clean immediately. This keeps the machine running at its best.
Tips for Daily Use
Small daily habits can greatly extend the time between deep cleans. These simple actions also improve the overall air quality in your home. I always make sure to follow these tips.
- Use Distilled Water: Tap water contains minerals that cause buildup. Distilled water has these minerals removed. This dramatically slows down scale formation. This is my number one tip for humidifier users.
- Empty and Refill Daily: Do not let water sit in the tank for days. Stagnant water encourages mold and bacteria growth. Empty any leftover water and refill with fresh water daily.
- Wipe Down Exterior: Quickly wipe the exterior surfaces with a damp cloth every few days. This removes dust and prevents grime buildup.
- Check for Unusual Smells: If you detect a musty odor, it means mold or bacteria are growing. This is a sign you need to deep clean immediately, even if it is not time for your scheduled clean.
By following these simple practices, your Dyson humidifier will remain clean and efficient. This ensures it provides healthy humidified air for your home. Consistent care saves effort later.
Troubleshooting Common Deep Cleaning Issues
Even with a careful deep cleaning process, you might encounter small issues. Do not worry. Most problems have simple solutions. My own experience has shown me how to fix common hiccups. This section addresses frequent questions that come up after a deep clean.
Understanding these solutions helps you keep your Dyson humidifier in top shape. It also prevents you from needing a service call. These tips ensure your deep clean efforts pay off.
Persistent Odor Issues
Sometimes, after a deep clean, a faint odor might remain. This can happen if mold spores were deeply embedded or if the cleaning solution was not fully rinsed. The smell is usually a sign that one more step is needed.
- Re-clean with Stronger Solution: Try another round of deep cleaning. This time, use a slightly stronger white vinegar solution (e.g., 2 parts vinegar to 1 part water). Let it soak for a longer period, perhaps an hour or two.
- Thorough Rinsing: The most common reason for lingering smell is incomplete rinsing. After soaking, rinse all parts multiple times with fresh, warm water. Make sure no residue of the cleaning solution remains. Let the parts air dry completely in a well-ventilated area.
- Run a Pure Water Cycle: Fill the tank with only distilled water. Run the humidifier on a high setting for an hour in a well-ventilated room. This helps flush out any remaining odors.
Stubborn Mineral Deposits
Hard water can leave very stubborn mineral scale. Sometimes, normal soaking might not remove all of it. These hard deposits look like white, crusty patches. They can be tricky to remove.
- Repeat Soaking: For tough deposits, a longer soak time is often the answer. Try soaking the affected parts in a concentrated citric acid solution or undiluted white vinegar overnight. Ensure the entire affected area is submerged.
- Gentle Scraping: After a long soak, try gently scraping the deposits with a plastic scraper or your fingernail. Do not use metal tools. They can scratch and damage the surfaces. A soft brush will also help loosen the scale after soaking.
- Targeted Application: For very small, specific spots, apply a vinegar-soaked paper towel directly to the deposit. Let it sit there for several hours. This delivers a concentrated treatment to the stubborn area.
- Consider a Professional Cleaning Service: If deposits are impossible to remove and affect performance, consider contacting Dyson support. They might offer specific advice or service options. In rare cases, a professional might be needed for specific parts.
Addressing these issues promptly ensures your Dyson humidifier continues to work effectively. It helps keep the air in your home fresh and clean. Regular and thorough cleaning prevents most of these problems from becoming major concerns.
FAQ Section
How often should I deep clean my Dyson humidifier?
You should deep clean your Dyson humidifier at least once a month. If you use it daily or have hard water, consider deep cleaning every two weeks. Regular cleaning prevents mineral buildup and stops mold and bacteria growth. This keeps your air healthy.
Can I use bleach to clean my Dyson humidifier?
No, never use bleach or harsh chemical cleaners on your Dyson humidifier. Bleach can damage the internal components and leave harmful residues. It can also produce dangerous fumes when mixed with mineral deposits. Stick to white vinegar or citric acid for safe and effective cleaning.
What kind of water should I use in my Dyson humidifier?
Always use distilled water in your Dyson humidifier. Tap water contains minerals that cause scale buildup. This buildup reduces the machine’s efficiency and shortens its lifespan. Distilled water prevents mineral deposits, keeping your humidifier cleaner for longer.
My Dyson humidifier still smells after cleaning. What should I do?
If a smell remains, the cleaning solution might not have been fully rinsed. Rinse all parts thoroughly again with fresh water. You can also try another deep clean with a stronger vinegar solution and let it soak longer. Air dry all components completely before reassembly.
How do I know if my Dyson humidifier needs a deep clean?
Signs your Dyson humidifier needs a deep clean include reduced mist output, visible white mineral scale on parts, or a musty odor coming from the unit. Your machine might also show error codes related to maintenance. Do not wait for these signs; clean regularly.
Can I put my Dyson humidifier parts in the dishwasher?
No, do not put any Dyson humidifier parts in the dishwasher. Dishwashers use high heat and harsh detergents that can damage the delicate electronic components and plastics of your humidifier. Always hand wash parts following the instructions in your manual.
Conclusion
Running a deep clean on your Dyson humidifier is a simple yet vital task. It protects your health by preventing mold and bacteria from spreading. It also ensures your expensive appliance works efficiently and lasts longer. We have covered all the steps, from gathering your tools to reassembling the machine. I hope this guide makes the process easy for you.
Remember, consistency is key. A monthly deep clean, combined with daily quick rinses and using distilled water, keeps your Dyson humidifier in excellent condition. This ensures you always enjoy clean, pure humidified air in your home. Take action today. Perform a deep clean on your Dyson humidifier. Experience the difference a truly clean machine makes for your home environment. You will breathe easier and enjoy your humidifier more.
- Dyson humidifier
- deep clean
- humidifier maintenance
- appliance cleaning
- home air quality
- Dyson care

Todd Martin
Senior Writer
With over 15 years of experience in home renovation and design, I started HEG to share what I’ve learned with homeowners who want to create spaces that are both beautiful and functional. I’ve always believed in a hands-on approach, and over the years, I’ve picked up practical solutions that actually work. Through HEG, I aim to make home improvement more approachable, sharing real tips that help you create a home you truly love.