· Todd Martin · Grow Tent Setup · 19 min read
How To Set Up Carbon Filter Outside Grow Tent
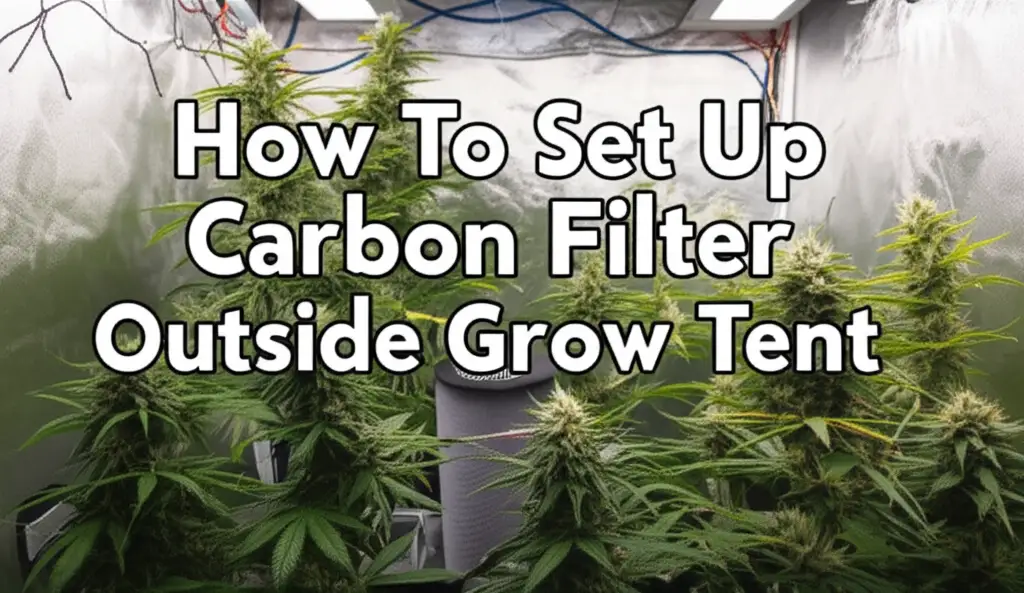
Setting Up Your Carbon Filter Outside Grow Tent for Optimal Air Quality
Stepping into the world of indoor gardening brings many exciting challenges and rewards. One of the biggest hurdles growers face involves managing the distinct odors produced by plants. A carbon filter is your best friend in this battle. It captures unwanted smells, ensuring your growing space remains discreet.
Many growers typically install carbon filters inside their grow tents. However, placing your carbon filter outside the grow tent offers unique advantages. This setup can save valuable interior space. It also helps manage heat and noise more effectively. This guide will show you how to properly set up a carbon filter outside your grow tent. We will cover everything from choosing the right equipment to optimizing your system for peak performance. Get ready to create a cleaner, more efficient growing environment.
Takeaway:
- Setting up your carbon filter outside the grow tent saves space and reduces noise inside.
- Proper equipment selection (filter, fan, ducting) is essential for effective odor control.
- Careful installation and sealing of all connections prevent air leaks and odor escape.
- Maintaining negative pressure inside the tent ensures all air passes through the filter.
- Regular maintenance keeps your filtration system working efficiently.
Setting up a carbon filter outside a grow tent involves connecting the filter to an inline fan and ducting. This system then pulls air from the tent and exhausts it through the filter outside the tent. This creates negative pressure inside, controlling odors effectively.
Why Position Your Carbon Filter Outside the Grow Tent?
Deciding where to place your carbon filter is a key decision for any indoor grower. Most people think about putting it inside the tent. However, placing your carbon filter outside the grow tent offers several significant benefits. This external setup can improve your growing environment in multiple ways. We will explore the reasons why this positioning might be the best choice for your indoor garden.
Space Optimization and Accessibility
Grow tents often have limited space, especially smaller models. Every inch inside counts for your plants and their equipment. Placing a large carbon filter and its inline fan inside the tent can take up valuable room. This can restrict plant growth or make it harder to move around. Moving the filter outside frees up this precious interior space. Your plants can grow larger and healthier without physical obstructions.
An external setup also makes the filter easier to access. When the filter is inside, you often need to stop your grow cycle or disturb plants to perform maintenance. This includes tasks like checking the pre-filter or replacing the carbon filter. With the filter outside, you can easily reach it for routine checks and cleaning. This convenience saves time and reduces stress on your plants.
Noise Reduction and Heat Management
Inline fans, which are crucial for moving air through carbon filters, can generate noise. When this fan is inside the grow tent, the noise can be quite noticeable. Placing the fan and filter unit outside helps dampen this sound. The tent fabric itself provides some sound insulation. You might also place the external setup in a cabinet or box to further reduce noise levels. This creates a quieter environment, which is beneficial for both you and your plants.
Furthermore, inline fans produce a small amount of heat as they operate. While small, this heat can contribute to rising temperatures inside a sealed grow tent. Every degree matters for optimal plant health. Moving the fan and filter outside prevents this extra heat from entering your enclosed growing space. This helps maintain a stable, cooler temperature within the tent. Cooler temperatures are often ideal for many types of plants. It also reduces the workload on your grow tent’s cooling systems, saving energy.
Essential Equipment for an External Carbon Filter Setup
Setting up a carbon filter outside your grow tent requires specific components. Choosing the right equipment ensures your system works efficiently. It also guarantees effective odor control. We will detail the essential pieces of equipment you need. Understanding each component’s role helps you make informed decisions.
Selecting the Right Carbon Filter and Inline Fan
The carbon filter and inline fan are the heart of your ventilation system. They work together to pull air from the tent and neutralize odors. Your carbon filter needs to be sized correctly for your grow tent. Look at the cubic feet per minute (CFM) rating of the filter. This rating tells you how much air the filter can process. You should match this with the volume of air in your tent. A good rule of thumb is to calculate your tent’s volume (length x width x height). Then, choose a filter and fan that can exchange this air volume every 1 to 3 minutes.
The inline fan’s CFM rating must match or exceed the carbon filter’s rating. This ensures efficient airflow through the filter. Look for a fan with a strong motor and quiet operation. Some fans come with speed controllers, which are very useful. They allow you to adjust airflow based on your needs. For example, you might need more airflow during flowering stages due to increased odors. A fan that allows you to control its speed helps manage power consumption and noise.
Both the filter and fan should have the same ducting diameter. Common sizes are 4-inch, 6-inch, or 8-inch. Mismatched sizes will require adapters, which can introduce air leaks. High-quality carbon filters use activated virgin carbon. This material provides superior odor absorption. A good filter can last up to two years with proper care. You can find more details on how to choose and hang these components effectively by reading about how to hang carbon filter and fan in grow tent.
Ducting, Clamps, and Hanging Hardware
Ducting creates the pathway for air to travel from the grow tent, through the filter, and out. Flexible aluminum ducting is a popular choice. It is easy to maneuver and connect. Ensure your ducting matches the diameter of your fan and filter ports. Avoid using ducting that is too long or has too many bends. Both can reduce airflow efficiency.
Ducting clamps, also known as hose clamps or duct clamps, secure the ducting to the fan and filter. They ensure airtight connections. Choose clamps that fit your ducting size. Metal clamps with a screw mechanism offer the strongest and most reliable seal. You will need several clamps for each connection point.
Even though the filter is outside, you might still need hanging hardware. This is especially true if you plan to suspend the fan and filter unit. Heavy-duty rope ratchets, bungee cords, or metal chains work well. They allow you to safely suspend the equipment from a ceiling joist or a sturdy frame. Ensure the chosen hardware can support the combined weight of your carbon filter and inline fan. This prevents accidental drops and potential damage. Safety is important when setting up any grow room equipment.
Step-by-Step Guide to Installing Your External Carbon Filter
Installing a carbon filter outside your grow tent might seem complicated. However, it is a straightforward process when broken down into steps. Proper installation ensures maximum efficiency in odor control and air circulation. We will walk you through each stage. This includes preparing your tent, connecting components, and sealing everything effectively.
Preparing Your Grow Tent for External Ventilation
Before you begin connecting equipment, you must prepare your grow tent. Your grow tent needs an opening for the ducting to pass through. Most modern grow tents come with specific ports or socks for this purpose. These ports are usually drawstring-adjustable. Select a port near the top of the tent. Hot air rises, so extracting from the top is most efficient.
Ensure the chosen port matches the diameter of your ducting. If it is too large, you might need an adapter or more creative sealing methods. If your tent does not have a suitable port, you may need to carefully cut a hole. Use a sharp utility knife and reinforce the edges with duct tape to prevent tearing. Measure twice before cutting. You want a snug fit for the ducting to prevent air leaks. A tight fit is essential for creating negative pressure. This pressure pulls air through the filter, keeping odors inside.
Connecting the Carbon Filter and Inline Fan
This is the core of your external filtration system. First, identify the intake and exhaust sides of your inline fan. Air flows from the grow tent, through the carbon filter, then into the fan, and finally out through the exhaust ducting.
Attach one end of your ducting to the selected port on your grow tent. Secure it tightly with a ducting clamp. Next, connect the other end of this ducting to the intake side of your carbon filter. Use another ducting clamp to ensure an airtight seal. It is crucial for the air to pass through the filter first.
Now, connect the carbon filter to the inline fan. The output side of the carbon filter should connect directly to the intake side of the inline fan. Use a third ducting clamp for this connection. Ensure all clamps are tightened securely. Any loose connections will allow unfiltered air to escape. This means odors will get out. You can refer to guides on how to hang carbon filter and fan in grow tent for visual examples of these connections, even if your setup is external.
Routing Ducting and Sealing Connections
With the filter and fan connected, you need to route the exhaust ducting. This ducting will carry the filtered air away from your grow space. Connect one end of your second piece of ducting to the exhaust side of the inline fan. Secure it with a ducting clamp.
Now, route this exhaust ducting to your desired exit point. This could be a window, another room, or an attic vent. Try to keep the ducting runs as short and straight as possible. Long runs or excessive bends reduce airflow efficiency. If venting through a window, use a window vent kit or create a custom board to seal the opening around the duct. This prevents unfiltered air from re-entering your home.
Thoroughly inspect all connections. Use aluminum foil tape or high-quality duct tape over any joints or seams. This ensures every connection is completely airtight. Leaks, even small ones, can allow odors to escape. They can also reduce the overall effectiveness of your system. Pay extra attention to the tent’s port where the ducting exits. Use a drawstring or tape to seal it tightly around the duct.
Securing the External Setup
Your carbon filter and inline fan system can be quite heavy. Proper support is essential. If you are placing the unit on a flat surface, ensure it is stable and level. A sturdy shelf or a dedicated platform works well. If you are hanging the unit, use strong hanging hardware. Rope ratchets are excellent for this. They allow for easy height adjustment.
Attach the rope ratchets or chains to ceiling joists or a solid support structure. Then, use the hooks to suspend the inline fan and filter combination. Some growers build a small frame or box to house the entire external setup. This can further reduce noise and protect the equipment. Ensure there is enough space around the filter for air to circulate freely. Do not block the intake or exhaust ports. A secure setup prevents vibrations and potential damage. This also ensures a long lifespan for your equipment.
Optimizing Airflow and Negative Pressure
Achieving proper airflow and negative pressure is vital for effective odor control and a healthy grow environment. Simply setting up the equipment is not enough. You must understand how air moves within your system. This allows you to fine-tune it for maximum efficiency. Let’s delve into these important concepts.
Understanding Airflow Dynamics
Airflow dynamics refers to how air moves and behaves within your grow tent and ventilation system. Your carbon filter and inline fan system creates an exhaust path. This means air is continuously pulled out of the grow tent. To replace this exhausted air, fresh air must enter the tent. This fresh air typically comes from passive intake vents or a separate intake fan.
Optimal airflow ensures that stagnant air, heat, and humidity are constantly removed. Stagnant air can lead to issues like mold and mildew. It also makes it harder for plants to breathe. Effective airflow brings in fresh CO2 for photosynthesis. It also helps manage temperature and humidity levels.
The path of air inside your tent matters. You want air to move evenly through the entire growing space. This prevents “dead spots” where air doesn’t circulate well. Consider placing intake vents or fans at the bottom of the tent. This allows cooler, fresh air to enter low. It then rises as it warms, pulling through the plant canopy, and exits through the top exhaust port. This creates a natural convection current, aiding in heat and humidity removal.
Achieving Proper Negative Pressure
Negative pressure is a key concept for odor control in a grow tent. It means the air pressure inside the tent is slightly lower than the air pressure outside the tent. When your exhaust fan pulls air out, it creates this pressure difference. This ensures that any air escaping the tent can only do so by passing through the carbon filter.
You can test for negative pressure easily. Just open a small flap or zipper on your grow tent. If the tent walls suck inwards slightly, you have achieved negative pressure. This is a good sign. If the walls bulge outwards, you might have positive pressure. This means air is leaking out without filtration.
To achieve or maintain negative pressure, ensure your exhaust fan’s CFM rating is slightly higher than the combined CFM of your intake fans (if any). If you only have passive intake vents, ensure they are not too large. Large, unrestricted intake vents can reduce the negative pressure effect. If your exhaust system is very powerful, it can still create negative pressure with large passive intakes. The goal is to always have more air being pulled out than is entering freely.
Properly sealed connections are also critical for negative pressure. Any unsealed gaps or holes in your tent or ducting will allow unfiltered air to escape. This compromises your odor control. Regularly check all zippers, seams, and duct connections for leaks. Using strong duct tape or sealant where needed can make a big difference. This precise balancing act ensures that all smelly air is forced through your carbon filter.
Common Challenges and Troubleshooting External Setups
Even with careful planning, you might encounter issues with your external carbon filter setup. Troubleshooting common problems helps maintain an efficient and effective system. Knowing what to look for can save you time and frustration. Let’s address some of the typical challenges growers face.
Addressing Noise and Vibration
While placing the filter outside helps reduce noise, some sound or vibration might still be present. The inline fan is the primary source of noise. If the fan is too noisy, first check its mounting. Ensure it is securely hung or placed on a stable surface. Loose connections can cause rattling. Rubber isolation mounts or bungee cords can help dampen vibrations if the fan is suspended.
You can also build an insulated box around the fan and filter unit. Line the inside of the box with sound-absorbing materials like acoustic foam. This acts as a sound buffer. Using larger diameter ducting can also sometimes reduce fan noise. Smaller ducting forces the fan to work harder, creating more turbulence and noise.
Another option is to use a fan speed controller. Running the fan at a lower speed can significantly reduce noise. Remember to balance noise reduction with maintaining adequate airflow. You still need to move enough air for proper ventilation and odor control.
Preventing Air Leaks and Odor Escape
Air leaks are the enemy of effective odor control. Even small gaps can allow strong plant odors to escape. Regularly inspect all connections in your ducting. Check where the ducting enters and exits the grow tent. Use high-quality aluminum foil tape or strong duct clamps on all joints.
Pay close attention to your grow tent’s zippers and seams. Over time, these can degrade or loosen. If you detect air leaking from the tent itself, consider patching small holes with heavy-duty repair tape. Ensure all drawstring ports are cinched tightly around the ducting. If you cut a custom hole, make sure it is perfectly sealed.
Maintaining negative pressure, as discussed earlier, is your best defense against odor escape. If the tent walls are not sucking inwards slightly, it means air is finding an easier path out than through your filter. Revisit your fan speed and check for blockages or large, unsealed intake vents. An airtight system is key to keeping all odors contained.
Maintaining Filter Efficiency
A carbon filter’s efficiency decreases over time as it absorbs odors. The activated carbon becomes saturated. The pre-filter, a mesh sleeve around the carbon filter, collects dust and debris. This can reduce airflow. Regularly check and clean the pre-filter. It is usually washable. Gently remove it, wash it with mild soap and water, rinse thoroughly, and let it air dry completely before putting it back.
The lifespan of your carbon filter depends on many factors. These include the size of your grow, the strength of odors, and environmental humidity. High humidity can shorten a filter’s life. Most filters last 1-2 years. You will notice the filter needs replacement when odors start to become detectable again. Do not wait until odors are obvious. Plan to replace your carbon filter periodically. This proactive approach ensures continuous, effective odor control. You do not clean the carbon itself, only replace the entire filter when it is exhausted. While this article focuses on external setup, proper tent hygiene overall contributes to filter lifespan and effective air quality. You can find more information on how to clean grow tent for a comprehensive approach to grow space cleanliness.
Advanced Tips for External Carbon Filter Systems
Once you have your external carbon filter system set up, you can further enhance its performance. These advanced tips focus on integrating additional components and monitoring your environment. They help create an even more controlled and productive growing space.
Integrating Air Intake and Circulation Fans
While your exhaust system handles odor and heat removal, you also need to manage fresh air intake. For smaller setups, passive intake vents might be enough. These are typically mesh-covered openings at the bottom of your tent. However, for larger grow tents or situations requiring precise environmental control, an active intake fan is beneficial.
An active intake fan pulls fresh air into the tent. It works in conjunction with your exhaust fan. Position the intake fan at the bottom of your tent. Ensure it pulls air from a clean source, preferably from outside your immediate grow space. The CFM of your intake fan should be slightly lower than your exhaust fan. This maintains the crucial negative pressure inside the tent.
Internal circulation fans are also critical. These small fans move air within the grow tent. They ensure an even distribution of air, CO2, and temperature around your plants. Circulation fans prevent hot spots and help strengthen plant stems. Place them strategically, often above or below the canopy, to create gentle airflow without directly blowing on plants. This combination of exhaust, intake, and circulation fans creates a complete air management system.
Monitoring Environmental Conditions
A successful grow operation relies on consistent environmental conditions. Your external carbon filter system plays a big part in managing air quality, but monitoring is key. Use a good quality hygrometer and thermometer. These devices measure temperature and humidity inside your grow tent. Place them at canopy level for accurate readings.
Some growers use advanced environmental controllers. These devices can automate your fans based on temperature or humidity settings. For example, if the temperature rises above a certain point, the controller can automatically increase your exhaust fan speed. This keeps conditions stable without constant manual adjustments.
Regularly check your air quality. While a carbon filter handles odors, other air contaminants can be present. Ensure your external air source is clean. Avoid pulling air from dusty areas or places with strong chemical odors. Paying attention to these details helps create an optimal environment for your plants. A healthy environment contributes directly to plant vigor and yield.
FAQ Section
Can I run my carbon filter 24/7?
Yes, you should run your carbon filter and inline fan 24/7. Plants produce odors around the clock. Continuous airflow also helps manage temperature and humidity inside the grow tent. This creates a stable environment for your plants.
How often should I clean the pre-filter?
You should check your pre-filter every 2-4 weeks. Dust and debris can build up, reducing airflow. If it looks dirty, gently remove it and wash it with mild soap and water. Make sure it is completely dry before putting it back on.
How long does a carbon filter last?
The lifespan of a carbon filter varies. It depends on grow size, odor intensity, and humidity. Most carbon filters last between 1 to 2 years. High humidity can shorten its life. Replace it when you notice odors escaping your grow tent.
Does an external carbon filter setup reduce humidity?
Yes, an external carbon filter setup helps reduce humidity. The inline fan continuously pulls humid air out of the tent. It replaces it with drier air from your room or outside. This process prevents excess moisture buildup.
What size carbon filter do I need for my grow tent?
To size your carbon filter, calculate your tent’s volume (length x width x height). Then, choose a filter and fan with a Cubic Feet per Minute (CFM) rating that can exchange this air volume every 1 to 3 minutes. For example, a 4x4x6 ft tent (96 sq ft) needs a fan around 100-200 CFM.
Can I use any ducting for my carbon filter?
It is best to use flexible, insulated aluminum ducting. It is durable and helps reduce noise. Ensure the ducting diameter matches your carbon filter and inline fan ports. Avoid kinks or sharp bends in the ducting.
Conclusion
Setting up your carbon filter outside the grow tent is a smart choice for many indoor growers. This method optimizes internal space, reduces noise, and helps manage heat effectively. We have covered the entire process, from choosing the right equipment to fine-tuning your system for peak performance. You now understand the importance of matching your carbon filter and inline fan sizes. You also know how to properly connect and seal all ducting for an airtight system.
Remember, maintaining negative pressure is crucial for preventing unwanted odors from escaping. Regular cleaning of your pre-filter and timely replacement of the carbon filter ensure consistent odor control. By following these steps, you create a discreet, efficient, and healthy environment for your plants to thrive. Invest in quality equipment and take the time for proper installation. Your efforts will pay off with a more pleasant growing experience. Ready to upgrade your grow space? Start setting up your carbon filter outside your grow tent today and breathe easy!
- carbon filter setup
- grow tent ventilation
- odor control
- air filtration
- inline fan

Todd Martin
Senior Writer
With over 15 years of experience in home renovation and design, I started HEG to share what I’ve learned with homeowners who want to create spaces that are both beautiful and functional. I’ve always believed in a hands-on approach, and over the years, I’ve picked up practical solutions that actually work. Through HEG, I aim to make home improvement more approachable, sharing real tips that help you create a home you truly love.