· Todd Martin · Air Compressor Maintenance · 16 min read
How To Tighten Belt On Ingersoll Rand Air Compressor
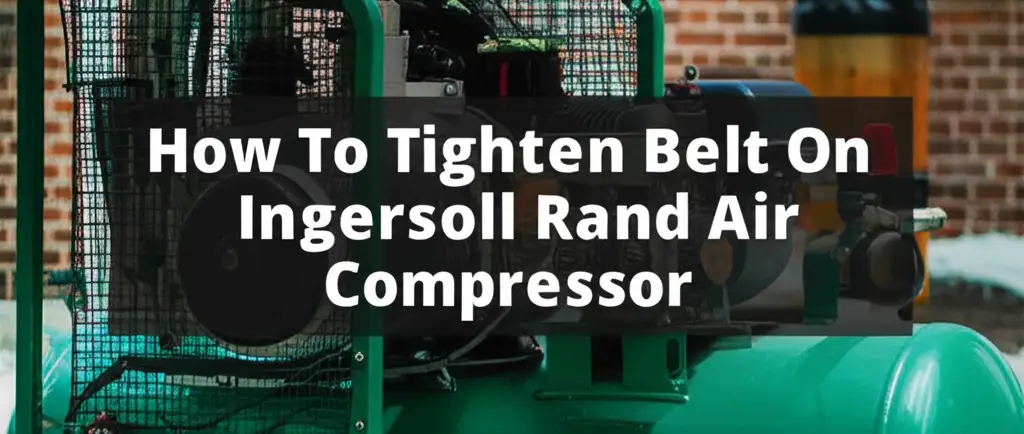
Tighten Belt on Ingersoll Rand Air Compressor: A Comprehensive Guide
An Ingersoll Rand air compressor serves as a workhorse for many workshops and homes. Its reliable operation depends on various components working in harmony. One crucial part often overlooked is the drive belt, which transfers power from the motor to the compressor pump. A properly tensioned belt ensures peak efficiency and prevents premature wear.
Neglecting belt tension can lead to frustrating performance issues, loud noises, and even system failure. I understand the importance of keeping these machines running smoothly. This article shows you how to tighten the belt on your Ingersoll Rand air compressor. We cover how to identify a loose belt, prepare safely for the job, and execute the tightening process. We also include troubleshooting tips and maintenance advice. Let us ensure your compressor operates at its best for years.
Takeaway
Tightening your Ingersoll Rand air compressor belt involves key steps:
- Safety First: Always disconnect power and depressurize the tank before starting work.
- Identify Looseness: Look for squealing, reduced performance, or excessive belt slack.
- Access Belt: Remove the belt guard to expose the drive belt and pulleys.
- Loosen Motor Mounts: Slightly loosen the bolts holding the motor in place.
- Adjust Tension: Use a pry bar to move the motor away from the compressor pump, increasing belt tension.
- Check Deflection: Measure belt deflection with a straightedge and ruler; 1/2 inch of play is typical for 12-16 inch span.
- Secure Motor: Re-tighten motor mounting bolts firmly.
- Test Performance: Reconnect power and run the compressor to confirm proper operation and no squealing.
Tightening the belt on an Ingersoll Rand air compressor requires careful attention to safety and proper tensioning. You must first disconnect power and depressurize the tank. Then, loosen the motor mounting bolts and adjust the motor position to achieve the correct belt deflection, typically around 1/2 inch. Finally, re-tighten all bolts and test the compressor.
Understanding Your Ingersoll Rand Compressor’s Belt System
Your Ingersoll Rand air compressor relies on a belt drive system to function. This system transfers power from the electric motor to the compressor pump. The belt, often a V-belt, wraps around two pulleys: one on the motor shaft and another on the compressor pump shaft. When the motor spins, the belt turns the compressor pump. This action draws in air and compresses it.
Proper belt tension is critical for efficient operation. A belt that is too loose will slip, causing a distinct squealing noise and reducing the compressor’s ability to build pressure. This slippage wastes energy and generates heat. Conversely, a belt that is too tight can put excessive strain on the motor bearings and compressor pump bearings. This stress shortens their lifespan and leads to costly repairs. Maintaining the correct tension ensures smooth power transfer and prolongs the life of your equipment. A well-maintained belt helps avoid issues like your Ingersoll Rand air compressor shutting off unexpectedly. I have found that paying attention to these details saves time and money.
Identifying the Need for Belt Tightening
Recognizing the signs of a loose air compressor belt helps you address the issue promptly. The most common symptom is a high-pitched squealing sound. This noise happens when the belt slips on the pulleys instead of gripping them firmly. You might hear it especially when the compressor starts or when the pump is under heavy load. This sound clearly indicates the belt lacks proper tension.
Another key sign is reduced compressor performance. If your compressor takes longer than usual to build pressure or struggles to reach its maximum PSI, a loose belt could be the culprit. The slippage means the compressor pump is not turning at its intended speed. This directly impacts its efficiency. You might also notice the motor running hotter than usual. This heat occurs because it works harder to compensate for the power loss due to belt slippage.
Visually inspecting the belt can also reveal issues. Look for signs of wear, such as glazing on the belt’s surface. This glazing indicates that the belt has been slipping. You can also manually check the belt tension. With the compressor off and unplugged, press down on the belt midway between the two pulleys. Excessive deflection, more than typically recommended (usually about 1/2 inch for a span of 12-16 inches), means the belt is too loose. Addressing these issues quickly prevents more significant problems, similar to how maintaining other parts like oil levels helps keep your compressor running efficiently. Checking the oil level on your Ingersoll Rand air compressor is another important maintenance step.
Safety First: Preparing for Belt Adjustment
Before you begin any work on your Ingersoll Rand air compressor, prioritize safety. Ignoring safety precautions can lead to serious injury or damage to your equipment. I always emphasize this step because it is the most critical. Always ensure the compressor is completely powered down and de-energized.
First, disconnect the power supply. If your compressor plugs into an outlet, unplug it. If it is hardwired, locate the circuit breaker that supplies power to the compressor and switch it off. Tag the breaker to prevent accidental re-energization. This step eliminates the risk of electric shock or the compressor unexpectedly starting.
Next, depressurize the air tank. Locate the drain valve, usually at the bottom of the air tank, and open it to release all compressed air. You should hear a hissing sound as the air escapes. Once the air stops flowing, close the drain valve. Some compressors also have a safety valve or pressure relief valve you can briefly lift to ensure all pressure is gone. This prevents any sudden air release during the adjustment process. You should always ensure your air tank is clear, much like learning how to clean an air compressor tank is important for overall maintenance.
Gather all necessary tools before you start. You will typically need the following:
- Wrench set or socket set: For loosening and tightening the motor mounting bolts.
- Pry bar or similar lever: To gently move the motor and tension the belt.
- Straightedge or ruler: For accurately measuring belt deflection.
- Personal Protective Equipment (PPE): Safety glasses are essential to protect your eyes from dust or debris. Work gloves can protect your hands.
Having these tools ready saves time and ensures you can complete the task efficiently and safely. Always take a moment to double-check these safety measures.
Step-by-Step Guide to Tighten the Belt
Tightening the belt on your Ingersoll Rand air compressor is a straightforward process when you follow these steps. I find that taking a systematic approach ensures I do not miss anything important. Remember, safety remains the top priority throughout this procedure.
1. Access the Belt Guard
Most Ingersoll Rand compressors have a belt guard covering the belt and pulleys. This guard protects you from moving parts and keeps debris away from the belt. You must remove this guard to access the belt.
- Locate the bolts or screws holding the belt guard in place.
- Use the appropriate wrench or screwdriver to remove these fasteners.
- Carefully lift the guard away and set it aside in a safe place.
2. Loosen Motor Mounting Bolts
The electric motor on your compressor is usually mounted on a sliding base. This design allows you to adjust its position to tension the belt. You will see several bolts securing the motor to its base.
- Locate these motor mounting bolts. There are typically four of them.
- Use your wrench or socket to loosen these bolts. You do not need to remove them completely, just loosen them enough so the motor can slide.
3. Adjust Belt Tension
Now you can adjust the belt tension. This step requires a gentle but firm approach.
- Position your pry bar or a sturdy wooden lever between the motor and the compressor pump.
- Gently apply pressure with the pry bar to push the motor away from the compressor pump. This action will increase the tension on the drive belt.
- As you apply tension, avoid excessive force. Too much tension can damage bearings.
- Check the belt tension periodically as you adjust it. Press down on the belt midway between the pulleys. For most V-belts on Ingersoll Rand compressors, you want approximately 1/2 inch (about 12-13 mm) of deflection when pressing firmly on a 12-16 inch span. You want to avoid overtightening; a slightly loose belt is better than a too-tight one.
4. Re-tighten Motor Mounting Bolts
Once you achieve the desired belt tension, you must secure the motor in its new position.
- While maintaining the correct tension with your pry bar, carefully re-tighten the motor mounting bolts.
- Tighten them in an alternating pattern to ensure even pressure.
- Once all bolts are snug, remove the pry bar.
- Double-check the belt tension one last time to confirm it has not changed after tightening the bolts.
5. Reinstall Belt Guard and Test
With the belt tension adjusted and secured, you can reassemble the compressor.
- Replace the belt guard, aligning it correctly, and secure it with its original bolts or screws.
- Ensure all tools are clear of the compressor.
- Reconnect the power supply.
- Start the air compressor and listen for any squealing noises. Observe if it builds pressure efficiently. If the squealing persists or performance is still poor, you may need to repeat the adjustment process or consider if the belt itself needs replacement, similar to how one might clean a serpentine belt on a vehicle.
This careful approach helps ensure your Ingersoll Rand air compressor operates correctly and safely.
Checking Belt Tension and Alignment
After tightening the belt, verifying both tension and alignment is crucial. This step ensures optimal performance and prevents premature wear on the belt and pulleys. I always take the extra time for this check.
Accurate Belt Deflection Measurement
The most common way to check belt tension is by measuring its deflection. You need a straightedge and a ruler.
- Place the straightedge across the top of the two pulleys, spanning the belt.
- Position the ruler perpendicular to the belt at its midpoint.
- Apply firm pressure with your thumb or finger to the center of the belt. Note the measurement of how much the belt deflects downward.
- For most Ingersoll Rand V-belts on typical home or small shop compressors, a deflection of about 1/2 inch (12-13 mm) is ideal for a belt span of 12-16 inches. Refer to your compressor’s manual for precise specifications. Too little deflection means the belt is too tight, and too much means it is too loose.
Importance of Pulley Alignment
Proper pulley alignment is as important as correct tension. Misaligned pulleys can cause the belt to run off-center, leading to uneven wear, excessive heat, and vibration. This issue can also cause the belt to squeal even if the tension is correct.
- Visually inspect the pulleys. They should be perfectly in line with each other. You can use a long straightedge or a laser alignment tool (if available) to check this. Place the straightedge against the face of both pulleys. If there is a gap on one side, they are misaligned.
- If misalignment occurs, you may need to adjust the motor or compressor pump position slightly. This usually involves loosening the mounting bolts again and carefully nudging one component until the pulleys are collinear.
- Once aligned, re-tighten all mounting bolts securely.
Proper tension and alignment significantly extend your belt’s life. They also ensure your compressor runs efficiently and quietly. Neglecting these checks can lead to repeated belt issues and damage to expensive components like bearings, much like how a general understanding of your compressor, such as how to turn on a Husky air compressor, contributes to its longevity.
Common Belt Problems and Troubleshooting
Even with proper maintenance, you might encounter issues with your Ingersoll Rand air compressor belt. Knowing how to troubleshoot these common problems helps you maintain your equipment effectively. I have seen many of these issues in the field.
Belt Too Loose
A belt that is too loose causes several noticeable problems. The most obvious sign is a loud squealing noise, especially upon startup or when the compressor loads up. This noise means the belt is slipping on the pulleys. Slippage also leads to reduced compressor performance, meaning it takes longer to build pressure or cannot reach its maximum PSI. The belt may also wear out faster due to the friction from slipping, showing glazing or black dust around the pulleys. The solution is to re-adjust the tension following the steps outlined previously.
Belt Too Tight
While less common, a belt that is too tight can be equally damaging. An overtightened belt places excessive stress on the bearings of both the electric motor and the compressor pump. This stress can lead to premature bearing failure, which is a much more expensive repair than a simple belt adjustment or replacement. Symptoms of a too-tight belt include a whining or grinding noise from the bearings and increased motor heat. The belt itself may also show signs of cracking or stretching more quickly. If you suspect your belt is too tight, loosen the motor mounting bolts slightly and re-adjust the tension to the specified deflection.
Worn or Damaged Belt
Sometimes, the issue is not just tension but the belt itself. Belts degrade over time due to age, heat, and continuous flexing. Look for cracks, fraying, glazing, or missing sections. If the belt shows these signs of wear, no amount of tightening will fix the problem. It needs replacement. Replacing a worn belt prevents sudden breakdowns and ensures consistent performance.
Pulley Misalignment
Even with perfect tension, a misaligned pulley can cause problems. Symptoms of misalignment include uneven belt wear (one side of the belt wears faster), belt noise that is not a typical squeal (more of a rubbing sound), and the belt potentially trying to walk off the pulley. You can check alignment using a straightedge across both pulley faces. If they are not perfectly parallel, you need to adjust the motor or compressor pump mounting until they are. Proper alignment is crucial for belt longevity and efficient power transfer. Neglecting belt issues can lead to more severe problems, similar to how a Craftsman air compressor tripping a breaker indicates an underlying electrical issue that needs immediate attention.
Maintaining Your Compressor Belt for Longevity
Regular maintenance extends the life of your Ingersoll Rand air compressor belt. A proactive approach helps avoid unexpected breakdowns and ensures continuous, efficient operation. I find that a little effort upfront saves a lot of trouble later.
Routine Inspection Schedule
Establish a routine inspection schedule for your compressor belt. For compressors used frequently, inspect the belt at least once a month. For occasional use, a quarterly inspection is usually sufficient. During each inspection, check for:
- Correct tension: Press on the belt to check deflection as discussed earlier.
- Signs of wear: Look for cracks, fraying, glazing, or any chunks missing from the belt.
- Proper alignment: Ensure the pulleys are in line.
- Debris: Check for any dirt, oil, or foreign objects on the belt or pulleys.
Catching these issues early allows for minor adjustments or replacements before they escalate into major problems.
Cleaning the Belt and Pulleys
Keeping the belt and pulleys clean is vital. Dust, oil, and grime can accumulate on these surfaces. This build-up reduces friction, leading to belt slippage even if the tension is correct.
- Disconnect power and depressurize the tank before cleaning.
- Use a clean, dry cloth to wipe down the belt. If there’s stubborn grease or oil, you can use a mild degreaser specifically designed for rubber belts, but ensure it leaves no residue.
- Clean the grooves of the pulleys thoroughly. A stiff brush can help remove compacted dirt.
- Ensure the belt and pulleys are completely dry before reassembling the guard and operating the compressor. This step is similar to how you would approach cleaning a serpentine belt on a vehicle.
When to Replace the Belt
A belt will eventually wear out, regardless of how well you maintain it. Replace the belt if you observe any of the following:
- Deep cracks or missing chunks: These indicate structural integrity loss.
- Severe glazing: A shiny, hardened surface means the belt has been slipping excessively and lost its grip.
- Persistent squealing after tension adjustment: If the belt still slips even when properly tensioned, it may be stretched or hardened.
- Excessive fraying: The belt material is breaking down.
Always replace the belt with one that matches the manufacturer’s specifications for your Ingersoll Rand model. Using the correct size and type ensures optimal performance and prevents compatibility issues. By maintaining your belt regularly, you contribute to the overall health and longevity of your air compressor, much like using the correct oil is crucial.
Frequently Asked Questions
How often should I check my Ingersoll Rand compressor belt tension?
You should check your Ingersoll Rand compressor belt tension at least once a month for frequent use. For occasional use, a quarterly inspection is sufficient. Always check the belt if you notice unusual noises like squealing or a decrease in compressor performance. Regular checks help prevent issues.
What are the signs of a too-tight compressor belt?
A too-tight compressor belt can cause whining or grinding noises from the motor or pump bearings. It might also lead to premature bearing failure and excessive heat buildup in the motor. The belt itself may show signs of accelerated cracking or stretching due to constant high tension.
Can a loose belt damage my air compressor?
Yes, a loose belt can damage your air compressor. It causes slippage, leading to reduced efficiency, increased power consumption, and excessive heat generation. Prolonged slippage can glaze the belt, shorten its life, and potentially damage motor and pump bearings due to vibrations and inefficient power transfer.
What tools do I need to tighten an air compressor belt?
To tighten an air compressor belt, you will typically need a wrench or socket set to loosen and tighten motor mounting bolts. A pry bar or sturdy lever is useful for gently adjusting motor position to tension the belt. A straightedge and ruler are essential for accurately measuring belt deflection.
Is belt tightening different for different Ingersoll Rand models?
The general procedure for tightening the belt is similar across most Ingersoll Rand air compressor models. However, the specific location and number of motor mounting bolts, the belt deflection specifications, and the method of accessing the belt guard may vary slightly. Always consult your specific model’s owner’s manual for precise instructions.
Can I use any V-belt for my compressor?
No, you should only use the specific V-belt type and size recommended by Ingersoll Rand for your compressor model. Using an incorrect belt can lead to poor performance, premature wear, and potential damage to the compressor. Belts vary in length, width, and groove angle, which are critical for proper fit and function.
Conclusion
Maintaining the drive belt on your Ingersoll Rand air compressor is a straightforward task that directly impacts its performance and lifespan. You now know how to tighten the belt on an Ingersoll Rand air compressor. A properly tensioned belt prevents annoying squeals, ensures efficient air production, and protects critical components from premature wear.
We covered how to identify the signs of a loose belt, the essential safety precautions to take before you begin, and a detailed, step-by-step guide for the adjustment process. Remember to always prioritize safety by disconnecting power and depressurizing the tank. Consistent maintenance, including routine inspections and timely belt replacement, ensures your Ingersoll Rand compressor remains a reliable tool for years to come. Do not let a simple belt issue sideline your valuable equipment. Take action today to ensure your compressor runs at peak efficiency.
- Ingersoll Rand
- air compressor maintenance
- belt tension
- compressor repair
- DIY compressor
- V-belt
- equipment longevity


