· Todd Martin · Kitchen Appliances · 19 min read
How To Turn On Jenn Air Gas Oven
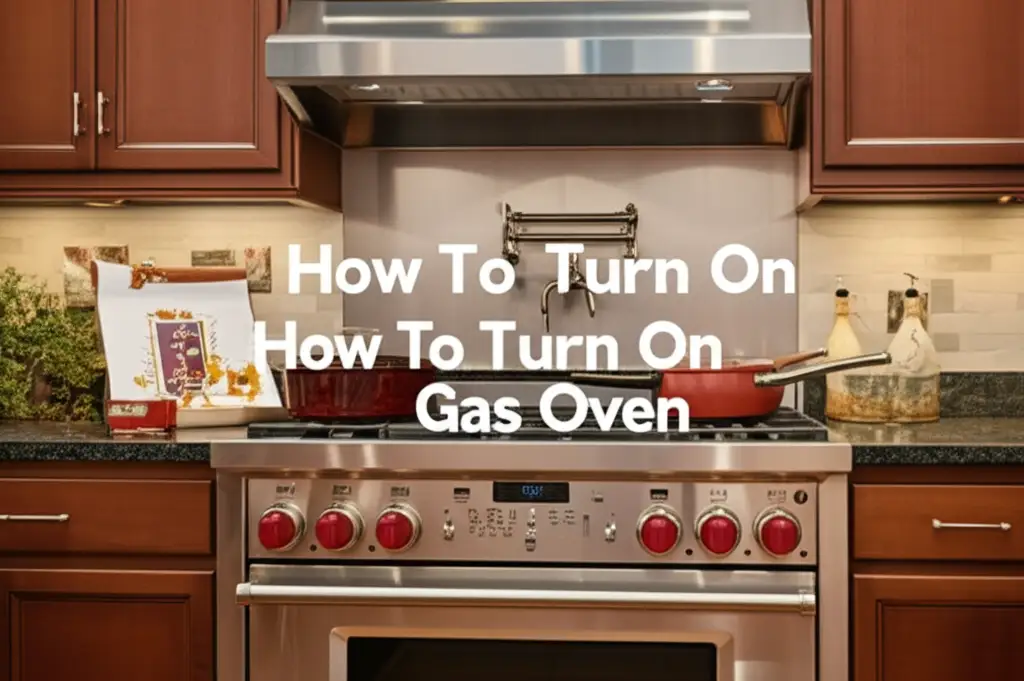
Turn On Your Jenn Air Gas Oven Safely
Do you want to start cooking but find yourself wondering how to turn on your Jenn Air gas oven? You are not alone. Operating a gas oven, especially if it is new or if you are new to gas appliances, can seem tricky at first. This guide simplifies the process for you. We will walk you through each step, from basic safety checks to understanding the controls and addressing common issues. My goal is to make using your Jenn Air gas oven simple and stress-free.
Learning to properly ignite your gas oven ensures safety and cooking success. We will cover important pre-checks, detailed instructions for various Jenn Air models, and practical troubleshooting advice. This article helps you feel confident in your kitchen, ensuring your oven is ready when you are. Get ready to bake, roast, and broil with ease.
Takeaway
Turning on your Jenn Air gas oven involves straightforward steps. Remember these key points for a safe and easy experience:
- Always perform a quick safety check before starting your oven.
- Understand your oven’s specific controls, whether they are knob-based or digital.
- Follow the proper ignition sequence carefully, allowing time for gas to ignite.
- Ventilate your kitchen well, especially during initial use or burn-off.
- Address any unusual smells or issues promptly to ensure safety.
To turn on a Jenn Air gas oven, first ensure the gas supply valve is open. Next, push in and turn the control knob to the desired temperature for older models, or press “Bake” and set the temperature on digital displays. The igniter will glow, initiating gas flow and flame. Always follow your specific model’s manual for precise instructions.
Essential Safety Steps Before Using Your Jenn Air Gas Oven
Safety is the first thing you must consider when operating any gas appliance. Before you even think about how to turn on your Jenn Air gas oven, take a moment to ensure your kitchen is safe. These initial checks help prevent accidents and ensure your oven works properly. My top priority is your peace of mind in the kitchen.
First, check the gas supply. Confirm that the main gas shut-off valve for your oven is in the “on” position. This valve is usually located behind or near the appliance. If it is closed, your oven will not receive gas, and it cannot ignite. Make sure the valve handle aligns with the gas pipe, indicating it is open.
Next, ensure good ventilation in your kitchen. Gas ovens produce some byproducts during operation. Opening a window or turning on your range hood helps keep the air fresh. This step is especially important during the oven’s initial “burn-off” period. Proper ventilation reduces the buildup of any fumes.
Finally, make sure the oven interior is clear. Remove any forgotten items like baking sheets or foil. A clean oven prevents potential fire hazards from debris. It also helps the oven heat evenly. Always keep the area around the oven free from flammable materials.
- Check Gas Supply: Verify the gas valve is open. The handle should be parallel with the gas line. If the gas is off, you will not be able to light the oven.
- Ensure Proper Ventilation: Open a window or turn on your range hood. This helps clear any gas odors or initial manufacturing smells.
- Clear the Oven Interior: Remove all racks and accessories that came with the oven for initial burn-off. After that, remove any loose items before use.
- Inspect Gas Line: Look for any visible damage or kinks in the gas line. A damaged line can cause leaks. If you suspect a leak, do not use the oven. You can learn how to tell if your gas oven is leaking and what to do next.
Following these simple safety precautions will make sure your cooking experience is safe and enjoyable. You will feel more confident knowing you have prepared your kitchen properly. These steps are a small effort for a big safety payoff.
Understanding Your Jenn Air Gas Oven Controls
Jenn Air gas ovens come with different types of controls depending on their model and age. Knowing your specific oven’s control system is important for successful operation. Some models use traditional knobs, while newer ones feature digital touchscreens. Let me help you understand both.
Older Jenn Air gas ovens often have manual control knobs. You will usually find one knob for temperature selection and another for function (Bake, Broil, Off). To set the oven, you push in the knob and turn it to the desired setting. This action signals the oven to begin its ignition sequence. Understanding these knobs is important for manual control.
Newer Jenn Air gas ovens typically feature electronic control panels. These are sleek, touch-sensitive displays. You interact with them by pressing buttons for functions like “Bake,” “Broil,” “Convect,” and then entering the temperature using a numerical keypad. Some models even offer smart features like Wi-Fi connectivity, although that is not directly related to turning it on. These digital interfaces offer precise control.
Regardless of your model, the principle of operation remains the same: you select a function and a temperature. The oven then activates its igniter to light the gas. If your oven has a pilot light (very rare in modern ovens, but possible in older models), you will need to manually light it first. Modern ovens use an electronic igniter that glows red to light the gas automatically. This is a significant safety and convenience improvement.
Knob-Based Controls
- Push and Turn: For older models, push the temperature knob in. Then, turn it to your desired temperature. This engages the safety valve and allows gas flow.
- Function Selection: Some older ovens have a separate function knob. Turn this to “Bake” or “Broil.”
- Pilot Light (Rare): If your oven has a pilot light instead of an electronic igniter, you must manually light it with a match or lighter. Consult your owner’s manual for specific instructions on pilot light operation. Most modern gas ovens do not have a pilot light.
Digital Touchpad Controls
- Select Function: Press the “Bake” or “Roast” button on the digital panel.
- Enter Temperature: Use the number pad to type in your desired temperature.
- Press Start: Confirm your selection by pressing the “Start” button. The oven will begin preheating.
- Preheat Indicator: The display will show “Preheating” or the current temperature rising until it reaches the set temperature. This is a helpful feature.
Knowing how your specific oven operates is key. If you are unsure, your Jenn Air owner’s manual is your best resource. It provides detailed diagrams and instructions for your exact model. Take a few minutes to familiarize yourself with your oven’s unique features.
Step-by-Step Guide to Turning On Your Jenn Air Gas Oven
Turning on your Jenn Air gas oven involves a sequence of steps. Whether you have a classic knob-controlled model or a modern digital one, the core process is simple. I will guide you through each action, ensuring you feel confident and ready to cook. Let us get your oven heated up.
For Knob-Controlled Jenn Air Gas Ovens
This method applies to older models that rely on mechanical knobs for temperature and function selection.
- Open the Oven Door Slightly: Some older gas ovens might require you to slightly open the oven door for a moment during ignition. This allows any trapped air or unlit gas to dissipate safely. Check your manual for specific guidance on this.
- Push and Turn the Temperature Knob: Locate the oven temperature control knob. Push it in firmly. While holding it in, turn the knob to your desired baking or roasting temperature. You might hear a faint hiss of gas.
- Listen for the Ignition Click: As you turn the knob, the electronic igniter will start clicking. This sound indicates that the igniter is attempting to spark and light the gas. This clicking might last for several seconds.
- Observe the Flame: After a few seconds of clicking, you should see a small blue flame ignite at the burner located at the bottom of the oven. The clicking sound will stop once the flame is established.
- Release the Knob: Once you see the flame and hear the clicking stop, carefully release the knob. The flame should remain lit. If the flame goes out, repeat steps 2-5. You may need to hold the knob in for a few more seconds after ignition before releasing it, allowing the safety valve to fully engage.
- Close the Door: Once the flame is stable, you can close the oven door. The oven will now begin to preheat to your set temperature.
For Digital Touchpad Controlled Jenn Air Gas Ovens
Most modern Jenn Air gas ovens feature electronic controls for easier and more precise operation.
- Ensure Power is On: Make sure your oven is plugged in and has power. Even gas ovens require electricity for their electronic controls and igniter. If your oven is not responding, check the circuit breaker. Sometimes, a simple power cycle can resolve minor issues. Consider if your gas oven works when power is out.
- Press the “Bake” Button: On the control panel, locate and press the “Bake” button. This is the most common function for general cooking. Other options like “Roast” or “Convect Bake” may also be available.
- Enter Desired Temperature: Using the numerical keypad, input the temperature you want your oven to reach. For example, press “3,” “5,” “0” for 350 degrees Fahrenheit.
- Press “Start”: Confirm your temperature selection by pressing the “Start” button. The oven’s igniter will activate. You might hear a faint gas hiss and then a soft “whoosh” as the burner lights.
- Monitor Preheating: The display will usually show “Preheating” and the current temperature. The temperature will steadily climb until it reaches your set point. A chime or indicator light will signal when preheating is complete.
- Check for Flame (Optional but Recommended): For peace of mind, you can briefly open the oven door during the initial preheating phase to confirm the burner flame is lit. It should be a steady blue flame. Once confirmed, close the door immediately to retain heat. This simple check helps you know if your gas oven is working correctly.
Remember, patience is key, especially during ignition. The igniter needs a moment to heat up and light the gas. If it does not light on the first try, wait a minute, and then try again. Never force the controls or hold the gas valve open manually for too long if ignition fails. This could create a dangerous gas buildup.
First-Time Use Considerations for Your Jenn Air Gas Oven
Bringing home a new Jenn Air gas oven is exciting. Before you jump into baking your first batch of cookies, there are a few important steps for its initial use. These steps help prepare your oven and ensure its longevity. I want you to have the best start with your new appliance.
Your new oven will likely have a protective coating and some residual manufacturing oils inside. When heated, these can produce a distinct smell and even some smoke. This is completely normal and not cause for alarm. This is often called the “burn-off” process.
To properly prepare your oven, you should perform an initial burn-off. Open nearby windows and turn on your kitchen range hood for maximum ventilation. Then, set your oven to its highest temperature, typically 500-550°F (260-288°C), for about 30 to 60 minutes. This high heat will burn off any manufacturing residues. You will notice the smell and perhaps some smoke. This will lessen over time.
After the burn-off, let the oven cool down completely. Once cool, you can wipe down the interior with a damp cloth if desired. This removes any lingering ash or residue from the burn-off. Your oven is now ready for cooking. Understanding this initial process is part of how to use a gas oven for the first time.
Initial Burn-Off Process
- Ventilate Thoroughly: Open windows wide and turn on your exhaust fan or range hood to its highest setting. This is crucial for air circulation.
- Remove All Packaging and Accessories: Take out all racks, probes, literature, and any protective packaging from inside the oven cavity.
- Set High Temperature: Turn on your Jenn Air gas oven and set it to its maximum temperature (usually 500-550°F or 260-288°C).
- Run for Duration: Allow the oven to run at this high temperature for at least 30 to 60 minutes. This gives time for all residues to burn away.
- Monitor Smell/Smoke: Expect a strong, chemical smell and possibly some light smoke. This is normal. Do not be alarmed unless the smoke is very heavy or the smell persists for an unusually long time after the burn-off.
- Cool Down and Wipe: After the burn-off, turn off the oven and let it cool completely. Once cool, you can lightly wipe down the interior with a clean, damp cloth to remove any residue.
By following these initial steps, you ensure your Jenn Air gas oven is clean and ready for years of safe and efficient use. This process removes any unpleasant odors that could transfer to your food during your first few cooking sessions. It is a small but important investment in your appliance’s performance.
Common Issues When Turning On Your Gas Oven
Sometimes, your Jenn Air gas oven might not light on the first try, or you might notice something unusual. Do not worry; many common issues have simple solutions. I will walk you through typical problems and what they mean. Knowing these can save you time and frustration.
One frequent issue is a gas oven that does not ignite. You might hear the clicking of the igniter, but no flame appears. This usually points to a gas supply problem or a weak igniter. If there is no clicking, the electrical supply to the igniter might be the issue. These are often easy to diagnose.
Another common concern is a weak or yellow flame. A healthy gas flame should be blue and steady. A yellow or flickering flame can indicate incomplete combustion or a dirty burner. This can also happen if the gas-to-air mixture is off. Such flames are less efficient and can produce more carbon monoxide.
Finally, unusual smells are a red flag. While a new oven will have an initial burn-off smell, persistent gas odors or a rotten egg smell are serious. This indicates a gas leak. You must act immediately if you detect this. Safety always comes first.
Troubleshooting Gas Oven Ignition Problems
If your Jenn Air gas oven is not igniting, here are some steps to take:
- Check Gas Supply: Double-check that the main gas valve to your oven is fully open. A partially open valve can restrict gas flow.
- Verify Power: Even gas ovens need electricity for the igniter and controls. Ensure the oven is plugged in and the circuit breaker has not tripped. If power is out, your gas oven may still work in some capacity, but not for electronic ignition.
- Give It Time: The igniter needs to glow red hot to ignite the gas. This can take 30-60 seconds. Be patient and wait for the flame.
- Clean Igniter: A dirty igniter may not generate enough heat. If accessible and you are comfortable, you can gently brush off any debris with a soft brush (after unplugging the oven).
- Reset Oven: Sometimes, a simple reset can resolve electronic glitches. Turn off the oven at the control panel, unplug it from the wall for a minute, then plug it back in.
- Check for Pilot Light Issues (if applicable): Very old Jenn Air gas ovens might have a standing pilot light. If yours does, make sure it is lit. If not, relight it following your manual’s instructions. Modern ovens use an electronic igniter, so this is unlikely for newer models.
If your oven still does not light, or if you consistently hear the igniter clicking without a flame, it might indicate a failing igniter. A weak igniter will not get hot enough to ignite the gas. This is a common part that wears out over time.
Addressing Weak or Yellow Flames
- Clean Burner Ports: Food spills can clog the burner ports, causing an uneven or weak flame. Once the oven is cool, inspect the burner and gently clean any clogged holes with a small wire or needle. Be careful not to enlarge the holes. Learning how to clean your gas oven properly can help prevent this.
- Adjust Air Shutter (Professional Only): A yellow flame can also mean an incorrect air-to-gas mixture. This adjustment is best left to a qualified technician. Do not attempt this yourself, as it involves working with the gas line.
What to Do About Gas Smells
- A Mild Smell at Startup: A very faint gas smell for a few seconds during ignition is normal. This happens as the gas flows before lighting.
- Persistent or Strong Smell: If you smell gas that lingers, or if it smells like rotten eggs, immediately turn off the oven and the main gas supply to your home. Do not use any electrical switches, light matches, or create any sparks. Open windows and doors.
- Evacuate and Call: Leave your home immediately. From a safe distance, call your gas company or emergency services. Do not re-enter until advised by professionals. A persistent gas smell is a serious safety hazard.
For problems that go beyond simple troubleshooting, like a consistently gas oven that turns off by itself, it is always best to consult a certified appliance technician. They have the expertise to safely diagnose and repair complex issues.
Maintaining Your Jenn Air Gas Oven for Optimal Performance
Regular maintenance helps your Jenn Air gas oven perform at its best and ensures its longevity. Proper care can prevent many common issues, including problems with ignition. I find that a little effort upfront saves a lot of trouble later. Let’s keep your oven running smoothly.
Cleaning is a fundamental part of oven maintenance. Food spills and grease can build up on the oven’s surfaces, including the burner and igniter areas. This buildup can interfere with proper gas flow and ignition. It also causes smoke and unpleasant odors during operation. Regular cleaning keeps your oven efficient and sanitary.
Beyond cleaning, periodic professional inspection is beneficial. A qualified technician can check gas line connections, burner efficiency, and igniter function. They can identify minor issues before they become major problems. This proactive approach ensures your oven operates safely and efficiently for years to come.
Finally, always consult your owner’s manual for specific maintenance recommendations for your Jenn Air model. Every oven is a little different, and your manual provides the most accurate care instructions. Following these guidelines helps extend your appliance’s life.
Regular Cleaning Practices
- Wipe Down Spills Immediately: Clean up food spills as soon as the oven cools down. This prevents them from baking on and becoming harder to remove.
- Deep Clean Regularly: Depending on usage, perform a deep clean every few months. Many Jenn Air ovens have a self-cleaning cycle. If so, follow your manual’s instructions for safe and effective use of this feature. Ensure good ventilation during self-cleaning.
- Clean Under the Oven Bottom: For some gas ovens, the bottom panel can be lifted to clean underneath the burner. Always ensure the oven is off and cool before attempting this. Remove any debris that might block air vents or burner ports. For more detailed cleaning instructions, consider resources on how to clean a gas oven inside.
- Inspect Burner Ports: Periodically check the small holes around the burner for clogs. Use a small wire or a straightened paper clip to gently clear any blocked ports. Be careful not to scratch or damage the burner.
- Clean Oven Racks: Remove and clean your oven racks separately. They can be soaked in warm, soapy water or cleaned in the dishwasher if suitable. This contributes to overall oven cleanliness. Similarly, maintaining gas oven grates is important for stovetop burners.
Professional Inspections
- Annual Check-Up: Consider scheduling an annual professional inspection, especially for older gas ovens. A technician can check for gas leaks, test the igniter’s strength, and ensure all components function correctly.
- Gas Line Integrity: Technicians can verify the integrity of the gas line and connections, ensuring there are no leaks or obstructions. This is a critical safety check.
- Igniter Performance: Over time, igniters can weaken, leading to slow ignition or failures. A technician can test the igniter’s resistance and recommend replacement if needed. A weak igniter is a common reason for a gas oven not lighting or not turning on.
- Burner Calibration: They can also ensure the burner is properly calibrated for efficient gas combustion, which impacts flame quality and oven temperature.
By prioritizing these maintenance practices, you extend the life of your Jenn Air gas oven. You also ensure it remains a reliable and safe appliance in your kitchen. A well-maintained oven is a happy oven, and it makes cooking a joy.
Advanced Troubleshooting for Jenn Air Gas Oven Ignition
Sometimes, basic troubleshooting does not solve the problem. If your Jenn Air gas oven still refuses to light, or if you face recurring issues, some deeper troubleshooting steps might be necessary. I will help you identify more complex causes for ignition failure. Remember, some of these steps might require professional help.
A common culprit for a gas oven not lighting is a faulty igniter. The igniter is a critical component that heats up to ignite the gas. If it is cracked, weak, or not glowing red, it cannot light the gas. Another less common issue could be with the oven’s control board, which sends power to the igniter.
Gas supply issues extend beyond just an open valve. There could be a problem with the gas regulator, which controls the pressure of gas entering the oven. Or, in rare cases, a blocked gas line. These problems are more complex and often require a professional.
Lastly, safety features can sometimes prevent ignition. Modern ovens have safety valves that will not open if the igniter does not reach a sufficient temperature. This prevents unlit gas from accumulating, which is a good thing. However, it can make diagnosis tricky.
Diagnosing Igniter Problems
- Visual Check: With the oven off and cool, inspect the igniter. It is usually a brittle, greyish-white or black bar near the burner. Look for any visible cracks or breaks. A damaged igniter needs replacement.
- Glow Test: Try to turn on the oven. Observe the igniter. It should glow bright orange or red within 30-60 seconds. If it glows weakly, flickers, or does not glow at all, it might be failing. A weak igniter will not get hot enough to ignite the gas flowing past it.
- Professional Replacement: Replacing an igniter involves working with gas and electrical components. It is best left to a qualified appliance technician. They can safely replace the part and test the oven’s function.
Gas Supply and Pressure Issues
- Check Other Gas Appliances: If other gas appliances in your home (like your stovetop burners or water heater) are also not working, it might indicate a broader gas supply issue to your home. Contact your gas utility company immediately.
- Gas Regulator: The gas pressure regulator ensures a consistent gas flow to your oven. If it fails, the oven might not receive enough gas to ignite properly. This component requires professional diagnosis and replacement.
- Blocked Gas Line: While rare, debris or a kink in the gas line could restrict flow. This is a serious issue that only a certified technician should address. Do not attempt to fix gas lines yourself.
- Jenn Air oven
- gas oven
- oven operation
- kitchen safety


