· Katria Melrose · Appliance Usage · 21 min read
How To Use Whirlpool Microwave Oven For Baking Cake
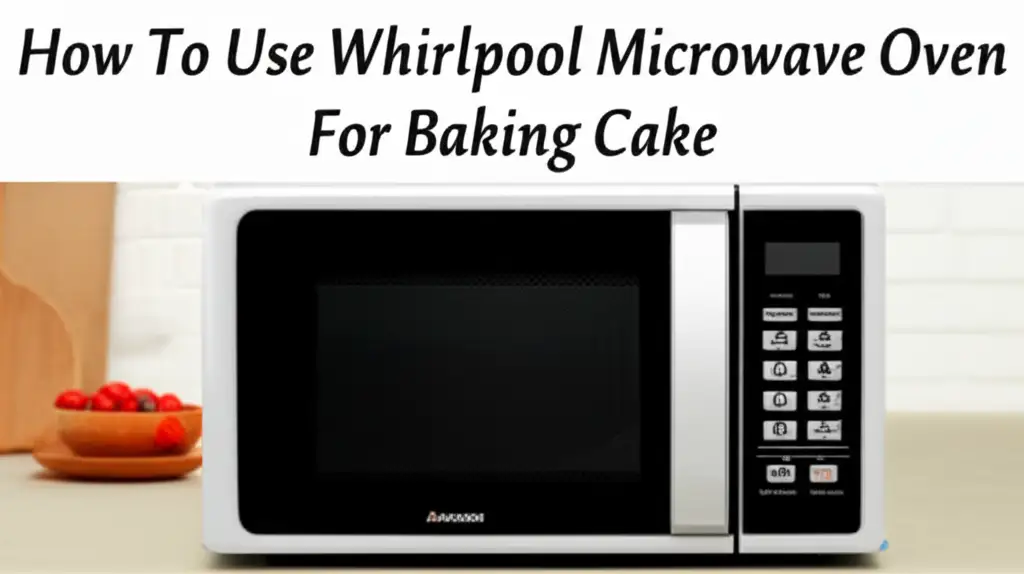
Mastering Cake Baking in Your Whirlpool Microwave Oven
Have you ever wondered if your trusty Whirlpool microwave oven can do more than just reheat leftovers or pop popcorn? Many people overlook its hidden potential, especially when it comes to baking. If you dream of fresh, fluffy cakes but lack a conventional oven, your Whirlpool microwave might be the perfect solution.
Baking a cake in a microwave, specifically a convection model, is a convenient and efficient method. It opens up a world of possibilities for quick desserts and delightful treats. This guide will walk you through every step. We will cover understanding your specific Whirlpool model, choosing the right bakeware, preparing your oven, and troubleshooting common issues. Get ready to bake wonderful cakes right in your kitchen.
Takeaway:
- Confirm your Whirlpool microwave has a convection mode for successful cake baking.
- Use metal or oven-safe bakeware suitable for convection settings.
- Always preheat your microwave oven in convection mode for even baking.
- Adjust traditional recipes for microwave baking times and temperatures.
- Monitor your cake closely as microwave baking times vary.
Answer: To bake a cake in your Whirlpool microwave oven, ensure it has a convection mode. Preheat the oven to the recipe’s specified temperature. Place your cake batter in suitable metal or glass bakeware on the low metal rack. Use the convection setting to bake, monitoring for doneness with a toothpick.
Understanding Your Whirlpool Microwave: Is It Ready for Baking?
Not all microwave ovens are built for baking cakes. This is an important point to understand from the start. Your ability to bake a cake in your Whirlpool microwave depends on its specific features. Specifically, you need a Whirlpool microwave oven with a convection function.
Standard microwave ovens heat food using microwaves, which excite water molecules. This process is excellent for reheating and cooking, but it does not brown or crisp food. It will not bake a cake properly. A solo microwave will make a rubbery, steamed cake at best.
A convection microwave oven, however, combines traditional microwave heating with a heating element and a fan. This fan circulates hot air evenly throughout the oven cavity. This is exactly how a conventional oven bakes. The hot air surrounds the food, allowing it to cook through, brown, and rise properly. Without this convection feature, your baking attempts will likely disappoint.
To confirm your Whirlpool model’s capabilities, you can check its user manual. The control panel often has a dedicated “Convection” or “Bake” button. You can also look up your specific model number online. Knowing your oven type is the first step to successful cake baking. If you are unsure about your model, you can learn more about how to identify your Whirlpool oven type.
- Solo Microwave: This type only uses microwave energy. It is suitable for reheating and basic cooking. It cannot bake cakes.
- Grill Microwave: This adds a grilling element for browning. It is good for toast or grilling small items. It still lacks the circulating hot air for proper baking.
- Convection Microwave: This combines microwave, grill, and conventional oven functions. It has a heating element and fan that circulates hot air. This is the only type of microwave that can bake cakes successfully. This function acts just like a regular oven.
If your Whirlpool microwave has a convection mode, you are in luck. You are ready to explore the world of microwave cake baking. I find this feature incredibly convenient for small batches or when I do not want to heat up my entire kitchen.
Essential Bakeware and Accessories for Microwave Cake Baking
Choosing the right bakeware is critical when baking cakes in a Whirlpool microwave oven. The type of bakeware you use depends on the function you select. For convection baking, you generally have more options than for regular microwave heating. Understanding these choices ensures safety and proper baking results.
When you use the convection mode, your Whirlpool microwave oven acts like a traditional oven. This means you can use various materials that are oven-safe. However, some materials are better suited for even heat distribution.
- Metal Bakeware: This is the best choice for convection baking. Metal pans conduct heat efficiently, ensuring even browning and baking. You can use aluminum, stainless steel, or non-stick metal pans. Loaf pans, round cake pans, and square baking dishes made of metal work perfectly. Just remember, never use metal bakeware in regular microwave mode, only in convection mode. This is a common mistake that can damage your appliance.
- Glass and Ceramic Bakeware: These materials are also safe for convection baking. They retain heat well, which can be beneficial for some recipes. However, they might take a bit longer to heat up and may not brown the cake as effectively as metal. Make sure the glass or ceramic dish is labeled as oven-safe. Pyrex or similar heat-resistant glass dishes are good examples.
- Silicone Bakeware: Silicone molds and pans are incredibly versatile. They are safe for both convection and microwave modes. Silicone bakeware offers excellent non-stick properties, making cake removal easy. They are flexible and durable. However, they might not provide the same crispness or browning as metal. If you are considering using silicone, you can also explore how silicone cake pans perform in other appliances like an air fryer, which shares some heating principles with convection ovens.
- Special Microwave-Safe Plastic: While some plastic bakeware is labeled “microwave-safe,” it is generally not suitable for the high temperatures of convection baking. These plastics are designed for microwave heating, not baking. Avoid them for cakes.
You will also need a metal rack. Most Whirlpool convection microwaves come with a high rack and a low rack. For baking cakes, always use the low metal rack. This positions the cake closer to the heating element, allowing for better air circulation and even baking. If you do not have the metal racks, contact Whirlpool customer service for replacements.
Beyond bakeware, standard baking accessories are also essential. You will need measuring cups and spoons for accurate ingredient proportions. A mixing bowl, whisk, or electric mixer will help prepare your batter. A cooling rack is also useful for cooling your cake evenly after baking. Knowing what you can and cannot use is important. For example, if you wonder about using regular cake pans in other appliances, it is helpful to check how traditional bakeware performs in similar heating environments like an air fryer.
Preparing Your Whirlpool Microwave Oven for Baking Cake
Getting your Whirlpool microwave oven ready for baking is straightforward but requires specific steps. Proper preparation ensures your cake bakes evenly and perfectly. This is not like simply warming food; it involves preheating and setting the right functions.
The first and most critical step is to preheat your Whirlpool microwave oven in convection mode. Just as you would with a traditional oven, preheating is vital for baking success. It allows the oven cavity to reach the desired temperature before the cake enters. This immediate exposure to even heat helps the cake rise properly and cook consistently. Without preheating, your cake might not rise well, or it could bake unevenly.
Here is how to preheat your Whirlpool microwave for baking:
- Select Convection Mode: On your Whirlpool microwave’s control panel, find the “Convection” or “Bake” button. Press it to activate the convection function.
- Set Temperature: Use the number pad or dial to set the desired baking temperature. Most cake recipes call for temperatures between 325°F (160°C) and 375°F (190°C). Always follow your recipe’s temperature recommendations.
- Start Preheating: Press the “Start” button. The oven will typically display “Preheating” or a similar indicator. Wait for the oven to reach the set temperature. Many models will beep to signal that preheating is complete.
- Insert Metal Rack: While preheating, ensure the low metal rack is inside the oven. The cake pan will sit on this rack, allowing hot air to circulate around it. Do not put the high rack in for baking. The low rack ensures your cake is optimally positioned for even baking and browning.
Once the oven is preheated, you are ready to introduce your cake. Carefully place your prepared cake pan, filled with batter, onto the low metal rack inside the preheated oven. Close the door gently.
For those new to using a Whirlpool appliance, understanding the initial setup can be very helpful. You can find useful information on how to use a Whirlpool oven for the first time, which often covers general operation and feature identification pertinent to both dedicated ovens and microwave-oven combos. This foundational knowledge ensures you are comfortable with your appliance before you start baking.
Double-check your settings before starting the bake cycle. Make sure it is still in convection mode and the temperature is correct. This careful preparation sets the stage for a beautifully baked cake.
Baking Your Cake: Step-by-Step Guide for Whirlpool Microwaves
Baking a cake in your Whirlpool convection microwave is a rewarding experience. It follows many of the same principles as conventional oven baking, with a few key adjustments. Let us walk through the process, from preparing your batter to achieving that perfect golden brown finish.
Choose and Adapt Your Recipe: You can use most standard cake recipes for convection microwave baking. However, you might need to make minor adjustments to the baking time and temperature. Generally, microwave convection ovens can bake a bit faster than full-sized ovens. Start with the recipe’s recommended temperature, but be prepared to reduce the baking time by 10-20%. A simpler, denser cake might fare better than a very light, airy one for your first attempt. Consider starting with simpler recipes, like a basic vanilla or chocolate cake. If you are interested in specific dietary needs, exploring how to make eggless cake in a convection microwave oven can provide excellent starting points for adaptable recipes.
Prepare Your Cake Batter: Follow your chosen recipe’s instructions precisely for mixing ingredients. Accuracy in measuring and mixing helps ensure consistent results. Over-mixing can lead to a dense cake, while under-mixing might leave lumps. Ensure all ingredients are at room temperature for better emulsion and texture. Grease and flour your chosen metal or glass cake pan thoroughly. This step is crucial for preventing the cake from sticking. You can also line the bottom with parchment paper for extra insurance.
Pour Batter into Pan: Carefully pour your prepared cake batter into the greased and floured bakeware. Fill the pan no more than two-thirds full. This allows room for the cake to rise without overflowing. Gently tap the pan on your counter a few times to release any large air bubbles.
Set Baking Time and Temperature:
- Place Pan: With your Whirlpool microwave oven already preheated in convection mode, carefully place the cake pan onto the low metal rack inside.
- Set Time: Input the estimated baking time from your recipe, but set a timer for a slightly shorter duration than a conventional oven (e.g., if a recipe says 30 minutes, set 25). This allows you to check for doneness before overbaking.
- Monitor: Keep an eye on the cake as it bakes. Convection microwaves often have an interior light, making monitoring easy. Avoid opening the door too often, especially in the first two-thirds of the baking time, as this can cause the cake to deflate.
Test for Doneness: When the timer goes off, it is time to check if your cake is done. Insert a toothpick or a thin skewer into the center of the cake. If it comes out clean or with a few moist crumbs attached, the cake is ready. If it comes out with wet batter, continue baking for another 5-10 minutes, checking again. The cake should also feel springy to the touch in the center. The edges might pull away slightly from the pan.
Cooling and Removal: Once baked, carefully remove the cake pan from the microwave using oven mitts. Place the pan on a wire cooling rack. Let the cake cool in the pan for 10-15 minutes. This allows it to firm up before removal. Then, gently invert the cake onto the cooling rack to cool completely. Allowing a cake to cool properly in the pan is a vital step. If you need tips on how to get cake out of a cake pan without breaking it, specific techniques can help ensure a perfect release.
Remember, baking times can vary slightly depending on your specific Whirlpool model, the size of your cake, and even the ingredients. Practice makes perfect, and soon you will develop a feel for your oven’s nuances.
Tips for Achieving Perfect Cakes in Your Whirlpool Microwave
Baking a cake is an art, and mastering it in your Whirlpool microwave requires attention to detail. These tips will help you achieve consistent, delicious results every time. They focus on common challenges and best practices for microwave convection baking.
Understand Heat Distribution: Convection microwaves circulate hot air, which is excellent for even baking. However, sometimes certain spots might get hotter than others. If you notice one side browning faster, you can carefully rotate the cake pan halfway through the baking time. This promotes more uniform browning and ensures the cake cooks evenly throughout. Avoid opening the door too frequently, though, as it causes temperature fluctuations.
Preventing Dry Cakes: Overbaking is the primary cause of dry cakes. Always start checking for doneness a few minutes before the recipe’s minimum suggested time. A toothpick test is your best friend. A slightly moist crumb on the toothpick is often better than a completely dry one, as the cake will continue to cook slightly from residual heat after it comes out of the oven. Using ingredients at room temperature also helps create a more tender crumb. Ensure your wet ingredients are properly measured.
Handle Common Issues:
- Sinking Cake: A cake can sink in the middle for several reasons. Opening the oven door too early during baking, especially in the first 20 minutes, can cause this. Over-mixing the batter, using too much leavening agent, or incorrect oven temperature can also contribute. Ensure your oven is fully preheated.
- Uneven Rise: If one side of your cake rises more than the other, it might indicate uneven heat distribution or an uneven surface. Make sure your microwave is on a flat, stable counter. Rotating the cake mid-bake can also help.
- Burnt Spots: If your cake has dark or burnt spots, the temperature might be too high, or the cake is too close to a heating element. Ensure you are using the low metal rack. You can also try reducing the temperature slightly or covering the browning areas with aluminum foil (loosely tented, not touching the heating elements) for the last part of baking.
Cooling Your Cake Properly: Once your cake is baked and passes the toothpick test, resist the urge to remove it from the pan immediately. Allow it to cool in the pan for 10-15 minutes on a wire rack. This period allows the cake to firm up and prevents it from breaking when inverted. After this initial cooling, gently invert the cake onto the wire rack to cool completely. Proper cooling is just as important as baking for a perfect texture. Learning how to properly get cake out of a cake pan without breaking it is a skill that will save you from common baking frustrations.
Cleanliness Matters: A clean microwave oven performs better. Food spills and grease can affect heat distribution and even create odors that transfer to your baked goods. Regularly clean the interior, especially after any spills. A clean oven is an efficient oven. This also extends the lifespan of your appliance.
By paying attention to these details, you will consistently bake impressive cakes in your Whirlpool microwave. Each bake will teach you more about your oven’s unique characteristics.
Troubleshooting Common Whirlpool Microwave Baking Issues
Even with the best intentions, baking can sometimes present challenges. When using your Whirlpool microwave oven for baking cakes, you might encounter specific issues. Understanding common problems and their solutions can save your next baking project. These tips focus on problems that frequently arise during the baking process.
Cake Not Rising:
- Problem: Your cake is flat and dense, not light and airy.
- Cause: This often happens due to old or inactive leavening agents (baking powder or baking soda). Ensure your ingredients are fresh. Over-mixing the batter can also develop too much gluten, making the cake tough and preventing rise. Opening the oven door too early releases heat, causing the cake to deflate before it sets.
- Solution: Check expiration dates on baking powder/soda. Mix batter only until just combined. Avoid opening the microwave door during the first two-thirds of baking time. Ensure your oven is fully preheated.
Uneven Browning:
- Problem: Some parts of the cake are darker or more cooked than others.
- Cause: While convection ovens aim for evenness, hot spots can occur. This might be due to uneven placement of the pan or slight variations in the oven’s heating.
- Solution: Rotate the cake pan halfway through the baking time (e.g., after 15-20 minutes). Ensure the pan is centered on the low metal rack. If recurring, try a slightly lower temperature for a longer period.
Overcooking/Undercooking:
- Problem: The cake is either too dry and hard (overcooked) or gooey and raw in the center (undercooked).
- Cause: Incorrect baking time or temperature settings. Microwave convection ovens can sometimes bake faster than conventional ovens.
- Solution: Always start checking for doneness a few minutes before the recipe’s minimum suggested time. Use the toothpick test. For undercooked cakes, continue baking in 5-minute increments until done. For overcooked cakes, adjust future baking times down. Calibrate your oven if you suspect temperature inaccuracies.
Oven Error Codes:
- Problem: Your Whirlpool microwave displays an error code during operation.
- Cause: Error codes indicate specific issues, ranging from sensor problems to door malfunctions.
- Solution: Consult your Whirlpool microwave’s user manual for the meaning of the specific error code. Often, simply unplugging the microwave for a few minutes and plugging it back in (a “soft reset”) can clear minor errors. If the problem persists, it may require professional service. For more general troubleshooting like “why is my Whirlpool microwave not working but has power” or “why is my Whirlpool microwave running but not heating,” these often relate to internal component failures that are beyond simple fixes.
Cake Sticking to the Pan:
- Problem: The cake breaks apart when you try to remove it from the pan.
- Cause: Insufficient greasing and flouring of the pan. Not allowing the cake to cool enough in the pan before removal.
- Solution: Always grease the pan thoroughly with butter or cooking spray, then dust with flour, tapping out the excess. You can also line the bottom with parchment paper. Allow the cake to cool in the pan on a wire rack for 10-15 minutes before inverting it. This crucial step lets the cake structure firm up, making it easier to release.
Addressing these common issues will significantly improve your cake baking success rate. Do not get discouraged by a few less-than-perfect attempts; every baker experiences them. Learning from these helps you refine your technique.
Maintenance and Cleaning for Optimal Baking Performance
Maintaining your Whirlpool microwave oven is just as important as understanding its baking functions. A clean and well-maintained appliance ensures consistent baking results, extends its lifespan, and prevents potential issues. Regular cleaning is not just about aesthetics; it is about performance and hygiene.
Regular Interior Cleaning:
- Why it matters: Food splatters and grease buildup inside the microwave can absorb heat, leading to uneven baking. These residues can also cause unpleasant odors that transfer to your baked goods. Over time, heavy buildup can even affect the efficiency of the heating elements.
- How to clean: After each baking session, especially if there are spills, wipe down the interior. For more thorough cleaning, place a microwave-safe bowl of water with a few lemon slices or a tablespoon of vinegar inside. Microwave on high for 5-10 minutes until steam builds up. This will loosen stuck-on food. Then, carefully remove the bowl and wipe down the interior with a damp cloth. For stubborn grime, a paste of baking soda and water can be very effective, which is a common and safe method for oven cleaning. You can refer to guides on how to clean an oven with baking soda for detailed steps.
Clean the Metal Racks:
- Why it matters: The metal racks used in convection mode can accumulate grease and food particles. Dirty racks can affect air circulation and overall baking performance.
- How to clean: Remove the racks and wash them in warm, soapy water. Use a non-abrasive scrub brush or sponge to remove baked-on residue. Rinse thoroughly and dry completely before placing them back in the oven.
Exterior Cleaning:
- Why it matters: While less directly impactful on baking performance, a clean exterior helps maintain the appliance’s appearance and hygiene.
- How to clean: Wipe the exterior surfaces with a soft, damp cloth and a mild detergent. Avoid harsh chemicals or abrasive cleaners that can damage the finish. Pay attention to the control panel and door handle, which are frequently touched.
Air Vent Maintenance:
- Why it matters: Convection microwaves have vents, often on the top or back, that help circulate air and dissipate heat. Blocked vents can lead to overheating and reduced performance.
- How to maintain: Ensure the vents are clear of obstructions. Regularly dust or gently vacuum the vent areas to remove any lint or debris buildup.
Avoid Spills and Overfills:
- Why it matters: Preventing spills is easier than cleaning them. Overfilling cake pans can lead to batter overflowing, creating a messy situation inside the oven.
- How to prevent: Ensure your cake pan is not more than two-thirds full. Place a baking sheet or foil underneath the cake pan on the rack if you are concerned about potential overflows during baking. This catches any drips and makes cleanup much simpler.
Regular maintenance ensures your Whirlpool microwave oven remains in top condition, ready to bake perfect cakes every time. It also helps in preventing common operational issues, keeping your appliance reliable for years.
Frequently Asked Questions (FAQ)
Q1: Can I bake any type of cake in my Whirlpool microwave oven? A1: You can bake most standard cake types in a Whirlpool convection microwave. Recipes for sponge cakes, chocolate cakes, and even fruitcakes generally adapt well. Extremely delicate or very large, multi-tiered cakes might be challenging due to space and specific browning requirements. Stick to simpler recipes when you are starting out.
Q2: Why is my cake not browning properly in my Whirlpool convection microwave? A2: If your cake isn’t browning, ensure you are using metal bakeware, as it conducts heat best for browning. Also, check that you are using the convection mode correctly and that the temperature is set high enough. Sometimes, a slightly higher temperature or a few extra minutes of baking can help achieve better browning. Ensure your metal rack is on the correct low position.
Q3: How do I know if my Whirlpool microwave has a convection mode? A3: Look for buttons labeled “Convection,” “Bake,” or a symbol resembling a fan inside a square on your control panel. Check your user manual for specific model features. If your microwave is a basic model, it likely only has solo or grill functions. Only convection models can effectively bake cakes.
Q4: Can I use regular microwave-safe plastic bowls for baking cakes in convection mode? A4: No, you should never use regular microwave-safe plastic bowls in convection mode. Convection mode uses high heat, similar to a conventional oven. Plastic bowls are not designed for these high temperatures and can melt, warp, or release harmful chemicals. Always use oven-safe bakeware made of metal, glass, or silicone for convection baking.
Q5: What is the ideal temperature for baking cakes in a Whirlpool microwave oven? A5: The ideal temperature for baking cakes in a Whirlpool convection microwave oven is generally the same as a conventional oven. Most cake recipes call for temperatures between 325°F (160°C) and 375°F (190°C). Always follow your recipe’s specific temperature recommendations and adjust baking time as needed, as microwave convection can sometimes bake faster.
Q6: My cake takes longer to bake than the recipe suggests. What could be wrong? A6: Several factors can cause this. Your oven might not be fully preheated, or its thermostat might be slightly off. Cake size and density also affect baking time. Ensure you use the low metal rack for optimal air circulation. Try calibrating your oven temperature or allow a longer preheating time for future bakes.
Conclusion
Baking a cake in your Whirlpool microwave oven, particularly a convection model, is a convenient and efficient way to enjoy homemade treats. We have explored the essential steps, from ensuring your microwave has the necessary convection capabilities to choosing the right bakeware and mastering the baking process. Remember that understanding your appliance’s features and following proper baking techniques are key to success.
I hope this comprehensive guide empowers you to bake delicious cakes with confidence right in your kitchen. Do not hesitate to experiment with different recipes and adjust them to your Whirlpool microwave’s unique characteristics. With a little practice, you will be creating perfect, moist, and beautifully baked cakes every time. Your Whirlpool microwave oven is more versatile than you might think. So, preheat that convection function and start baking your next delightful dessert today! Happy baking!
- Whirlpool microwave
- baking cake
- convection microwave
- cake recipes
- home baking
- appliance tips

Katria Melrose
Cleaning Specialist
With over 12 years of experience in commercial cleaning and a certification in workplace ergonomics, I’ve developed a deep understanding of what makes a workspace truly productive. At HEG, I specialize in helping people transform their home offices into clean, efficient, and comfortable environments. Through smart cleaning routines and strategic organization solutions, I empower readers to create spaces that support focus, comfort, and success—one well-organized desk at a time.