· Todd Martin · Home Maintenance · 16 min read
How To Use Whirlpool Washing Machine Semi Automatic
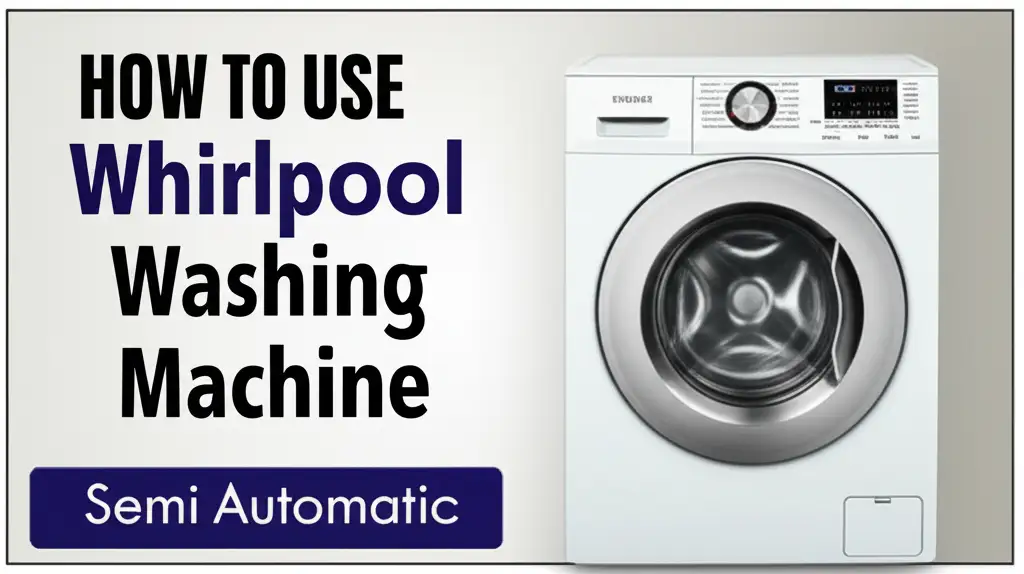
Unlock Easy Laundry: Using Your Whirlpool Semi-Automatic Washer
Doing laundry does not have to be a chore. Many people find themselves puzzled by new appliances. Using a Whirlpool semi-automatic washing machine can be simple. It offers control and efficiency for your laundry needs. This guide will help you understand every step.
I will walk you through setting up your machine. You will learn to wash and spin clothes properly. We will also cover important maintenance tips. This article makes laundry day easy and effective. Let’s get your Whirlpool semi-automatic washer working for you.
Takeaway
- Whirlpool semi-automatic washers offer manual control over the wash cycle.
- The process involves adding water, detergent, washing, draining, and then spinning.
- Proper setup and regular cleaning extend machine life and improve laundry results.
- Understanding basic troubleshooting helps solve common issues quickly.
How do you use a Whirlpool semi-automatic washing machine?
You use a Whirlpool semi-automatic washing machine by manually filling the wash tub with water and clothes, adding detergent, selecting a wash cycle, and then draining the water. Afterward, you transfer the clothes to the spin tub to remove excess water.
Understanding Your Whirlpool Semi-Automatic Washer
Let’s begin by understanding what a semi-automatic washing machine is. This type of machine requires some manual effort. It has two separate tubs. One tub is for washing clothes. The other tub is for spinning clothes dry.
This design gives you more control. You decide when to add water and when to drain it. You also move clothes between the tubs. This control can save water and electricity. Many users find it easy to manage.
What Makes It Semi-Automatic?
A semi-automatic washer is different from a fully automatic one. A fully automatic machine does everything itself. It fills, washes, rinses, and spins in one cycle. A semi-automatic machine needs your help. You manually fill the water. You also transfer clothes after washing.
This manual step saves you money. You use only the water you need. You also use less electricity because you control the cycles. This makes it a great choice for many homes.
Key Parts of Your Machine
Your Whirlpool semi-automatic washer has a few main parts. Knowing them helps you use it better.
- Wash Tub: This is the larger tub. You put clothes and water here. The agitator inside cleans your clothes.
- Spin Tub: This is the smaller tub. It removes water from clothes. Clothes spin very fast here.
- Control Panel: This panel has knobs. You use them to set wash time, wash mode, and spin time.
- Water Inlet: This is where you connect the water hose. Water flows into the wash tub.
- Drain Hose: This tube removes dirty water. You position it to drain into a sink or floor drain.
- Lint Filter: This filter collects lint and debris. You must clean it regularly.
Understanding these parts is the first step. It helps you prepare for laundry. Next, we will set up your machine for its first use. Different Whirlpool washing machines have specific features, but the basic semi-automatic operation remains consistent. You can explore how some other models work, such as the Whirlpool 360 Bloomwash for a comparison of features.
Getting Started: Initial Setup and Preparation
Setting up your Whirlpool semi-automatic washing machine is simple. First, choose a good spot for it. The spot should have a water source and a drain. It also needs a power outlet. The floor should be level to prevent wobbling.
Next, unbox your machine carefully. Remove all packing materials. Read the instruction manual. It has important safety information. I always recommend checking everything before plugging it in.
Connecting Water and Power
Connecting water to your machine is easy. Locate the water inlet at the back. Attach the water inlet hose firmly. Ensure there are no kinks in the hose. Place the drain hose into a sink or floor drain. Make sure it stays in place during operation.
Now, plug the power cord into a wall outlet. Use a grounded outlet. Avoid extension cords if possible. Always ensure your hands are dry when handling power cords. If your Whirlpool washing machine won’t fill with water, check these connections first.
Sorting Your Laundry
Sorting clothes is a key step. It helps protect your garments. It also ensures a better clean.
- Separate Colors: Wash whites and light colors together. Wash dark colors separately. This prevents color bleeding.
- Separate Fabric Types: Wash delicate items like silk and lace separately. Use a gentle cycle for them. Heavy items like jeans and towels can go together.
- Check Pockets: Always check pockets before washing. Remove coins, tissues, or small items. These can damage your machine or clothes.
- Pre-Treat Stains: Treat tough stains before washing. Apply a stain remover directly to the spot. Let it sit for a few minutes. This improves cleaning results.
Proper preparation makes a big difference. It helps your clothes last longer. It also keeps your machine running smoothly. Now you are ready to start washing.
The Washing Process: Step-by-Step Guide
Washing clothes in your Whirlpool semi-automatic machine is a hands-on experience. It gives you full control. Follow these steps for a clean and fresh load. I find this process very straightforward once you do it a few times.
Step 1: Loading Clothes into the Wash Tub
Open the lid of the wash tub. Place your sorted clothes inside. Do not overload the tub. Overloading prevents proper cleaning. It also puts stress on the motor. Clothes should move freely in the water. I usually fill it about two-thirds full.
Step 2: Adding Water and Detergent
Now, add water to the wash tub. You can use a bucket or a connected hose. Fill the tub according to your load size. Most machines have water level indicators. Look for “Low,” “Medium,” or “High” marks.
Add your detergent to the water. Follow the detergent manufacturer’s instructions. Liquid detergent dissolves easily. Powder detergent might need a bit of stirring. Place the detergent directly into the tub with the water and clothes.
Step 3: Setting the Wash Cycle
Go to the control panel. You will see a wash timer knob. Turn it to set the wash time. For lightly soiled clothes, 10-15 minutes is fine. For heavily soiled clothes, choose 20-30 minutes.
You also have wash mode options. These might include “Gentle,” “Normal,” or “Strong.” “Gentle” is for delicate items. “Normal” works for most clothes. “Strong” is for very dirty items like jeans or towels. Select the mode that matches your load.
Step 4: Agitation and Draining
Once the timer starts, the agitator will move. It mixes clothes, water, and detergent. This action cleans your clothes. Let the machine complete the wash cycle.
When the wash cycle finishes, the machine stops. Now, it’s time to drain the dirty water. Locate the drain knob or lever on the control panel. Turn it to the “Drain” position. The dirty water will flow out through the drain hose. Ensure your drain hose is placed correctly. If you need help with this, you can refer to a detailed guide on how to drain water in a Whirlpool washing machine.
Step 5: Rinsing (Optional, but Recommended)
For better cleaning, you can rinse the clothes. After draining the wash water, refill the tub with fresh water. Let the clothes agitate for a few minutes. Then, drain the rinse water. You can repeat this rinse step if needed. This removes any leftover soap. Now your clothes are ready for spinning.
Spin Drying Your Laundry: Achieving Best Results
After washing and rinsing, your clothes are full of water. The spin tub removes this excess water. This makes clothes dry faster. It is a simple but important step. I always make sure clothes are evenly spread for the best spin.
Transferring Clothes to the Spin Tub
First, open the lid of the spin tub. Carefully take clothes from the wash tub. Place them into the spin tub. Do not put too many clothes in the spin tub at once. Overloading can make the machine vibrate. It can also prevent proper water removal.
Place clothes evenly around the spin tub’s center. This balances the load. An unbalanced load can cause the machine to shake excessively. It can also cause loud noises.
Closing the Spin Tub Lid
Once clothes are in, close the spin tub lid tightly. Most semi-automatic machines have a safety lid. The machine will not spin if the lid is not closed. This prevents accidents. Ensure the small cover disc, if present, is placed over the clothes before closing the main lid. This stops clothes from flying out.
Setting the Spin Timer
Now, go to the control panel. Find the spin timer knob. Turn it to set the spin time.
- For synthetic fabrics or delicate items: 1-2 minutes is usually enough.
- For cottons and regular clothes: 3-5 minutes works well.
- For heavy items like towels or jeans: 5-7 minutes will remove more water.
The machine will spin very fast during this time. You will hear a humming sound. The water will drain out through the hose.
Safety Precautions During Spin
The spin cycle is powerful. Always follow safety rules.
- Do not open the spin tub lid during operation. The clothes are spinning at high speeds. Opening it can be dangerous. Wait until the tub completely stops.
- Do not touch the moving parts. Keep hands away from the spinning tub.
- If the machine vibrates excessively: Stop the spin cycle immediately. Open the lid and redistribute the clothes. Close the lid and restart the spin. This often fixes the issue. If you notice unusual leaks during or after the spin cycle, it could indicate a problem with the machine, perhaps even water leaking from the bottom of your Whirlpool washing machine.
After the spin cycle finishes, your clothes will be damp. They will be ready for air drying or line drying. This process makes drying much faster.
Troubleshooting Common Whirlpool Semi-Automatic Issues
Even reliable appliances can have small problems. Knowing how to fix common issues saves time. It prevents bigger repairs. I have encountered a few of these myself.
Machine Not Turning On
- Check Power Connection: Make sure the power cord is fully plugged into a working outlet.
- Check Fuse or Breaker: A tripped circuit breaker can stop power. Reset it if needed.
- Door/Lid Not Closed: Some machines do not start if the lid is open. Ensure both wash and spin tub lids are closed properly.
- Overheating: If the machine was used for a long time, it might overheat. Let it cool down for 30 minutes. If your Whirlpool washing machine is not turning on, these basic checks are the first steps.
Water Not Filling
- Check Water Supply: Ensure your tap is open. Make sure there is water pressure.
- Hose Kinks: The water inlet hose might be bent or kinked. Straighten it out.
- Inlet Filter Clog: The small filter at the water inlet can get clogged. Disconnect the hose and clean the filter screen. This is a common reason why your Whirlpool washing machine might not be filling with water.
Machine Making Strange Noises
- Unbalanced Load: This is common during the spin cycle. Stop the machine and redistribute clothes evenly.
- Foreign Objects: Small items like coins or keys can get stuck. Check inside the wash tub and lint filter.
- Motor Issues: If the noise is grinding or very loud, it might be a motor problem. This needs professional repair.
Water Leaking
- Hose Connections: Check that the water inlet and drain hoses are tight. Ensure no cracks are present.
- Overfilling: Do not fill the wash tub too much. Water can overflow.
- Drain Hose Position: The drain hose must be placed correctly. It should not be too low or too high.
- Damaged Tub: A crack in the tub can cause leaks. This requires repair or replacement.
Spin Tub Not Working
- Lid Safety Switch: The spin tub lid must be fully closed. The safety switch prevents operation if it’s open.
- Overload: Too many clothes can stop the spin. Remove some items.
- Motor Issue: If the motor hums but does not spin, it might be faulty.
For more complex issues, refer to your machine’s manual. Sometimes, a simple restart fixes minor glitches. Always unplug the machine before inspecting anything inside. Safety comes first.
Maintaining Your Whirlpool Semi-Automatic for Longevity
Regular maintenance keeps your washing machine running well. It extends its lifespan. It also ensures cleaner laundry. I clean my machine regularly, and it really pays off.
Cleaning the Wash Tub and Spin Tub
- After Each Use: Wipe down the inside of both tubs. Use a soft cloth. This removes detergent residue and dirt.
- Monthly Deep Clean: Fill the wash tub with hot water. Add one cup of white vinegar or a machine cleaner. Run a short wash cycle. Let it sit for 30 minutes, then drain. You can use bleach for a thorough clean; here’s how to clean a Whirlpool washing machine with bleach.
- Clean Exterior: Wipe the outside of the machine with a damp cloth. Avoid harsh chemicals.
Cleaning the Lint Filter
Your machine has a lint filter. It collects lint and fibers from clothes. A clogged filter reduces cleaning performance. It can also cause drainage issues.
- Locate the Filter: The lint filter is usually on the side of the wash tub. It might be a removable mesh bag or a fixed screen.
- Clean Regularly: Clean the filter after every 2-3 washes. Remove it and rinse it under running water. Use a brush if needed.
- Reinsert Correctly: Make sure to put the lint filter back in its place.
Draining Residual Water
After using the machine, some water might remain in the hoses. This can cause odors. It can also cause mold growth.
- Lift Drain Hose: After the last use, lift the drain hose higher than the machine. This helps empty any remaining water.
- Leave Lids Open: Leave the wash and spin tub lids open. This allows air to circulate. It helps dry out the tubs. This prevents musty smells.
Regular Checks
- Hose Inspection: Check water inlet and drain hoses regularly. Look for cracks or leaks. Replace damaged hoses.
- Power Cord: Inspect the power cord for fraying or damage. Ensure it is not pinched.
- Leveling: Check if the machine is still level. Adjust the feet if needed. A level machine prevents vibration.
By following these simple maintenance steps, your Whirlpool semi-automatic washing machine will serve you well for years. This care ensures top performance and keeps your laundry fresh.
Advanced Tips for Optimal Laundry Care
Beyond the basics, a few advanced tips can enhance your laundry routine. These help you get the best results. They also ensure gentle care for your clothes. I have found these tips really make a difference.
Pre-Soaking Stubborn Stains
For very dirty clothes or tough stains, pre-soaking helps.
- Fill the wash tub with water. Add a small amount of detergent or a pre-soak solution.
- Place stained items in the tub. Let them soak for 30 minutes to a few hours. For very tough stains, soak overnight.
- After soaking, drain the water. Then proceed with the regular wash cycle. This method helps loosen dirt and makes cleaning easier.
Using Fabric Softener
Fabric softener makes clothes soft. It also reduces wrinkles and static cling.
- Add during the rinse cycle. Do not add it at the beginning of the wash.
- Dilute softener. Mix the recommended amount of fabric softener with some water.
- Pour into the wash tub. Add the diluted softener during the last rinse cycle. Let the machine agitate for a few minutes.
- Drain the water. Then proceed to the spin cycle.
Dealing with Delicate Items
Your Whirlpool semi-automatic washer can handle delicate items. Use the “Gentle” wash mode.
- Use a mesh laundry bag. Place delicate items like lingerie, lace, or sweaters in a mesh bag. This protects them during agitation.
- Reduce wash time. Use a shorter wash time, around 5-7 minutes.
- Gentle Spin: Use a very short spin time, 1-2 minutes, or hand-wring delicate items.
Energy and Water Saving Tips
Semi-automatic machines are already efficient. You can save even more.
- Wash Full Loads: Wash a full load whenever possible. This saves water and electricity per item.
- Use Cold Water: Use cold water for most loads. It saves energy used for heating water. Cold water cleans many fabrics effectively.
- Optimize Spin: Spin clothes for an adequate time. This removes more water. It reduces drying time, saving energy.
- Air Dry: Line dry clothes whenever possible. This saves electricity compared to using a dryer.
Avoiding Overloading
Overloading is a common mistake. It affects cleaning performance. It can also damage your machine.
- Leave Space: Always leave enough space in the wash tub. Clothes need to move freely for proper cleaning.
- Spin Tub Limit: Never overload the spin tub. It can cause imbalance and machine damage. If your machine seems faulty and your Whirlpool washing machine is beeping during a cycle, overloading might be a contributing factor or a symptom of the stress on the appliance.
By implementing these advanced tips, you will achieve cleaner clothes. You will also extend the life of your Whirlpool semi-automatic washing machine.
Frequently Asked Questions
Can I wash all types of clothes in a Whirlpool semi-automatic machine?
Yes, you can wash most types of clothes. Use the “Gentle” setting for delicate items like silk or wool. “Normal” and “Strong” settings work for cottons, synthetics, and heavier fabrics. Always check garment care labels before washing.
How much detergent should I use?
The amount of detergent depends on your load size and water hardness. Refer to your detergent’s instructions. Usually, a full load needs 1-2 scoops or caps of detergent. Using too much can leave residue. Using too little may not clean well.
Is a semi-automatic machine better than a fully automatic one?
It depends on your needs. Semi-automatic machines are often cheaper to buy and run. They save water and electricity because you control the cycles. Fully automatic machines offer more convenience. They do everything automatically. Semi-automatics require more manual effort.
Why is my machine making a loud noise during spin?
A loud noise during spin often means the load is unbalanced. Stop the machine. Open the lid and redistribute the clothes evenly around the spin tub. Close the lid and restart. If the noise persists, check for foreign objects or consider professional service.
How often should I clean the lint filter?
You should clean the lint filter after every 2-3 washes. This prevents lint buildup. A clean filter ensures efficient drainage. It also improves washing performance. A clogged filter can affect machine efficiency and cleanliness.
What should I do if my Whirlpool semi-automatic washing machine is not turning on?
First, check if the power cord is properly plugged into a working outlet. Ensure the wash and spin tub lids are fully closed, as safety features prevent operation if open. Check your home’s circuit breaker for a trip. If problems continue, it might indicate a more complex issue.
Conclusion
Using your Whirlpool semi-automatic washing machine is a practical choice. It gives you control over your laundry. It helps you save water and energy. This guide covered everything from setting up your machine to washing and spinning clothes.
We discussed important maintenance steps. We also looked at common issues and their solutions. With this information, you can manage your laundry effectively. Your Whirlpool semi-automatic washer is a reliable helper. Use these tips to keep it running smoothly. Enjoy fresh, clean clothes every time.
- Whirlpool semi-automatic
- washing machine guide
- laundry tips
- appliance usage
- home essentials

Todd Martin
Senior Writer
With over 15 years of experience in home renovation and design, I started HEG to share what I’ve learned with homeowners who want to create spaces that are both beautiful and functional. I’ve always believed in a hands-on approach, and over the years, I’ve picked up practical solutions that actually work. Through HEG, I aim to make home improvement more approachable, sharing real tips that help you create a home you truly love.