· Katria Melrose · Outdoor Living · 18 min read
How To Waterproof A Table For Outdoor Use

Safeguard Your Table: How To Waterproof for Outdoor Use
Imagine stepping onto your patio, ready to enjoy a cup of coffee or a meal outdoors. Your outdoor table should be a reliable centerpiece, not a source of worry. Over time, rain, sun, and humidity can severely damage unprotected outdoor furniture. Water seeps into cracks, wood rots, metal rusts, and finishes peel. This article helps you understand how to waterproof a table for outdoor use, ensuring it remains beautiful and functional for many seasons. We will explore various waterproofing methods, step-by-step application processes, and vital maintenance tips.
Takeaway
- Prepare Thoroughly: Clean, sand, and repair your table before applying any waterproofing product.
- Choose Wisely: Select the right waterproofing material based on your table’s material and desired finish.
- Apply Correctly: Follow product instructions for optimal coats and curing times.
- Maintain Regularly: Clean and reapply protection periodically to extend your table’s life.
To waterproof an outdoor table, first clean and prepare its surface thoroughly. Then, select an appropriate sealant, stain, or paint designed for outdoor conditions. Apply the chosen product in thin, even coats, ensuring each layer dries completely before the next. This multi-step process creates a durable barrier against moisture and environmental damage.
Understanding the Need for Outdoor Table Protection
Your outdoor table faces constant challenges from nature. Sun exposure fades colors and dries out materials. Rain, snow, and humidity cause rot, rust, and mildew. Protecting your table is not just about aesthetics; it is about durability. A well-waterproofed table resists these elements, preventing costly repairs or replacements.
Water damage can quickly ruin a beautiful wooden table, leading to warping and cracking. Metal tables can corrode, weakening their structure. Even plastic tables can become brittle and discolored from UV rays and moisture. Proactive waterproofing saves you money and effort in the long run. It helps your table stand strong against the harshest weather. We often underestimate the power of consistent exposure.
Beyond just water, outdoor tables face dirt, grime, and environmental buildup. Regular cleaning before waterproofing is crucial. Keeping your outdoor furniture clean extends its life and prepares it for protection. Learn more about how to clean outdoor furniture to keep your entire patio setup in top condition. Neglecting proper care shortens the lifespan of any outdoor item.
Choosing the Right Waterproofing Material
Selecting the correct waterproofing material is vital for success. Different table materials benefit from different products. Understanding your options helps you make the best choice for lasting protection. Consider both the level of protection needed and your desired aesthetic.
- Wood Sealers: These products penetrate wood, creating a water-repellent barrier. They often maintain the wood’s natural look. You can find clear sealers or those with a slight tint. Always ensure the sealer is rated for outdoor use.
- Outdoor Stains with Sealant: Stains add color while also protecting the wood. They typically contain pigments that offer UV protection. Look for “stain and sealer in one” products for convenience. These are popular for their dual benefits.
- Outdoor Paints: Paint provides a solid, opaque color coating. It creates a strong barrier against moisture and UV rays. Ensure the paint is specifically designed for exterior use on furniture. Paint offers the most dramatic change in appearance.
- Waterproof Oils: Certain oils, like tung oil or linseed oil, penetrate deeply into wood. They enhance natural beauty and offer some water resistance. These require more frequent reapplication than sealers or paints. Oils condition the wood from within.
- Epoxy Resins: For extreme durability and a glossy finish, epoxy resins are an option. They create a hard, clear, waterproof layer. Epoxy is more complex to apply and is usually reserved for tabletops. This option is highly robust.
Each material has its pros and cons regarding application, appearance, and maintenance. Consider your table’s material, its current condition, and how much effort you are willing to invest. For wooden tables, choosing a product that protects against sun damage is also important. Discover how to protect outdoor wood furniture from sun damage to double your table’s defense.
Preparing Your Table for Waterproofing
Proper preparation is the foundation of effective waterproofing. Skipping steps here can lead to poor adhesion and premature failure of your protective coating. A clean, smooth, and dry surface ensures the waterproofing material performs at its best.
Clean the Table Thoroughly:
- Remove Debris: Use a brush or vacuum to remove loose dirt, leaves, and cobwebs.
- Wash the Surface: Mix mild dish soap with water. Use a soft brush or sponge to scrub the table. For stubborn grime or mildew, a specialized outdoor cleaner may be necessary. If your table is wood, you can learn more about how to clean a wood table for detailed instructions. Rinse thoroughly with clean water.
- Allow to Dry Completely: This is crucial. Any trapped moisture under the sealant will cause problems later. Let the table dry for at least 24-48 hours, or longer in humid conditions. Ensure it is completely dry to the touch.
Inspect for Damage and Make Repairs:
- Tighten Loose Parts: Check all screws and bolts. Tighten any loose connections to stabilize the table.
- Fill Gaps and Cracks: Use wood filler for wooden tables to fill any cracks, holes, or gaps. For metal, use a suitable metal repair epoxy. Sand smooth once dry.
- Address Rust: If your metal table has rust, sand it away completely. Apply a rust-inhibiting primer before waterproofing. Rust can quickly spread if left untreated.
Sand the Surface (if applicable):
- Wooden Tables: Lightly sand the entire surface to create a smooth, even texture. This helps the waterproofing product adhere better. Start with 120-grit sandpaper, then move to 220-grit for a finer finish. If you need to remove old finishes or deep scratches, you might consider using a power sander. Knowing how to use a belt sander on a table top can make this task much easier and more efficient.
- Metal Tables: For previously painted or coated metal, light sanding with fine-grit sandpaper can scuff the surface. This improves adhesion for primers or new coatings.
- Concrete Tables: Sanding may not be necessary unless the surface is very rough or uneven. Cleaning and etching solutions are usually sufficient.
- Plastic/Wicker: Sanding is generally not needed. A thorough cleaning is enough.
Remove Dust: After sanding, wipe down the entire table with a tack cloth or a damp cloth to remove all sanding dust. Dust will prevent proper adhesion of your chosen waterproofing material. Ensure the table is dust-free and dry before proceeding.
Step-by-Step Guide to Applying Waterproofing
Once your table is clean, dry, and prepared, you can begin the waterproofing process. Following these steps ensures maximum protection and a professional finish. Patience and attention to detail are key during application.
Read Product Instructions:
- Every waterproofing product has specific instructions. These include recommended application methods, temperature ranges, drying times, and recoat times. Always read and follow these guidelines carefully. Ignoring them can compromise the effectiveness of the product.
Gather Your Tools and Safety Gear:
- Tools: Brushes, rollers, sprayers (depending on product and preference), stirring sticks, paint trays.
- Safety: Gloves, eye protection, respirator (especially for strong fumes). Work in a well-ventilated area.
Apply the First Coat:
- Stir Well: Before opening, gently shake or stir the product thoroughly. This ensures all components are evenly mixed.
- Even Application: Apply a thin, even coat of your chosen waterproofing material. Avoid applying too much product at once, as this can lead to drips, runs, and uneven drying. Work in sections if your table is large.
- Brush/Roller/Sprayer:
- Brushes: Best for intricate areas, edges, and smaller tables. Apply in the direction of the wood grain for wooden tables.
- Rollers: Ideal for large, flat surfaces. Use a foam roller for smooth finishes.
- Sprayers: Provide the most even coat, especially for large or irregularly shaped furniture. Ensure you mask off any areas you don’t want coated.
- Edge Work: Pay extra attention to edges and corners, as these are often vulnerable points for moisture.
Allow Proper Drying Time:
- This is a critical step. Consult your product’s instructions for the recommended drying time between coats. Rushing this step will prevent proper bonding and curing, leading to a less durable finish. Drying times can vary greatly based on humidity and temperature. Do not touch the surface during this time.
Apply Subsequent Coats:
- Most waterproofing products require multiple coats for optimal protection. Typically, two to three coats are recommended.
- Light Sanding (Optional, for smooth finish): For a super smooth finish, lightly sand between coats with a very fine-grit sandpaper (e.g., 220-grit or higher). This removes any imperfections or raised grain. Always wipe away sanding dust before applying the next coat.
- Consistent Application: Apply each subsequent coat as evenly as the first. Ensure full coverage.
Allow for Full Curing:
- Drying time is when the surface feels dry to the touch. Curing time is when the product reaches its full hardness and protective capabilities. This can take anywhere from 24 hours to several days or even weeks.
- Protect During Curing: Avoid placing heavy objects or allowing water to pool on the table during the curing period. If rain is expected, cover the table or move it indoors. The product is most vulnerable during this phase.
Maintaining Your Waterproofed Outdoor Table
Waterproofing is not a one-time task; it requires ongoing maintenance to ensure long-lasting protection. Regular cleaning and timely reapplication keep your outdoor table looking great and performing its best. These simple steps prolong its life significantly.
Regular Cleaning:
- Weekly Dusting: Use a soft cloth or brush to remove dust, pollen, and light debris weekly.
- Monthly Wash: Every month, wash the table with mild soap and water. This removes built-up grime without harsh chemicals that could damage the waterproof coating. Rinse well and allow to air dry. For specific types of tables, detailed cleaning guides exist. For example, knowing how to clean outdoor wood furniture ensures you use the right approach for your table’s material. Always avoid abrasive cleaners.
Inspect for Wear and Tear:
- Annual Check: At least once a year, preferably before the rainy season or after winter, inspect your table thoroughly. Look for any signs of wear:
- Fading: Is the color dulling?
- Cracks or Peeling: Is the protective layer cracking, flaking, or peeling?
- Water Absorption: Does water bead up on the surface, or does it soak in? If water no longer beads, the waterproofing is wearing off.
- Mildew Growth: Even with waterproofing, stubborn mildew can sometimes appear. If you spot any, address it promptly.
- Annual Check: At least once a year, preferably before the rainy season or after winter, inspect your table thoroughly. Look for any signs of wear:
Timely Reapplication:
- Follow Product Guidelines: Most waterproofing products specify a reapplication interval, typically every 1-3 years. This depends on the product type and your local climate.
- Signs of Deterioration: If you notice any of the wear and tear signs mentioned above, it is time to reapply, even if it is sooner than the recommended interval.
- Preparation for Reapplication: Before reapplying, thoroughly clean and lightly sand the table surface. This ensures proper adhesion of the new coat. This is like refreshing the original process.
Winter Storage/Protection:
- Covering: If possible, cover your outdoor table during harsh winter months or periods of extended non-use. Use a breathable, waterproof furniture cover. This offers an extra layer of defense against extreme weather.
- Storage: Storing the table indoors, if space allows, provides the best protection. A garage or shed keeps it safe from frost, snow, and ice.
- Lifting: If your table sits directly on wet ground, consider placing it on furniture risers. This prevents moisture from wicking up into the legs.
Consistent maintenance helps your waterproofed table withstand the test of time. It remains an inviting spot for outdoor enjoyment for years to come.
Waterproofing Different Table Materials
While the general principles of cleaning and applying protection remain consistent, specific table materials require tailored approaches. Each material reacts differently to moisture and requires a suitable waterproofing solution. Understanding these nuances helps ensure the best outcome.
Waterproofing Wooden Tables
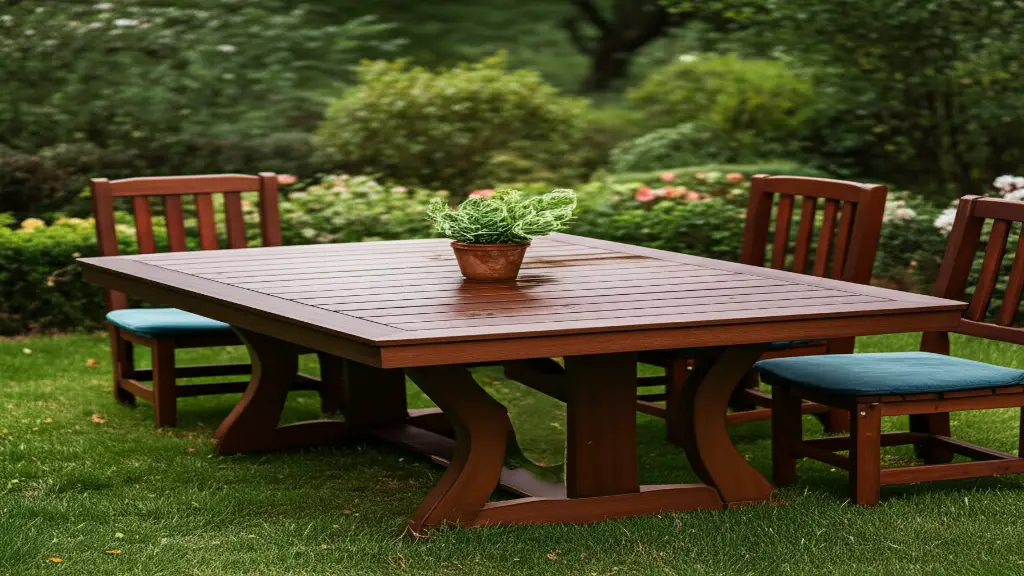
Wooden tables are a classic choice for outdoor spaces but are highly susceptible to water damage. The key is to seal the wood from within and on the surface.
- Preparation: Clean the wood thoroughly. Sand to remove old finishes and smooth the surface. Fill any cracks or holes with outdoor-grade wood filler. For a very rough surface, using a belt sander can expedite the preparation.
- Products:
- Oil-Based Sealers: Penetrate deeply, offering excellent water repellency and enhancing the natural wood grain. Examples include teak oil, linseed oil, or tung oil. They need more frequent reapplication (annually).
- Water-Based Sealers: Easier cleanup and less odor. They form a protective film on the surface. Many modern water-based sealers offer good UV protection.
- Outdoor Stains with Sealant: Provide color and protection. Choose a stain specifically designed for exterior wood.
- Application: Apply thin, even coats, following the wood grain. Allow proper drying time between coats. Usually, 2-3 coats are sufficient.
- Maintenance: Reapply every 1-3 years, depending on the product and exposure. Keep the wood clean.
Waterproofing Metal Tables
Metal tables, especially those made of steel or iron, are prone to rust when exposed to moisture. Aluminum is less susceptible but can still oxidize.
- Preparation: Clean the metal surface thoroughly. Remove any existing rust with a wire brush or sandpaper. For severe rust, a rust converter might be needed. Wipe clean with a degreaser.
- Products:
- Rust-Inhibiting Primer: Essential for steel and iron tables. Apply one or two coats to prevent future rust.
- Outdoor Metal Paint: Choose a paint specifically formulated for outdoor metal. Look for paints with rust-resistant properties.
- Clear Coat Sealant: For maintaining the metal’s natural look, a clear, outdoor-grade metal sealant can be applied over the primer or directly to unpainted, rust-resistant metals like aluminum.
- Application: Apply primer and paint in thin, even coats using a brush, roller, or sprayer. Ensure full coverage.
- Maintenance: Inspect annually for chips, scratches, or new rust spots. Touch up immediately to prevent rust spread.
Waterproofing Concrete Tables
Concrete tables are durable but porous, making them susceptible to staining and moisture absorption if left untreated.
- Preparation: Clean the concrete surface well. Remove any dirt, grime, or moss. Allow it to dry completely. For stubborn stains, specialized concrete cleaners may be necessary. For more specific advice on cleaning, consider looking at how to clean concrete table.
- Products:
- Concrete Sealers: These penetrate the concrete to create a barrier against water and stains. They come in various finishes: matte, satin, or glossy.
- Water-Repellent Sealers: Some sealers are designed to repel water rather than forming a film, allowing the concrete to breathe.
- Application: Apply the sealer with a roller or sprayer in thin, even coats. Avoid puddling. Multiple coats may be required.
- Maintenance: Reapply every 2-5 years, depending on product and exposure. Clean regularly to prevent grime buildup.
Waterproofing Plastic and Resin Tables
Plastic and resin tables are inherently water-resistant, but they can still degrade from UV exposure, leading to brittleness and fading.
- Preparation: Clean thoroughly with soap and water. Ensure it is free of dirt and grime.
- Products:
- UV-Protective Sprays/Coatings: These products are designed to protect plastic from sun damage and can add a layer of water repellency.
- Exterior Plastic Paints: If you want to change the color, use a paint formulated for outdoor plastic that offers UV and weather protection.
- Application: Apply a light, even coat of UV protector or paint. Multiple thin coats are better than one thick coat.
- Maintenance: Reapply protective sprays annually. Clean regularly to prevent dirt accumulation.
Waterproofing Wicker and Rattan Tables
Wicker (natural) and rattan (natural) are particularly vulnerable to moisture, leading to mold, mildew, and weakening. Synthetic wicker is more durable but benefits from protection.
- Preparation: Clean carefully to remove dirt and mildew. Use a soft brush for intricate woven areas. Allow to dry completely. For detailed cleaning of natural wicker, you might find tips on how to clean outdoor wicker furniture helpful.
- Products:
- Outdoor Varnish/Sealer: For natural wicker, a marine-grade varnish or exterior-grade clear sealer provides excellent protection.
- Outdoor Paint: Paint can also protect natural wicker, but it will cover the natural texture.
- UV-Protective Sprays: For synthetic wicker, a clear UV-protective spray can prevent fading and add a layer of water repellency.
- Application: Apply with a brush, ensuring all woven areas are covered. For sprays, apply evenly.
- Maintenance: Inspect for mildew and damage regularly. Reapply protection every 1-2 years for natural wicker.
Each material demands specific care to ensure its long-term durability outdoors. Choosing the right product and applying it correctly is essential for success.
Common Mistakes to Avoid When Waterproofing
Waterproofing your outdoor table can be a straightforward DIY project. However, certain mistakes can undermine your efforts and shorten the life of your protective coating. Being aware of these pitfalls helps you achieve the best results. Avoid these common errors to ensure a lasting and effective waterproof barrier.
Skipping Surface Preparation: This is perhaps the most critical mistake. Applying waterproofing over a dirty, dusty, or unprepared surface is like painting a greasy wall. The product will not adhere properly. It will peel, crack, or wear off quickly. Always clean, sand (if needed), and dry the table thoroughly before starting. Remember, preparation is 80% of the job.
Not Allowing Adequate Drying Time Between Coats: Patience is a virtue in waterproofing. Rushing to apply the next coat before the previous one has fully dried and often cured will lead to problems. Trapped moisture or solvents prevent proper bonding, resulting in a weaker, less durable finish that can bubble or chip. Always follow the product’s recommended drying and recoat times. These times can vary based on temperature and humidity.
Applying Too Much Product in One Go: A common misconception is that a thick coat provides better protection. In reality, applying thick coats can lead to uneven drying, drips, runs, and a tacky surface. It also increases the risk of peeling. Thin, even coats are always preferable. Multiple thin layers build a stronger, more flexible barrier.
Using Indoor-Only Products for Outdoor Use: Interior paints, varnishes, and sealers are not designed to withstand outdoor conditions. They lack the UV inhibitors, moisture resistance, and temperature flexibility needed for exterior use. Always choose products explicitly labeled for “outdoor” or “exterior” furniture. Using the wrong product guarantees failure.
Ignoring Weather Conditions During Application: Temperature and humidity significantly impact how waterproofing products perform. Applying in direct sunlight can cause rapid drying, leading to brush marks or poor adhesion. High humidity can extend drying times and cause a hazy finish. Extreme cold can prevent proper curing. Always check the product’s recommended temperature and humidity range. Pick a clear, mild day for your project.
Not Considering the Table’s Material: As discussed, different materials require different products. Using a wood sealer on a concrete table, or a metal paint on plastic, will not provide effective protection. Always match the waterproofing product to your table’s specific material. This ensures compatibility and optimal performance.
Neglecting Edge and Underside Protection: Water can seep into any unprotected area. Edges, corners, and the underside of the tabletop are often overlooked. These areas are just as vulnerable, if not more so, than the top surface. Ensure full and even coverage on all sides of the table. Pay extra attention to seams and joints.
Forgetting About Ongoing Maintenance: Waterproofing is not a “set it and forget it” solution. Over time, all protective coatings will wear down due to sun, rain, and use. Regularly inspect your table for signs of wear. Reapply protection as needed, usually every 1-3 years. Consistent maintenance ensures your table remains protected for many years.
Avoiding these common mistakes helps you achieve a professional, long-lasting waterproof finish for your outdoor table. Proper technique and attention to detail are key to extending your furniture’s life.
FAQ Section
Q1: How often should I re-waterproof my outdoor table? A1: Reapplication frequency depends on the product type, local climate, and table use. Generally, expect to reapply every 1 to 3 years. Check your table annually for signs of wear, such as water no longer beading on the surface. If you see water soaking in, it is time for a new coat.
Q2: Can I waterproof an old, previously finished table? A2: Yes, you can waterproof an old table. You must first prepare the surface thoroughly. Remove all old flaking paint or finish. Clean the table completely and sand it smooth. This ensures the new waterproofing material adheres properly. It is a crucial step for success.
Q3: Is it better to paint or seal an outdoor wooden table? A3: The choice depends on your preference. Paint provides solid color, strong moisture protection, and UV resistance. Sealers enhance the wood’s natural look while protecting it from water. Stains with sealers offer color with visible grain. Consider aesthetics and desired level of maintenance.
Q4: What’s the best way to clean my table before waterproofing? A4: Start by brushing off loose debris. Then, wash the table with mild dish soap and water using a soft brush or sponge. For stubborn dirt or mildew, use an appropriate outdoor furniture cleaner. Rinse thoroughly with clean water. Let the table dry completely for 24-48 hours before any further steps.
Q5: Can I waterproof a metal table to prevent rust? A5: Yes, you can waterproof a metal table to prevent rust. First, remove any existing rust with sanding. Then, apply a rust-inhibiting primer designed for outdoor metal. Follow this with an exterior-grade metal paint or a clear coat sealant. This creates a protective barrier against moisture.
Q6: What kind of weather should I avoid when waterproofing? A6: Avoid extreme temperatures, direct hot sunlight, high humidity, and windy conditions. These can affect drying times, cause uneven finishes, or lead to airborne debris sticking to the wet surface. A mild, dry day with temperatures between 50-80°F (10-27°C) is ideal for application.
Conclusion
Waterproofing your outdoor table is an investment that pays off in durability and beauty. By following these comprehensive steps, you equip your outdoor furniture with the necessary defense against the elements. From preparing the surface to choosing the right material and applying it with care, each stage contributes to a long-lasting, weather-resistant finish. Remember, the effort you put into waterproofing now saves you from costly repairs and replacements later.
A well-protected table remains a welcoming spot for family meals and outdoor gatherings. It continues to enhance your outdoor living space for many seasons. Take pride in knowing you have extended the life and beauty of your table. Start your waterproofing project today to keep your outdoor table in top condition. Enjoy peace of mind knowing your outdoor furniture is ready for any weather.
- outdoor table
- waterproofing
- wood sealing
- furniture protection
- weather resistance
- patio furniture
- DIY outdoor
- table maintenance


