· Todd Martin · Home Appliance Troubleshooting · 20 min read
Why Does My Vicks Humidifier Keep Leaking Water
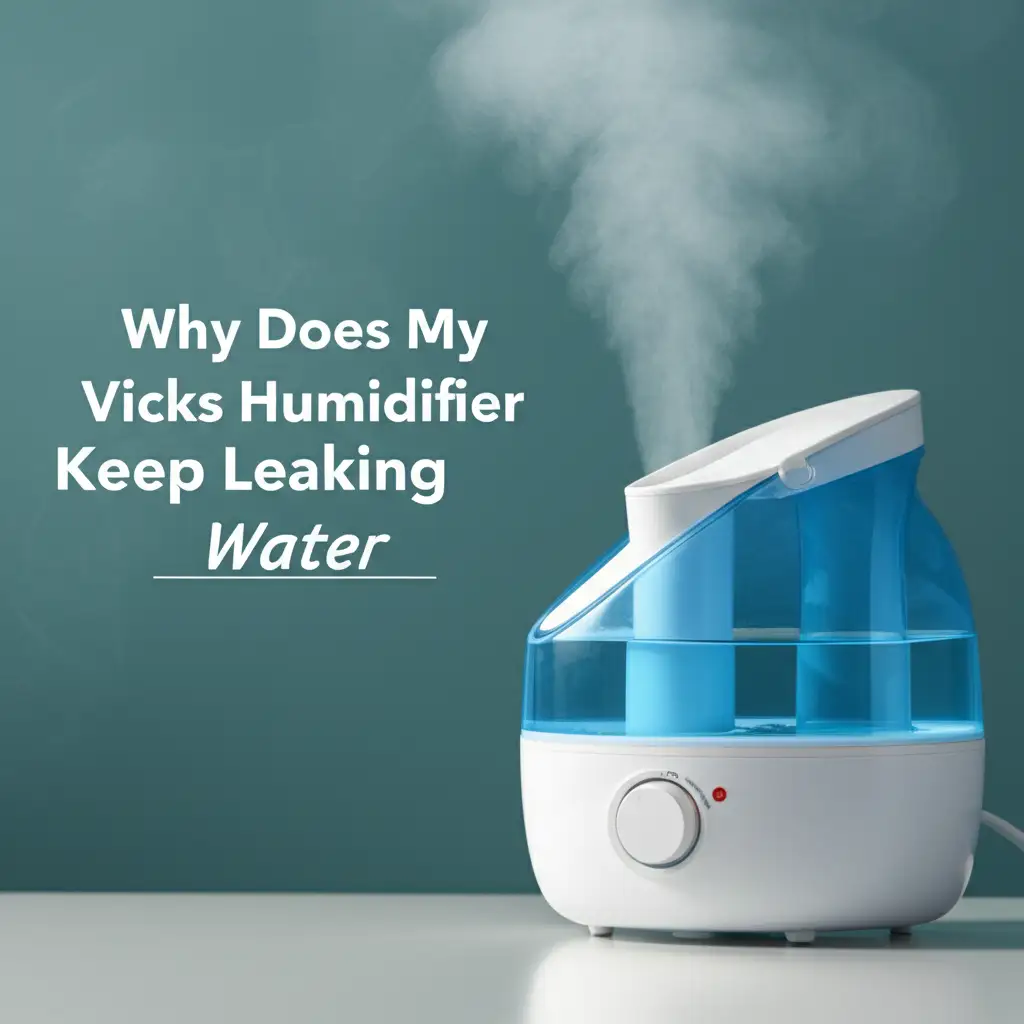
Resolving Vicks Humidifier Leaks: A Comprehensive Guide
Few things are as frustrating as discovering a puddle of water around your humidifier. You rely on this device to add moisture to your air, especially during dry seasons or when someone in your home needs relief from cold symptoms. But when your Vicks humidifier keeps leaking water, it defeats its purpose and can damage your floors or furniture. I understand this common problem completely. Many users, myself included, have experienced this exact issue.
This article will help you understand “Why Does My Vicks Humidifier Keep Leaking Water”. We will explore the most frequent reasons behind these annoying leaks. I will guide you through simple troubleshooting steps. You will learn how to identify the cause and implement effective solutions. We will cover everything from assembly mistakes to mineral buildup and damaged parts. You will gain knowledge to keep your humidifier working correctly and your home dry.
Takeaway
- Always ensure all Vicks humidifier parts are correctly assembled.
- Clean your humidifier regularly to prevent mineral buildup and blockages.
- Check the water tank and base for any cracks or visible damage.
- Fill the water tank only to the indicated maximum fill line.
- Place your humidifier on a flat, stable, and level surface.
Clear Answer to the Main Query
Your Vicks humidifier likely leaks water due to improper assembly, overfilling the tank, mineral buildup clogging components, or damaged parts like a cracked water tank or worn seals. Proper setup, regular cleaning, and careful handling are essential steps to prevent most leaks.
Improper Assembly and Placement Issues Cause Leaks
Sometimes, the simplest explanations are the correct ones. Many Vicks humidifier leaks stem from how the unit is put together or where it sits. If parts are not secure or the humidifier is unstable, water can easily escape. I have seen this happen often with new users or after a thorough cleaning. It is crucial to ensure every piece fits perfectly into place.
You should always consult your Vicks humidifier’s user manual for specific assembly instructions. Each model might have slight variations. Before you fill the tank with water, take a moment to confirm everything aligns as it should. This quick check can save you a lot of trouble and cleaning later.
Incorrect Water Tank Seating
The water tank on your Vicks humidifier must sit perfectly on the base. If the tank is not seated correctly, the valve at the bottom of the tank might not seal properly. This allows water to continuously flow into the base, overwhelming the system. The excess water then overflows, causing a leak. I always listen for a click or feel for a firm connection when placing the tank.
- Check Alignment: Ensure the tank’s spout or opening aligns perfectly with the base’s water reservoir.
- Firm Push: Apply a gentle but firm push down on the tank to ensure it settles into its slot.
- Twist-Lock Mechanism: Some Vicks models have a twist-lock system. Make sure you twist the tank until it locks into position.
A misaligned tank is a very common reason for leaks, especially from the bottom of the unit. If your Vicks humidifier is leaking from the bottom, this is one of the first things to inspect. You can read more about why your Vicks humidifier is leaking from the bottom to get additional insights.
Misaligned Base and Tank Components
Beyond the main tank seating, other smaller components might also contribute to a leak if not correctly aligned. These parts include mist nozzles, covers, or internal trays. If these are even slightly off-kilter, water flow can be disrupted. This disruption might redirect water outside the intended path. It is like a small dam with a tiny crack; even a minor misalignment can lead to significant water escape over time.
- Mist Outlet: Ensure the mist outlet cap or cover is securely in place and facing the correct direction.
- Internal Trays: Some Vicks humidifiers have internal trays or components that collect water. Make sure these are positioned flat and not tilted.
- Filter Housing: If your model uses a filter, confirm its housing is sealed properly.
Uneven Surface Placement
Where you place your Vicks humidifier makes a significant difference. Placing the unit on an uneven surface can cause it to tilt. Even a slight tilt can disrupt the water flow inside the humidifier. This tilt can lead to water pooling in unintended areas. Eventually, this pooled water can overflow the internal channels and escape from the humidifier’s casing.
- Flat Surface: Always place your Vicks humidifier on a completely flat and stable surface. A countertop or sturdy table works best.
- Avoid Soft Surfaces: Do not place the humidifier on carpets, rugs, or bedding. These can create an unstable foundation and block air vents.
- Check for Level: Use a small level tool if you are unsure. Ensure the humidifier sits perfectly straight to maintain proper water balance.
An unstable setup can lead to various problems, including water leaks that appear to come from nowhere. Remember, proper placement is a simple yet effective preventative measure. For general humidifier leaks from the bottom, which often relate to placement or assembly, you can also check out why your humidifier is leaking from the bottom for broader tips.
Overfilling and Incorrect Water Levels
It is easy to assume that more water means longer operation. However, overfilling your Vicks humidifier is a very common cause of leaks. Humidifiers are designed to hold a specific volume of water. Exceeding this limit creates internal pressure and can disrupt the delicate balance of water flow. I often remind myself to check the fill line carefully before closing the tank.
When the water tank is too full, the humidifier’s internal mechanisms cannot manage the excess. Water may overflow the internal reservoir. It might seep through seals not designed for such high pressure. This leads to water seeping out from places it should not.
Exceeding Max Fill Line
Every Vicks humidifier has a clear “Max Fill” line on its water tank. This line indicates the absolute maximum amount of water the tank can hold safely. Filling the tank beyond this line is a direct pathway to leaks. The extra water puts undue pressure on the tank’s valve and seals. It can also cause water to slosh over the edges when you place the tank onto the base.
- Locate the Line: Always find the maximum fill line before adding water.
- Fill Slowly: Pour water slowly into the tank. This helps you monitor the level accurately.
- Stop at the Mark: Stop filling precisely at the “Max Fill” indicator. Do not guess.
Sometimes, when you carry a full tank, a small amount of water might spill onto the outside. This is not a leak from the unit itself. It is just spillage from handling. Ensure you wipe down the tank’s exterior before placing it on the base.
Water Spillage During Refills
Even if you fill the tank correctly, water can still end up outside the unit during the refilling process. This often happens when you invert the tank to place it back on the base. A few drips are normal, but a significant amount indicates either a shaky hand or an overfilled tank. It is not a true leak from the humidifier’s operation, but it still creates a mess.
- Carry Carefully: Hold the filled tank upright and steady when moving it from the sink to the humidifier base.
- Quick Inversion: Invert the tank quickly and confidently when placing it on the base. This minimizes the time water has to drip from the valve.
- Wipe Down: Always wipe the exterior of the tank dry before placing it on the unit. This prevents residual water from being mistaken for a leak.
Using the right type and amount of water is key to preventing both leaks and other operational issues. While Vicks humidifiers generally work with tap water, using just pure water helps minimize certain issues. You can learn more about using just water in your Vicks humidifier if you are curious about water types.
Mineral Buildup and Clogged Components
Over time, water leaves behind mineral deposits. This is especially true if you use hard tap water. These minerals, often appearing as white or crusty residue, can accumulate inside your Vicks humidifier. This buildup is a common culprit for leaks. It affects the performance and lifespan of the appliance. I learned this the hard way by neglecting regular cleaning.
Mineral deposits interfere with the delicate mechanics of the humidifier. They can block water channels. They can prevent valves from closing completely. When water cannot flow freely or parts cannot seal, leaks become inevitable. Regular cleaning is not just about hygiene; it is about preventing mechanical failures.
Hard Water Deposits in the Base
The humidifier’s base is where water typically collects before being turned into mist. Hard water leaves behind scale deposits here. These deposits can build up around the transducer (the part that creates mist) and in the small channels that guide water. If minerals accumulate around the water valve at the bottom of the tank, they can prevent it from sealing tightly when the tank is in place.
- Inspect the Base: Regularly check the humidifier’s base for any white, crusty deposits.
- Valve Area: Pay close attention to the area where the water tank connects to the base. Mineral buildup here is a frequent cause of leaks.
- Channels: Look inside the base for any blocked water pathways.
This accumulation of deposits can also lead to other issues, such as your humidifier spitting out water instead of misting correctly. If your Vicks humidifier keeps spitting out water, it might be due to similar mineral blockages.
Clogged Mist Nozzles or Channels
The mist nozzle is where the water vapor exits the humidifier. Mineral buildup can partially or completely block this opening. When the mist cannot exit freely, pressure builds inside the unit. This pressure can force water to find alternative escape routes. Water might then leak from seams or openings not designed for liquid expulsion.
- Clear the Nozzle: Use a small brush or a cotton swab to gently clear any visible mineral deposits from the mist nozzle.
- Internal Channels: Some Vicks models have internal channels that guide the mist. These can also become clogged, leading to back pressure and leaks.
- Ventilation: Ensure the humidifier’s air intake vents are clear. Blocked vents can also contribute to internal pressure issues.
Impaired Valve Operation
The valve at the bottom of your Vicks humidifier’s water tank is crucial for preventing leaks. This valve is designed to open only when the tank is correctly seated on the base. It then allows water to flow into the reservoir at a controlled rate. Mineral buildup can coat this valve. It can prevent it from creating a complete seal when the tank is inverted. It can also prevent it from closing fully when you lift the tank off the base.
- Examine the Valve: Inspect the valve and its rubber seal for any mineral deposits or debris.
- Clean Thoroughly: Use a descaling solution or vinegar to dissolve any buildup around the valve.
- Test the Seal: After cleaning, briefly fill the tank and check if the valve leaks when held upright. If it drips, the seal might be compromised.
Regular and thorough cleaning is essential to prevent these mineral-related leaks. I cannot stress enough how important it is to clean your Vicks humidifier regularly. For detailed instructions, refer to how to clean your Vicks humidifier. This will prevent mineral buildup and ensure optimal performance. In some cases, neglected cleaning can even lead to more serious issues like black stuff in the water, which indicates mold or severe mineral problems. Learn more about why your Vicks humidifier has black stuff in the water.
Damaged or Worn-Out Parts Leading to Vicks Humidifier Leaks
Even with the best care, humidifier parts can wear down or become damaged over time. Plastics can crack, and rubber seals can degrade. When a structural component of your Vicks humidifier is compromised, it creates a direct pathway for water to escape. I have seen many cases where a seemingly perfect setup still results in a leak due to unseen damage.
It is important to regularly inspect your humidifier for any signs of physical wear or damage. Small cracks or worn seals might be barely noticeable at first. However, they can lead to significant leaks once the unit is full of water and operating.
Cracked Water Tank or Base
The water tank and the base are the primary containers for water. If either of these components develops a crack, water will inevitably leak out. Cracks can occur from accidental drops, impacts, or even from stress over time due to repeated use and temperature changes. Sometimes, cracks are hairline and difficult to spot.
- Visual Inspection: Empty the humidifier and thoroughly inspect the entire surface of the water tank and the base. Look for hairline cracks, especially near seams or edges.
- Light Test: Fill the tank with water and hold it over a dry paper towel or cloth. Watch for drips. For very small cracks, you might need to leave it for a few minutes.
- Sound Check: Gently tap the tank. A different sound in one area might indicate a structural weakness or crack.
- Base Check: Examine the bottom and sides of the base for any signs of damage.
A cracked water tank or base means you usually need a replacement part or a new humidifier. Repairing cracked plastic is often not effective for a watertight seal. This is a common issue that causes a Vicks humidifier to leak directly from its main components.
Deteriorated Gaskets and Seals
Humidifiers use rubber gaskets and seals to create watertight connections between different parts. The most critical seal is often found around the water tank’s valve. Over time, these rubber components can harden, crack, or become less pliable. This degradation prevents them from forming a tight seal. When a seal fails, water can seep past it.
- Locate Seals: Identify all rubber gaskets and seals, especially the one on the tank cap or valve.
- Check for Wear: Inspect them for cracks, hardening, flattening, or signs of discoloration.
- Test Elasticity: Gently try to stretch or compress the seal. If it feels brittle or does not spring back, it might be compromised.
If a seal is worn, replacing it is often a straightforward fix. Check the Vicks website or authorized parts distributors for replacement seals specific to your model. A faulty seal is a common culprit when your Vicks humidifier is leaking from the bottom.
Faulty Transducer or Heating Element
Some Vicks humidifiers use a transducer (ultrasonic models) or a heating element (warm mist models) to create mist. While these parts are not directly responsible for containing water, a malfunction can indirectly lead to leaks. For example, if a transducer is not vibrating correctly, it might cause water to accumulate excessively in the mist chamber rather than being converted into mist. This excess water can then overflow.
- Ultrasonic Transducer: Check if the transducer disc in the base is clean and intact. If it is severely encrusted with minerals or damaged, it might not atomize water efficiently.
- Warm Mist Heating Element: In warm mist models, a faulty heating element might not heat water quickly enough, leading to water accumulation and potential overflow.
- Professional Help: If you suspect an internal component like the transducer or heating element is faulty, it is usually best to contact Vicks customer support or a professional for repair or replacement. These are not typically user-serviceable parts.
Remember, issues causing leaks from the base are very common. It is crucial to address them promptly to avoid further damage. When trying to figure out why your Vicks humidifier is leaking from the bottom, these damaged components are certainly high on the list of potential causes.
Understanding Condensation and “Apparent” Leaks
Sometimes, what appears to be a leak from your Vicks humidifier is actually just condensation. This phenomenon is a natural result of how humidifiers operate. They release cool or warm mist into a room, increasing moisture levels. When this moist air encounters colder surfaces, it can cool down and turn back into liquid water. This water then collects on surfaces around the humidifier. I have often mistaken condensation for a true leak myself.
It is important to differentiate between actual leaks and condensation. A true leak means water is escaping directly from the humidifier’s internal system. Condensation means the humidifier is working as intended, but environmental factors are causing water to form outside the unit. Understanding this difference helps you troubleshoot effectively.
Excessive Room Humidity
If your room already has high humidity, adding more moisture from a humidifier can push it over the saturation point. When the air cannot hold any more water vapor, the excess moisture will condense into liquid water. This water will settle on nearby surfaces, including the humidifier itself, furniture, and walls. It can look exactly like a leak from the unit.
- Use a Hygrometer: A hygrometer measures room humidity. Aim for relative humidity levels between 30% and 50%.
- Adjust Output: If humidity is already high, lower your humidifier’s mist output setting.
- Ventilate: Open a window for a short period to allow some moist air to escape, especially in smaller rooms.
This is a common issue, especially if you have been running the humidifier for a long time or if the weather is naturally humid.
Cold Room Temperatures
The temperature of the room also plays a significant role in condensation. When the warm or cool mist from your humidifier comes into contact with cold air or cold surfaces, it loses heat quickly. This rapid cooling causes the water vapor to condense into liquid droplets. You might see these droplets forming on the mist nozzle, the top of the humidifier, or even on the floor directly beneath the mist output.
- Maintain Room Temperature: Try to keep your room at a comfortable and consistent temperature. Avoid very cold rooms when using a humidifier.
- Distance from Cold Surfaces: Place the humidifier away from cold windows, external walls, or drafty areas.
- Direct Mist Away: Ensure the mist output is not aimed directly at a wall, furniture, or other cold surfaces where condensation can easily form.
This is particularly true for cool mist humidifiers, as the mist is already cooler than room temperature.
Mist Output Direction
The direction and intensity of the mist output can directly contribute to localized condensation. If the mist is aimed downwards or directly at a nearby surface, the water particles do not have enough space or time to disperse evenly into the air. Instead, they quickly settle and condense in one spot. This creates a wet patch that resembles a leak. This can sometimes be related to why a humidifier might be spitting out water rather than producing a fine mist.
- Adjust Nozzle: If your Vicks humidifier has an adjustable mist nozzle, point it upwards or away from immediate surroundings.
- Clear Area: Ensure there is clear space around the humidifier for the mist to dissipate. Do not place it in a cramped corner.
- Elevate: Placing the humidifier on a slightly elevated surface can help the mist disperse more effectively before it falls.
By understanding these environmental factors, you can often solve “leaks” that are not actually a humidifier malfunction. This knowledge prevents unnecessary worry and helps you optimize your humidifier’s placement and settings for better performance.
Prevention and Regular Maintenance Steps
Preventing leaks in your Vicks humidifier is far easier than fixing them. Regular maintenance is not just about extending your appliance’s lifespan. It is also about ensuring it operates safely and efficiently. I have learned that a consistent cleaning schedule and careful handling make a huge difference in avoiding issues.
Adopting a routine of care for your humidifier will save you time, effort, and potential damage to your home. These simple steps can keep your Vicks humidifier working flawlessly. They ensure you get the benefits of humidified air without the mess of unexpected leaks.
Routine Cleaning Schedule
Mineral buildup and mold are leading causes of humidifier issues, including leaks. Establishing a regular cleaning schedule prevents these problems before they start. Minerals can block valves, and mold can create slimy residues that impede proper sealing. Cleaning ensures all components function as intended.
- Daily Rinse: Empty and rinse the water tank and base daily with fresh water.
- Weekly Deep Clean: At least once a week, perform a thorough cleaning.
- Descaling: Use a vinegar solution (equal parts white vinegar and water) to dissolve mineral deposits. Fill the base and tank with the solution, let it sit for 20-30 minutes, then rinse thoroughly.
- Disinfecting: For sanitization, use a bleach solution (1 teaspoon bleach per gallon of water) to wipe down surfaces. Let it sit for 10-15 minutes, then rinse repeatedly until no bleach smell remains.
- Dry Completely: Allow all parts to air dry completely before reassembling and storing the humidifier. This prevents mold growth.
Regular cleaning is the most important step you can take to prevent leaks and maintain your humidifier’s performance. For comprehensive cleaning instructions, refer to how to clean your Vicks humidifier.
Using Distilled Water
Tap water contains minerals like calcium and magnesium. These minerals are what create the white dust and hard water deposits that cause issues. Using distilled water virtually eliminates this problem. Distilled water has had these minerals removed, leading to significantly less buildup inside your humidifier. This simple change reduces the frequency of deep cleaning needed for mineral removal. It also extends the life of your humidifier’s components.
- Reduces Buildup: Distilled water prevents mineral scale from forming on the transducer, heating element, and seals.
- Fewer Clogs: With no minerals, there are fewer chances for mist nozzles and water channels to become blocked.
- Better Performance: Your Vicks humidifier will likely operate more efficiently and consistently without mineral interference.
While it is an extra cost, the benefits of using distilled water often outweigh the expense in terms of maintenance and longevity.
Careful Handling and Storage
How you handle and store your Vicks humidifier also impacts its susceptibility to leaks. Dropping the water tank or bumping the unit can cause unseen cracks. Improper storage during off-seasons can also lead to issues. Protecting the humidifier from physical damage is as important as cleaning it.
- Gentle Handling: Always handle the water tank and base with care. Avoid dropping or banging them against hard surfaces.
- Empty Before Moving: Never move a humidifier with water in it. Always empty the tank and base before relocating the unit.
- Proper Storage: When not in use for an extended period, thoroughly clean and dry your humidifier. Store it in its original box or a protective container in a cool, dry place. This protects it from dust and accidental damage.
- Regular Inspection: Before each use, quickly inspect the tank and base for any new cracks, loose parts, or worn seals.
By incorporating these preventative measures into your routine, you can significantly reduce the chances of your Vicks humidifier leaking. This ensures your appliance remains a reliable source of comfort and healthy air in your home.
FAQ Section
Q1: Can I use tap water in my Vicks humidifier without it leaking?
Yes, you can use tap water, but it often leads to mineral buildup, especially if your tap water is hard. This buildup can clog components and compromise seals, eventually causing leaks. Using distilled water significantly reduces mineral accumulation and the likelihood of leaks, extending your humidifier’s lifespan.
Q2: How often should I clean my Vicks humidifier to prevent leaks?
You should rinse the water tank and base daily. Perform a deep clean, including descaling and sanitizing, at least once a week. If you use hard water or notice visible mineral buildup, cleaning more frequently is advisable. Regular cleaning prevents clogs and seal issues that lead to leaks.
Q3: Is it safe to use a Vicks humidifier if it’s leaking a little?
No, it is not safe to use a Vicks humidifier that is leaking, even if it’s just a little. Leaking water can damage floors and furniture. It can also create electrical hazards if water reaches internal components. Unplug the unit immediately, identify the cause of the leak, and fix it before using the humidifier again.
Q4: How do I know if my Vicks humidifier tank is cracked?
Empty the tank and visually inspect its entire surface for hairline cracks, especially near seams or the bottom valve area. Fill the tank with water and place it over a dry cloth or paper towel to observe for any drips. Small cracks might only leak slowly, so leave it for a few minutes.
Q5: Can Vicks VapoPads cause a humidifier to leak?
Vicks VapoPads themselves do not typically cause a humidifier to leak water. VapoPads are designed to release soothing vapors. However, if the VapoPad tray becomes excessively clogged with residue or if the pad blocks air vents, it could potentially
- Vicks humidifier
- humidifier leaking
- water leak
- troubleshooting
- humidifier maintenance
- appliance repair
- home care


