· Katria Melrose · Home Appliances · 18 min read
Why Is My Kitchenaid Refrigerator Freezer Not Freezing
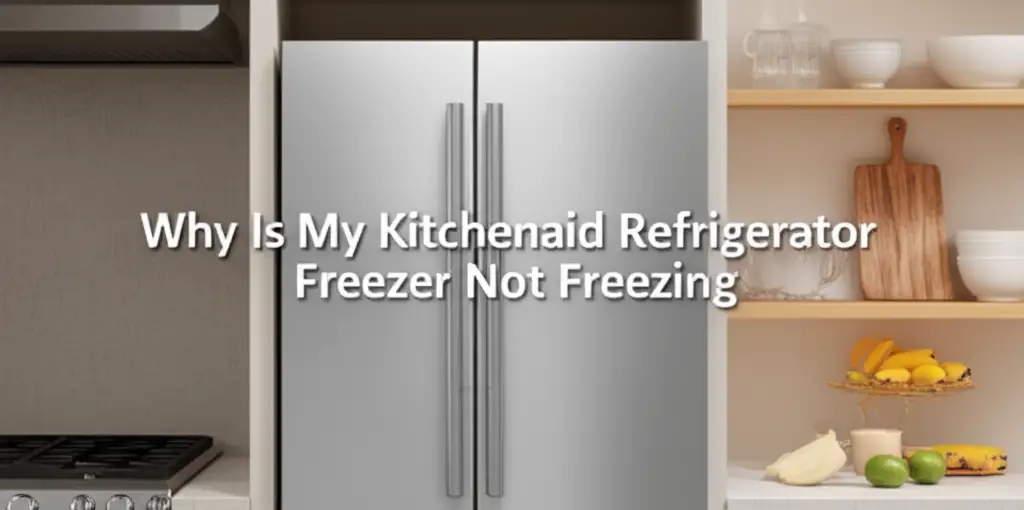
KitchenAid Refrigerator Freezer Not Freezing: Solutions
I understand your frustration. A KitchenAid refrigerator freezer not freezing can disrupt your home life. You count on this appliance to keep food safe. When it stops working right, frozen foods can thaw and spoil quickly. This problem affects many homeowners. It often signals underlying issues within the cooling system. I am here to help you understand common causes and find solutions. This article explains why your KitchenAid freezer may not freeze. It offers practical steps for diagnosis and repair.
Takeaway:
- Check temperature settings first.
- Inspect door seals for airtight closure.
- Clear frost buildup from the evaporator coils.
- Listen for fan noises; replace faulty fans.
- Clean condenser coils thoroughly.
- Consider professional help for sealed system issues.
Your KitchenAid refrigerator freezer is not freezing because of common issues. These include incorrect temperature settings, faulty defrost components, blocked air vents, or malfunctioning fan motors. Condenser coils or the compressor might also be at fault. Fixing the problem often involves simple checks or part replacements.
Understanding KitchenAid Refrigerator Cooling Basics
Your KitchenAid refrigerator operates using a vapor compression system. This system transfers heat from inside the freezer to outside. The main components are the compressor, condenser coils, evaporator coils, and an expansion device. Refrigerant circulates through these parts. It changes state from liquid to gas and back, absorbing and releasing heat.
The process begins with the compressor. It pressurizes the refrigerant gas. This increases its temperature. The hot, high-pressure gas then moves to the condenser coils. These coils are typically at the back or bottom of your refrigerator. Air flows over them. This cools the refrigerant, causing it to condense into a high-pressure liquid. A condenser fan often assists this cooling process. Keeping these coils clean is crucial for efficient operation. Dirty coils hinder heat dissipation. This makes the compressor work harder. For a related task, you can learn how to clean coils on GE Top Freezer Refrigerator.
Next, the liquid refrigerant passes through an expansion device. This component reduces the refrigerant’s pressure. The pressure drop causes the liquid to flash into a cold, low-pressure gas. This cold gas then enters the evaporator coils. These coils are inside your freezer compartment. The warm air from the freezer blows over these very cold coils. The refrigerant absorbs heat from the air. This cools the freezer compartment. The absorbed heat causes the refrigerant to evaporate into a gas. An evaporator fan circulates air over these coils. It distributes the cold air throughout the freezer. Finally, the refrigerant gas returns to the compressor. The cycle then repeats continuously.
Common Reasons for a KitchenAid Freezer Not Freezing
Several factors can cause your KitchenAid freezer to stop freezing food. Some issues are simple to fix yourself. Others may need professional service. I have seen many cases where a basic check solves the problem quickly. It is important to rule out the easy fixes first. This saves time and potential repair costs. For a broader understanding of cooling issues, you can also explore Why is my Frigidaire Refrigerator Not Cooling or Freezing?.
- Incorrect Temperature Settings: This is often overlooked. Your freezer may be set too high. Check the temperature dial or digital display. Most freezers should be set to 0°F (-18°C) or lower for optimal food preservation. If it is set higher, lower it and wait. It can take hours for the temperature to stabilize.
- Blocked Air Vents: Vents inside the freezer allow cold air to circulate. If these vents are blocked by food items or containers, air cannot flow. This prevents cold air from reaching all areas. Rearrange items to ensure clear airflow. Make sure nothing is pressing against the vents.
- Dirty Condenser Coils: Dust and debris accumulate on condenser coils. This acts as an insulator. It prevents heat from escaping the refrigerator. The compressor then runs hotter and works harder. This reduces cooling efficiency. Clean the coils regularly. They are usually under or behind the unit.
- Faulty Door Seals: Damaged or worn door gaskets allow warm air to enter the freezer. This warm, moist air increases the internal temperature. It also leads to excessive frost buildup. Test the seals by closing the door on a dollar bill. If you can pull the bill out easily, the seal is weak.
- Overloaded Freezer: Packing the freezer too full can restrict airflow. This prevents the cold air from circulating properly. It also increases the thermal load. The freezer struggles to cool the dense mass of food. Try to maintain some space around items. This allows air to move freely.
Troubleshooting Defrost System Issues in Your KitchenAid Freezer
The defrost system prevents ice buildup on the evaporator coils. If too much frost accumulates, it insulates the coils. This stops them from cooling the air. Your freezer then feels warm. A malfunctioning defrost system is a common reason for a KitchenAid freezer not freezing. If you notice a lot of ice inside the freezer, especially on the back wall, this system might be the culprit. Excessive frost can also make the freezer appear to freeze up. This is a related issue. Sometimes a freezer stops cooling because of ice. You can read more about it here: Why does my LG Refrigerator Keep Freezing Up?.
The defrost system consists of several parts:
- Defrost Heater: This electric heater melts frost from the evaporator coils. It turns on during defrost cycles. If it burns out, frost will accumulate continuously. You can test it for continuity with a multimeter. No continuity means it needs replacement.
- Defrost Thermostat: This component senses the temperature of the evaporator coils. It ensures the heater only turns on when coils are cold enough. It also cuts power to the heater when the frost is melted. A faulty thermostat might prevent the heater from activating. It can also cause the heater to run too long. This leads to overheating.
- Defrost Timer or Adaptive Defrost Control (ADC): Older models use a timer. It cycles the refrigerator between cooling and defrost modes. Newer KitchenAid models use an Adaptive Defrost Control board. This board monitors usage patterns. It adjusts defrost cycles as needed. If the timer or ADC fails, the defrost cycle may not occur. This leads to heavy frost.
Steps to diagnose defrost issues:
- Visually Inspect Evaporator Coils: Unplug the refrigerator. Remove the freezer’s back panel. Look at the evaporator coils. If they are covered in a thick layer of ice, the defrost system is likely failing.
- Test Components: Use a multimeter to test the defrost heater and defrost thermostat for continuity. Consult your KitchenAid model’s service manual for specific resistance values or test procedures.
- Manual Defrost: For a temporary fix, you can manually defrost your freezer. Unplug it for 24-48 hours with the doors open. Place towels on the floor to catch water. This melts all the ice. If the freezer works well after this but then fails again later, a defrost component is bad. Remember to clean the freezer after this process. You can find tips on how to clean freezer effectively.
Diagnosing Fan Motor Problems: Evaporator and Condenser Fans
Fan motors are crucial for proper air circulation and heat exchange in your KitchenAid refrigerator. There are two primary fans. Each plays a distinct role in keeping your freezer cold. If either fan stops working, your freezer’s ability to freeze food will be compromised. I often hear from homeowners who overlook these components. They are small but vital.
Evaporator Fan Motor: This fan is inside the freezer compartment. It draws air over the cold evaporator coils. It then circulates this chilled air throughout the freezer space. If the evaporator fan fails, cold air cannot reach your food. You may hear a distinct buzzing or grinding noise from inside the freezer. Or you may hear no sound at all from the fan when the compressor is running.
- Symptoms of a Faulty Evaporator Fan:
- Freezer is warm, but the refrigerator section might still be cold.
- No air movement felt when you open the freezer door.
- Unusual noises coming from the freezer’s back panel.
- Troubleshooting: Unplug the refrigerator. Access the evaporator fan, usually behind a panel at the back of the freezer. Spin the fan blades by hand. If they are stiff or do not spin freely, the motor bearings are bad. If the motor hums but the blades do not turn, the motor is failing.
- Symptoms of a Faulty Evaporator Fan:
Condenser Fan Motor: This fan is typically near the compressor and condenser coils, at the bottom rear of your refrigerator. Its job is to pull air over the condenser coils. This cools the hot refrigerant gas. It also cools the compressor itself. If the condenser fan motor fails, the compressor and coils overheat. This prevents proper heat dissipation. The refrigerator struggles to cool.
- Symptoms of a Faulty Condenser Fan:
- Freezer and refrigerator sections are both warm.
- Compressor runs constantly or cycles on and off quickly.
- Loud humming or buzzing from the back of the refrigerator.
- The compressor feels very hot to the touch.
- Troubleshooting: Unplug the appliance. Remove the rear access panel at the bottom. Visually inspect the condenser fan. Check for any obstructions around the fan blades. Spin the blades by hand. They should spin freely. If they are stiff or the motor does not run when the compressor is on, it needs replacement. Regularly cleaning the condenser coils helps the condenser fan work efficiently.
- Symptoms of a Faulty Condenser Fan:
Checking the Compressor and Refrigerant Levels
The compressor is the heart of your KitchenAid refrigerator’s cooling system. It pumps refrigerant through the coils. If the compressor fails, or if there is a problem with the refrigerant (sealed system issue), your freezer will not freeze. These issues are more complex. They often require a certified appliance technician. I advise caution when dealing with sealed system components. Refrigerant is a pressurized gas. It requires special handling.
Compressor Failure: A compressor can fail for several reasons. It may simply wear out over time. It can also overheat due to dirty condenser coils or a faulty condenser fan. When a compressor fails, you may hear a click, but the compressor does not start. Or, it may hum but not run properly. Sometimes, it runs continuously but produces no cooling.
- Symptoms:
- No cooling in either the refrigerator or freezer.
- Compressor is completely silent or makes a loud clicking sound without starting.
- The compressor runs continuously but the unit does not get cold.
- Diagnosis: Listen to the compressor. A working compressor will make a steady hum. If it cycles on and off frequently, or makes loud noises, it could be failing. A technician can test the compressor’s windings and starting components.
- Symptoms:
Refrigerant Leaks (Sealed System Issue): The refrigerant travels in a sealed system. A leak means refrigerant is escaping. This reduces the amount of coolant available to absorb heat. Even a small leak can significantly impact cooling performance. Identifying a leak is difficult without specialized tools.
- Symptoms:
- Gradual loss of cooling over time.
- The compressor runs constantly but struggles to cool.
- No visible signs of a problem, yet the freezer is warm.
- Sometimes, an oily residue near coils may indicate a leak.
- Diagnosis: A technician uses a leak detector to pinpoint leaks. If a leak is found, the system must be repaired and recharged with refrigerant. This is not a DIY task. It requires specific training and equipment. It also involves handling environmentally controlled substances.
- Symptoms:
If you suspect a compressor or refrigerant issue, do not attempt to repair it yourself. These repairs are complex. They can be dangerous. They often require specialized tools and certifications. It is best to contact a qualified KitchenAid service technician for these types of problems.
Assessing Door Seals, Gaskets, and Airflow Restrictions
Maintaining proper door seals and ensuring unobstructed airflow are critical for your KitchenAid freezer’s efficiency. These are often overlooked yet common causes of inadequate freezing. I always recommend checking these simple things first. They can save you money and time.
Damaged or Worn Door Seals (Gaskets): The door gasket forms an airtight seal when the freezer door is closed. This seal keeps cold air inside and warm, humid air out. Over time, gaskets can become brittle, cracked, or torn. Even a small gap allows warm air to infiltrate the freezer. This forces the compressor to work harder. It also leads to excessive frost buildup, which further hinders cooling.
- How to Check:
- Visual Inspection: Examine the entire gasket around the freezer door. Look for cracks, tears, deformities, or flattened spots.
- Dollar Bill Test: Close the freezer door on a dollar bill. Try to pull the bill out. If it slides out easily, the seal is compromised at that spot. Repeat this test around the entire door.
- Light Test: Place a flashlight inside the freezer at night. Turn off the room lights. If you see light escaping from anywhere around the door, the seal is not complete.
- Solution: Clean the gasket thoroughly with warm soapy water. Sometimes, debris can prevent a good seal. If the gasket is visibly damaged or fails the tests, it needs replacement. You can typically order a new gasket for your KitchenAid model and install it yourself.
- How to Check:
Airflow Restrictions: Refrigerators and freezers rely on consistent air circulation to distribute cold air. This air moves through vents and around food items. If this airflow is blocked, certain areas of the freezer will not get cold enough.
- Inside the Freezer:
- Over-packing: A freezer packed too tightly restricts airflow. Leave space between items and away from the back and sides.
- Blocked Vents: Food packages or ice can block air vents located on the back or sides of the freezer compartment. Ensure these vents are clear.
- Outside the Refrigerator:
- Clearance: Your KitchenAid refrigerator needs proper clearance from walls and cabinets. This allows heat to dissipate from the condenser coils. Check your owner’s manual for recommended clearances.
- Condenser Coils: As discussed before, dirty condenser coils hinder airflow and heat transfer. Keeping them clean is essential.
- Inside the Freezer:
If you have a side-by-side KitchenAid model, pay extra attention to both sections. Air can transfer between them. Issues in one section can impact the other. Sometimes, a freezing issue can be related to a problem that causes the freezer to over-freeze, which then blocks the proper flow of air. If you’ve had issues like Why is my Side by Side Refrigerator Freezing Up?, it can sometimes lead to subsequent cooling failures if frost builds up extensively.
Considering Electronic Control Board and Sensor Malfunctions
Modern KitchenAid refrigerators use sophisticated electronic components. These components control the cooling cycles, defrost operations, and temperature regulation. If the electronic control board or a sensor malfunctions, your freezer may not freeze properly. These issues are less common than mechanical failures. However, they can be difficult to diagnose without specific knowledge. I find that homeowners often overlook these parts. They can cause seemingly random cooling problems.
Temperature Sensors (Thermistors): Your KitchenAid freezer has thermistors. These are temperature-sensing devices. They monitor the temperature inside the freezer and refrigerator compartments. They send this information to the main control board. The control board uses this data to decide when to turn the compressor and fans on or off. If a thermistor is faulty, it can send incorrect temperature readings. For example, it might tell the control board the freezer is cold enough, even when it is not. This prevents the compressor from running long enough.
- Symptoms of a Faulty Thermistor:
- Inconsistent temperatures within the freezer.
- Compressor runs too little or too much.
- Error codes on the display (check your owner’s manual for code meanings).
- Diagnosis: A technician can test the thermistor’s resistance with a multimeter. The resistance changes with temperature. Comparing the reading to the manufacturer’s specifications will show if the thermistor is working.
- Symptoms of a Faulty Thermistor:
Main Control Board (PCB): The main control board is the brain of your KitchenAid refrigerator. It receives signals from sensors. It then sends commands to the compressor, fans, and defrost system. A faulty control board can cause a wide range of issues. These include erratic cooling, non-starting components, or complete system failure.
- Symptoms of a Faulty Control Board:
- Multiple components not working, with no clear single cause.
- Intermittent cooling problems.
- The display panel shows unusual behavior or no response.
- No power to certain components, even when other parts are working.
- Diagnosis: Diagnosing a control board issue is complex. It often involves checking power inputs and outputs. It also includes ruling out all other component failures. Sometimes, a visual inspection reveals burnt spots or damaged components on the board. However, this is not always the case. Replacing a control board is often a last resort after checking all other possibilities.
- Symptoms of a Faulty Control Board:
Resetting your refrigerator can sometimes fix minor electronic glitches. Unplug the unit for about 10-15 minutes. Then, plug it back in. This can sometimes clear temporary errors in the control board’s memory. If the problem persists after a reset, you will likely need a professional technician. They have diagnostic tools. They can accurately determine if a sensor or the control board is the problem.
DIY Fixes and When to Call a Professional
When your KitchenAid refrigerator freezer is not freezing, there are several things you can try yourself. I encourage you to attempt these steps. They often resolve common problems. However, know your limits. Some issues require expert knowledge and tools. Safety is paramount when working with appliances. Always unplug your refrigerator before performing any checks or repairs.
DIY Troubleshooting Steps:
- Check Power Supply:
- Ensure the refrigerator is plugged in firmly.
- Check the circuit breaker for your kitchen. Reset it if it has tripped.
- Test the outlet with another appliance to confirm it has power.
- Verify Temperature Settings:
- Locate the temperature controls inside your freezer and refrigerator.
- Set the freezer to 0°F (-18°C) or lower.
- Wait 24 hours for the temperature to stabilize before rechecking.
- Inspect and Clean Condenser Coils:
- Unplug the refrigerator.
- Locate the coils, usually at the bottom or back.
- Use a coil brush or vacuum cleaner with a brush attachment to remove dust and pet hair.
- Regular cleaning improves efficiency.
- Examine Door Gaskets:
- Clean the gaskets with warm, soapy water.
- Look for tears, cracks, or gaps. Perform the dollar bill test.
- If damaged, replacement gaskets are available.
- Clear Air Vents:
- Remove all items from the freezer.
- Ensure no food or ice blocks the air vents on the back or sides.
- Maintain space around food items for proper airflow.
- Listen for Fan Operation:
- Listen for the evaporator fan in the freezer when the compressor is running.
- Listen for the condenser fan at the back or bottom of the refrigerator.
- No sound or grinding noises indicate a potential fan motor issue.
- Perform a Manual Defrost:
- If you see excessive frost, unplug the unit for 24-48 hours. Keep doors open.
- Place towels to catch water.
- This temporarily clears ice buildup. If the problem returns, a defrost component is faulty.
When to Call a Professional:
You should contact a qualified appliance technician if:
- Compressor Issues: You hear no compressor hum, or it’s excessively loud, or it runs constantly with no cooling. These indicate sealed system problems.
- Refrigerant Leaks: If there’s a hissing sound, oily residue, or the unit gradually loses cooling without obvious cause. Refrigerant handling requires certification.
- Electrical Control Board/Sensor Malfunctions: If you have tested other components and suspect the main control board or a thermistor is faulty. These parts require precise diagnosis.
- Persistent Problems: You have tried all DIY steps, but your KitchenAid freezer still does not freeze.
- Lack of Tools or Expertise: You do not feel comfortable performing internal component tests or replacements.
- Safety Concerns: If you are unsure about any step or notice exposed wiring.
While some basic repairs are achievable, specialized sealed system work or control board diagnosis is best left to a professional. They have the training, tools, and experience to safely and effectively repair your KitchenAid appliance. They can ensure your freezer returns to optimal performance.
FAQ Section
Q1: How long does it take for a KitchenAid freezer to get cold after plugging in? A1: After plugging in a KitchenAid freezer, it typically takes 4 to 8 hours to reach a stable freezing temperature of 0°F (-18°C). If it was just defrosted, it might take a bit longer. Avoid placing food inside until the freezer reaches its target temperature to ensure proper preservation. Always allow adequate time for the system to stabilize.
Q2: Can a dirty freezer cause it not to freeze? A2: Yes, a dirty freezer can definitely affect its ability to freeze. Specifically, dirty condenser coils hinder heat dissipation, making the compressor work harder and reducing cooling efficiency. Also, excessive frost buildup on evaporator coils, often caused by a failing defrost system, insulates the coils and prevents cold air production.
Q3: Why is my KitchenAid refrigerator working but the freezer is not freezing? A3: If your KitchenAid refrigerator section is cold but the freezer is not freezing, the problem likely points to issues within the freezer compartment itself. Common culprits include a malfunctioning evaporator fan, a faulty defrost system (heater, thermistor, or timer), or blocked air vents preventing cold air circulation.
Q4: Is it normal for my KitchenAid freezer to build up ice? A4: A small amount of frost around the ice maker or door seals is normal. However, excessive or thick ice buildup on the back wall or evaporator coils is not normal. This usually indicates a problem with the defrost system or a faulty door seal letting in too much humid air. This requires investigation.
- KitchenAid refrigerator
- freezer not cold
- appliance troubleshooting
- defrost system


