· Katria Melrose · Home Appliances · 19 min read
Why Is My Levoit Humidifier Leaking From The Bottom
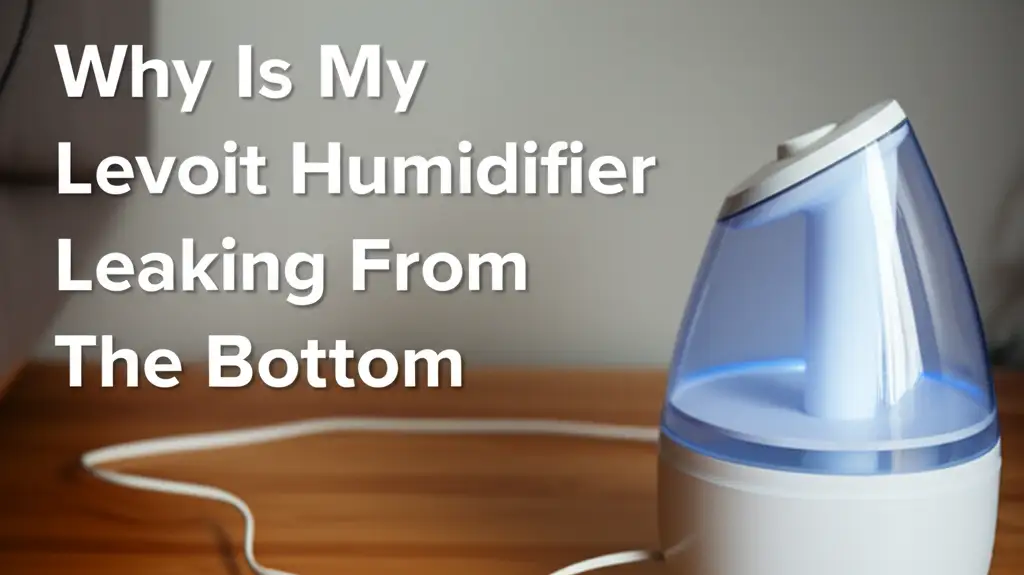
Fix Your Levoit Humidifier: Why It Leaks From The Bottom
A leaking humidifier can be a real headache. I understand your frustration when you see water pooling around your Levoit humidifier. It creates a mess and raises concerns about potential damage to your floors or furniture. You bought the humidifier for comfort, not for puddles.
A Levoit humidifier leaking from the bottom is a common problem, but often has simple solutions. Most leaks come from issues like improper tank placement, mineral buildup, or a damaged component. I am here to help you identify the specific cause of the leak. This article will guide you through common reasons for leaks and provide clear troubleshooting steps. We will also cover essential maintenance tips to prevent future issues. Let’s get your humidifier working properly again.
Takeaway
- Check Tank Seating: Ensure the water tank sits correctly on the base.
- Inspect for Cracks: Look for any damage on the water tank or base.
- Clean Regularly: Remove mineral buildup from the valve and ultrasonic disc.
- Avoid Overfilling: Do not fill the water tank past the maximum line.
- Use Distilled Water: This helps prevent mineral deposits.
A Levoit humidifier typically leaks from the bottom due to issues like an improperly seated water tank, cracks in the tank or base, clogged internal components from mineral buildup, or a faulty water valve. Addressing these common problems often resolves the leakage. Regular cleaning and proper assembly are key to preventing future leaks.
Understanding Levoit Humidifier Design and Operation
Levoit humidifiers are popular choices for improving indoor air quality. They add moisture to the air through a simple but effective process. Most Levoit models use ultrasonic technology to create a fine mist. This mist then disperses into your room, raising humidity levels.
The design of a Levoit humidifier includes a few main parts. You have the water tank, which holds the water. There is also a base unit that houses the electronic components. Inside the base, you will find an ultrasonic transducer and a fan. A small valve at the bottom of the water tank releases water into the base’s reservoir. The transducer vibrates at a high frequency, breaking water into a fine mist. The fan then pushes this mist out through the nozzle.
Water needs to flow smoothly from the tank to the base. Any disruption in this flow can cause problems. For example, if the tank does not sit properly, water can escape. If the valve does not close fully, water can continuously flow out. The design relies on sealed connections and precise component placement. Understanding these parts helps when you troubleshoot a leak. Knowing how water moves through the unit makes it easier to find where it escapes. This basic knowledge empowers you to solve common leaking issues.
Key Components of Your Levoit Humidifier
Your Levoit humidifier has specific parts that manage water. The water tank stores all the water before it becomes mist. It has a cap or a valve assembly at its base. This valve opens when the tank sits on the humidifier’s main body. The main body, or base, holds a small water reservoir. This reservoir feeds water to the ultrasonic transducer.
The transducer vibrates quickly, turning water into a fine mist. A float sensor is also in the base. It tells the humidifier when water levels are low. A fan inside the base pushes the mist up and out. All these components must work together perfectly to prevent leaks. The seals around the water tank and the valve are critical. If any of these parts are faulty or dirty, a leak can start.
Common Causes of Levoit Humidifier Leaks
Discovering a puddle under your Levoit humidifier is frustrating. Many different things can cause a leak. I want to help you pinpoint the exact reason. Identifying the cause is the first step to fixing the problem. Let’s look at the most common culprits.
One very common cause is improper tank placement. The water tank needs to sit perfectly on the base unit. If it is slightly off-kilter, the seal around the water outlet can break. This allows water to drip out from the bottom. I always recommend carefully aligning the tank grooves with the base. Give it a gentle twist or push to ensure a secure fit. A small misalignment can lead to a big mess.
Another frequent issue is a cracked water tank or base. Sometimes, a drop or impact can create tiny hairline cracks. These cracks might not be immediately visible, but they allow water to seep through. Inspect both the tank and the base thoroughly for any signs of damage. Pay close attention to seams and corners. Even a small crack can lead to a persistent leak.
Mineral buildup is a silent enemy of humidifiers. Hard water leaves mineral deposits over time. These deposits can clog the water valve at the bottom of the tank. They can also accumulate around the ultrasonic transducer or the float valve in the base. When the valve cannot close properly, water keeps flowing out. Buildup on the transducer can prevent proper misting, leading to water accumulation. Regular cleaning helps prevent this problem. For detailed guidance, learn how to clean a humidifier effectively.
Overfilling the water tank can also cause leaks. Humidifiers have a maximum fill line. Filling water above this line puts too much pressure on the internal components. It can also cause water to spill into areas not designed to hold it. This extra water then finds its way out through the bottom. Always respect the “max” fill line on your Levoit humidifier. Following this simple rule prevents many potential leaks.
Finally, a faulty water valve can be the problem. The valve inside the tank cap controls water release into the base. If this valve becomes worn, damaged, or stuck open, it will continuously leak. You might notice water escaping even when the tank is not on the base. In such cases, the valve itself might need replacement. Sometimes, just cleaning the valve thoroughly can solve the issue if mineral deposits are preventing it from sealing.
Identifying the Leak Source
Finding where the water comes from is crucial. Start by placing your humidifier on a dry towel. Fill the tank and place it on the base. Watch closely for where the first drops appear. If water leaks right away, it points to a problem with the tank or the valve. If it leaks after some time, the issue might be internal, like a clog.
Check the area where the tank connects to the base. This is a common leakage point. Feel around the edges for any wetness. Also, examine the underside of the base itself. This can help you narrow down the leak’s origin. A systematic approach helps save time and effort.
Troubleshooting Steps for a Leaking Levoit Humidifier
When your Levoit humidifier starts leaking, it is time to troubleshoot. Do not panic; many problems have easy solutions. I have broken down the steps to help you find and fix the leak. Follow these actions carefully to get your humidifier working properly again.
First, always start by unplugging your humidifier. Safety is paramount when dealing with electrical appliances and water. Empty the water tank and the base reservoir completely. This prevents further mess and allows you to inspect the unit without electrical risk. Once unplugged and emptied, you can begin the inspection.
The most common culprit is often the simplest: improper tank seating. The water tank must sit perfectly aligned on the base. Lift the tank off the base and then carefully place it back down. Ensure it clicks into place or sits snugly. Sometimes, a slight rotation can help it settle correctly. Wiggle it gently to confirm it is stable and secure. If the tank is not seated right, water will surely escape.
Next, inspect the water tank and base for any cracks or damage. Look closely at the bottom of the tank, especially around the water outlet. Also, examine the seams and corners of the base unit. Small hairline cracks can be hard to spot but allow water to seep through. If you find any significant cracks, the component might need replacement. Minor cracks can sometimes be sealed with waterproof adhesive, but tank replacement is often safer for water-holding components.
Mineral buildup is a significant cause of leaks. Hard water leaves behind white or yellowish deposits. These deposits can prevent the water valve at the bottom of the tank from sealing properly. They can also clog the float valve in the base. Remove the water tank and look inside the base reservoir. Check for any white crusty residue. If you find buildup, it is time for a thorough cleaning. I recommend cleaning your humidifier regularly to prevent this. For a comprehensive guide on keeping your unit clean, refer to instructions on how to clean your humidifier.
To clean mineral buildup effectively, you can use a vinegar solution. Mix equal parts white vinegar and water. Pour this solution into the base and let it sit for 30 minutes to an hour. You can also soak the tank cap and valve in the solution. Vinegar breaks down mineral deposits. After soaking, gently scrub any remaining residue with a soft brush or cloth. Rinse all parts thoroughly with clean water. Make sure no vinegar smell remains before refilling. For specific details on this method, learn how to clean your humidifier with vinegar.
Finally, check the float valve within the base. This small plastic piece usually floats up and down. It tells the humidifier when to stop drawing water from the tank. If it is stuck or covered in mineral deposits, it might not work correctly. This can cause the base to overfill, leading to leaks. Gently move the float valve to ensure it moves freely. Clean any mineral buildup around it. After performing these steps, reassemble your Levoit humidifier and test it. Monitor it closely for any signs of leakage before leaving it unsupervised.
Systematic Leak Detection
A methodical approach helps diagnose leaks faster. First, empty the unit completely. Then, fill only the water tank and place it on a dry surface away from the base. See if the tank itself leaks. If it does, the tank or its valve is the problem. If the tank holds water, place it carefully onto the base. Watch where the water begins to appear. Is it from the seam where the tank meets the base? Is it from under the base itself? Observing the exact leak point guides your repair. This process isolates the component causing the issue.
The Impact of Mineral Buildup and Hard Water
Hard water is a common issue in many homes. It contains high levels of dissolved minerals, primarily calcium and magnesium. While generally safe for consumption, hard water can be problematic for appliances that use water, like your Levoit humidifier. When this water evaporates, it leaves behind these mineral deposits. This white, crusty residue, often called “scale,” can accumulate over time. I have seen how this affects humidifiers.
Mineral buildup can severely impact your Levoit humidifier’s performance. It clogs the delicate components responsible for water flow and mist production. Specifically, the water valve at the bottom of the tank can get obstructed. When this valve cannot close properly due to scale, water continuously drips into the base, leading to overfilling and leaks from the bottom. The float sensor in the base, which controls water levels, can also get stuck. A stuck float sensor cannot signal the humidifier to stop drawing water, causing the base to overflow.
Furthermore, mineral deposits can coat the ultrasonic transducer. This is the part that vibrates to create mist. When covered in scale, the transducer cannot vibrate effectively. This reduces mist output and can cause water to pool in the base instead of being vaporized. This excess water then has nowhere to go but out through the bottom. The “white dust” you sometimes see around your humidifier is also a result of these minerals being dispersed into the air.
Preventing mineral buildup is crucial for your humidifier’s longevity and to prevent leaks. The best way to combat hard water effects is to use distilled water. Distilled water has had its minerals removed, eliminating the source of the problem. While it might be a small extra cost, it saves you from frequent cleaning and potential repairs. If distilled water is not an option, consider using demineralization cartridges if your Levoit model supports them. These cartridges help reduce mineral content in tap water.
Regular cleaning remains the most effective way to manage mineral buildup even with distilled water. I recommend cleaning your Levoit humidifier at least once a week, especially if you use tap water. This prevents scale from hardening and becoming difficult to remove. Focus on the water tank, the base reservoir, the water valve, and the ultrasonic disc. A solution of white vinegar and water is excellent for dissolving mineral deposits. For specific cleaning steps for your Levoit model, you can find detailed instructions on how to clean your Levoit 300S humidifier or general guidance on how to clean any humidifier. By actively preventing scale, you extend your humidifier’s life and avoid frustrating leaks.
Preventing Mineral Scale
Prevention is always better than cure when it comes to mineral scale. I always advise using distilled water in your humidifier. This simple change removes the source of mineral deposits entirely. If distilled water is not practical, consider using a demineralization cartridge if your Levoit model supports it. These cartridges filter minerals from tap water. Regular deep cleaning, as outlined in other sections, is also vital. Do not let scale build up; clean proactively.
Proper Maintenance to Prevent Leaks
Regular maintenance is key to a healthy, leak-free Levoit humidifier. Neglecting cleaning can lead to many problems, including leaks from the bottom. I want to share some vital maintenance tips that will keep your unit performing its best. Think of it as a small investment of time that saves you from bigger headaches.
First and foremost, establish a routine cleaning schedule. For daily users, a quick rinse of the water tank and base with fresh water is ideal every day. This prevents stagnant water and initial mineral buildup. Once a week, perform a more thorough cleaning. Disassemble the removable parts and give them a good scrub. Pay close attention to the water tank, the base reservoir, and the ultrasonic transducer. These are critical areas where minerals love to collect. For a complete weekly cleaning process, refer to guides like how to clean your Levoit 300S humidifier.
Descaling is an essential part of maintenance, especially if you use tap water. Mineral deposits, or scale, can clog valves and coat the ultrasonic disc, leading to inefficient operation and leaks. I recommend using white vinegar for descaling. Mix equal parts white vinegar and water, then pour it into the base. Let it sit for at least 30 minutes. You can also soak the water tank cap and any small, removable parts in the vinegar solution. The acid in vinegar dissolves mineral buildup effectively. After soaking, gently scrub stubborn areas with a soft brush or sponge. Rinse all components thoroughly with clean water until the vinegar smell is gone. This ensures no residual vinegar gets into your mist. For detailed instructions on this method, you can follow how to clean your humidifier with vinegar.
Always use the right type of water. As discussed earlier, distilled water is the best choice to prevent mineral buildup. If you must use tap water, be prepared for more frequent cleaning. Some Levoit models come with demineralization cartridges; replace these according to the manufacturer’s recommendations. These cartridges help reduce mineral content, lessening scale formation. Using filtered water might also help reduce the amount of minerals introduced into the unit.
Inspecting gaskets and seals regularly is another critical step. The rubber gaskets and seals around the water tank outlet and within the base wear out over time. Cracks or tears in these seals can allow water to escape. Gently inspect them for any signs of damage. If they appear worn, cracked, or loose, contact Levoit customer support for replacement parts. A compromised seal is a direct route for a leak.
When storing your humidifier, always ensure it is completely dry. Leaving water in the tank or base during storage promotes mold and mildew growth. It can also cause components to warp or deteriorate, leading to future leaks. Disassemble, clean, dry, and then store your Levoit humidifier in a cool, dry place. Proper storage extends its lifespan and ensures it is ready for use when you need it next. Following these maintenance tips will significantly reduce the chance of your Levoit humidifier leaking from the bottom.
Routine Cleaning Schedule
Maintaining a regular cleaning schedule prevents most humidifier issues. I suggest a quick daily rinse of the tank and base. This removes standing water and loose particles. Perform a deep clean weekly using a vinegar solution. This targets stubborn mineral deposits and prevents mold. Consistent cleaning keeps your humidifier efficient and leak-free. A clean unit works better and lasts longer.
When to Contact Levoit Support or Replace Your Humidifier
Sometimes, despite your best efforts, a leak persists. You have checked everything, cleaned every component, and ensured proper assembly. At this point, it is wise to consider reaching out for professional help or evaluating if it is time for a new unit. I understand the desire to fix things yourself, but some issues require specific solutions.
First, consider your Levoit humidifier’s warranty. Most Levoit products come with a one-year warranty. If your humidifier is still under warranty, contact Levoit customer support immediately. Provide them with detailed information about the issue. Explain the troubleshooting steps you have already taken. They might offer specific troubleshooting advice, send replacement parts, or arrange for a replacement unit. Attempting unauthorized repairs can void your warranty, so be mindful of this before taking things apart.
If your humidifier is out of warranty or you have exhausted all troubleshooting steps, assess the extent of the damage. For example, if you find a large crack in the water tank or the base unit that cannot be easily sealed, a replacement might be the most practical solution. Levoit may offer replacement parts like water tanks or caps, but sometimes the cost of parts plus your time can approach the price of a new unit. Weigh the cost of repair against the cost of a new humidifier.
Consider the age of your humidifier. Like all appliances, humidifiers have a lifespan. Components wear out, plastic can become brittle, and internal electronics can fail. If your Levoit humidifier is several years old and consistently giving you trouble, a new model might offer better efficiency and reliability. Newer models often have improved designs and features, making a replacement a worthwhile investment.
Signs that it might be time for a new humidifier include:
- Persistent leaks: Even after thorough cleaning and part inspection.
- Reduced mist output: Despite a full tank and clean components, it does not humidify effectively.
- Unusual noises: Grinding, rattling, or loud humming sounds.
- Electrical issues: Fuses tripping, unit not powering on consistently.
- Visible wear: Significant cracking, discoloration, or brittle plastic.
Contacting Levoit’s customer service can provide clarity. They have specialized knowledge of their products. They can offer specific diagnostic steps or tell you if a particular part is known to fail. Even if your warranty expired, they might offer discounted parts or advice. Making an informed decision, whether to repair or replace, saves you money and frustration in the long run. Sometimes, accepting that an appliance has reached the end of its life is the most practical choice.
Assessing Repair vs. Replacement
Deciding whether to repair or replace is a practical decision. Consider the repair cost versus a new unit’s price. If parts are expensive or hard to find, replacement often makes more sense. Also, think about the age of your humidifier. Older units might face more issues soon. A new humidifier can offer better features and reliability. Make the choice that saves you time and money in the long run.
FAQ Section
Q1: Why does my Levoit humidifier leak after cleaning? A Levoit humidifier can leak after cleaning due to several reasons. You might not have reassembled the water tank correctly onto the base. Check that the tank is seated firmly and aligned. Sometimes, stubborn mineral deposits are missed during cleaning, especially around the water valve or float sensor, preventing proper sealing. Ensure all parts are completely dry before reassembly to prevent water from simply running out.
Q2: Can I use tap water in my Levoit humidifier? You can use tap water in most Levoit humidifiers, but it is not ideal. Tap water contains minerals that can lead to white dust and mineral buildup (scale) inside the unit. This buildup can clog components and cause leaks over time. For best performance and to prevent leaks, I strongly recommend using distilled water. If tap water is your only option, plan for more frequent and thorough cleaning.
Q3: How often should I clean my Levoit humidifier to prevent leaks? I recommend cleaning your Levoit humidifier regularly to prevent leaks. If you use it daily, rinse the tank and base daily. Perform a thorough cleaning with vinegar at least once a week, especially if you use tap water. This schedule prevents mineral buildup and mold growth, which are common causes of leaks and poor performance. Consistent maintenance is key.
Q4: Is a leaking humidifier dangerous? A leaking humidifier can pose several risks. Water pooling around the unit can damage furniture, flooring, or carpets. It also creates a slip hazard. More importantly, water near electrical components presents an electrical shock risk. Prolonged dampness can also encourage mold and mildew growth. Always unplug a leaking humidifier immediately and address the issue before further use.
Q5: Where can I find replacement parts for my Levoit humidifier? You can usually find replacement parts for your Levoit humidifier directly from Levoit’s official website. They often sell water tanks, tank caps, and demineralization cartridges. Online retailers like Amazon might also carry genuine or compatible parts. If you are unsure which part you need, contact Levoit customer support. Provide them with your humidifier model number for accurate assistance.
Conclusion
A leaking Levoit humidifier can certainly disrupt your comfort and peace of mind. We have explored the most common reasons why your Levoit humidifier might be leaking from the bottom. Issues often stem from simple problems like improper tank seating or accumulated mineral buildup. Addressing these concerns often brings a quick resolution to the leak. I hope these insights help you quickly diagnose and fix your unit.
Regular maintenance is not just a suggestion; it is a necessity for your humidifier’s health. Consistent cleaning, especially descaling with vinegar, prevents mineral deposits from wreaking havoc. Using distilled water can also significantly extend your humidifier’s lifespan and reduce leak risks. By being proactive with care, you keep your air healthy and your floors dry. If you have tried all the troubleshooting steps and the leak persists, consider contacting Levoit customer support. They can provide specific guidance or help with warranty claims. Remember, a well-maintained Levoit humidifier provides excellent comfort for years to come.
- Levoit humidifier leaking
- humidifier troubleshooting
- humidifier repair
- leaking humidifier fix
- Levoit humidifier maintenance
- bottom leak
- water leakage

Katria Melrose
Cleaning Specialist
With over 12 years of experience in commercial cleaning and a certification in workplace ergonomics, I’ve developed a deep understanding of what makes a workspace truly productive. At HEG, I specialize in helping people transform their home offices into clean, efficient, and comfortable environments. Through smart cleaning routines and strategic organization solutions, I empower readers to create spaces that support focus, comfort, and success—one well-organized desk at a time.