· Katria Melrose · Appliance Repair · 19 min read
Why Is My Whirlpool Side By Side Refrigerator Leaking Water From The Bottom
Troubleshooting Your Whirlpool Side-by-Side Refrigerator Leaking Water
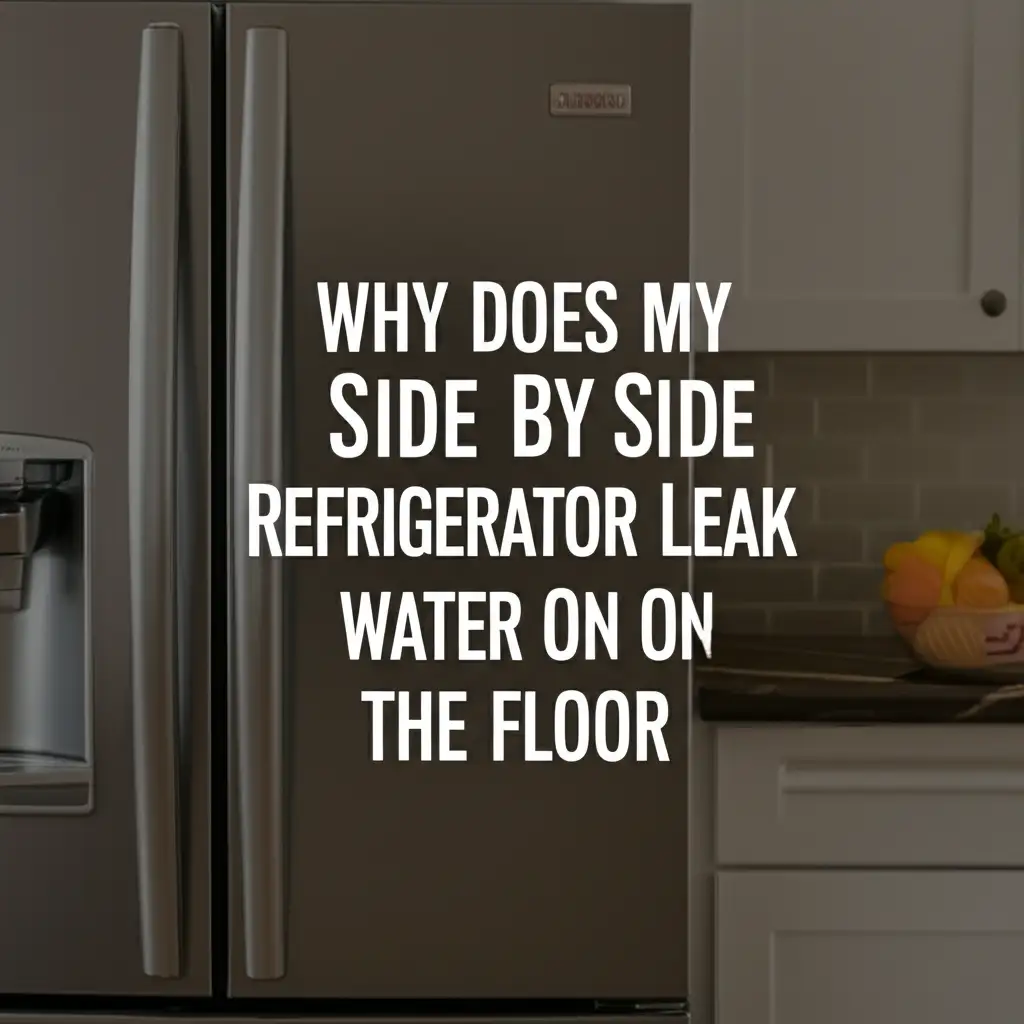
Finding a puddle under your refrigerator is never a welcome sight. When your Whirlpool side-by-side refrigerator starts leaking water from the bottom, it signals an issue needing immediate attention. This common appliance problem can cause floor damage or even create a slipping hazard. It also suggests your refrigerator may not work as it should.
This article will help you understand why your Whirlpool side-by-side refrigerator leaks water. We will explore the common reasons for these leaks. You will learn how to diagnose the problem. We will also provide step-by-step solutions for various issues. Our guide helps you get your appliance back in working order.
Takeaway
- Identify the Source: Pinpoint where the water originates from (e.g., defrost drain, water valve, drain pan).
- Clear Blockages: Address clogged defrost drains or ice build-ups.
- Inspect Water Connections: Check the water supply line and inlet valve for damage or loose fittings.
- Maintain Regularly: Clean coils, check seals, and ensure proper leveling to prevent future leaks.
- Call a Pro: Seek professional help for complex issues or if basic troubleshooting does not work.
A Whirlpool side-by-side refrigerator leaks water from the bottom due to common issues. These include a clogged defrost drain line, a damaged water inlet valve or supply line, or an overflowing drain pan. Ice maker problems, faulty water filter housing, or improper leveling can also cause leaks. Identifying the exact source is key to a solution.
Understanding Common Causes of Whirlpool Refrigerator Leaks
A leaking refrigerator can be frustrating. Many reasons can cause your Whirlpool side-by-side refrigerator to leak water from the bottom. Knowing these common causes helps you pinpoint the problem quickly. Each component plays a role in keeping water inside the appliance.
Clogged Defrost Drain Line
This is a very common cause of leaks. Your refrigerator has a defrost cycle. During this cycle, ice on the evaporator coils melts. The water flows down a drain line. This drain line leads to a drain pan under the fridge. If food particles or ice block this drain line, water cannot pass. It then overflows inside the freezer compartment. The water eventually drips down and collects under the refrigerator.
Frozen Evaporator Coils
Sometimes, the defrost system fails. This causes ice to build up excessively on the evaporator coils. This ice can extend beyond the normal defrost area. When this large amount of ice melts, the drain line may not handle the volume. Water can then spill over the drain pan. This water flows to the bottom of the unit. Excessive frost also makes your refrigerator work harder.
Damaged Water Inlet Valve
The water inlet valve connects your home’s water supply to the refrigerator. This valve controls the water flow to the ice maker and water dispenser. If this valve cracks, wears out, or becomes loose, it will leak water. This leak usually appears at the back or bottom of the refrigerator. You might see a slow drip or a more steady stream of water.
Cracked Water Supply Line
Your refrigerator needs water for the ice maker and dispenser. A plastic or copper supply line delivers this water. This line runs from your home’s water pipe to the refrigerator’s water inlet valve. Over time, this line can crack, crimp, or become loose. A damaged supply line will cause water to drip. This water often runs along the line to the bottom of the appliance. Always check for visible signs of wear.
Overflowing Drain Pan
The drain pan sits at the bottom of your refrigerator. It collects water from the defrost cycle. This water normally evaporates over time. If the drain pan gets cracked or moves out of place, water can leak out. A severe clog in the drain line can also make the pan overflow before the water evaporates. This creates a puddle. You might need to clean the area under the refrigerator to access it. Learn how to clean under a refrigerator for better access and maintenance.
Faulty Water Filter Housing
Many Whirlpool side-by-side refrigerators have an internal water filter. This filter improves water quality. The filter sits in a housing unit. If the filter is not installed correctly, or if the housing itself cracks, water can leak. This leak often occurs when you change the filter. Always ensure the filter is securely seated. Make sure the O-rings are in good condition. You can also learn how to clean refrigerator water dispenser mold if you notice any associated issues.
Improper Refrigerator Leveling
A refrigerator needs to be level to work properly. If your appliance tilts too much, water may not flow correctly into the drain pan. Instead, it can spill out. You might notice the leak happening in specific spots around the bottom. Use a level tool to check your refrigerator’s balance. Adjust the leveling feet as needed to ensure stability.
Condensation Build-Up
Sometimes, a refrigerator leaks due to excessive condensation. This happens if the door seals are faulty or if the door is left open too often. Warm, moist air enters the refrigerator. This moisture condenses and turns into water droplets. If too much water builds up, it can overflow internal channels. It will then find its way to the bottom. Checking your seals is a simple step to prevent this. You can check for leaks by examining your refrigerator door seals.
Diagnosing the Exact Source of Your Whirlpool Side-by-Side Refrigerator Leak
Finding the exact spot of the leak is the first step to fixing it. A small puddle on the floor can indicate a bigger problem. Different leak locations suggest different issues. A systematic approach helps you find the true cause.
Observe the Leak Location
Look closely at where the water collects. Does it appear at the front, back, or sides of the refrigerator? A leak at the front often points to a clogged defrost drain or an overflowing drain pan. Water at the back might mean a problem with the water supply line or inlet valve. Observing the exact puddle helps narrow down possibilities. Note the size of the puddle.
Check the Back of the Refrigerator
The back of your Whirlpool side-by-side refrigerator houses important components. Unplug the refrigerator first for safety. Pull the refrigerator away from the wall. Inspect the water supply line connecting to the inlet valve. Look for kinks, cracks, or loose fittings. Also, check the inlet valve itself for any drips. You might see mineral deposits if there has been a slow leak over time. Ensure all connections are tight.
Inspect Inside the Freezer Compartment
Open the freezer door. Look for ice buildup on the back wall or floor of the freezer. Excessive frost suggests a defrost problem. If you see ice overflowing into the bottom of the freezer, the defrost drain is likely clogged. Use a flashlight to see into the drain hole if possible. You might also notice water collecting under the crisper drawers inside the fridge section. This can be another sign of a clogged drain.
Examine the Water Dispenser and Ice Maker Area
If your Whirlpool side-by-side refrigerator has an ice maker and water dispenser, check them. These components use water directly. Look for leaks around the water filter housing. Ensure the filter is seated correctly. Check the water lines going to the ice maker for any signs of damage or loose connections. A cracked ice maker fill tube can also cause leaks inside the freezer compartment. Learn how to clean refrigerator ice maker water line to prevent future issues. Also, regular cleaning of the ice maker can prevent buildup that leads to leaks. Learn how to clean refrigerator ice maker for more details.
Look for External Damage
Sometimes, the leak source is simpler. Check the exterior of the refrigerator. Look for any visible damage to panels or seals. Confirm the refrigerator is level. Uneven leveling can cause water to flow incorrectly. Use a spirit level to check the top of your refrigerator. Adjust the leveling feet until the appliance sits flat and stable. Even minor tilts can redirect defrost water.
Step-by-Step Fixes for a Clogged Defrost Drain
A clogged defrost drain is a common culprit for Whirlpool side-by-side refrigerator leaks. Fixing this issue usually involves clearing an obstruction. This process is straightforward. You can often do it yourself.
Safely Accessing the Drain Line
First, unplug your Whirlpool refrigerator from the power outlet. This prevents electric shock. Locate the drain pan at the bottom back of the refrigerator. You may need to remove a rear access panel. Use a screwdriver for this. Inside the freezer, you will find the evaporator cover. This is usually at the back. Remove it to expose the evaporator coils. The drain hole is typically directly below these coils. It will lead to the drain line. You might also see a small drain tube visible in the back if you look from the outside.
Clearing the Obstruction
Once you locate the drain hole, you need to clear any blockage. You can use a turkey baster or a syringe with warm water. Gently squirt warm water into the drain hole. This helps melt any ice blockages. You can also use a small, flexible wire or a pipe cleaner. Carefully push it down the drain tube. This dislodges any food debris or ice that has built up. Do not use sharp objects that could puncture the tube. For persistent clogs, a mixture of warm water and a small amount of baking soda can help. This mixture breaks down organic material. It also helps to freshen the drain line. Once clear, water should flow freely into the drain pan.
Preventing Future Clogs
After clearing the drain, take steps to prevent future clogs. Regular cleaning is important. Wipe down the freezer interior to remove food crumbs. These crumbs can fall into the drain. Avoid storing food directly against the back wall of the freezer. This can cause excess condensation and ice buildup. You can also pour a small amount of warm water mixed with baking soda down the drain hole every few months. This helps keep it clear. Additionally, ensure your refrigerator door seals are clean and tight. This prevents warm, moist air from entering and creating excess frost. A clean refrigerator works better. Learn how to clean the refrigerator for complete care. Also, maintaining a clean area under your refrigerator helps prevent debris from accumulating near the drain pan. Remember to also learn how to clean under a refrigerator for the best results.
Addressing Water Inlet Valve and Supply Line Issues
Problems with the water inlet valve or supply line can cause significant leaks. These components control the flow of water to your Whirlpool side-by-side refrigerator’s ice maker and dispenser. Identifying and addressing issues here is crucial.
Checking the Water Inlet Valve
The water inlet valve is usually at the back bottom of your Whirlpool refrigerator. First, turn off the water supply to the refrigerator. Unplug the appliance from the wall outlet. Carefully pull the refrigerator away from the wall to access the back. The valve connects to the main water line from your house. Look for any visible cracks on the valve body. Check for water drips around the valve itself or its connections. Sometimes, mineral deposits or rust indicate a slow leak that has been present for some time. You can tighten connections if they appear loose.
Inspecting the Water Supply Line
The supply line delivers water from your home’s plumbing to the water inlet valve. This line is often made of plastic or braided stainless steel. Inspect the entire length of the supply line. Look for kinks, pinholes, or obvious cracks. Pay close attention to the areas where the line bends or connects to fittings. If the line is plastic, it can become brittle over time. This makes it prone to cracking. A small leak in the supply line can lead to a large puddle over time. You might feel moisture along the line or see drips.
Replacing Components
If you find a damaged water inlet valve or supply line, replacement is often the best solution. You can purchase replacement parts from appliance supply stores or online. For the water inlet valve, disconnect the water supply and electrical wires. Then, unmount the old valve and install the new one. Ensure all connections are secure. For the supply line, simply unhook the old line and connect the new one. Always use new compression fittings if needed for a tight seal. After replacement, slowly turn on the water supply. Check for any leaks immediately. This prevents water damage to your home. Consider also checking and cleaning your water dispenser regularly to prevent other water-related issues. Learn how to clean refrigerator water dispenser mold to keep it in top condition.
Solutions for Drain Pan and Condensation Problems
The drain pan and condensation are crucial parts of your Whirlpool side-by-side refrigerator’s water management system. Issues with either can lead to leaks. Addressing these problems helps maintain a dry floor and efficient operation.
Emptying and Cleaning the Drain Pan
The drain pan is located under the refrigerator, usually behind a removable kick plate or a rear access panel. It collects water from the defrost cycle. This water normally evaporates. If the pan is full or cracked, it can cause leaks. First, unplug your refrigerator for safety. Carefully slide the pan out. Be aware that it may contain water. Empty the pan and clean it thoroughly with warm, soapy water. Remove any debris, mold, or mildew. Rinse it well. A dirty drain pan can smell bad and prevent proper evaporation. Ensure the pan is not cracked. If it is, you need to replace it. Once clean, slide it back into its correct position. Make sure it sits level and secure.
Improving Refrigerator Seal
A faulty door seal allows warm, humid air into your refrigerator. This causes excessive condensation. The condensation forms as water droplets inside the fridge and freezer compartments. If too much water builds up, it can overflow the internal drainage system. This leads to leaks from the bottom. Check your refrigerator door seals for cracks, tears, or gaps. You can do a simple paper test: close the door on a dollar bill. If you can pull the bill out easily, the seal is not tight. Clean the seals regularly with warm, soapy water. This removes sticky residues that can prevent a proper seal. If the seals are damaged, replace them. Learn how to clean refrigerator seals for best results. Good seals help your refrigerator run more efficiently and prevent condensation-related leaks.
Ensuring Proper Airflow
Proper airflow inside and around your refrigerator helps manage condensation and overall performance. When air circulates well, the defrost system works efficiently. This prevents excessive ice buildup. Make sure nothing blocks the refrigerator’s vents inside the freezer and fresh food compartments. Do not overpack your refrigerator. This restricts airflow and can lead to temperature fluctuations. These fluctuations cause more condensation. Also, ensure there is enough space around the exterior of the appliance. This allows the condenser coils to dissipate heat. Dirty condenser coils make your refrigerator work harder. This can lead to more condensation and defrost issues. Clean the coils regularly. Learn how to clean refrigerator coils effectively to maintain proper airflow. This helps prevent many common refrigerator problems, including leaks.
Maintaining Your Whirlpool Side-by-Side to Prevent Leaks
Regular maintenance is key to preventing your Whirlpool side-by-side refrigerator from leaking. Proactive steps can save you time, money, and hassle. A well-maintained appliance works more efficiently and lasts longer.
Regular Cleaning Schedule
Clean your refrigerator regularly, inside and out. This includes wiping down shelves and drawers. Remove any food spills or crumbs. Food particles can fall into the defrost drain and cause clogs. Clean the interior walls to prevent mildew growth. Pay special attention to the drain hole in the freezer. Pour a small amount of warm water down it periodically to keep it clear. Cleaning also includes the exterior. Wipe down surfaces. This keeps the appliance looking good. It also helps prevent dust and grime from interfering with components. Learn how to clean the refrigerator for a thorough guide.
Checking Water Connections Periodically
Your Whirlpool side-by-side refrigerator relies on water connections for its ice maker and dispenser. Make it a habit to check these connections a few times a year. Pull the refrigerator away from the wall. Inspect the water supply line for any visible kinks, cracks, or signs of wear. Feel along the line for any moisture. Tighten any loose fittings on the supply line and the water inlet valve. A small drip can become a significant leak quickly. Ensure the connection to your home’s water supply is secure. This simple check can prevent serious water damage to your floors.
Proper Refrigerator Leveling
A refrigerator must be level to function correctly. If it tilts, water from the defrost cycle might not flow correctly into the drain pan. It can then overflow. Use a spirit level to check the top of your refrigerator. If it is not level, adjust the leveling feet at the bottom. Most refrigerators have two adjustable feet at the front. You can turn them to raise or lower each side. Ensure the appliance is stable and does not wobble. Proper leveling also helps the doors seal tightly. This prevents warm air from entering and creating excess condensation.
Timely Filter Replacement
If your Whirlpool side-by-side refrigerator has a water filter, replace it as recommended by the manufacturer. This is usually every six months. An old or clogged water filter can restrict water flow. It can also cause pressure issues within the water lines. In rare cases, this pressure can lead to leaks around the filter housing or connections. When replacing the filter, ensure it is installed correctly. Make sure it is fully seated and locked into place. Listen for the click. A poorly installed filter can leak water immediately. Replacing the filter on time ensures clean water. It also helps prevent potential leaks.
When to Call a Professional Appliance Repair Technician
While many refrigerator leaks are fixable with DIY methods, some situations require professional help. Knowing when to call a technician can save you time, effort, and potentially more damage.
Complex Repairs Beyond DIY Skills
Some refrigerator components are complex or hard to access. If the leak comes from inside the sealed refrigeration system, it needs specialized tools and knowledge. Issues with the compressor, condenser, or evaporator coils often fall into this category. These parts contain refrigerants. Handling them requires specific certifications. If your diagnosis points to these internal components, it is best to consult an expert. Trying to fix complex parts without proper training can cause more damage. It can also be dangerous.
Persistent or Unidentified Leaks
You have tried all the common troubleshooting steps. You have cleaned the drain line, checked the water connections, and inspected the drain pan. Despite your efforts, your Whirlpool side-by-side refrigerator continues to leak water from the bottom. This indicates a hidden problem. It could be a subtle crack in a water line you missed or an intermittent issue with a valve. A professional technician has diagnostic tools. They can identify problems that are not obvious. They can also access parts that are difficult for a homeowner to reach.
Warranty Considerations
Before attempting any major repairs yourself, check your Whirlpool refrigerator’s warranty. Many manufacturers offer warranties on parts and labor for a certain period. Performing DIY repairs, especially complex ones, might void your warranty. If your refrigerator is still under warranty, calling a certified Whirlpool service technician is often the best choice. They can perform the repair without voiding your coverage. This ensures you do not incur unexpected costs later. They also use genuine parts.
FAQ Section
Q: Why is my Whirlpool refrigerator leaking water from the bottom but not from the dispenser?
A: If your Whirlpool refrigerator leaks from the bottom but the dispenser works, the issue is likely not the dispenser line itself. Common causes include a clogged defrost drain, an overflowing drain pan, or a faulty water inlet valve at the back. It could also be a cracked internal water line not connected to the dispenser.
Q: How do I unclog the defrost drain in my Whirlpool side-by-side?
A: To unclog the defrost drain, first unplug the refrigerator. Remove the freezer’s back panel to find the drain hole. Use warm water in a turkey baster or a flexible wire to clear the blockage. You can also pour warm water down the exterior drain tube at the back.
Q: Is a refrigerator leak dangerous?
A: A refrigerator leak is not directly dangerous in terms of health risks, but it can cause significant property damage. Prolonged leaks can damage flooring, subflooring, and baseboards. They can also create slipping hazards and promote mold growth. Electrical hazards are also possible if water reaches electrical components or outlets.
Q: How often should I clean my refrigerator drain pan?
A: You should inspect and clean your refrigerator drain pan at least once or twice a year. If you notice any odors or excessive water buildup, clean it more often. Regular cleaning prevents mold and mildew growth and ensures proper water evaporation.
Q: Can a faulty water filter cause a Whirlpool refrigerator to leak?
A: Yes, a faulty or improperly installed water filter can cause your Whirlpool refrigerator to leak. If the filter housing cracks, or if the O-rings are damaged, water can drip. Ensure the filter is correctly seated and twisted into place.
Q: What is the average lifespan of a Whirlpool side-by-side refrigerator?
A: A Whirlpool side-by-side refrigerator generally lasts 10 to 13 years. With good maintenance, some models can last even longer. Regular cleaning, timely repairs, and proper care help extend its operational life significantly.
Conclusion
Discovering your Whirlpool side-by-side refrigerator leaking water from the bottom can be worrying. We explored the common culprits behind these leaks. We discussed issues like clogged defrost drains and damaged water lines. We also covered problems with the water inlet valve and drain pan. You now have steps to diagnose and fix many of these problems.
Many refrigerator leaks are simple to fix with basic tools and some patience. Regular maintenance is key to preventing future leaks. By keeping your drain lines clear and checking water connections, you can avoid many common issues. Remember to clean your refrigerator coils and seals. If the leak persists, or if you feel unsure about the repair, call a professional. Appliance technicians have the skills and tools to handle complex problems. Taking action quickly saves you from further damage. It also keeps your Whirlpool refrigerator running well for years.
- Whirlpool refrigerator
- refrigerator leak
- side-by-side fridge
- appliance repair
- DIY repair
- water leak
- defrost drain
- water inlet valve


