· Katria Melrose · Appliance Repair · 22 min read
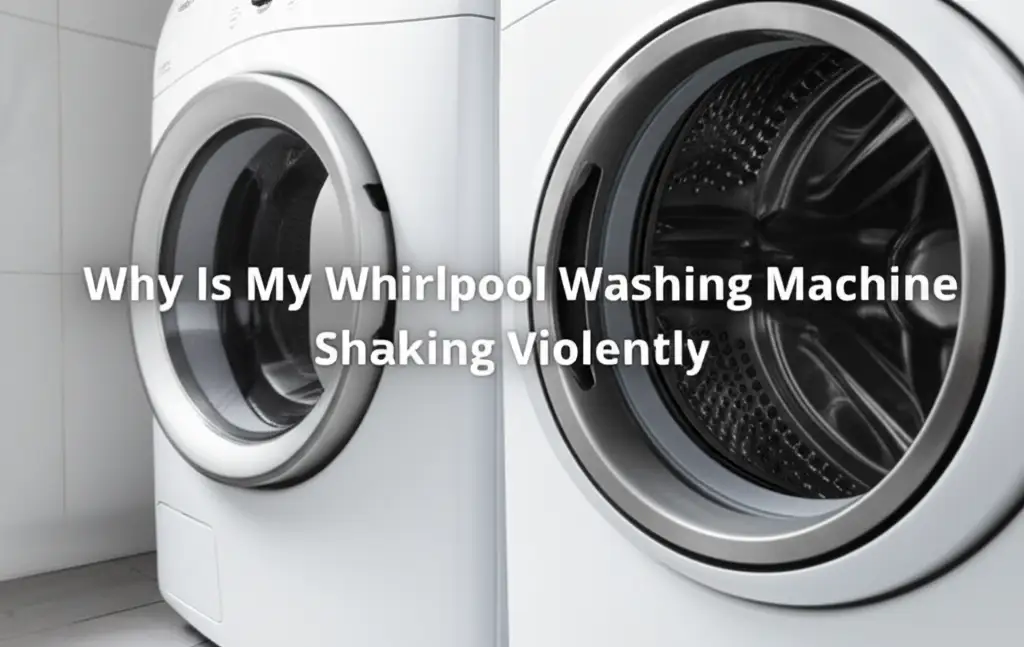
Why Is My Whirlpool Washing Machine Shaking Violently
Whirlpool Washing Machine Shaking? Here’s Why It Happens
Have you ever walked into your laundry room and heard what sounds like a small earthquake? My Whirlpool washing machine has certainly given me a fright or two with its violent shaking during a spin cycle. This common issue is not just annoying; it can actually damage your appliance or even your home. When your Whirlpool washing machine is shaking violently, it signals a problem that needs attention.
Understanding the root cause helps you fix it quickly. This guide will walk you through the most common reasons why your Whirlpool washer might be vibrating excessively. We will cover simple fixes, deeper issues, and when it is time to call a professional. Let’s make your laundry routine peaceful again.
Takeaway
- Balance the Load: Always distribute clothes evenly in the drum.
- Level the Machine: Ensure all four feet sit firmly on the floor.
- Inspect Suspension: Check springs and shock absorbers for wear.
- Examine Bearings: Listen for grinding noises; bad bearings cause severe shaking.
- Clear Drain Path: Ensure the drain pump and hose are free from blockages.
- Professional Help: Call a technician for complex internal component issues.
Why does my Whirlpool washing machine shake violently?
A Whirlpool washing machine often shakes violently due to an unbalanced load, improper leveling, or worn suspension components. The machine’s internal parts, such as the drum bearings, drive motor, or drain pump, can also cause excessive vibration if they are faulty or obstructed. Addressing these common issues quickly helps restore quiet operation.
Understanding Excessive Washer Vibrations: What’s Normal?
When a washing machine runs, some vibration is normal, especially during the high-speed spin cycle. The drum rotates very fast to remove water from clothes. This action naturally creates movement. However, “shaking violently” goes beyond normal operation. It often means your machine is not distributing the force evenly.
A healthy washing machine should hum and vibrate gently. You should not hear loud banging noises or see the machine move across the floor. If your Whirlpool washing machine is shaking violently, it indicates a problem that needs immediate attention. Ignoring it can lead to bigger repairs or damage to your floor.
Identifying the Severity
How do you know if the shaking is too much? Observe your washer during the spin cycle. Does it walk across the floor? Do you hear loud banging against the sides of the cabinet? Is the entire house shaking? These are all signs of excessive vibration.
Violent shaking can arise from simple things, like an uneven load of laundry. It can also point to more serious mechanical failures within the washer. We will explore each potential cause in detail. This helps you narrow down the problem and find the right solution.
Unbalanced Loads and Overloading: Common Causes of Violent Shaking
One of the most frequent culprits behind a violently shaking Whirlpool washing machine is an unbalanced load. Imagine trying to spin a lopsided bicycle wheel; it would wobble out of control. Your washer’s drum behaves similarly. When clothes clump together on one side, the drum’s weight distribution becomes uneven. As the drum spins at high speeds, this imbalance creates significant centrifugal force. The machine then struggles to stabilize itself, leading to severe shaking and loud banging noises.
Overloading your washing machine also contributes to this problem. Stuffing too many items into the drum does not leave enough space for clothes to tumble freely. This makes it impossible for the machine to properly distribute the weight. The washer’s sensors might detect the imbalance and try to re-distribute the load by stopping and starting again. If it fails, the spin cycle proceeds with the imbalanced weight, causing intense vibrations.
How to Prevent and Fix Load Issues
- Load Evenly: Always distribute clothes loosely and evenly around the agitator or drum. For front-loaders, avoid packing items tightly. For top-loaders, place items around the center.
- Avoid Overloading: Refer to your Whirlpool washer’s manual for its capacity. Generally, the drum should be no more than three-quarters full. Leave enough space for clothes to move.
- Wash Similar Items Together: Avoid washing a single heavy item, like a duvet or bath mat, with light clothing. Heavy items absorb more water and become much heavier, easily creating an imbalance. If you must wash a single heavy item, add a few towels to balance the load.
- Redistribute Mid-Cycle: If your washer starts shaking violently during a cycle, pause the machine. Open the lid or door and manually redistribute the laundry. Close the door and resume the cycle. This often resolves the problem immediately.
Proper loading techniques can save you from unnecessary repairs and extend the life of your Whirlpool washing machine. It is the easiest and often most effective first step in troubleshooting violent shaking.
Leveling Your Whirlpool Washing Machine: Foundation Matters
A washing machine needs a stable, level surface to operate correctly. If your Whirlpool washing machine is not perfectly level, it will struggle to maintain balance during spin cycles. Even a slight tilt can cause significant vibrations. Think of a table with one short leg; it wobbles every time you touch it. Your washer is the same. The machine uses its weight and internal components to balance the spinning drum. If its base is unstable, this balancing act becomes impossible.
Over time, washing machines can shift. Floors can also settle or be uneven. This means even a correctly installed washer can become unlevel. Checking and adjusting the leveling feet is a simple yet crucial step in troubleshooting a violently shaking washing machine. This directly impacts the machine’s ability to absorb vibrations.
Steps to Level Your Whirlpool Washer
- Locate Leveling Feet: Your Whirlpool washing machine has adjustable leveling feet, usually four of them, at the bottom corners.
- Check for Level: Place a spirit level on top of your washing machine, first from front to back, then from side to side. Note which direction it needs adjustment.
- Adjust the Feet:
- Slightly tilt the washing machine to lift the corner with the foot you need to adjust.
- Turn the leveling foot clockwise to lower that corner, or counter-clockwise to raise it. Many feet have a lock nut; loosen it first, make your adjustment, then tighten it against the machine’s frame to secure the foot.
- Adjust each foot until the washer is perfectly level and stable.
- Test for Stability: Once you think it is level, push down on each corner of the washing machine. It should not rock or wobble at all. If it does, adjust the feet further until it is completely stable.
- Check the Floor: Ensure your floor is strong enough to support the washer’s weight. Weak or flexible floors can contribute to excessive vibration. If your floor is the problem, you may need to reinforce it or place a sturdy plywood pad under the machine.
Proper leveling provides a stable base for your machine. This allows the internal suspension system to work effectively. It significantly reduces shaking, prolonging the life of your appliance. A level machine works more quietly and efficiently. For more complex do-it-yourself fixes, you can always refer to guides like do it yourself washing machine.
Troubleshooting Suspension System Issues: Springs and Dampers
Beyond simple leveling, the internal suspension system plays a critical role in absorbing vibrations. Your Whirlpool washing machine uses components like suspension rods, springs, or shock absorbers to cushion the movement of the wash drum. These parts act like the suspension in a car. They allow the drum to move freely within the outer tub during cycles, especially the high-speed spin. If these components wear out or break, they can no longer dampen the drum’s motion effectively. This leads to the drum banging against the sides of the washer cabinet, causing violent shaking.
Over time, suspension springs can lose their tension. Shock absorbers can leak fluid or become stiff. Suspension rods can crack or their plastic bushings can wear down. Any damage to these parts means the drum will have uncontrolled movement. This is particularly noticeable when the machine spins with a heavy, wet load. The vibrations become much more pronounced.
Inspecting and Replacing Suspension Components
- Access the Components: For most top-load Whirlpool washers, you might need to remove the back panel or lift the top of the machine to access the suspension rods or springs. For front-loaders, you often need to remove the front or top panel. Always disconnect power first.
- Examine Suspension Rods (Top-Loaders): Look for the four suspension rods that connect the wash tub to the top frame of the washer. They often have plastic ball-and-socket connections at both ends. Check for any rods that appear bent, broken, or are no longer firmly connected. The plastic bushings can also wear out, causing slop. If one rod is faulty, it is often recommended to replace all four as a set to maintain even tension.
- Check Springs (Top-Loaders): Some older Whirlpool models or specific designs might use springs to support the tub. Look for stretched, broken, or rusted springs. They should hold the tub firmly without too much sag.
- Inspect Shock Absorbers (Front-Loaders): Front-load washers typically use two or more shock absorbers mounted between the outer tub and the base frame. Look for signs of fluid leaks (oily residue), rust, or loose connections. Test them by pushing down on the drum; it should feel resistant and rebound smoothly. Worn shocks will offer little resistance or feel “bouncy.”
- Ordering Parts: Once you identify the faulty component, order new parts specific to your Whirlpool washer model. You can find your Whirlpool washing machine model number to ensure you get the correct parts.
- Installation: Follow your washer’s service manual or a reliable online tutorial for proper installation. This often involves careful disassembly and reassembly. Replacing these parts can significantly reduce shaking. If your machine is showing other signs of distress, such as leaking water from underneath, it might indicate wider damage.
Replacing suspension components can be a moderate DIY task. It requires some tools and mechanical aptitude. If you are unsure, consider professional help.
Checking the Drum Bearings and Drive Pulley: Deeper Problems
When your Whirlpool washing machine shakes violently, and you have ruled out simple causes like unbalanced loads and leveling, it is time to consider more serious internal components. Worn-out drum bearings or issues with the drive pulley can be the culprits. These parts are critical for the smooth rotation of the inner drum. If they fail, the drum can wobble erratically, leading to severe vibrations and loud grinding or rumbling noises.
Drum bearings allow the inner tub to spin freely and smoothly within the outer tub. There are typically one or two main bearings located at the back of the outer tub. Over time, water leaks, detergent residue, or general wear can cause these bearings to seize or deteriorate. When they go bad, the drum wobbles and rubs against other components. This causes violent shaking, especially during the spin cycle. The noise often sounds like an airplane taking off or a very loud grinding.
The drive pulley is usually located at the back of the drum, connected to the motor by a drive belt. It helps transmit power from the motor to rotate the drum. If the drive pulley is bent, cracked, or has come loose, it will cause the drum to spin off-center. This imbalance directly leads to significant shaking.
Diagnosing and Addressing Bearing and Pulley Issues
- Disconnect Power: Always unplug your washing machine before inspecting internal components.
- Access the Rear of the Drum: You will likely need to remove the back panel of your Whirlpool washing machine to access the outer tub and its components.
- Test the Drum for Play: With the power off, reach inside the drum. Try to move the inner tub up and down, and side to side, independently from the outer tub. If you feel significant play or hear a clunking sound, it indicates worn drum bearings. A healthy drum should feel stable with minimal movement.
- Check the Drive Pulley: While at the back, inspect the large drive pulley attached to the back of the outer tub. It should be firmly attached and perfectly flat. Look for any signs of warping, cracks, or looseness. If it is wobbly or visibly bent, it needs replacement.
- Listen for Bearing Noise: If you suspect bearings, manually spin the drum by hand. Listen for any grinding, roaring, or squealing noises. These sounds often confirm bad bearings.
- Bearing Replacement: Replacing drum bearings is a complex repair. It often involves disassembling a significant portion of the washer, including removing the outer tub and potentially splitting it open. This job requires specialized tools and significant technical knowledge. It is generally not a beginner-friendly DIY task.
- Pulley Replacement: Replacing a bent or loose drive pulley is usually simpler than bearings, but still requires accessing the back of the machine. Ensure the new pulley is tightened correctly and the drive belt is properly aligned.
If you confirm bad drum bearings, consider the age of your Whirlpool washing machine. Given the complexity and cost of the repair, a very old machine might be better replaced than repaired. However, if the machine is relatively new, replacing the bearings can be a cost-effective solution. For more general advice on fixing your washing machine, check out resources like do it yourself washing machine.
Drain Pump and Hoses: Blockages and Restrictions
While less common than other causes, issues with your Whirlpool washing machine’s drain pump or hoses can contribute to violent shaking. The drain system is responsible for removing water from the tub. If water cannot drain properly, it can remain in the outer tub during the spin cycle. This adds significant weight to the drum. A heavy, water-logged drum spinning at high speeds will inevitably cause excessive vibration and shaking, even if the load itself is balanced.
A clogged drain pump or a kinked/obstructed drain hose prevents the machine from evacuating water efficiently. Lint, small items from pockets, or detergent buildup can block the pump impeller. This leads to slow draining or no draining at all. The control board may try to spin the drum anyway, leading to the problems we discussed. You might also notice your washer being stuck on sensing or not completing cycles.
Troubleshooting Drain System Problems
- Check Drain Hose:
- Kinks: Inspect the drain hose at the back of your washer. Ensure it is not kinked, bent sharply, or pinched against the wall.
- Height: The drain hose should be properly installed. If it is too low, it can cause a siphoning effect, preventing proper drainage. Refer to your manual for the correct standpipe height.
- Obstructions: Disconnect the drain hose from the standpipe or sink. Check for visible blockages inside the hose itself.
- Inspect Drain Pump Filter/Trap: Many Whirlpool washing machines, especially front-loaders, have a small filter or trap accessible from the front bottom panel. This filter catches lint and small objects.
- Locate: Consult your owner’s manual for its exact location. It is often behind a small access door.
- Drain Water: Before opening, place a shallow pan and towels underneath. There will be residual water.
- Clean: Unscrew the filter and carefully remove any lint, coins, buttons, or other debris. Clean it thoroughly.
- Check the Drain Pump Itself: If the filter is clean and the hose is clear, the drain pump itself might be faulty.
- Listen: During a drain cycle, listen for the pump motor. If you hear a humming sound but no water movement, the impeller might be blocked or broken. If you hear nothing, the pump might be electrically dead.
- Access: Accessing the drain pump usually involves tilting the machine back or removing the front or back panel.
- Inspect Impeller: Check the pump’s impeller for any foreign objects that are jamming it.
- Test Cycle: After clearing any obstructions or replacing a faulty pump, run a test cycle (e.g., a rinse and spin cycle) with no clothes to see if the draining improves and if the shaking reduces.
Proper water drainage is essential for efficient and stable washer operation. If you notice your washer struggles to drain, or you see water remaining after a cycle, addressing these drain issues can often solve violent shaking problems. For more detailed instructions on draining, refer to how to drain water in Whirlpool washing machine.
Motor Coupling and Drive Belt Problems: Power Transmission
The motor is the heart of your Whirlpool washing machine. It drives the agitator or drum to wash and spin clothes. Between the motor and the drum, there are often components like a motor coupling (in some direct-drive models) or a drive belt (in belt-driven models) that transmit this power. Problems with these parts can lead to erratic drum movement and violent shaking.
In direct-drive Whirlpool washers, a motor coupling connects the motor directly to the transmission. This coupling has rubber or plastic components designed to absorb shock and wear out before the motor or transmission. If the motor coupling breaks, often due to overloading, the motor spins but the drum does not receive consistent power. This can lead to jerky movements and shaking as the motor tries to engage.
In belt-driven Whirlpool washers, a rubber drive belt wraps around the motor pulley and the large drive pulley on the drum. Over time, belts can stretch, fray, crack, or even break. A worn or slipping belt causes the drum to spin inconsistently or not at its intended speed. This uneven power delivery can result in vibrations and shaking, especially during the high-speed spin cycle.
Identifying and Replacing Motor Coupling or Drive Belt
- Disconnect Power: Always unplug your washing machine from the wall outlet before starting any internal inspection.
- Access the Components:
- Direct-drive (Motor Coupling): You typically need to access the motor from the bottom or by tilting the washer back. The motor coupling is located between the motor and the transmission.
- Belt-driven (Drive Belt): The drive belt is usually accessible by removing the back panel of the washer.
- Inspect Motor Coupling: For direct-drive models, look for a three-piece coupling. The two plastic halves should fit snugly over the motor and transmission shafts, with a rubber connector in the middle. If the rubber part is torn, chewed up, or the plastic parts are cracked, the coupling needs replacement.
- Examine Drive Belt: For belt-driven models, check the condition of the drive belt. It should be taut, without any cracks, fraying, or excessive looseness. If it is stretched or damaged, it will slip. Try to manually spin the drum; if the belt is loose, it might slip off or not turn the drum smoothly.
- Manual Rotation Test: With the belt removed or if it’s a direct-drive unit, try to rotate the main drum pulley by hand. If it is stiff or makes grinding noises, this could point to issues with the transmission or bearings, in addition to or instead of the belt/coupling.
- Replacement: Motor couplings and drive belts are common replacement parts and are relatively inexpensive.
- Motor Coupling: Simply unclip the old coupling pieces and snap the new ones into place.
- Drive Belt: Route the new belt around the motor pulley and the larger drum pulley. Ensure it is properly tensioned as you rotate the drum.
Replacing these components can often solve severe shaking issues. It restores the smooth power transfer from the motor to the drum. This is a good DIY project for someone with basic mechanical skills.
Preventative Maintenance: Keeping Your Washer Stable
Preventative maintenance is key to avoiding violent shaking and extending the life of your Whirlpool washing machine. Many common causes of shaking, such as unbalanced loads or an unlevel machine, can be prevented with a few simple habits. Regular checks can catch small issues before they escalate into major repairs. Think of it like taking care of your car; routine check-ups keep it running smoothly.
A well-maintained washing machine not only runs quietly but also operates more efficiently. This saves you money on energy bills and potential repair costs. It also ensures your clothes are properly cleaned and spun dry. Neglecting maintenance can lead to premature wear on various components. This includes the very parts responsible for preventing violent shaking.
Simple Steps for Long-Term Stability
- Regular Level Checks: Check the leveling of your washing machine every few months. Use a spirit level to ensure it sits perfectly flat and stable on the floor. Re-adjust the feet if necessary, remembering to tighten the lock nuts.
- Load Awareness: Always pay attention to how you load your laundry. Avoid overloading the machine. Distribute items evenly around the drum. For bulky items, add a few smaller items to balance the load.
- Inspect Hoses and Connections: Periodically check the water inlet hoses and the drain hose. Look for kinks, cracks, or loose connections. Ensure the drain hose is installed at the correct height to prevent siphoning issues.
- Clean the Drain Filter: If your Whirlpool model has a drain pump filter (often in front-load washers), clean it regularly, perhaps once every few months. This prevents lint, coins, and small items from building up and obstructing drainage. This also helps ensure water can drain correctly, preventing excess weight in the drum during spin cycles. For detailed cleaning instructions, see guides like how to clean washing machine filter.
- Avoid Excessive Detergent: Using too much detergent can lead to excessive suds. These suds can interfere with the drum’s balance and even cause water overflow. Use only the recommended amount of high-efficiency (HE) detergent for HE washers.
- Regular Cleaning: Keep the washer drum clean. Use a washer cleaning cycle with a washing machine cleaner or appropriate natural solutions like vinegar. This prevents mold, mildew, and detergent buildup that can affect performance. You can find guidance on how to clean Whirlpool washing machine with bleach for effective cleaning.
- Listen and Observe: Pay attention to your machine’s sounds and movements. New noises, increased vibration, or changes in performance are often early warning signs of a problem. Addressing them early can prevent more significant damage.
By incorporating these simple maintenance practices into your routine, you can significantly reduce the likelihood of your Whirlpool washing machine shaking violently. This keeps your appliance running efficiently and quietly for years to come.
When to Call a Professional for Violent Shaking
While many causes of a violently shaking Whirlpool washing machine are fixable by a homeowner, some issues require professional expertise. Knowing when to call a technician can save you time, frustration, and potentially prevent further damage to your appliance. Attempting complex repairs without the right tools or knowledge can be dangerous and costly.
If you have tried the basic troubleshooting steps—checking the load, leveling the machine, and inspecting easily accessible parts like the drain filter or drive belt—and the violent shaking persists, it is likely a deeper mechanical problem. Professional appliance repair technicians have specialized tools, diagnostic equipment, and extensive experience with Whirlpool washing machine internals. They can accurately identify issues that might be difficult for an untrained eye.
Signs It’s Time for a Service Call
- Persistent Shaking After Basic Checks: If you have balanced the load, leveled the machine, and checked simple components but the violent shaking continues, the problem is likely internal and more complex.
- Loud Grinding or Roaring Noises: These sounds, especially during the spin cycle, are strong indicators of failing drum bearings. Replacing bearings is a very involved repair, often requiring specialized tools and significant disassembly of the washer.
- Machine Leaks During Shaking: If your washer is shaking violently and also leaking water or leaking water from the bottom, it could mean a damaged outer tub, seal issues, or a crack due to excessive vibration. These require precise diagnosis and repair.
- Suspension System Failure: While replacing individual suspension rods or shocks can be a DIY task, if multiple components are failing or you cannot access them easily, a professional can assess the entire system.
- Motor or Transmission Problems: If you suspect the motor itself, the transmission, or other major drivetrain components are faulty, these are complex and expensive repairs best left to experts. Diagnosing these requires specific electrical knowledge and tools.
- Safety Concerns: If you are unsure about disconnecting power, handling electrical components, or disassembling parts, it is always safer to call a professional. Safety should be your top priority.
- Under Warranty: If your Whirlpool washing machine is still under warranty, attempting major repairs yourself might void it. Check your warranty terms before starting any complex work.
A professional can quickly diagnose the exact issue, provide an accurate estimate, and carry out the repair safely and effectively. While there’s a cost involved, it often prevents further damage and ensures your washing machine operates correctly for years to come.
FAQ Section
Q1: Is it safe to use a shaking washing machine?
No, it is not safe to regularly use a washing machine that is shaking violently. Violent shaking can cause further damage to the appliance’s internal components, such as the motor, bearings, or frame. It can also damage your floor, especially if it’s a weak wooden structure. Additionally, the machine could potentially move off its connections, leading to water leaks or electrical hazards. Address the issue immediately.
Q2: How much does it cost to fix a shaking Whirlpool washer?
The cost to fix a shaking Whirlpool washing machine varies widely based on the cause. Simple fixes like leveling or redistributing a load cost nothing. Replacing suspension rods or a drive belt might cost $50-$200 in parts, plus labor if you hire a professional. Major repairs like replacing drum bearings or the transmission can cost $300-$600 or more, often making replacement a better option for older machines.
Q3: Why does my Whirlpool washer shake only during the spin cycle?
Your Whirlpool washer primarily shakes during the spin cycle because this is when the drum rotates at its highest speeds. Any imbalance in the load, a slightly unlevel machine, or worn suspension components become most apparent at these high rotational forces. The spin cycle is designed to extract water, and any instability is amplified significantly during this phase.
Q4: Can a shaking washing machine damage my floor?
Yes, a violently shaking washing machine can absolutely damage your floor. Repeated impact from the machine’s movement can loosen floor tiles, crack linoleum, or weaken wooden floorboards. Over time, constant vibrations can even compromise the structural integrity of the floor underneath the appliance. Always place a sturdy anti-vibration mat under your washer if shaking is a recurring issue.
Q5: How do I know if my Whirlpool washer bearings are bad?
You can often tell if your Whirlpool washer bearings are bad by the sound and feel. Listen for a loud grinding, roaring, or jet-engine like noise during the spin cycle, especially as the speed increases. Additionally, try manually rocking the empty drum up and down or side to side; if you feel excessive play or hear a clunking sound, the bearings are likely worn out.
Conclusion
A violently shaking Whirlpool washing machine is more than an annoyance; it is a clear signal that something is wrong. We have explored the most common reasons, from easily fixable issues like an unbalanced load or an unlevel machine,
- Whirlpool washer
- washing machine repair
- violent shaking
- appliance troubleshooting
- laundry tips

Katria Melrose
Cleaning Specialist
With over 12 years of experience in commercial cleaning and a certification in workplace ergonomics, I’ve developed a deep understanding of what makes a workspace truly productive. At HEG, I specialize in helping people transform their home offices into clean, efficient, and comfortable environments. Through smart cleaning routines and strategic organization solutions, I empower readers to create spaces that support focus, comfort, and success—one well-organized desk at a time.