· Katria Melrose · Kitchen Appliances · 21 min read
Can You Use Countertop Microwave As Built In
Transform Your Kitchen: Can You Use Countertop Microwave as Built-In?
Many homeowners dream of a sleek, integrated kitchen. Built-in appliances offer a clean look, saving valuable counter space. A common question arises: “Can you use countertop microwave as built-in?” It is a cost-effective alternative to buying a dedicated built-in model. This article explores the feasibility of converting a standard countertop microwave into a seamless, built-in unit. We will discuss the differences, the installation process, and important safety considerations. Prepare to learn whether this DIY project is right for your home.
Takeaway
Converting a countertop microwave to a built-in unit is possible but requires careful planning. You need to address specific issues like ventilation and proper cabinet sizing. Consider the pros and cons before starting. This project can save money but demands precision and attention to detail.
Can you use a countertop microwave as a built-in?
Yes, you can use a countertop microwave as a built-in unit with modifications. This involves building a custom cabinet enclosure and installing a trim kit. Proper ventilation is essential to prevent overheating and ensure safe operation. This approach saves money compared to buying a factory-built model.
Understanding Microwave Types: Countertop vs. Built-In
Microwaves come in various designs for different kitchen needs. We often see countertop models. They are portable and simply sit on the counter. Built-in microwaves offer a more integrated look. They fit into a cabinet or wall space. Understanding these differences helps in deciding on a conversion project.
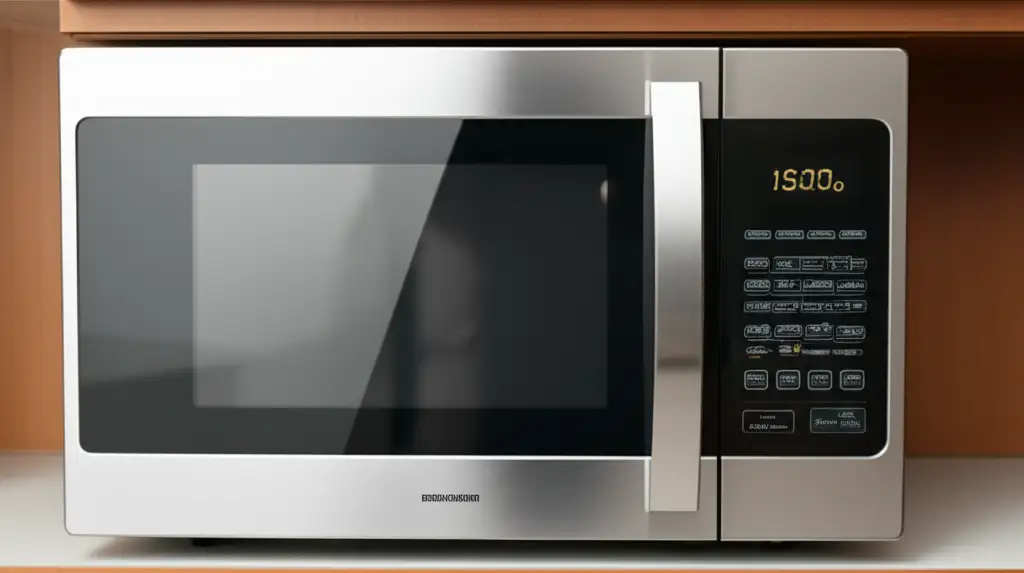
Countertop Microwaves: Flexible and Affordable
Countertop microwaves are popular for their simplicity. You plug them in, and they work. They do not require any special installation. Most kitchens have enough counter space for them. Countertop models are also generally cheaper. This makes them a good choice for many households. Their design usually has vents on the back or sides. These vents need open air circulation.
I appreciate their flexibility. I can move my countertop microwave if I redesign my kitchen. They are easy to replace if they break down. However, they do occupy valuable counter space. This can make smaller kitchens feel cluttered. Their appearance might not match a high-end kitchen design.
Built-In Microwaves: Integrated and Aesthetically Pleasing
Built-in microwaves blend seamlessly with kitchen cabinetry. They create a custom, polished look. These microwaves often come with special trim kits. The trim kits frame the appliance, making it look like part of the cabinet. This design frees up counter space. It also keeps the microwave at an ergonomic height. This can be at eye level or above a wall oven.
Built-in models are typically more expensive than countertop versions. They also require professional installation or precise DIY work. Their ventilation systems are usually designed for enclosed spaces. This means they vent forward or through specific channels. Replacing a built-in unit can be more complex. You need to find a model that fits the existing opening. I think they add significant value to a kitchen’s aesthetic.
The core difference lies in their ventilation and aesthetic integration. Countertop units rely on open air for cooling. Built-in units manage heat differently within an enclosure. This difference is critical for a successful conversion. Knowing these distinctions is the first step. It helps in planning if you wish to use a countertop microwave as built-in.
The Feasibility Factor: Converting a Countertop Microwave
Many people ask if they can really convert a countertop microwave. The simple answer is yes, you can. It involves more than just sliding it into a cabinet. You need to address ventilation, size, and aesthetics. This conversion aims to achieve the look of a true built-in unit. It is a popular project for budget-conscious homeowners.
Why Consider Converting?
Cost savings are a primary motivator. Dedicated built-in microwaves are often much more expensive. A high-quality countertop microwave plus a trim kit can be significantly cheaper. This allows you to achieve a custom look without breaking the bank. It is also an option if you already own a countertop microwave. You can reuse your existing appliance in a new kitchen design. This prevents waste and saves money on a new purchase.
Aesthetics also play a role. A built-in microwave creates a clean line in your kitchen. It eliminates the clutter of an appliance sitting on the counter. This can make a small kitchen feel larger and more organized. I find the integrated look very appealing. It elevates the overall design of the space.
Key Challenges in Conversion
Ventilation is the biggest challenge. Countertop microwaves vent from the back or sides. They rely on open air around them to cool. Placing them in a tight cabinet opening restricts this airflow. This can lead to overheating. Overheating reduces the microwave’s lifespan. It can also pose a fire hazard. Proper air circulation must be engineered into the cabinet design.
Size matching is another hurdle. You need a cabinet opening that perfectly fits your microwave. There also needs to be room for a trim kit. A trim kit hides the gaps around the appliance. It also helps with ventilation by directing airflow. Finding a compatible trim kit for a specific countertop model can be difficult. Most trim kits are designed for specific built-in models or a range of sizes. This requires careful measurement and research.
Finally, the electrical connection must be safe. You need an accessible outlet inside the cabinet space. The wiring must meet local electrical codes. If you are unsure, consult an electrician. This ensures safety and proper functionality. If you are wondering how to make this conversion, you can read our guide on how to convert countertop microwave to built-in.
Essential Considerations Before You Convert
Before you begin the conversion project, careful planning is crucial. Ignoring key factors can lead to safety issues or appliance damage. I always stress the importance of thorough preparation. This ensures a successful and safe installation.
Ventilation Requirements: The Most Critical Factor
Proper ventilation is non-negotiable. Countertop microwaves are designed to dissipate heat into open air. When enclosed, this heat can build up rapidly. This causes the microwave to overheat. Overheating shortens the appliance’s life. It can also create a fire risk. You must ensure adequate airflow around the unit.
- Air Gaps: Leave specific air gaps around the top, sides, and back of the microwave. Manufacturers usually specify these clearances in the owner’s manual. Follow these guidelines strictly.
- Front Venting: Consider using a trim kit that facilitates front ventilation. Some kits are designed to pull cool air from the bottom and push hot air out the top front. This is ideal for enclosed spaces.
- Cabinet Design: The cabinet itself needs to support airflow. This might involve cutting vent holes or designing an open back. Ensure that hot air has a clear path to escape. Blocked vents are a major safety concern.
Cabinet Modifications: Size and Structure
The existing or new cabinet must accommodate the microwave and its required clearances. Measure your microwave precisely. Account for the trim kit dimensions too. The cabinet opening needs to be slightly larger than the microwave. This allows for air circulation and the trim kit installation.
- Precise Measurements: Measure the height, width, and depth of your microwave. Add a few inches for air circulation on all sides. The trim kit will cover these gaps.
- Structural Support: The cabinet shelf must be strong enough to hold the microwave’s weight. Microwaves can be heavy. Ensure the shelf is fixed securely to the cabinet walls. Use sturdy brackets if necessary.
- Electrical Outlet: Plan for an electrical outlet inside the cabinet. It should be easily accessible. The outlet must be rated for the microwave’s power requirements. Always ensure the wiring adheres to local electrical codes.
Trim Kits: Aesthetics and Airflow Management
A trim kit gives a countertop microwave the appearance of a built-in unit. It fills the gaps between the microwave and the cabinet opening. Trim kits also play a role in directing airflow. They often feature vents to help manage heat.
- Compatibility: Finding a trim kit that fits your specific countertop microwave can be challenging. Most trim kits are brand-specific or designed for particular microwave dimensions. Research thoroughly before purchasing. Some universal trim kits exist but may not offer the same seamless look.
- Installation: The trim kit usually mounts directly to the cabinet. It secures the microwave in place. Follow the trim kit’s installation instructions carefully. This ensures proper fit and ventilation.
- Ventilation Integration: Select a trim kit designed for ventilation. These kits often have openings that pull cool air from the room. They then push warm air out through the front of the unit. This design is crucial for preventing heat buildup.
Considering these factors before you start saves time and prevents headaches. It is about safety and ensuring your appliance performs well for years.
Necessary Components and Tools for a Built-In Look
Converting a countertop microwave into a built-in unit requires specific materials and tools. Gathering everything beforehand simplifies the process. It ensures you have what you need when you start. I always make a checklist before beginning any project.
Essential Components You Will Need
- Countertop Microwave: Choose a reliable model. You might want to consider some of the best countertop microwaves you can buy for longevity.
- Microwave Trim Kit: This is crucial for the built-in appearance. It frames the microwave. It also helps manage ventilation. Ensure it fits your specific microwave model.
- Cabinet or Enclosure: This can be an existing cabinet or a new custom-built one. It must be strong enough to support the microwave’s weight.
- Power Outlet: A dedicated electrical outlet inside the cabinet space. It must match the microwave’s power requirements.
- Wood Screws/Brackets: For securing the cabinet shelf and trim kit.
- Ventilation Grates (Optional): If your trim kit or cabinet design needs additional airflow.
Tools for the Job
- Measuring Tape: For precise measurements of the microwave, cabinet, and trim kit. Accuracy is vital for a snug fit.
- Pencil/Marker: For marking cut lines and screw holes.
- Drill: For pre-drilling pilot holes and driving screws. A cordless drill offers convenience.
- Jigsaw or Circular Saw: For cutting cabinet openings or modifying shelves. Use safety glasses when cutting.
- Screwdriver Set: For manual adjustments or if a drill is too powerful.
- Level: To ensure the microwave and cabinet are perfectly level. This prevents uneven operation.
- Stud Finder: If you are mounting the cabinet directly to a wall. This helps locate wall studs for secure attachment.
- Safety Glasses and Gloves: Always protect your eyes and hands during DIY projects.
- Utility Knife: For scoring wood or opening packaging.
Having these components and tools ready streamlines the installation. It minimizes interruptions. Remember, precision in measurement is key. A small error can mean the microwave does not fit. Or it could compromise ventilation. Take your time with each step.
Step-by-Step Guide: How to Install a Countertop Microwave as Built-In
Installing a countertop microwave to look built-in takes careful steps. This guide will walk you through the process. Precision is key for both aesthetics and safety. If you’re looking for an even more detailed guide, consider our resource on how to install built-in microwave in cabinet.
Step 1: Measure and Plan Your Cabinet Opening
Accurate measurements are the foundation of this project.
- Measure the Microwave: Measure the height, width, and depth of your countertop microwave. Do not forget to measure the power cord location.
- Check Trim Kit Dimensions: Your chosen trim kit will specify its outer and inner dimensions. The inner dimension must accommodate your microwave. The outer dimension dictates the necessary cabinet opening size.
- Account for Airflow: Add clearance for proper ventilation. Most manufacturers recommend 1-2 inches of space around the top, sides, and back. This allows air to circulate freely. The trim kit will cover these gaps.
- Mark the Cabinet: Using a pencil, mark the precise cutting lines on your cabinet. Double-check all measurements before cutting.
Step 2: Prepare the Cabinet for Installation
This step involves modifying your cabinet to fit the microwave.
- Cut the Opening: Use a jigsaw or circular saw to cut the marked opening. Cut slowly and carefully to ensure straight lines. Sand any rough edges.
- Install a Shelf: If your cabinet does not have a sturdy shelf, install one. The shelf must be perfectly level and strong enough to support the microwave’s weight. Use wood screws and L-brackets for maximum support.
- Add an Electrical Outlet: Install a dedicated electrical outlet inside the cabinet, ideally behind where the microwave will sit. Ensure it is easily accessible. If you are not comfortable with electrical work, hire a licensed electrician. Safety is paramount here.
- Consider Rear Venting: For better airflow, you might need to create a large opening or cut out the back panel of the cabinet. This allows hot air to escape more easily. Ensure there’s a clear path for air.
Step 3: Install the Microwave Trim Kit
The trim kit gives your microwave the built-in appearance and helps with ventilation.
- Assemble the Trim Kit: Follow the manufacturer’s instructions for assembling the trim kit. Most kits have a frame that attaches to the cabinet.
- Secure the Trim Kit: Place the assembled trim kit into the cabinet opening. Secure it using the provided screws. Ensure it is level and flush with the cabinet face.
- Insert the Microwave: Carefully slide the countertop microwave into the trim kit opening. It should fit snugly. Connect the power cord to the outlet.
- Final Adjustments: Make any necessary adjustments to ensure the microwave is centered and stable. Some trim kits have adjustable clips to hold the microwave in place.
Step 4: Test and Monitor
Once installed, it is important to test the unit.
- Run a Test Cycle: Run the microwave on high for several minutes with a cup of water inside.
- Check for Overheating: After the test, feel around the vents and the cabinet. It should not be excessively hot. If it feels too hot, you may have ventilation issues. You might need to increase air gaps or improve airflow in the cabinet.
- Monitor Over Time: Keep an eye on the microwave’s performance and heat output for the first few weeks. Make sure it operates normally.
This detailed process ensures your countertop microwave functions safely and looks like a professionally installed built-in unit. Remember to always prioritize safety and follow manufacturer guidelines.
Addressing Ventilation and Heat Management Challenges
Ventilation is the single most critical aspect of converting a countertop microwave to a built-in unit. Ignoring it leads to serious problems. These problems include appliance failure and fire hazards. Understanding how to manage heat is essential for a safe and lasting installation.
Why Ventilation is So Important
Microwaves generate significant heat during operation. Countertop models are designed with vents on their back or sides. These vents rely on open air around the unit to cool down components. When you place a countertop microwave into an enclosed space, you restrict this natural airflow. The heat gets trapped inside the cabinet. This causes the internal components to overheat.
- Component Damage: Excessive heat damages the magnetron, transformer, and other electronic parts. This significantly shortens the microwave’s lifespan.
- Fire Risk: In extreme cases, severe overheating can cause components to fail. This could lead to smoke or even a fire.
- Performance Issues: An overheated microwave may shut down unexpectedly. It might also cook food unevenly.
I cannot stress this enough: do not compromise on ventilation. It is a matter of safety and appliance longevity.
Strategies for Effective Heat Dissipation
You must actively manage heat within the cabinet enclosure. Several strategies can help ensure proper airflow.
- Adequate Air Gaps: Provide ample space around the microwave. Most manufacturers recommend 1 to 2 inches on the top, sides, and back. Some even suggest space underneath. Check your microwave’s specific manual for its clearance requirements. These gaps allow air to flow around the unit.
- Front-Venting Trim Kits: This is the best solution. Many trim kits are designed to create a ventilation path. They draw cool air from the bottom front of the kit. They then expel hot air through vents at the top front. This system pushes heat out into the kitchen. This prevents heat buildup inside the cabinet.
- Cabinet Back Modification: Consider removing the back panel of the cabinet. This allows heat to dissipate into the wall cavity or open space behind the cabinet. If you cannot remove the entire back, cut large vent holes. These holes must align with the microwave’s vents.
- Internal Cabinet Airflow: Design the cabinet with internal air channels if possible. This might involve creating baffles or internal cutouts. These direct air from lower vents to upper vents, guiding heat out of the enclosure.
- Cooling Fan (Advanced): For extreme cases or very tight spaces, you could install a small, low-noise cooling fan. This fan would draw air into the cabinet and push hot air out. This is a more advanced solution and requires careful electrical planning.
- Material Selection: Use cabinet materials that can withstand heat. Wood is generally fine, but ensure proper insulation or distance from direct heat sources.
Always test your microwave after installation. Run it for several minutes. Check the temperature of the cabinet surfaces. If they feel hot, revisit your ventilation strategy. A well-ventilated built-in microwave operates safely and efficiently.
Pros and Cons of This DIY Kitchen Project
Deciding to convert a countertop microwave into a built-in unit involves trade-offs. Weighing the advantages and disadvantages helps you make an informed decision. I believe understanding both sides is crucial for any home improvement project.
Advantages of Converting a Countertop Microwave
- Cost Savings: This is often the biggest driver. Countertop microwaves are significantly cheaper than dedicated built-in models. Even with the cost of a trim kit and cabinet modifications, you can save hundreds of dollars. This allows you to achieve a high-end look on a budget.
- Space Saving: A built-in microwave frees up valuable counter space. This is especially beneficial in smaller kitchens. It makes the kitchen feel less cluttered and more organized. You gain functional workspace for food preparation.
- Seamless Aesthetics: An integrated microwave creates a sleek, custom look. It blends with your cabinetry for a cohesive design. This enhances the overall appeal and perceived value of your kitchen. It provides a clean line that many homeowners desire.
- Ergonomic Placement: You can install the microwave at a comfortable height. This avoids bending down to access the appliance. For me, this is a huge plus for daily use. It makes heating food much more convenient.
- Reusing Existing Appliances: If you already own a countertop microwave, converting it can be an economical choice. This avoids buying a new appliance. It also reduces waste, which is good for the environment.
Disadvantages and Potential Drawbacks
- Ventilation Challenges: As discussed, this is the main hurdle. Countertop microwaves are not designed for enclosed spaces. Ensuring adequate airflow requires careful planning and execution. Improper ventilation can lead to overheating, appliance failure, and fire risks. This is a serious concern.
- Compatibility Issues: Finding a trim kit that perfectly fits your specific countertop microwave can be difficult. Trim kits are often brand-specific or sized for certain models. You might end up with an imperfect fit or no suitable kit.
- DIY Skill Required: This project demands a certain level of DIY expertise. You need to be comfortable with measuring, cutting cabinets, and potentially some electrical work. Mistakes can be costly and time-consuming.
- Limited Repair Access: Once installed, accessing the microwave for repairs or maintenance can be harder. You might need to remove the trim kit or even the entire unit. This adds complexity to servicing the appliance.
- Not a True Built-In: While it looks like a built-in, it is still a modified countertop unit. Its internal components and ventilation system are not specifically engineered for enclosed use in the same way a true built-in model is. This might impact its long-term durability.
- Resale Value Impact: While a built-in look is appealing, a DIY conversion might not add the same resale value as a professionally installed, purpose-built appliance. Some buyers might prefer genuine built-in units.
Carefully weigh these pros and cons based on your skills, budget, and desired outcome. A successful conversion offers great benefits. However, a rushed or poorly executed one can lead to regrets.
Alternative Solutions and Professional Built-In Options
While converting a countertop microwave can be appealing, it is not the only path to a built-in look. Exploring alternatives helps you make the best decision for your kitchen. Sometimes, a dedicated solution might be safer or more practical.
Dedicated Built-In Microwaves
These appliances are designed specifically for cabinet installation. They come with integrated ventilation systems. The design ensures proper heat dissipation in an enclosed space.
- Pros:
- Optimal Ventilation: Engineered for safety and longevity in a cabinet.
- Perfect Fit: Designed to integrate seamlessly with standard cabinet dimensions.
- Warranty: Full manufacturer warranty coverage for built-in use.
- Professional Appearance: Unmatched aesthetic integration.
- Features: Often come with advanced features not found in basic countertop models.
- Cons:
- Cost: Significantly more expensive than countertop models.
- Installation: May require professional installation, adding to the cost.
- Limited Flexibility: Once installed, they are not easily moved.
- Consider this option if budget allows. It offers peace of mind and perfect integration.
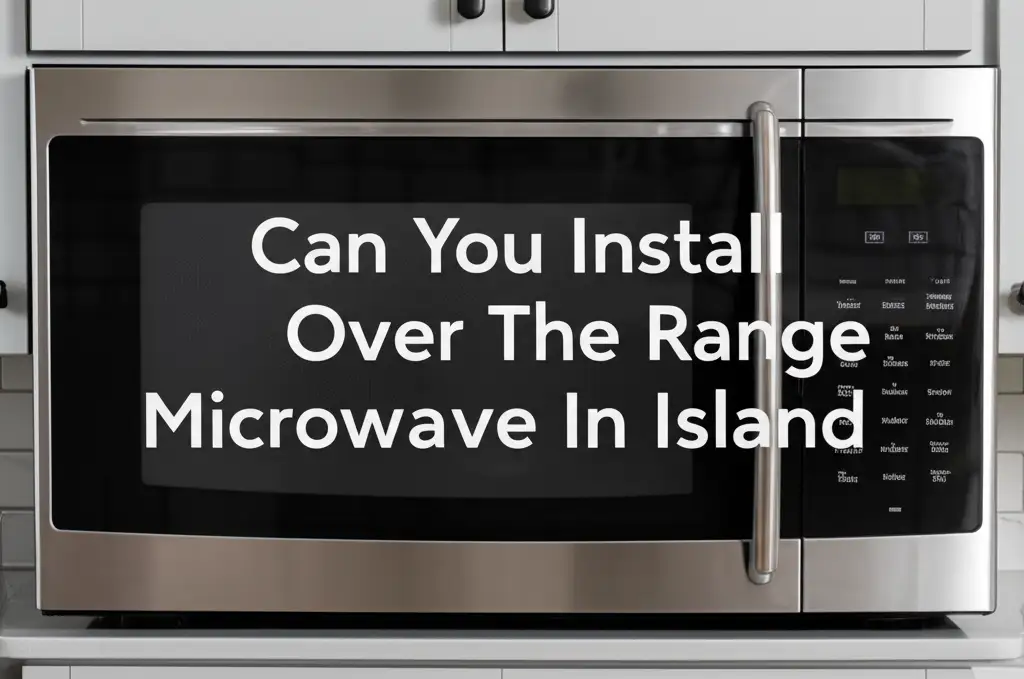
Over-the-Range Microwaves
These units are mounted above the range. They combine a microwave and an exhaust fan. They are a common choice for saving counter space. You might wonder, can over the range microwave be used as built-in? The answer is generally no.
- Pros:
- Dual Functionality: Acts as both a microwave and a range hood.
- Space Saving: Frees up counter space and cabinet space.
- Ventilation: Built-in fan effectively removes cooking odors and steam.
- Cons:
- Installation Location: Restricted to above the range.
- Ventilation Complexity: Requires ductwork for effective venting.
- Ergonomics: Can be too high for some users to access safely.
- Aesthetics: May not offer the sleek, integrated look of a true built-in microwave in a cabinet.
Microwave Drawers
Microwave drawers are a growing trend. They pull out like a drawer, offering easy access from above. They are often installed in lower cabinets or kitchen islands.
- Pros:
- Excellent Ergonomics: Easy to load and unload dishes from the top.
- Sleek Design: Very discreet when closed, maintaining clean lines.
- Space Saving: Keeps the counter clear.
- Child Safety: Can be installed lower for easier access by children, or higher to keep them out of reach.
- Cons:
- High Cost: These are generally the most expensive microwave option.
- Limited Capacity: Often smaller internal capacity compared to traditional models.
- Specialized Installation: Requires precise cabinet dimensions and electrical work.
Open Shelving or Appliance Garages
These are simpler alternatives to fully built-in units.
- Open Shelving: Simply place the countertop microwave on an open shelf. This frees up counter space. It also provides excellent ventilation. The look is less integrated but still neat.
- Appliance Garage: A cabinet designed to conceal appliances when not in use. The microwave sits on a pull-out shelf or fixed shelf inside. Doors hide it from view. This offers a clean look without complex installation.
Each option has its benefits and drawbacks. Your choice depends on your budget, DIY skill level, and kitchen design goals. Sometimes, investing in a purpose-built appliance is the more straightforward and safer choice.
FAQs About Using Countertop Microwaves as Built-In
Here are answers to common questions about converting a countertop microwave.
1. Is it safe to put a countertop microwave in a cabinet?
It can be safe if done correctly. You must ensure proper ventilation. Countertop microwaves need space around them to dissipate heat. Without adequate airflow, they can overheat, causing damage or even fire hazards. Always follow the manufacturer’s clearance recommendations and use a suitable trim kit.
2. Do all countertop microwaves work with trim kits?
No, not all countertop microwaves work perfectly with standard trim kits. Trim kits are often designed for specific microwave models or a range of dimensions. You need to find a trim kit that matches your microwave’s size precisely. Some universal trim kits exist but may not offer the same seamless fit.
3. How much space do I need around a built-in microwave for ventilation?
The specific clearance depends on your microwave model. Generally, manufacturers recommend at least 1-2 inches of space on the top, sides, and back. Some units may also require space underneath. Always consult your microwave’s owner’s manual for exact ventilation requirements. This is critical for safety and longevity.
4. Can I build my own trim kit for a countertop microwave?
Yes, you can build your own trim kit. This requires woodworking skills and precision. A custom-built trim kit can be tailored to your microwave and cabinet. However, ensure your design includes proper ventilation pathways. Factory-made trim kits are often designed with specific airflow channels, which are important for safety.
5. What are the signs of an overheated microwave?
Signs of an overheated microwave include unusual odors, a burning smell, reduced cooking efficiency, or the microwave shutting off unexpectedly during operation. If you notice these signs, immediately unplug the unit and check your ventilation. Persistent overheating means you need to re-evaluate the installation.
6. Do I need a dedicated electrical circuit for a built-in microwave?
It’s highly recommended. Microwaves draw a significant amount of power. A dedicated circuit ensures the appliance receives consistent power and prevents circuit overloads. This reduces the risk of tripped breakers or electrical hazards. Consult an electrician if you are unsure about your home’s wiring.
Conclusion
Converting a countertop microwave to a built-in unit is a popular DIY project. It offers a sleek kitchen aesthetic and saves money. While possible, it requires careful planning and execution. The most crucial aspect is ensuring proper ventilation. Ignoring this can lead to serious safety issues and shorten your appliance’s life. Always prioritize safety over savings.
I hope this guide helps you decide if this project is right for you. Measure carefully, choose the right trim kit, and ensure excellent airflow. If you are not confident in your DIY skills, consider professional help. A successful conversion will give you a beautiful, integrated kitchen that looks custom-designed. For more detailed instructions on related kitchen projects, explore other resources on our site. Transform your kitchen safely and beautifully.
- microwave installation
- kitchen remodel
- DIY kitchen
- countertop microwave
- built-in microwave
- appliance hacks

Katria Melrose
Cleaning Specialist
With over 12 years of experience in commercial cleaning and a certification in workplace ergonomics, I’ve developed a deep understanding of what makes a workspace truly productive. At HEG, I specialize in helping people transform their home offices into clean, efficient, and comfortable environments. Through smart cleaning routines and strategic organization solutions, I empower readers to create spaces that support focus, comfort, and success—one well-organized desk at a time.