· Todd Martin · Kitchen Appliances · 18 min read
How To Convert Countertop Microwave To Built In

How To Convert Countertop Microwave To Built In: A DIY Guide
Is your kitchen countertop cluttered with appliances? You are not alone. Many homeowners dream of a cleaner, more organized space. A countertop microwave takes up valuable surface area.
You can convert a countertop microwave to a built-in unit. This transformation offers a sleek, integrated look. It frees up counter space and enhances kitchen aesthetics. This guide shows you how to achieve this upgrade. We cover feasibility, planning, tools, and the installation process. You will learn about important safety tips and common pitfalls. This article helps you make an informed decision. I will walk you through each step.
Takeaway
Converting a countertop microwave to built-in is possible and rewarding. Here are the key actionable messages:
- Always verify your microwave model supports a built-in trim kit.
- Measure cabinet dimensions precisely before starting any work.
- Ensure proper ventilation is maintained around the installed microwave.
- Build a sturdy, level support frame inside the cabinet for the microwave.
- Follow all electrical safety guidelines during installation.
To convert a countertop microwave to a built-in unit, you must first confirm compatibility with a specific built-in trim kit for your microwave model. Then, you prepare a cabinet opening by precisely measuring and building an internal support frame. Finally, you install the microwave and secure the trim kit for a seamless, integrated appearance.
Is Converting a Countertop Microwave Feasible? Understanding the Basics
Many people wonder if they can turn their countertop microwave into a built-in one. The simple answer is yes, but it is not always straightforward. You cannot just slide a countertop microwave into a cabinet opening. Countertop microwaves are designed to sit on a flat surface. They need specific clearances for ventilation from all sides. A built-in microwave, however, uses a trim kit. This kit provides the necessary ventilation pathways. It also creates a finished, integrated look.
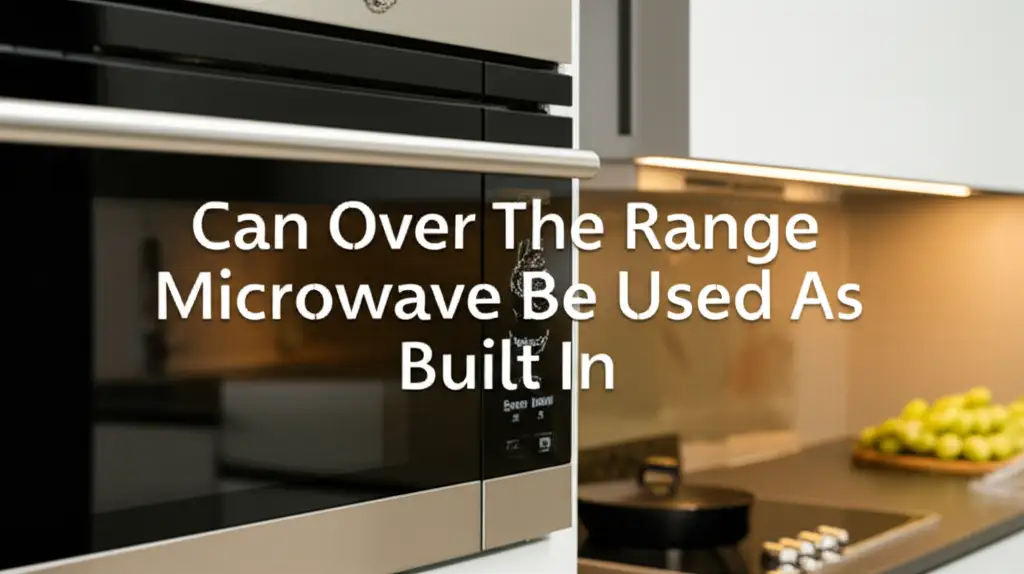
A proper conversion requires a compatible trim kit. Most microwave manufacturers offer these kits for specific models. Without a trim kit, your microwave will overheat. It could become a fire hazard. The trim kit frames the microwave. It also directs airflow from the front. This design ensures safe operation. It also gives the appliance a polished, installed appearance. Consider that an over-the-range microwave is designed for built-in use above a stove. It has its own ventilation system. Is an over-the-range microwave considered built-in? This type of microwave is different from a countertop model.
You must check your microwave’s model number. Look online or in the owner’s manual for available trim kits. If a kit exists, conversion is feasible. If not, you might need a new microwave designed for built-in installation. Built-in units often feature different internal ventilation systems. They push hot air forward, through the trim kit. This differs from countertop models that vent from the back or sides. Understanding these differences is key. You avoid potential problems later.
The main difference lies in ventilation and aesthetics. Countertop models are standalone units. They have vents on their sides and back. Built-in models rely on a trim kit. This kit ensures proper airflow when the microwave is enclosed. The trim kit also provides a clean, custom look. It fills any gaps between the appliance and the cabinet. This setup is crucial for safe and efficient operation. You must also consider the cost of the trim kit. Sometimes, buying a new, dedicated built-in microwave might be more cost-effective. Especially if your existing countertop model is old or incompatible.
The process of removing an existing built-in microwave can give you insights. You will see how they are secured and vented. How to remove a GE built-in microwave oven gives examples of such installations. This helps you understand the structure you need to replicate.
Essential Planning Before You Convert Your Microwave
Careful planning saves time and prevents mistakes. Before you begin any work, gather all necessary information. You need to know your microwave’s exact dimensions. You also need to understand the space available in your cabinet. This step determines the success of your conversion project. Do not rush this part.
Measuring Your Microwave and Cabinet Space
First, measure your countertop microwave. Get the precise width, height, and depth. Measure from the outer edges. Include any protrusions like handles or control panels. These dimensions are critical. Your chosen trim kit will specify the required microwave dimensions. It will also specify the required cabinet cutout size.
Next, measure the cabinet opening where the microwave will go. You need the width, height, and depth of the internal space. Remember, you are building a support structure inside the cabinet. The trim kit needs specific clearances around the microwave. Read the trim kit instructions carefully. They will tell you the exact opening dimensions needed. Ensure enough space for wiring and ventilation behind the unit. A good rule of thumb is to add a few inches of depth for the cord and airflow.
Selecting the Right Built-In Trim Kit
The trim kit is not just for looks; it is for function. It directs hot air away from the microwave. This prevents overheating. A specific trim kit is often designed for a particular microwave model. Check your microwave’s brand and model number. Then search for a compatible trim kit. Universal trim kits exist, but they may not offer the best fit or ventilation. A model-specific kit is always the best choice. It ensures proper airflow and a clean appearance.
Consider the trim kit’s color and finish. Match it to your other kitchen appliances or cabinet hardware. Stainless steel, black, or white are common options. A well-matched trim kit makes the microwave look like an original part of your kitchen design. It adds to the seamless, built-in look you desire.
Power Requirements and Electrical Considerations
A microwave oven needs a dedicated electrical circuit. This prevents overloading the circuit. Check your home’s electrical panel. Ensure there is a dedicated 20-amp circuit available. Most microwaves require a 120-volt, 15 or 20-amp outlet. The outlet needs to be accessible behind the cabinet opening. You may need to install a new outlet or extend an existing one. This work should ideally be done by a qualified electrician.
Safety is paramount when dealing with electricity. Do not attempt electrical work if you are unsure. Consider the overall kitchen layout. Think about where your appliances plug in. Sometimes, planning for other appliance installations can provide insights. For example, knowing do you install a dishwasher before or after the countertop gives you a sense of installation sequencing. This applies to microwave installation too. Always turn off power at the circuit breaker before touching any wiring. This prevents electric shock.
Gathering Tools and Materials for Conversion
Starting any project with the right tools makes the job smoother. You will need a variety of common household tools. Some specific materials are also necessary for this microwave conversion. Make a checklist. This ensures you have everything before you start. This prevents mid-project trips to the hardware store.
Here is a list of essential tools you will need:
- Tape Measure: For accurate measurements of your microwave and cabinet. Precision is key in this project.
- Pencil: To mark cutting lines and drill points on the cabinet.
- Level: To ensure your support frame is perfectly horizontal. A level frame is critical for the microwave to sit correctly.
- Drill: For pre-drilling pilot holes and driving screws. Choose a drill with appropriate bits for wood.
- Screwdrivers: Both Phillips and flathead, for various screws.
- Jigsaw or Reciprocating Saw: If you need to enlarge the cabinet opening. Use a fine-tooth blade for clean cuts.
- Stud Finder: To locate studs in the wall if you are mounting the cabinet or need to reinforce.
- Safety Glasses: To protect your eyes from sawdust or flying debris. Always wear these during cutting or drilling.
- Work Gloves: To protect your hands.
- Dust Mask: To avoid inhaling sawdust.
Here are the materials you will likely need:
- Microwave Built-In Trim Kit: This is crucial. Ensure it matches your specific microwave model. It provides the finished look and proper ventilation.
- Lumber for Framing: You will need 2x2s or 2x4s to build a sturdy support frame inside the cabinet. The size depends on the weight of your microwave and the cabinet structure.
- Wood Screws: Various lengths for securing the frame. Use screws appropriate for wood. Ensure they are long enough to hold the frame securely but not so long they pierce through the cabinet.
- Wood Glue: For extra strength when assembling the support frame. This adds durability to the structure.
- Electrical Outlet and Wiring (if needed): If your cabinet does not have a suitable outlet, you will need these. Consult an electrician for this step.
- Sanding Paper: To smooth any rough edges after cutting the cabinet. This improves the finish and safety.
Having these tools and materials ready prevents delays. It helps you focus on the installation process. Double-check all items before you start. This preparation makes the conversion much smoother.
Preparing Your Cabinet for the Built-In Microwave
The cabinet preparation phase is critical. It involves modifying the existing cabinet to perfectly fit your microwave and its trim kit. This work requires precision. A well-prepared cabinet ensures a stable and professional-looking installation. Remember, the goal is to make the countertop microwave look like it was always a built-in unit.
Clearing and Measuring the Cabinet
Start by emptying the cabinet where the microwave will go. Remove any shelves, drawers, or other obstructions. You need a clear opening. Measure the internal dimensions of this space again. Compare these measurements to the trim kit’s required cutout dimensions. The trim kit manual provides these precise figures.
You might need to enlarge the opening. Use your pencil to mark the new cut lines. Always measure twice and cut once. Use a level to ensure your lines are straight. If you are cutting through cabinet material, be careful. Support the cabinet structure during cuts. This prevents damage. Remember to account for the thickness of the cabinet material.
Constructing the Support Frame
Your microwave needs a sturdy, level platform to rest on. This platform is typically a wooden frame built inside the cabinet. Use 2x2s or 2x4s for this frame. The frame must be strong enough to support the microwave’s weight. Build the frame slightly smaller than the microwave’s width and depth. This allows the trim kit to cover the edges.
Assemble the frame pieces using wood screws and wood glue. Ensure all corners are square. Once assembled, place the frame inside the cabinet. Use a level to check that it is perfectly flat. Secure the frame to the cabinet walls. Use screws that go into the cabinet’s structural parts. Do not just screw into thin paneling. Some people use brackets for extra support. A solid frame prevents the microwave from sagging or shifting over time. Building a secure frame is similar to the structural work involved in how to build a built-in desk. That project also requires a strong, stable base.
Ensuring Proper Ventilation
Built-in microwaves need good airflow to prevent overheating. The trim kit is essential for this. It directs the exhaust air forward. Make sure there is enough space behind and around the microwave for air circulation. The trim kit manual will specify these clearances. Do not block any vents on the microwave or the trim kit.
If your cabinet has a back panel that is too tight against the microwave, consider cutting a ventilation hole. This is especially true if the microwave vents from the rear. You can also install a small vent fan if airflow is a major concern. However, most trim kits are designed to manage airflow adequately. Always prioritize following the trim kit’s ventilation guidelines. Proper ventilation extends the life of your microwave. It also prevents fire hazards. When preparing the cabinet base, it is helpful to ensure the surface is level. This principle also applies to kitchen installations like how to level cabinets for countertop. A level base ensures the appliance sits correctly.
Installing Your Countertop Microwave as a Built-In Unit
Once the cabinet is ready, the actual installation of the microwave is the next step. This stage requires careful handling of the appliance. You also need to precisely attach the trim kit. Follow these steps to ensure a secure and professional-looking finish.
Placing the Microwave into the Opening
First, ensure the electrical outlet is accessible. The microwave’s power cord needs to reach it comfortably. You should have enough slack so the microwave can slide in without crimping the cord. Carefully lift the microwave. Slide it into the prepared cabinet opening. The microwave should rest squarely on the support frame you built.
Do not force the microwave into the space. If it feels too tight, recheck your measurements and the support frame. Forcing it can damage the microwave or the cabinet. The microwave should slide in smoothly. It should sit flush with the front edge of the cabinet. This alignment is important for the trim kit to fit correctly.
Attaching the Trim Kit
The trim kit is the finishing touch. It secures the microwave and provides a built-in appearance. Most trim kits come with their own hardware and instructions. Typically, the trim kit consists of a metal frame. This frame screws into the cabinet face, not the microwave itself.
Position the trim kit around the microwave opening. Align it with the edges of the cabinet. Make sure it is straight and level. Use a pencil to mark the screw hole locations. Pre-drill pilot holes if recommended by the trim kit instructions. This prevents wood splitting. Then, use the screws provided to secure the trim kit to the cabinet. Do not overtighten the screws. This can damage the trim kit or the cabinet. The trim kit should hold the microwave firmly in place. It should also cover any gaps around the microwave’s edges. The installation process for a built-in microwave, especially with a trim kit, shares similarities with how to install your semi-built-in microwave column installation. Both require precise fitting and securing.
Connecting Power and Testing
After the microwave and trim kit are in place, plug the microwave into the dedicated electrical outlet. Ensure the connection is secure. Once plugged in, turn on the circuit breaker. Do a test run of the microwave.
Check various functions. Test heating, the turntable, and the light. Listen for any unusual noises. Observe if any indicator lights are behaving strangely. This initial test confirms the microwave is working properly in its new home. It also gives you peace of mind. If anything seems wrong, immediately unplug the unit. Then, recheck all connections and the trim kit placement. Ensure no wires are pinched. This final check ensures safety and functionality.
Troubleshooting and Maintenance Tips
Even with careful planning, issues can arise during or after your microwave conversion. Knowing how to troubleshoot common problems saves you time and frustration. Regular maintenance also extends the life of your appliance.
Common Issues and Solutions
- Microwave does not fit: This is often due to inaccurate measurements. Double-check your microwave’s dimensions against the cabinet opening and trim kit requirements. You might need to enlarge the cabinet opening slightly. Or you might need to adjust the support frame.
- Overheating: If the microwave feels excessively hot during operation, ventilation is likely restricted. Review the trim kit instructions for specific clearance requirements. Ensure no vents are blocked. You might need to add more space behind or around the unit. Sometimes, cutting a ventilation hole in the back of the cabinet helps.
- Trim kit not flush: The trim kit might not sit flush with the cabinet face. This usually means the microwave is not seated properly on its support frame. Or the cabinet opening is not perfectly square. Adjust the support frame. Or, if necessary, fine-tune the cabinet opening.
- Electrical problems: If the microwave is not powering on, check the circuit breaker. Ensure the outlet is live. If you installed a new outlet, confirm correct wiring. For persistent electrical issues, call a certified electrician. Never attempt complex electrical repairs yourself.
Maintenance for Your Built-In Microwave
Regular cleaning is vital for any microwave. For a built-in unit, this includes the visible surfaces and the trim kit.
- Clean the interior: Wipe down the inside after each use. Use a damp cloth and mild dish soap. This prevents food buildup. Food particles can absorb microwave energy and cause odors.
- Clean the exterior and trim kit: Wipe the outside of the microwave and the trim kit with a soft, damp cloth. Use a non-abrasive cleaner. This keeps the unit looking new. Be careful not to spray cleaner directly into vents.
- Check ventilation paths: Periodically check the trim kit’s vents. Ensure they are free from dust and debris. Dust accumulation can restrict airflow and cause overheating. You can use a vacuum cleaner with a brush attachment to gently clear the vents.
- Light bulb replacement: Like any appliance, the microwave light bulb might burn out. Accessing the bulb on a built-in unit can be different from a countertop model. Typically, you may need to partially remove the microwave to reach the bulb. Instructions for how to change a built-in microwave light bulb can offer guidance.
By addressing issues promptly and performing routine maintenance, your newly built-in microwave will serve you well for years. Regular checks ensure its safe and efficient operation.
Advantages and Considerations of a Built-In Microwave
Converting your countertop microwave to a built-in unit offers several benefits. However, it also comes with a few considerations you should know. Weighing these points helps you decide if this project is right for your home.
Advantages of a Built-In Microwave
- Enhanced Aesthetics: A built-in microwave creates a seamless and integrated look in your kitchen. It blends with your cabinetry. This gives your kitchen a more modern and custom feel. The trim kit provides a professional finish.
- Space Saving: This is a major benefit. By moving the microwave off the countertop, you free up valuable workspace. This is especially useful in smaller kitchens. It creates a cleaner and less cluttered environment.
- Improved Resale Value: A kitchen with built-in appliances often appeals to potential homebuyers. It suggests a well-designed and upgraded space. This can add to your home’s market value.
- Ergonomic Placement: You can install the microwave at a more convenient height. This means less bending over to access your food. You can place it above an oven or at eye level. This improves user comfort and accessibility.
Considerations Before Conversion
- Cost: The cost includes the trim kit and any materials for cabinet modification. If you need to hire an electrician, that adds to the expense. Sometimes, buying a new dedicated built-in microwave might be more cost-effective than converting an old countertop model.
- Complexity of Installation: This is a DIY project. It requires precise measurements and some carpentry skills. You must be comfortable with tools and electrical safety. Mistakes can lead to damage or safety hazards. If you are unsure, hiring a professional is wise.
- Limited Portability: Once converted, your microwave is fixed in place. You cannot easily move it to another location. A countertop microwave offers flexibility.
- Ventilation Requirements: Strict ventilation requirements apply to built-in units. Improper ventilation can cause overheating. This shortens the microwave’s lifespan and poses a fire risk. You must ensure adequate airflow around the unit.
- Microwave Compatibility: Not all countertop microwaves are suitable for conversion. The availability of a specific trim kit for your model is the biggest factor. Without a compatible trim kit, the conversion is not recommended.
Converting your microwave can greatly enhance your kitchen. It improves both its looks and its functionality. But it requires a commitment of time, effort, and possibly money. Evaluate these points carefully. Decide if the benefits outweigh the challenges for your specific situation.
FAQ Section
Q1: Can any countertop microwave be converted into a built-in unit? A: No, not every countertop microwave can be converted. The primary requirement is the availability of a specific built-in trim kit for your microwave model. Without this kit, proper ventilation is impossible. The microwave will overheat. The trim kit ensures both safety and a finished look. Always check for model compatibility first.
Q2: Do I really need a special trim kit for the conversion? A: Yes, a special trim kit is essential. It provides the necessary ventilation for the microwave when it is enclosed in a cabinet. Countertop microwaves vent differently. The trim kit also provides a finished, aesthetic appearance. It fills gaps between the microwave and the cabinet. Using a microwave without a proper trim kit can lead to overheating and fire hazards.
Q3: How much space do I need around the microwave for ventilation? A: The exact ventilation space varies by microwave and trim kit model. You must consult your trim kit’s instruction manual. Generally, built-in microwaves require a few inches of clearance around the top, sides, and back. This ensures proper airflow. Blocking these vents will cause the unit to overheat.
Q4: Is converting a countertop microwave a difficult DIY project? A: This project requires intermediate DIY skills. You need precise measuring, some carpentry for the support frame, and attention to detail. If you are comfortable with basic tools and following instructions, it is achievable. If you are unsure about electrical work or significant cabinet modifications, consider hiring a professional.
Q5: What are the risks of converting a microwave without a trim kit? A: Converting without a trim kit carries significant risks. The main danger is overheating. Countertop microwaves need space for heat dissipation from all sides. Enclosing one without proper ventilation channels (provided by a trim kit) traps heat. This can damage the microwave, reduce its lifespan, or even cause a fire. The installation will also look unfinished.
Q6: Can I put a countertop microwave into a standard oven cabinet space? A: You can use a standard oven cabinet space, but you must still follow all conversion steps. This includes building a support frame for the microwave. You also need to install a compatible trim kit. Ensure the electrical outlet is appropriate and accessible. The oven cabinet’s dimensions need to match the
- microwave conversion
- built-in microwave
- kitchen remodel
- DIY kitchen
- appliance installation
- countertop microwave
- kitchen design

Todd Martin
Senior Writer
With over 15 years of experience in home renovation and design, I started HEG to share what I’ve learned with homeowners who want to create spaces that are both beautiful and functional. I’ve always believed in a hands-on approach, and over the years, I’ve picked up practical solutions that actually work. Through HEG, I aim to make home improvement more approachable, sharing real tips that help you create a home you truly love.