· Todd Martin · Kitchen Appliances · 18 min read
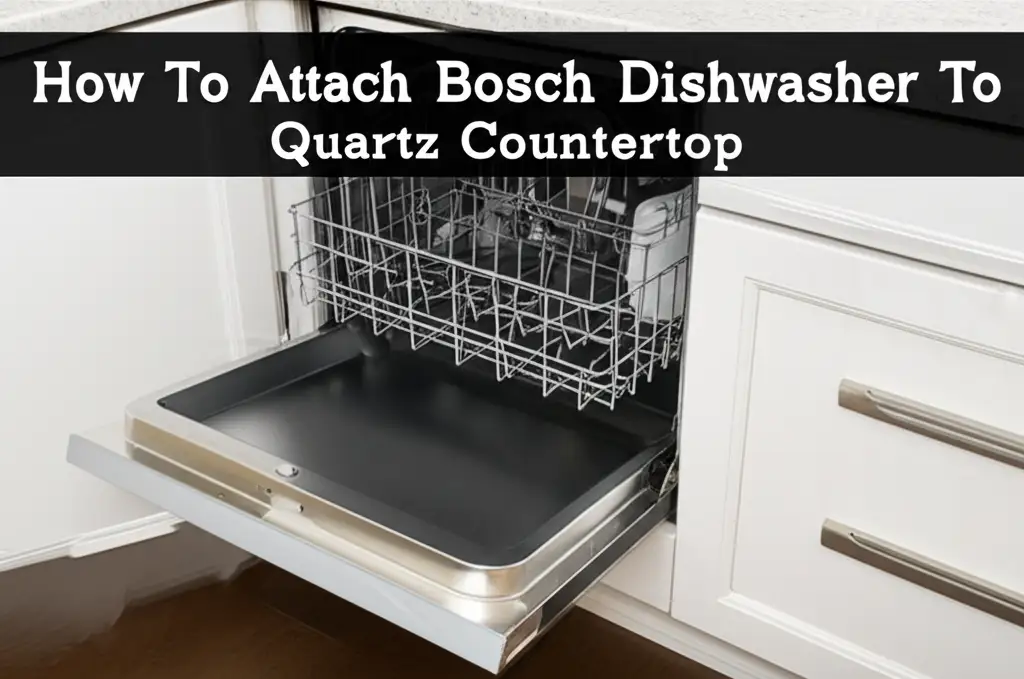
How To Attach Bosch Dishwasher To Quartz Countertop
Secure Your Bosch Dishwasher to Quartz Countertops
Moving into a new kitchen, or perhaps upgrading your appliances, feels exciting. A new Bosch dishwasher promises sparkling clean dishes. But then you face a common installation question: how do you attach Bosch dishwasher to quartz countertop? Many people wonder about this specific task. Quartz countertops are popular, beautiful, and durable. They also present a unique challenge for securing appliances like dishwashers. Standard attachment methods often involve drilling into the countertop. This is usually not an option with quartz. This article gives you a clear path. We will explore the best ways to ensure your Bosch dishwasher stays secure and functions perfectly. You will learn the correct tools, methods, and steps.
Takeaway
Attaching a Bosch dishwasher to a quartz countertop requires specific methods. You cannot drill into quartz from the top. Bosch dishwashers typically use side-mounting brackets. These brackets secure the appliance to the adjacent cabinets. If side mounting is not feasible, specialized adhesive methods or mounting kits can provide stability.
Clear Answer
To attach a Bosch dishwasher to a quartz countertop, use its built-in side-mounting brackets to secure the dishwasher to the side of the adjacent cabinets. If side mounting is not possible, use an adhesive kit or L-brackets with strong, specialized construction adhesive on the underside of the quartz countertop.
Understanding Bosch Dishwashers and Quartz Countertops
Before you begin, understanding both your Bosch dishwasher and your quartz countertop is important. Bosch dishwashers are known for their quiet operation and efficient cleaning. They often come with a specific design for attachment. This design usually features side-mounting brackets. These brackets extend from the sides of the dishwasher. You use them to attach the unit to the surrounding cabinets. This design helps avoid the need to drill into the countertop itself.
Quartz countertops are engineered stone surfaces. Manufacturers create them from natural quartz crystals, resins, and pigments. This composition makes quartz incredibly hard and non-porous. It resists scratches, stains, and impacts well. However, this hardness also makes quartz brittle under stress. Drilling into quartz, especially from the top surface, can cause cracking or chipping. This is a primary reason why top-mounting brackets are problematic with quartz. My experience has taught me that caution is key here. You want to protect your investment in beautiful quartz.
Many older dishwasher models or some brands use top-mount clips. These clips screw into the underside of the countertop. For quartz, this method is risky. You risk damaging your countertop. Bosch’s side-mounting system offers a safer alternative. This system attaches the dishwasher to the cabinet frames. It avoids contact with the quartz underside. This method keeps your quartz intact and your dishwasher stable. If you just installed your quartz countertop, remember to handle it with care. You can find more information about its care here.
Choosing the correct attachment method ensures stability. A stable dishwasher operates quietly. It also functions correctly. A loose dishwasher can vibrate. It can also move during cycles. This movement causes leaks or poor wash performance. Your dishwasher needs to be firm. This secures its position. It also prevents tipping when you pull out the racks. Proper installation is crucial. It ensures your appliance lasts for years.
Essential Tools and Materials for Dishwasher Attachment
You need the right tools and materials for any successful home project. Attaching your Bosch dishwasher to a quartz countertop is no different. Gathering everything beforehand saves time. It also prevents frustration. I always prepare my workspace first. This step makes the whole process smoother. You will need a few common household tools. Some specialized items might also be necessary.
Here is a list of essential tools you should have:
- Measuring Tape: Accurate measurements are crucial for fitting the dishwasher. You will use it to check the cabinet opening.
- Level: A good level ensures your dishwasher stands perfectly flat. This prevents drainage issues. It also reduces operational noise.
- Phillips Head Screwdriver: Most Bosch dishwashers use Phillips head screws for their brackets.
- Pliers: Pliers can help with tightening water lines. They also assist with adjusting leveling feet.
- Utility Knife: This is useful for scoring adhesive or opening packages.
- Flashlight or Headlamp: You will work in tight, dark spaces. Good lighting helps you see connections.
For materials, consider these items:
- Bosch Dishwasher Mounting Brackets (Side-Mounting): Your Bosch dishwasher should come with these. They attach to the cabinet sides.
- Wood Screws: These screws secure the side-mounting brackets to the cabinet frames. Use screws long enough to bite firmly into the cabinet wood.
- Silicone Adhesive (Construction Grade): If side-mounting is not an option, this strong adhesive secures brackets to the quartz underside. Choose a product designed for stone or general construction.
- Adhesive Mounting Plates/L-Brackets: These are optional. You use them if side mounting is impossible. They provide a surface for adhesive application.
- Shims: Small shims can help level the dishwasher on uneven floors. They can also fill gaps between the dishwasher and cabinet.
- Drop Cloths or Towels: Protect your floors and cabinets during the installation. Water leaks can happen.
- Safety Glasses and Gloves: Always wear safety gear. This protects your eyes and hands.
Having these items ready prevents trips to the hardware store. It makes the installation process efficient. I always double-check my list. This ensures I have every item before starting. Getting the right tools helps prevent damage. It also ensures a secure fit. You want your Bosch dishwasher to be stable. Proper tools make this possible.
Preparing the Dishwasher Opening and Area
Proper preparation of the installation area is a critical first step. This foundation sets you up for a smooth process. Before even thinking about the dishwasher itself, clear out the existing space. Remove any old appliances or debris. I like to start with a clean slate. This gives me plenty of room to work.
Begin by measuring the opening. Use your tape measure to check the width, height, and depth of the cabinet space. Bosch dishwashers typically fit standard 24-inch wide openings. However, variations exist. Ensure your specific Bosch model fits. Measure from the floor to the underside of your quartz countertop for height. Also, check the depth from the front edge to the back wall. This ensures the dishwasher will not stick out too far.
Next, examine the floor within the opening. It should be clean, dry, and level. If the floor is uneven, you might need to use shims. Place these shims under the dishwasher’s leveling feet later. This initial floor check prevents future problems. An uneven dishwasher does not drain well. It also causes noise and instability. You want a solid base for your appliance.
Confirm that all utility connections are ready and accessible. This includes the water supply line, the drain hose, and the electrical outlet. These connections should be within reach at the back of the opening. If you are replacing an old dishwasher, these lines should already be there. If this is a new installation, ensure they meet local plumbing and electrical codes. You may need to consult a professional for these connections. For instance, sometimes people ask if you install a dishwasher before or after the countertop. Knowing the sequence helps.
Before you slide the dishwasher in, consider the flooring. If you have soft flooring like vinyl or laminate, avoid pulling the dishwasher directly over it. This action can cause tears or damage. Use a piece of cardboard or a moving blanket. Slide the dishwasher over this protective layer. This small step protects your beautiful kitchen floor. My own experience taught me to always protect the flooring. It saves you from costly repairs later on.
Positioning and Leveling Your Bosch Dishwasher
Once the area is prepared, it is time to move your Bosch dishwasher into place. This stage requires careful handling. You want to avoid scratching your floors or cabinets. It is a good idea to have someone help you. A second pair of hands makes the process much easier and safer.
Gently slide the dishwasher into the opening. Do not push it all the way back yet. Leave enough room to access the water, drain, and electrical connections. These connections are typically located at the rear of the appliance. Now is the moment to connect them.
First, connect the water supply line. Use pliers to tighten the connection firmly but do not overtighten. Over-tightening can strip threads or crack fittings. Next, connect the drain hose to your sink’s drain or garbage disposal. Ensure the drain hose forms a high loop. This loop prevents dirty water from flowing back into the dishwasher. Finally, plug the power cord into the electrical outlet. Make sure the outlet matches the dishwasher’s power requirements. Always ensure the circuit breaker for the dishwasher is off before plugging it in. Safety comes first.
With the utilities connected, you can now slide the dishwasher fully into its cabinet opening. Push it gently until the front face aligns with your cabinet fronts. Some people like it flush, others prefer a slight recess. This is your choice. Now, the critical step of leveling begins. Your Bosch dishwasher has adjustable leveling legs at each corner. Use a wrench or pliers to turn these legs. Raise or lower each leg until the dishwasher is perfectly level from side to side and front to back.
Place your level on the top edge of the dishwasher. Adjust the front legs first until the bubble is centered. Then, place the level across the front-to-back direction. Adjust the rear legs if accessible, or use shims. An optimally leveled dishwasher prevents dishes from clanking. It also ensures proper water drainage. If you find water in the bottom of your Bosch dishwasher, it could be a leveling issue. You can learn more about this here. Proper leveling also reduces vibration and noise during operation. This step is often overlooked. However, it significantly impacts appliance performance and longevity.
Methods to Attach Bosch Dishwasher to Quartz Countertop
Attaching your Bosch dishwasher to a quartz countertop requires specific thought. Standard top-mounting methods are not safe for quartz. Bosch dishwashers typically offer a better solution. They use side-mounting brackets. This is the most common and recommended method.
Option A: Side Mounting (Standard for Bosch)
Bosch dishwashers usually come with metal mounting tabs or brackets on their sides. These tabs extend out when you pull them. You use them to attach the dishwasher to the adjacent cabinet walls. This method is ideal for quartz countertops. It avoids any drilling into the stone itself. I consider this the safest and most reliable way.
Here is how you do it:
- Locate Side Brackets: Find the metal tabs on the upper sides of your Bosch dishwasher. They might be folded inward for shipping. Pull them out to extend horizontally.
- Position Dishwasher: Push the dishwasher fully into the opening. Make sure it is level and centered. The side brackets should align with the cabinet frame or a sturdy wooden panel.
- Secure Brackets: Use wood screws to attach the side brackets to the cabinet frames. Ensure the screws bite firmly into the wood. Do not overtighten them. You need just enough pressure to hold the dishwasher steady. Two screws per side are usually sufficient. This method secures the dishwasher firmly. It prevents any movement or tipping.
This method works well for most installations. It protects your quartz countertop. It also provides a strong, stable attachment point.
Option B: Using Adhesive or Silicone (If Side Mounting Not Possible)
Sometimes, side mounting is not an option. This happens if your cabinets are metal or have no suitable wood frame for screws. In these cases, you can use specialized adhesive methods. This method involves attaching brackets to the underside of the quartz countertop using strong adhesive.
Here is the process:
- Prepare Surfaces: Clean the underside of the quartz countertop where the brackets will go. Use rubbing alcohol to remove any grease or dust. This ensures the adhesive bonds well.
- Apply Adhesive to Brackets: Use L-brackets or universal dishwasher mounting brackets. Apply a strong construction-grade silicone adhesive to one side of the brackets. Choose an adhesive specifically designed for stone or general construction.
- Attach Brackets: Press the adhesive-coated brackets firmly onto the clean underside of the quartz countertop. Position them carefully. They should align with the top screw holes on your Bosch dishwasher.
- Cure Time: Allow the adhesive to cure fully. This can take 24-72 hours, depending on the product. Do not attach the dishwasher until the adhesive is fully cured. This ensures a strong bond.
- Secure Dishwasher: Once cured, slide the dishwasher into place. Then, use screws to attach the top of the dishwasher to these newly installed brackets.
This method is less common for Bosch dishwashers. It is a good alternative when side mounting is not feasible. For insights into similar installations, you might find this guide helpful: How to Install a Dishwasher Under Granite Countertop.
Option C: Specialized Brackets/Kits
Several manufacturers offer specialized dishwasher mounting kits. These kits often include angled brackets or wider plates. They help distribute weight or provide more surface area for adhesive. These kits are often called “dishwasher accessory kits for stone countertops.”
How to use them:
- Identify Kit Components: Each kit comes with specific parts and instructions. Follow them closely.
- Attach to Dishwasher: Some kits attach directly to the dishwasher’s frame. Others are universal.
- Secure to Countertop/Cabinet: These kits often use a combination of adhesive to the quartz or screws into the cabinet sides. Some kits might include special tension rods that press against the countertop.
Always consult the Bosch dishwasher manual first. It specifies the preferred attachment methods. Bosch typically favors side mounting for good reason. It is the safest for your quartz. While general principles apply to various dishwashers, like those from Samsung, each brand might have its specific design. You can learn more about attaching other dishwashers, for example, how to attach a Samsung dishwasher to a granite countertop, to understand the variations. Regardless of the method, the goal is always a secure and stable dishwasher.
Securing the Dishwasher and Final Checks
After you have chosen and implemented your attachment method, it is time for final securing and checks. This stage ensures everything is tight, safe, and ready for use. You want to prevent any movement. A loose dishwasher can be a source of noise. It also poses a safety risk.
First, double-check all attachment points. If you used side-mounting brackets, ensure the screws are firmly tightened into the cabinet sides. If you used an adhesive method, verify the adhesive has fully cured. Then, make sure the screws connecting the dishwasher to the adhesive-mounted brackets are tight. Do not overtighten them. Just make them snug. Excessive force can strip screws or damage materials. My rule is usually “hand-tight, plus a quarter turn.”
Next, conduct a thorough test of your Bosch dishwasher. Close the dishwasher door. Run a short wash cycle. During this cycle, carefully observe the appliance. Check for any unusual vibrations or noises. A well-installed dishwasher should operate quietly and smoothly. Listen for rattling. Also, pay attention to the display. You want to be sure everything is working as it should. Knowing how to know when your Bosch dishwasher is done is helpful for proper testing and use.
While the cycle runs, crucial checks for leaks. Examine all water connections. Look at the water supply line and the drain hose connections. Feel around them with a dry paper towel. Any dampness indicates a leak. Tighten connections if you find any drips. If a leak persists, you might need to re-tape or re-seal the connections. Do this immediately to prevent water damage to your cabinets or floor. Water damage is something no homeowner wants.
Once the cycle finishes, open the dishwasher door. Check if it opens and closes smoothly. The door should latch securely without requiring excessive force. If the door feels stiff or rubs, the dishwasher might not be perfectly level or aligned. Adjust the leveling feet if needed. This fine-tuning ensures smooth operation.
Finally, install the toe kick panel or kick plate. This is the decorative panel at the bottom front of the dishwasher. It covers the leveling legs and plumbing connections. This step completes the aesthetic integration of the dishwasher into your kitchen. It gives a finished look. Your Bosch dishwasher now looks like a seamless part of your kitchen design. It is now ready for years of efficient use.
Troubleshooting Common Attachment Issues
Even with careful planning, sometimes issues arise during installation. Knowing how to troubleshoot common attachment problems helps you address them quickly. My experience tells me that most problems have simple solutions. Do not get discouraged if something does not go perfectly at first.
One common issue is dishwasher wobble. If your Bosch dishwasher moves or wobbles when you pull out the racks, it is not properly secured or leveled. First, recheck the leveling legs. Ensure all four legs make firm contact with the floor. Adjust them until the dishwasher is stable and perfectly level. Then, re-examine your chosen attachment points. If using side brackets, ensure the screws are fully engaged in the cabinet. If using adhesive, check that the bond is strong and cured. You may need to add more screws to the side cabinets. Or, you might need to reinforce the adhesive bond.
Another problem is bracket alignment issues. The side-mounting brackets on your Bosch dishwasher might not line up perfectly with your cabinet frames. This can happen due to slight variations in cabinet construction or dishwasher placement. If the brackets are slightly off, you can often gently bend them. Use pliers to adjust their angle slightly. This helps them meet the cabinet squarely. If a large gap exists, you might need to use shims or a small block of wood. Place it between the bracket and the cabinet. Then, screw through the bracket and shim into the cabinet. This creates a solid anchor point.
Preventing quartz damage is a top concern. If you are using any method that involves the underside of the quartz, be extra cautious. Never try to drill into quartz. If you used adhesive and need to remove a bracket, do not pry it off forcefully. You could chip the quartz. Instead, use a utility knife to score the adhesive. Then, use a specialized adhesive remover if necessary. Go slowly and carefully. This preserves your countertop. If you do get a dull spot on your quartz, there are ways to fix it. You can find information on how to fix a dull spot on quartz countertop to help you.
Finally, water leaks after installation can occur. This is often related to utility connections. If you notice a leak, immediately turn off the water supply to the dishwasher. Then, re-examine the connections. Ensure all fittings are tight. You might need to reapply plumber’s tape or pipe sealant to threaded connections. Sometimes, a washer might be missing or pinched. Replace it if needed. Always run a short test cycle after any adjustments to confirm the leak is resolved. Addressing these issues promptly saves you from bigger problems down the line. A little patience and methodical troubleshooting go a long way.
FAQ Section
Can you drill into quartz for a dishwasher?
No, you should not drill into quartz for a dishwasher. Quartz is an engineered stone that can crack or chip when drilled, especially from the top. Bosch dishwashers typically use side-mounting brackets, which attach to the adjacent cabinets, making drilling into the countertop unnecessary and risky.
How do you attach a Bosch dishwasher without drilling the countertop?
Bosch dishwashers are designed to attach without drilling the countertop. They use side-mounting brackets that extend from the top sides of the appliance. You secure these brackets with screws to the inside of the adjacent wooden cabinet frames. This method provides a stable and secure installation.
What are side mounting brackets for a Bosch dishwasher?
Side mounting brackets are metal tabs located on the upper sides of a Bosch dishwasher. You extend these tabs and then screw them into the wooden side panels or frames of the cabinets next to the dishwasher opening. This secures the dishwasher in place, preventing it from tipping or moving.
Is it okay for a dishwasher to sit loose?
No, it is not okay for a dishwasher to sit loose. A loose dishwasher can vibrate excessively, create noise, and potentially tip forward when you open its door or pull out the racks. It can also cause leaks or inefficient operation due to improper leveling and stability.
What kind of adhesive works on quartz?
If side mounting is not possible, a strong construction-grade silicone adhesive designed for stone or general building materials can work on quartz. You apply it to specialized L-brackets or mounting plates, which are then adhered to the clean underside of the quartz countertop. Allow the adhesive to cure fully before attaching the dishwasher.
Do all dishwashers attach the same way?
No, not all dishwashers attach the same way. While most modern dishwashers offer side-mounting options, some older models or specific brands may primarily use top-mounting clips that screw into the underside of the countertop. Always consult your specific dishwasher’s installation manual for the recommended attachment method.
Conclusion
Attaching your Bosch dishwasher to a quartz countertop does not need to be a daunting task. You now understand the challenge and the best solutions. The key is to avoid drilling into your beautiful quartz. Bosch dishwashers simplify this with their standard side-mounting brackets. These brackets secure the appliance firmly to your cabinet frames. This method is safe, effective, and preserves your countertop’s integrity.
- Bosch dishwasher
- quartz countertop
- dishwasher installation

Todd Martin
Senior Writer
With over 15 years of experience in home renovation and design, I started HEG to share what I’ve learned with homeowners who want to create spaces that are both beautiful and functional. I’ve always believed in a hands-on approach, and over the years, I’ve picked up practical solutions that actually work. Through HEG, I aim to make home improvement more approachable, sharing real tips that help you create a home you truly love.