· Todd Martin · Kitchen Appliances · 14 min read
How To Bread Toaster Oven
Mastering How To Bread Toaster Oven: Your Guide to Perfect Loaves
My kitchen is small, but my love for fresh bread is mighty. I once thought making bread was only for large ovens. Then, I discovered the incredible capability of my toaster oven. Learning how to bread toaster oven style has opened up a world of possibilities. It proves you do not need a huge kitchen to enjoy warm, homemade loaves.
This guide will show you everything you need. You will learn about preparing dough and choosing the right pan. We will cover precise baking temperatures. We will also discuss common issues and delicious recipes. Your toaster oven is a powerful baking tool. Get ready to bake wonderful bread right on your countertop.
Takeaway:
- Toaster ovens are great for small-batch bread baking.
- Precise temperature control is key for success.
- Choose the right pan size for your toaster oven.
- Understand dough proofing and shaping for compact baking.
- Regular cleaning ensures optimal performance.
How To Bread Toaster Oven?
To bread in a toaster oven, preheat it to the correct temperature. Place a small, well-prepared loaf of dough or quick bread batter in a suitable pan. Bake until golden brown and cooked through. Adjust baking time and temperature as needed for your specific toaster oven and bread type.
Understanding Your Toaster Oven for Bread Baking
Using a toaster oven for baking bread is an excellent choice. These compact appliances are more than just for toast. They offer surprising versatility for small-batch baking. Understanding your specific model is the first step. Different toaster ovens have varying features and heating elements.
Many models now include convection settings. This feature circulates hot air. It helps bread bake more evenly. This also often reduces baking time. Look at your oven’s manual to understand its capabilities. Knowing your oven helps you adjust recipes for the best results.
Temperature control is very important. Toaster ovens can heat up quickly. They can also fluctuate in temperature more than full-sized ovens. Using an external oven thermometer can be a smart move. It helps verify your oven’s true temperature. This ensures your bread bakes at the correct heat. For more on optimizing your toaster oven, consider exploring its cleaning and maintenance.
Key Considerations for Your Toaster Oven:
- Size and Capacity: Toaster ovens come in many sizes. Measure the inside carefully. This helps you select the right bread pan. A pan that is too large will not fit or will block airflow.
- Heating Elements: Most toaster ovens have top and bottom heating elements. Some have extra elements on the sides. Understand where the heat comes from. This affects where you place your bread.
- Convection Feature: If your oven has convection, use it for bread. It promotes even browning and a crisper crust. Experiment with it to see the difference.
Essential Tools and Ingredients for Toaster Oven Bread
Having the right tools makes all the difference when you bread toaster oven style. You do not need a lot of specialized equipment. Just a few key items will help you succeed. Selecting good ingredients is also crucial for delicious results. Quality flour and fresh yeast lead to better bread.
Start with your basic baking equipment. A small loaf pan is essential. Make sure it fits comfortably inside your toaster oven. Metal pans generally conduct heat well. Silicone pans can also work, but they may require slightly longer baking times.
Parchment paper is a baker’s best friend. It prevents sticking and makes cleanup easy. A wire cooling rack is also important. It allows air to circulate around the baked bread. This prevents the bottom from getting soggy. I always keep these items handy.
Must-Have Tools:
- Small Loaf Pan: Choose one that fits inside your toaster oven with some space for air circulation. Common sizes are 5x3 inches or 6x3 inches.
- Mixing Bowls: You will need bowls for mixing and proofing dough. Glass or stainless steel bowls work well.
- Measuring Cups and Spoons: Accurate measurements are critical for baking. Use both dry and liquid measuring cups.
- Parchment Paper: This prevents sticking and helps with easy removal. It also makes cleanup simpler.
- Wire Cooling Rack: Essential for cooling bread. It prevents moisture buildup on the bottom crust.
- Kitchen Scale (Optional but Recommended): Weighing ingredients, especially flour, is more accurate than cup measures.
Important Ingredients:
- Flour: All-purpose flour is a great starting point. Bread flour has higher protein, making chewier bread.
- Yeast: Active dry or instant yeast works for most recipes. Ensure it is fresh for proper rising.
- Water: Use lukewarm water, around 105-115°F (40-46°C), to activate yeast.
- Salt: Essential for flavor and controlling yeast activity.
- Sugar/Honey (Optional): A small amount can help activate yeast and add flavor.
Preparing Your Dough for Toaster Oven Success
Proper dough preparation is the heart of making good bread. This step is no different for a toaster oven than for a large oven. The key is to manage the dough in smaller batches. This makes it suitable for your compact appliance. I always ensure my ingredients are at room temperature. This helps with consistent mixing.
Start by activating your yeast if using active dry yeast. Mix it with lukewarm water and a pinch of sugar. Let it sit for a few minutes until foamy. This confirms your yeast is alive and ready. Then, combine the flour and salt in a separate bowl. Gradually add the wet ingredients to the dry.
Kneading is crucial for developing gluten. Gluten gives bread its structure. You can knead by hand on a floured surface. Or, you can use a stand mixer with a dough hook. Knead until the dough is smooth and elastic. It should spring back when poked gently. If you are baking something like sourdough, different kneading methods might apply, but the general principle of developing gluten remains. For various bread-making insights, consider resources like how to make sourdough bread in a panasonic bread maker.
Proofing Your Dough:
- First Proofing: Place the kneaded dough in a lightly oiled bowl. Turn it once to coat all sides. Cover the bowl with plastic wrap or a damp towel. Let it rise in a warm, draft-free place. It should double in size. This can take 1-2 hours depending on the temperature.
- Shaping Small Loaves: Once the first proof is complete, gently punch down the dough. This releases excess gas. Divide the dough into portions suitable for your small loaf pans. Shape each portion into a small loaf or roll. Avoid overworking the dough.
- Second Proofing (Final Rise): Place the shaped dough into your prepared toaster oven-safe pans. Cover them loosely. Let them rise again in a warm spot. This second rise makes the bread light and airy. It should visibly increase in size, but not necessarily double. This usually takes 30-60 minutes.
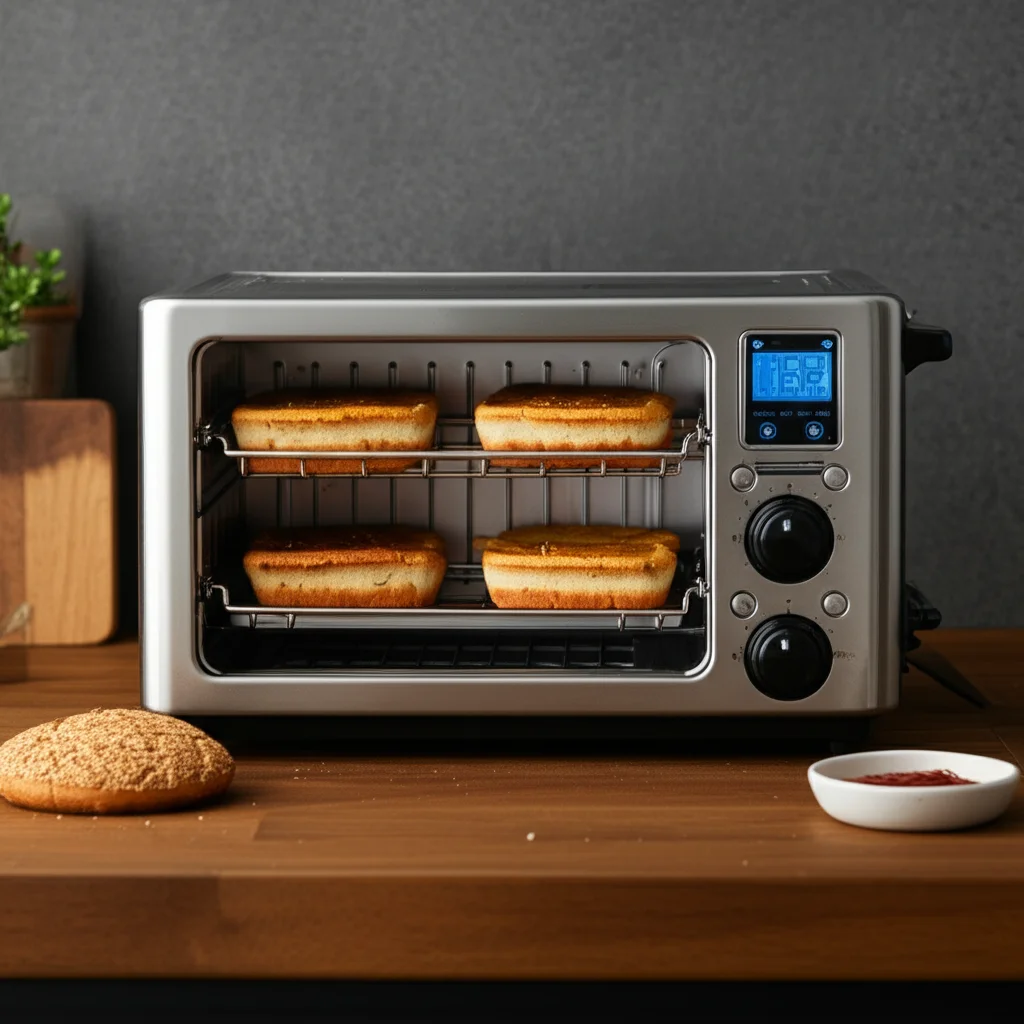
Baking Bread in a Toaster Oven: Step-by-Step Guide
Baking bread in a toaster oven requires attention to detail. The small size means heat distribution can be intense. Precise preheating and placement are very important. I always preheat my toaster oven longer than I think necessary. This ensures it reaches the target temperature and stabilizes.
First, position your oven rack correctly. For most loaves, the middle rack works best. This provides even heat from both top and bottom elements. If your toaster oven has multiple rack positions, experiment. You might find a slightly lower position better for preventing the top from browning too quickly.
Once the oven is preheated, carefully place your proofed dough inside. Some bakers like to add a small heat-safe dish of water to the bottom. This creates steam. Steam helps create a crisp, professional-looking crust. However, not all toaster ovens have space for this. If your oven tends to overheat, you might need to adjust your baking strategy. Learn how to troubleshoot an oven that is too hot if you notice issues.
Baking Steps:
- Preheat Thoroughly: Set your toaster oven to the recipe’s recommended temperature, typically 375-400°F (190-205°C). Allow it to preheat for at least 15-20 minutes. This ensures the internal temperature is stable.
- Prepare the Dough: Score the top of your loaf with a sharp knife or razor blade. This helps control expansion. It also adds a nice aesthetic.
- Load the Oven: Carefully place the bread pan on the middle rack. Close the door gently.
- Initial Bake: Bake for the first 10-15 minutes at the higher temperature. This creates oven spring.
- Adjust Temperature (if needed): Reduce the temperature slightly if the crust is browning too quickly. For example, drop from 400°F to 375°F.
- Monitor and Rotate: Keep an eye on your bread. Toaster ovens can have hot spots. Rotate the pan halfway through baking. This promotes even browning.
- Check for Doneness: The bread is done when it is golden brown. The internal temperature should be around 200-210°F (93-99°C). Tap the bottom; it should sound hollow.
- Cooling: Remove the bread from the pan immediately. Place it on a wire cooling rack. Let it cool completely before slicing. This prevents a gummy texture.
Troubleshooting Common Toaster Oven Bread Issues
Even experienced bakers face challenges. Baking bread in a toaster oven can present unique issues. Its small size and powerful elements sometimes lead to unexpected results. Do not get discouraged if your first loaf is not perfect. Understanding common problems helps you fix them. I learned many tricks through trial and error.
One frequent issue is uneven baking. Parts of the loaf might be darker than others. This is often due to hot spots in the toaster oven. Rotating your bread halfway through baking helps immensely. This ensures all sides get even heat exposure. You might also notice the top browning too quickly.
Another common problem is a dense or heavy crumb. This can happen for several reasons. It might be under-proofing. The yeast might be inactive. Or, the dough might have been over-kneaded. Always check your yeast’s expiration date. Ensure your proofing environment is warm enough.
Solving Common Baking Problems:
- Crust Too Dark/Burning:
- Solution: Cover the top of the bread loosely with aluminum foil. Do this about halfway through baking. Reduce the oven temperature by 15-25°F (8-14°C) next time.
- Pale Crust:
- Solution: Increase the baking time slightly. You can also raise the temperature by 15-25°F (8-14°C) for the last 5-10 minutes. Ensure enough steam is present if your oven allows.
- Dense or Gummy Inside:
- Solution: The bread might be undercooked. Bake it longer next time. Check the internal temperature with a thermometer. Ensure proper proofing; under-proofed dough often leads to dense bread.
- Uneven Baking/Hot Spots:
- Solution: Rotate the bread pan 180 degrees halfway through the baking time. Experiment with different rack positions in your toaster oven.
- Bread Sticking to Pan:
- Solution: Always grease your pan thoroughly. Use parchment paper for extra insurance.
Delicious Recipes and Ideas for Toaster Oven Bread
Your toaster oven is capable of more than just simple white loaves. It is perfect for a variety of small-batch bread recipes. Thinking creatively about sizes and types of bread expands your baking horizons. I love using my toaster oven for quick breads. They come together easily and bake beautifully in smaller pans.
Quick breads like banana bread, zucchini bread, or corn bread are fantastic options. They do not require yeast or proofing. This makes them less time-consuming. You can bake mini loaves that are perfect for snacks or gifting. These recipes usually adapt well to small loaf pans.
Beyond quick breads, consider yeast rolls or mini baguettes. These are individual portions. They fit perfectly in a toaster oven. You can also make small artisan loaves. Focus on recipes designed for smaller yields. This prevents dough from overflowing your pan.
Toaster Oven Bread Ideas:
- Mini Quick Breads:
- Banana Bread: Use a recipe scaled down for a single small loaf. It bakes up moist and flavorful.
- Zucchini Bread: A great way to use garden zucchini. Often freezes well for later enjoyment.
- Corn Bread: Bake in a small cast iron skillet or a mini loaf pan. It develops a wonderful crust.
- Yeast-Based Small Loaves/Rolls:
- Dinner Rolls: Shape dough into individual rolls. Bake a batch for dinner.
- Mini Baguettes: Form narrow loaves that fit length-wise in your toaster oven.
- Focaccia (Individual Portions): Press dough into a small, oiled pan. Top with herbs and olive oil.
- Reheating and Refreshing:
- Day-Old Bread: Spritz with water and warm in the toaster oven. It brings stale bread back to life.
- Frozen Rolls/Pastries: Use your toaster oven to bake off frozen dough. Or, simply reheat store-bought items.
Maintaining Your Toaster Oven for Optimal Baking
A clean toaster oven performs better. Regular maintenance is key to consistent baking results. Crumbs and spills can affect heating. They can also create odors or smoke. Keeping your toaster oven clean extends its life. It also ensures your bread bakes without issues.
I make it a habit to wipe down my toaster oven after each use. Small spills are easier to clean immediately. Let the oven cool completely first. Then, use a damp cloth to wipe the interior. A bit of dish soap can help with grease.
Deep cleaning is also important. Crumbs accumulate under the heating elements. They can also get trapped in crevices. Refer to your owner’s manual for specific cleaning instructions. Many parts are removable for easier washing. Regular cleaning prevents accumulated residue from affecting taste or baking consistency. For detailed guides on appliance care, check out resources like how to clean your air fryer toaster oven or general advice on how to clean a toaster oven.
Cleaning Tips for Your Toaster Oven:
- Unplug First: Always unplug your toaster oven before cleaning. This ensures your safety.
- Remove Crumb Tray: Most toaster ovens have a removable crumb tray. Empty and wash it frequently.
- Wipe Down Interior: Use a soft, damp cloth with a mild dish soap solution. Wipe down the walls and ceiling. Avoid harsh abrasives that can scratch surfaces.
- Clean Racks and Pans: Remove racks and any included baking pans. Wash them in warm, soapy water. For stubborn grease, a baking soda paste can work.
- Exterior Cleaning: Wipe the exterior with a damp cloth. Use a glass cleaner for the door.
- Address Spills Immediately: If something spills or burns, let it cool. Then clean it as soon as possible. This prevents it from baking on and becoming harder to remove.
FAQ Section
Can a toaster oven really bake a good loaf of bread?
Yes, a toaster oven can bake an excellent loaf of bread, especially small ones. It is great for single servings or mini loaves. The key is to manage the smaller size and powerful heating elements. Proper temperature control and pan selection lead to success.
What size bread pan fits in a standard toaster oven?
Standard toaster ovens usually accommodate small loaf pans. Look for sizes around 5x3 inches or 6x3 inches. Always measure the interior of your specific toaster oven first. Ensure there is enough space for air circulation around the pan.
Do I need to adjust baking times for a toaster oven?
Yes, you may need to adjust baking times and temperatures. Toaster ovens heat up quickly. They can also run hotter than their setting indicates. Monitor your bread closely. Consider reducing the temperature slightly or shortening the baking time from a conventional oven recipe.
How do I prevent my bread from burning on top in a toaster oven?
To prevent the top of your bread from burning, loosely tent it with aluminum foil. Do this if it starts browning too quickly. You can also try lowering the rack position slightly. Another option is to reduce the oven temperature by 15-25°F for the last part of baking.
Can I make sourdough bread in a toaster oven?
Yes, you can make small sourdough loaves in a toaster oven. The process for making the dough is the same. Just ensure your proofed sourdough fits in a small, oven-safe pan. Adjust baking time and temperature for the smaller oven.
Is convection mode good for baking bread in a toaster oven?
Yes, convection mode is generally good for baking bread in a toaster oven. It circulates hot air. This promotes more even baking and a crisper crust. If your toaster oven has a convection setting, I recommend experimenting with it for bread.
Conclusion
I hope this guide has shown you how easy it is to bread toaster oven masterpieces. Baking homemade bread no longer needs a giant kitchen. Your compact toaster oven is a powerful tool. It can produce warm, fragrant loaves right on your countertop. We covered everything from choosing the right pan to troubleshooting common issues.
Remember, practice makes perfect. Experiment with different recipes and techniques. You will quickly learn how your specific toaster oven performs. Soon, you will be enjoying delicious, fresh bread whenever you want. So, preheat that little oven and get baking! The delightful aroma of homemade bread awaits you.
- toaster oven
- bread baking
- homemade bread
- small appliance cooking
- kitchen tips

Todd Martin
Senior Writer
With over 15 years of experience in home renovation and design, I started HEG to share what I’ve learned with homeowners who want to create spaces that are both beautiful and functional. I’ve always believed in a hands-on approach, and over the years, I’ve picked up practical solutions that actually work. Through HEG, I aim to make home improvement more approachable, sharing real tips that help you create a home you truly love.