· Todd Martin · Home Improvement · 20 min read
How To Build Corner Cabinet
Build Your Own Corner Cabinet: A Step-by-Step DIY Guide
Do you dream of custom storage that fits perfectly into that awkward corner space? Building a corner cabinet yourself is a rewarding project. It adds functional storage and enhances the look of any room. You can create a piece that perfectly matches your home’s style and your specific storage needs.
This guide helps you understand the process from start to finish. We cover planning, selecting materials, using the right tools, and the step-by-step construction. By the end, you will have the knowledge to build a beautiful and practical corner cabinet. Let’s make that unused corner a valuable part of your home.
Takeaway
- Plan Thoroughly: Measure your space accurately and decide on the cabinet type and design.
- Gather Proper Tools and Materials: Ensure you have all necessary power tools, hand tools, wood, and hardware.
- Build the Box First: Focus on precise cuts and strong joinery for the cabinet’s main structure.
- Add Doors and Shelving: Customize the interior and exterior elements for optimal use and appearance.
- Apply a Quality Finish: Sand, stain, or paint your cabinet for durability and beauty.
- Install Safely: Secure the cabinet firmly to the wall or floor.
Building a corner cabinet involves careful planning, precise measurements, and step-by-step assembly. You will cut wood pieces, join them to form the cabinet box, and then add doors, shelves, and a finish. This project allows you to create custom storage that fits snugly into any corner, maximizing your space efficiently.
Understanding Corner Cabinet Types and Design
Starting any cabinet project begins with smart planning. Before you cut any wood, you need a clear vision. This includes deciding what type of corner cabinet you want to build and how it will function in your space. Proper planning saves time and prevents mistakes later on.
There are different types of corner cabinets, each serving a unique purpose. Knowing these options helps you choose the best design for your home. We often see corner cabinets in kitchens, but they also fit well in living rooms, bedrooms, or even hallways. Think about what items you want to store in your new cabinet.
Types of Corner Cabinets
- Standard Base Corner Cabinet: These usually have a blind corner design or a Lazy Susan. A blind corner cabinet extends along two walls, with one part hidden or “blind” behind an adjacent cabinet. This design maximizes storage in a tight space.
- Lazy Susan Corner Cabinet: This cabinet often has a pie-cut shape and features a rotating circular shelf system. It is excellent for easy access to items like pots, pans, or pantry goods. A Lazy Susan makes finding things simple. If you are looking to specifically optimize this space, learn how to organize a Lazy Susan corner cabinet.
- Wall Corner Cabinet: These cabinets hang on the wall, often above base cabinets. They can also have a blind corner or pie-cut shape. Wall cabinets provide overhead storage, perfect for dishes or lighter items.
- Diagonal Corner Cabinet: This type has a diagonal front that connects two perpendicular walls. It offers a larger opening and more accessible storage space than a blind corner. This design often houses sinks in kitchens or media in living rooms.
- Custom Corner Unit: You might design a unique unit, like a corner bookshelf or a corner desk setup. These projects adapt the basic corner cabinet principles to fit specific needs. Building a corner cabinet can be a fantastic way to create a corner bookshelf that fits your space perfectly.
Measuring Your Space Accurately
Accurate measurements are very important. Even small errors can lead to big problems when assembling your cabinet. Use a tape measure and a pencil to record all dimensions. Measure the walls where the cabinet will sit, noting height, width, and depth.
Consider any obstacles like existing trim, outlets, or window frames. These details affect your cabinet’s fit. Draw a sketch of your corner, labeling all measurements. Double-check your numbers to ensure accuracy. This careful preparation ensures your custom corner cabinet fits exactly as planned.
Essential Tools and Materials for Building Your Cabinet
Building a sturdy and good-looking corner cabinet requires the right set of tools and materials. Having everything ready before you start cuts down on interruptions. It also helps the building process go smoothly. Think of this step as preparing your workshop for success.
Choosing good quality materials is just as important as having the right tools. The type of wood you pick impacts the cabinet’s durability and its final look. Hardware choices affect how well your cabinet functions and how long it lasts. Investing in quality items now saves you problems later.
Essential Tools
- Measuring Tape and Pencil: For accurate marking and layout.
- Circular Saw or Table Saw: For precise, straight cuts on large wood sheets. A table saw offers more accuracy for repetitive cuts.
- Miter Saw: For cutting precise angles, especially useful for face frames or trim.
- Drill/Driver: For pre-drilling holes and driving screws.
- Kreg Jig (Pocket Hole Jig): Creates strong, hidden joints. This is a favorite tool for cabinet building.
- Clamps: Essential for holding pieces together while glue dries or screws are driven.
- Wood Glue: For strong, long-lasting joints.
- Sandpaper and Sander: For smoothing wood surfaces before finishing.
- Safety Glasses and Hearing Protection: Always protect your eyes and ears when using power tools.
- Level and Square: To ensure your cabinet is plumb and square during assembly.
Recommended Materials
- Plywood (3/4 inch and 1/4 inch): Plywood is a common choice for cabinet boxes because it is stable and strong. Use 3/4 inch for the frame and shelves, and 1/4 inch for the back panel. This material provides a solid foundation for your simple wall cabinet box.
- Solid Wood (e.g., Poplar, Maple, Oak): Use this for face frames, doors, and drawer fronts if you want a more traditional look. Solid wood holds up well to wear and tear.
- Wood Screws: Various lengths for joining different parts. Choose screws appropriate for the wood thickness.
- Cabinet Hinges: concealed or surface-mount hinges depending on your door style.
- Cabinet Pulls/Knobs: For doors and drawers. Consider the style and finish you want. You can learn more about how to install cabinet pulls later in the process.
- Shelf Pins: To support adjustable shelves.
- Wood Filler: To fill screw holes or imperfections.
- Finish (Paint, Stain, Polyurethane): To protect the wood and give your cabinet its final appearance. Consider how to seal cabinet paint for a durable finish.
Having all these items ready before you begin cutting helps your project flow smoothly. It ensures you can focus on the craftsmanship without interruption. This preparation is a key step towards building a successful corner cabinet.
Step-by-Step Construction: Building the Cabinet Box
Building the cabinet box is the core of your project. This part creates the main structure that will hold everything. Precision in this step is crucial for a stable and square cabinet. Take your time with each cut and assembly.
Start by laying out all your cuts on the plywood. Measure twice and cut once. Use a straight edge or a cutting guide with your circular or table saw for accurate cuts. Label each piece as you cut it to avoid confusion later.
Cutting and Preparing the Panels
- Cut Side Panels: Determine the height and depth of your cabinet. Cut two identical side panels from 3/4-inch plywood. For a standard 90-degree corner cabinet, these panels will form the outer sides.
- Cut Top and Bottom Panels: Cut the top and bottom panels to match your desired width and depth. Ensure they are perfectly square. These will connect the side panels.
- Cut Back Panel: For the back, use 1/4-inch plywood. This panel adds rigidity and keeps the cabinet square. Measure the exact dimensions of the opening created by the assembled sides, top, and bottom.
- Cut Shelves (Optional): If your design includes fixed shelves, cut them to size now. For adjustable shelves, you’ll drill shelf pin holes later.
Assembling the Cabinet Box
- Drill Pocket Holes: Using your Kreg Jig, drill pocket holes on the edges of your top and bottom panels. These holes will connect these panels to the side panels. Ensure the holes are placed strategically for strong joints.
- Attach Side Panels: Apply wood glue along the edges of the side panels where they meet the top and bottom panels. Use pocket hole screws to secure the top and bottom panels to the side panels. Use clamps to hold pieces firmly while you drive screws. Ensure the assembly is square using a carpenter’s square.
- Install Stretchers/Cleats: For base cabinets, install stretchers at the top and bottom front. These provide points for attaching the face frame and counter top. For wall cabinets, add hanging cleats at the top and bottom back for secure mounting. These foundational pieces help in building robust base kitchen cabinets.
- Attach Back Panel: Once the main box is assembled and square, attach the 1/4-inch plywood back panel. Apply wood glue to the edges of the cabinet box. Then, nail or screw the back panel into place. The back panel significantly adds to the cabinet’s stability and squareness. Ensure the back panel is flush with the edges.
This structured approach ensures that your cabinet box is strong and perfectly aligned. A well-built box is the foundation for a professional-looking corner cabinet.
Crafting and Attaching Cabinet Doors and Drawers
Cabinet doors and drawers are key elements of your corner cabinet. They define its style and provide access to the storage inside. Building these components requires careful attention to detail for a smooth operation and appealing finish. This step is where your cabinet starts to truly take shape.
Whether you choose simple slab doors or more decorative raised panel doors, precision is important. Any misalignment will be noticeable. Take your time with measurements and cuts to ensure a perfect fit.
Building Cabinet Doors
- Measure Door Openings: Measure the exact height and width of each cabinet opening. Subtract 1/8 inch from each dimension for clearance. This creates a 1/16-inch gap on all sides when the door is installed.
- Cut Door Panels: For slab doors, cut your chosen material (e.g., plywood, MDF, or solid wood) to these exact dimensions. For framed doors, cut stiles (vertical pieces) and rails (horizontal pieces). Assemble them using pocket holes, dowels, or mortise and tenon joints.
- Prepare for Hinges: Decide on your hinge type (e.g., concealed European hinges, surface-mount hinges). Mark and drill holes for the hinges on both the door and the cabinet frame. Concealed hinges require a specific drill bit (Forstner bit) and careful alignment.
Installing Cabinet Doors
- Attach Hinges to Doors: Screw the hinges securely to the cabinet doors.
- Attach Doors to Cabinet: Position the door onto the cabinet opening. Align the hinges with the marked spots on the cabinet frame. Screw the hinge plates to the cabinet.
- Adjust Doors: Most hinges allow for adjustment. Adjust the doors up, down, left, right, and in or out until they are perfectly aligned. Ensure there are even gaps around all sides of the door. This step ensures a professional look and smooth operation. For more ideas on how to customize your cabinet’s appearance, you might consider how to decorate cabinet doors. If you wish to incorporate transparent elements, learning how to make glass cabinet doors could be a great addition.
Building and Installing Drawers (If Applicable)
- Measure Drawer Openings: Measure the inside dimensions of your drawer opening. Subtract necessary clearances for drawer slides.
- Cut Drawer Box Components: Cut four sides and a bottom panel for each drawer box. Use 1/2-inch or 5/8-inch plywood for the sides and 1/4-inch plywood for the bottom.
- Assemble Drawer Boxes: Join the drawer box sides using pocket holes, rabbet joints, or dovetails. Ensure the box is square. Route a dado on the inside bottom edge of the sides to accept the drawer bottom panel. Slide the bottom into the dado.
- Install Drawer Slides: Attach drawer slides to the inside of the cabinet and to the sides of the drawer boxes. Follow the slide manufacturer’s instructions for proper placement.
- Attach Drawer Fronts: Once the drawer box slides smoothly, attach the decorative drawer front. Use screws from the inside of the drawer box, adjusting until the front is perfectly aligned with adjacent doors or drawer fronts.
This detailed process ensures that your cabinet doors and drawers operate smoothly and enhance the overall aesthetic of your custom corner cabinet.
Finishing Touches: Sanding, Painting, and Hardware Installation
After the construction of your corner cabinet is complete, the finishing touches make all the difference. This stage transforms your raw woodworking project into a polished piece of furniture. It is where you give your cabinet its character and protect it for years to come. Do not rush this part, as a good finish enhances the cabinet’s beauty and durability.
The finishing process involves several important steps. Each step prepares the surface for the next, ensuring a smooth, even, and lasting result. Proper surface preparation is key to a professional-looking finish.
Sanding for a Smooth Surface
- Start with Coarse Grit: Begin sanding with 120-grit sandpaper to remove any rough spots, glue squeeze-out, or pencil marks. Work systematically over all surfaces of the cabinet box, doors, and drawer fronts.
- Progress to Finer Grits: Move to 150-grit sandpaper, then to 180-grit, and finally to 220-grit. Each successive grit removes the scratches left by the previous, leaving a silky smooth surface. For best results, sand with the grain of the wood.
- Clean Dust: After each sanding stage, use a vacuum cleaner and a tack cloth to remove all dust. Dust can contaminate your finish and lead to a rough texture.
Applying Your Chosen Finish
Choose Your Finish:
- Paint: Offers a wide range of colors and a uniform, opaque look. Use a high-quality primer first, especially on plywood or MDF edges, for a smooth finish. Apply thin, even coats of paint.
- Stain: Enhances the natural beauty of the wood grain. Apply stain evenly and wipe off excess according to the product instructions.
- Polyurethane/Varnish: Provides a protective clear coat over stained or natural wood. Apply multiple thin coats, sanding lightly between coats with a very fine grit (e.g., 320-grit) for a durable, smooth surface.
Apply Even Coats: Whether painting or staining, apply thin, even coats. Avoid drips and runs. Allow adequate drying time between coats as recommended by the product manufacturer. Multiple thin coats are always better than one thick coat.
Installing Hardware
- Mark Hardware Placement: Measure and mark the exact location for your cabinet pulls or knobs on the doors and drawer fronts. Use a hardware jig for consistent placement. This ensures all hardware aligns perfectly.
- Drill Pilot Holes: Drill pilot holes through the marked spots. Use a drill bit slightly smaller than the screw diameter to prevent splitting the wood.
- Attach Hardware: Secure the pulls or knobs with the screws provided. Do not overtighten, as this can damage the wood or the hardware.
Taking the time for these finishing steps transforms your newly built corner cabinet into a beautiful and lasting piece. It provides the durability needed for daily use and enhances the overall look of your home.
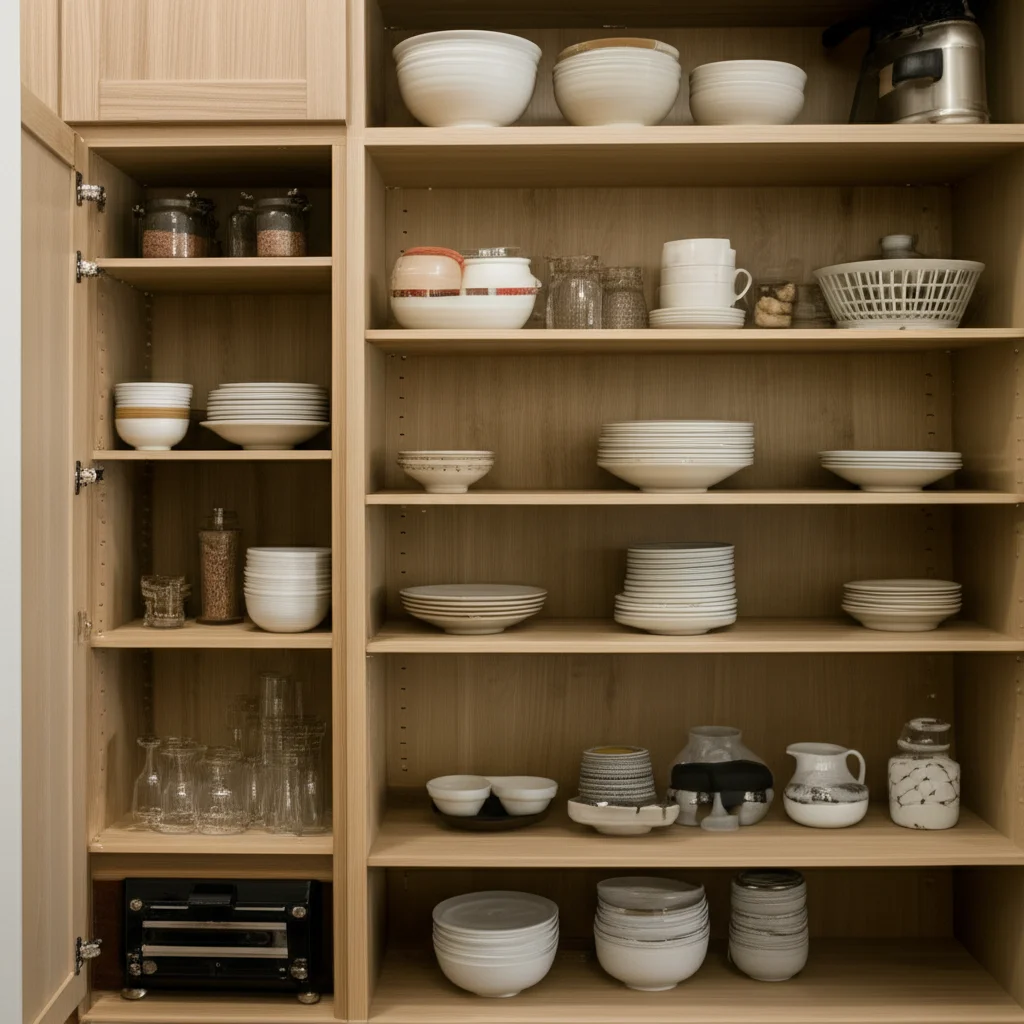
Customizing Your Corner Cabinet: Storage Solutions and Features
A custom corner cabinet offers more than just basic storage; it provides an opportunity to tailor the space precisely to your needs. This is where you can add personal touches that enhance both functionality and aesthetics. Think about how you use your space and what features would make your cabinet truly useful.
The inside of your cabinet is just as important as the outside. Smart internal solutions can double your storage capacity and improve organization. Consider how you can make every inch of that corner space work harder for you.
Adding Adjustable Shelves
- Flexibility is Key: Adjustable shelves are a must for any custom cabinet. They allow you to change shelf height to fit items of different sizes. This flexibility means your cabinet can adapt to changing storage needs over time.
- Drilling Shelf Pin Holes: Use a shelf pin jig for accurate and evenly spaced holes. Mark the vertical lines on the inside of your cabinet side panels. Drill a series of holes along these lines. Ensure holes on opposing sides are at the same height. Insert shelf pins into the desired holes to support your shelves.
Incorporating Specialty Hardware
- Lazy Susan: For a kitchen corner cabinet, a Lazy Susan is a game-changer. It spins to bring items from the back of the cabinet to the front. This is perfect for spices, small appliances, or cleaning supplies. There are various Lazy Susan styles, including full-round, half-moon, and pie-cut. You can explore more ways to organize a Lazy Susan corner cabinet for maximum efficiency.
- Pull-Out Organizers: Consider pull-out wire baskets or drawer systems. These make accessing items in deep or blind corners much easier. They are especially useful for pantry items, pots, or recycling bins.
- Built-in Lighting: Adding LED strip lights inside your cabinet can illuminate contents. This makes it easier to find items, especially in deep corner spaces. It also adds a touch of elegance.
Personalizing the Exterior and Interior
- Glass Doors: For a decorative touch, consider adding glass panels to your cabinet doors. This allows you to display decorative items while keeping them dust-free. If you want to include this feature, you should know how to make glass cabinet doors.
- Decorative Trim: Add molding or trim to the face frame or crown molding to the top of the cabinet. This enhances its built-in look and adds architectural detail.
- Paint or Stain Accents: Use a contrasting paint color for the interior of the cabinet. This creates a visually interesting backdrop for your stored items. For specific items, like a corner TV stand, you might customize the internal layout for media components.
These customization options transform your corner cabinet from a simple storage unit into a highly functional and beautiful feature of your home. Tailoring it to your specific needs ensures it serves you well for years.
Tips for a Successful Corner Cabinet Project and Common Pitfalls
Building a corner cabinet is a rewarding DIY project. However, like any woodworking task, it comes with its challenges. Knowing some key tips and avoiding common mistakes can make the process smoother and ensure a better outcome. Your goal is a sturdy, functional, and attractive cabinet.
Success in woodworking often comes down to patience and precision. Rushing steps or overlooking small details can lead to bigger problems later. Remember, a well-planned project is a successful project.
Tips for Success
- Measure Everything Twice (or Thrice!): This cannot be stressed enough. Small measurement errors lead to large fitting issues. Double-check all dimensions before making any cuts. Use a high-quality tape measure.
- Use a Story Stick or Template: For repetitive cuts or complex angles, create a story stick or a template. This ensures consistency and reduces errors compared to measuring each piece individually.
- Dry Fit All Components: Before applying glue or driving screws, assemble your cabinet parts without fasteners. This “dry fit” allows you to check for fit, squareness, and alignment. You can correct any issues before they become permanent.
- Work on a Flat, Level Surface: Your workbench or floor must be flat and level. This helps ensure that the cabinet components are square during assembly. Any twist in the assembly surface can translate into a twisted cabinet.
- Use Good Quality Wood: Choose straight, flat, and defect-free lumber or plywood. Warped or twisted wood will make assembly difficult and result in a less professional finish.
- Clamp Effectively: Use plenty of clamps to hold pieces securely while glue dries or screws are driven. Good clamping pressure creates strong, tight joints.
- Prioritize Safety: Always wear safety glasses when using power tools. Use hearing protection for noisy tools. Be mindful of where your hands are in relation to blades and bits. Safety first protects you and your project.
- Understand Installation: While this article focuses on building, knowing how you will install the cabinet is important. This helps with design choices. For more on this, you can check out how to install a corner cabinet.
Common Pitfalls to Avoid
- Incorrect Measurements: The most frequent error. Always verify your measurements against your design plan.
- Not Squaring the Cabinet Box: If the box is not perfectly square, doors will not hang straight, and shelves will wobble. Use a large framing square during assembly and check diagonals.
- Poor Joinery: Weak joints will lead to a flimsy cabinet. Ensure your pocket holes are drilled correctly, glue is applied generously, and screws are appropriate.
- Rushing the Finish: Applying finish too quickly or without proper sanding leads to an uneven, unattractive surface. Take your time with sanding and apply multiple thin coats.
- Ignoring Obstructions: Forgetting about outlets, light switches, or window sills can cause major headaches during installation. Plan for these from the start.
- Over-Sanding Plywood: Plywood has thin veneers. Aggressive sanding can sand through the top layer, revealing the core and ruining the appearance. Be gentle with finer grits.
By following these tips and being aware of common mistakes, you can build a corner cabinet that you are proud of. It will be a functional and beautiful addition to your home.
FAQ Section
What type of wood is best for building a corner cabinet?
Plywood is excellent for cabinet boxes due to its stability and strength, especially good-quality birch or maple plywood. For face frames, doors, and drawer fronts, solid hardwoods like maple, oak, or poplar offer durability and a beautiful finish. The choice often depends on your budget, desired look, and finishing plans.
How long does it take to build a corner cabinet?
The time it takes to build a corner cabinet varies widely. Factors include your woodworking skill level, the complexity of the design, and the tools you have. A basic corner cabinet might take 2-4 days of dedicated work. A more intricate design with custom features and a detailed finish could take a week or more.
Can I build a corner cabinet for a small kitchen?
Yes, building a corner cabinet is ideal for small kitchens. It maximizes often-underused corner space, providing valuable storage. Designs like Lazy Susan cabinets or blind corner units are perfect for small kitchens, making tight spaces more functional and efficient. You can customize the size to fit any small area.
What is the difference between a pie-cut and a blind corner cabinet?
A pie-cut corner cabinet typically has a 90-degree angle with a diagonal front and usually features a Lazy Susan. This design provides full access to the interior. A blind corner cabinet has a portion of the cabinet that extends into the corner, “blind” or hidden behind an adjacent cabinet. It maximizes storage but can make access to items in the very back more challenging.
How do I ensure my corner cabinet is stable?
Ensure stability by building a square and sturdy cabinet box using strong joinery methods like pocket screws and wood glue. When installing, secure the cabinet directly to wall studs using long screws. For base cabinets, ensure the base is level and shim if necessary before securing to the wall and floor.
Is building a corner cabinet a good beginner project?
Building a basic corner cabinet can be a good project for an ambitious beginner with some prior woodworking experience. It involves fundamental skills like measuring, cutting, and joining. Start with a simpler design, like a basic shelf unit, before attempting complex doors or drawers. Always follow safety guidelines and take your time.
Conclusion
Building your own corner cabinet is a highly rewarding project that transforms an underutilized space into valuable storage. We have covered every step, from the initial planning and design to the final touches and hardware installation. You learned about different cabinet types, essential tools, and materials, and how to execute each construction phase with precision. Remember, accuracy in measurement and patience in assembly are your best allies for a successful outcome.
By taking on this DIY challenge, you not only save money but also gain a unique piece perfectly suited to your home. You will have a custom corner cabinet that serves your specific needs and enhances your living space. Ready to make that awkward corner a functional and beautiful part of your home? Grab your tools and start building your own custom corner cabinet today!
- corner cabinet
- DIY cabinet
- custom cabinets
- woodworking projects
- home storage
- kitchen organization
- cabinet building

Todd Martin
Senior Writer
With over 15 years of experience in home renovation and design, I started HEG to share what I’ve learned with homeowners who want to create spaces that are both beautiful and functional. I’ve always believed in a hands-on approach, and over the years, I’ve picked up practical solutions that actually work. Through HEG, I aim to make home improvement more approachable, sharing real tips that help you create a home you truly love.