· Todd Martin · Home Improvement · 19 min read
How To Build A Pantry Cabinet With Doors
How to Build a Pantry Cabinet with Doors
Do you find yourself constantly searching for more kitchen storage? Are your countertops overflowing with pantry items? A well-designed pantry cabinet with doors offers a perfect solution. Building your own allows you to create a custom storage unit that fits your space and meets your exact needs.
This comprehensive guide will walk you through the entire process. We will cover everything from initial planning and material selection to the final installation of your new pantry. You will learn the essential steps to construct a sturdy and functional cabinet. You will also get insights into building and hanging its doors. Get ready to transform your kitchen organization with a DIY pantry cabinet.
Takeaway
- Plan your pantry cabinet size and design carefully to fit your space and needs.
- Select the right materials and gather all necessary tools before starting.
- Accurately cut and assemble the cabinet carcass for a strong foundation.
- Customize the interior with adjustable shelves or pull-outs for optimal organization.
- Build or prepare the doors, then precisely hang them for proper function and appearance.
- Apply a durable finish and install hardware to complete your custom pantry.
- Securely install the finished cabinet to ensure stability and safety.
To build a pantry cabinet with doors, you first plan its size and design, then cut and assemble the cabinet box from plywood or MDF. Next, you build or purchase doors and attach them with hinges. Finally, you install shelving and finish the unit with paint or stain.
Planning Your Custom Pantry Cabinet Design
Building a custom pantry cabinet begins with thorough planning. This initial phase ensures your cabinet fits perfectly and functions exactly as you need it to. Taking precise measurements of your available space is the first critical step. Consider both the width, height, and depth where your pantry will stand. Think about existing features like outlets, vents, or trim that might affect the cabinet’s placement.
Decide on the overall dimensions of your cabinet. A standard pantry depth is often 12 to 24 inches, but you can adjust this. Tall pantry cabinets typically range from 84 to 96 inches in height. The width depends on your space and storage needs. Drawing a detailed sketch or using design software helps visualize the final product.
Material Selection for Durability
Choosing the right materials impacts the cabinet’s longevity and appearance. Plywood is a popular choice for cabinet carcasses due to its strength and stability. It resists warping better than solid wood in large panels. High-quality Baltic birch plywood or cabinet-grade hardwood plywood works well. MDF (Medium Density Fiberboard) is another option. It offers a smooth surface for painting and is budget-friendly. However, MDF is heavier and can be less resistant to moisture.
For the doors, you can use plywood, MDF, or solid wood. Solid wood doors offer a classic look and can be stained. Plywood or MDF doors are ideal if you plan to paint your cabinet. Consider the environmental conditions in your kitchen. High humidity might make some materials more prone to expansion or contraction. I usually lean towards plywood for the main structure because it offers a great balance of strength and workability.
Essential Tools for Cabinet Construction
Having the right tools makes the building process smoother and more accurate. Here is a list of tools you will likely need:
- Measuring Tools: Tape measure, combination square, pencil.
- Cutting Tools: Circular saw with a guide, table saw (optional but highly recommended for accuracy), miter saw.
- Drilling Tools: Cordless drill, drill bits, countersink bit, pocket hole jig (if using pocket screws).
- Clamping Tools: Bar clamps or pipe clamps.
- Assembly Tools: Wood glue, screws (cabinet screws, pocket hole screws), sandpaper.
- Safety Gear: Safety glasses, hearing protection, dust mask.
Investing in good quality tools pays off in the long run. They provide more accurate cuts and safer operation. I always double-check my measurements and cuts before proceeding. This saves a lot of frustration later on.
Cutting and Assembling the Cabinet Carcass
The cabinet carcass forms the backbone of your pantry. Accurate cuts are crucial for a square and sturdy structure. Start by creating a detailed cut list based on your design plan. This list should specify the dimensions for the top, bottom, sides, and shelves. Lay out all your cuts on your plywood sheets to minimize waste. A good plywood cutting technique involves supporting the sheet well and using a sharp blade.
Use a circular saw with a straight edge guide for precise, long cuts. A table saw offers even greater accuracy if you have access to one. Always measure twice and cut once. This old saying holds true for cabinet making. Label each piece as you cut it. This prevents confusion during assembly.
Joinery Methods for Strength
There are several methods to join the cabinet pieces. Pocket hole joinery is popular for DIY projects. It uses special screws driven at an angle through one piece into another. A pocket hole jig makes this process easy and creates strong joints. This method is quick and requires fewer clamps.
Another common method is using dadoes or rabbets. These are grooves or notches cut into one piece to accept another. They provide excellent strength and alignment. However, they require more precise cutting with a router or table saw. I often use pocket holes for speed and convenience, reinforced with wood glue for extra strength. For the back panel, you can use a thin piece of plywood or hardboard. This panel can be recessed into a rabbet or simply screwed flush to the back edges of the cabinet.
Assembly Steps
Assembling the cabinet carcass follows a logical sequence:
- Attach the Sides to the Bottom: Apply wood glue to the edges. Use clamps to hold the pieces in place while you drive screws (either pocket screws or regular cabinet screws through the bottom into the sides). Ensure the assembly stays square.
- Add the Top: Once the sides are secure, attach the top piece using the same method. Again, check for squareness frequently.
- Install the Back Panel: If using a thin back panel, glue and screw it into place. This adds rigidity to the whole structure.
- Create a Toe Kick: Most pantry cabinets sit on a toe kick. This is a recessed area at the bottom front. You can build it as a separate base or integrate it into the cabinet sides. It makes cleaning around the cabinet easier and gives a finished look.
- Reinforce Joints: For added durability, use corner blocks or additional screws. This helps prevent racking over time.
Remember to let the glue dry completely before moving or putting stress on the cabinet. A strong, square carcass is the foundation for a successful pantry cabinet. If you find any gaps between your cabinet and the wall during installation, you can learn how to fill large gap between cabinet and wall to ensure a seamless fit.
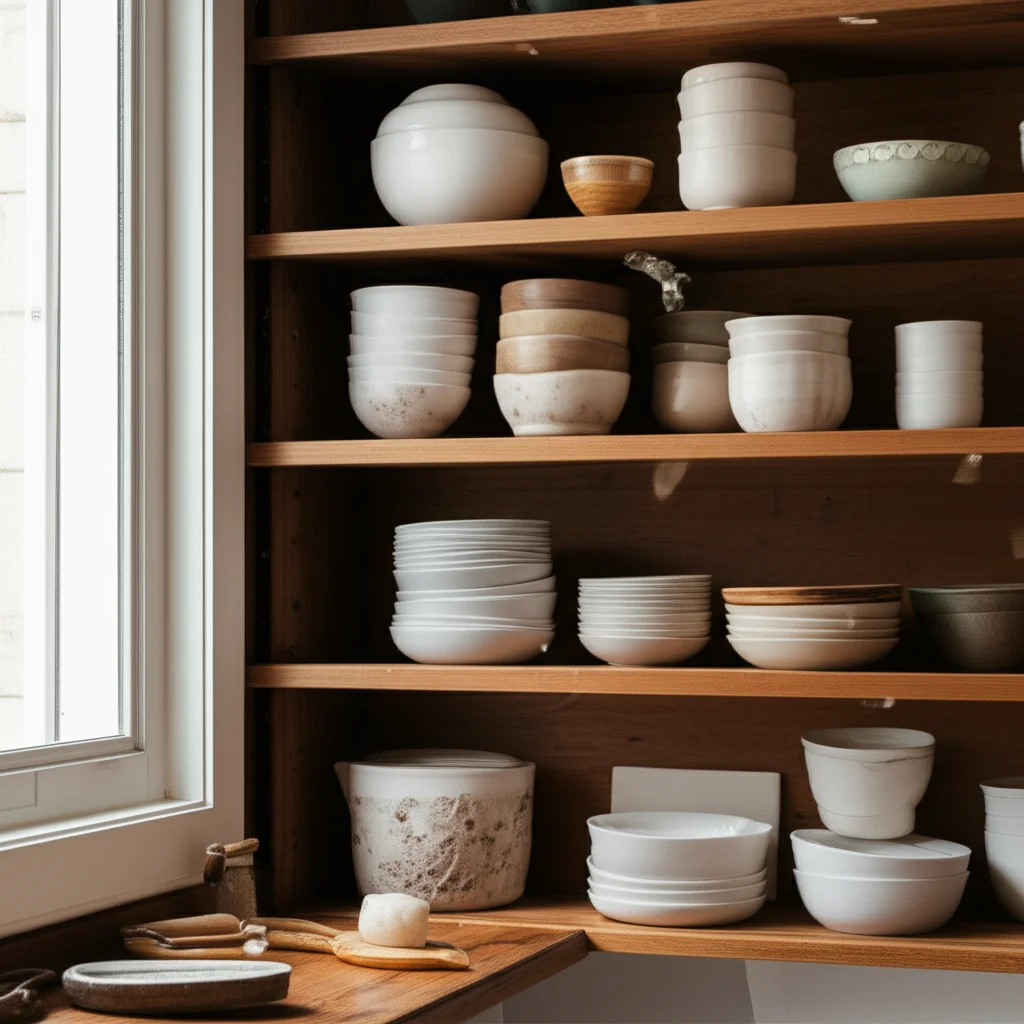
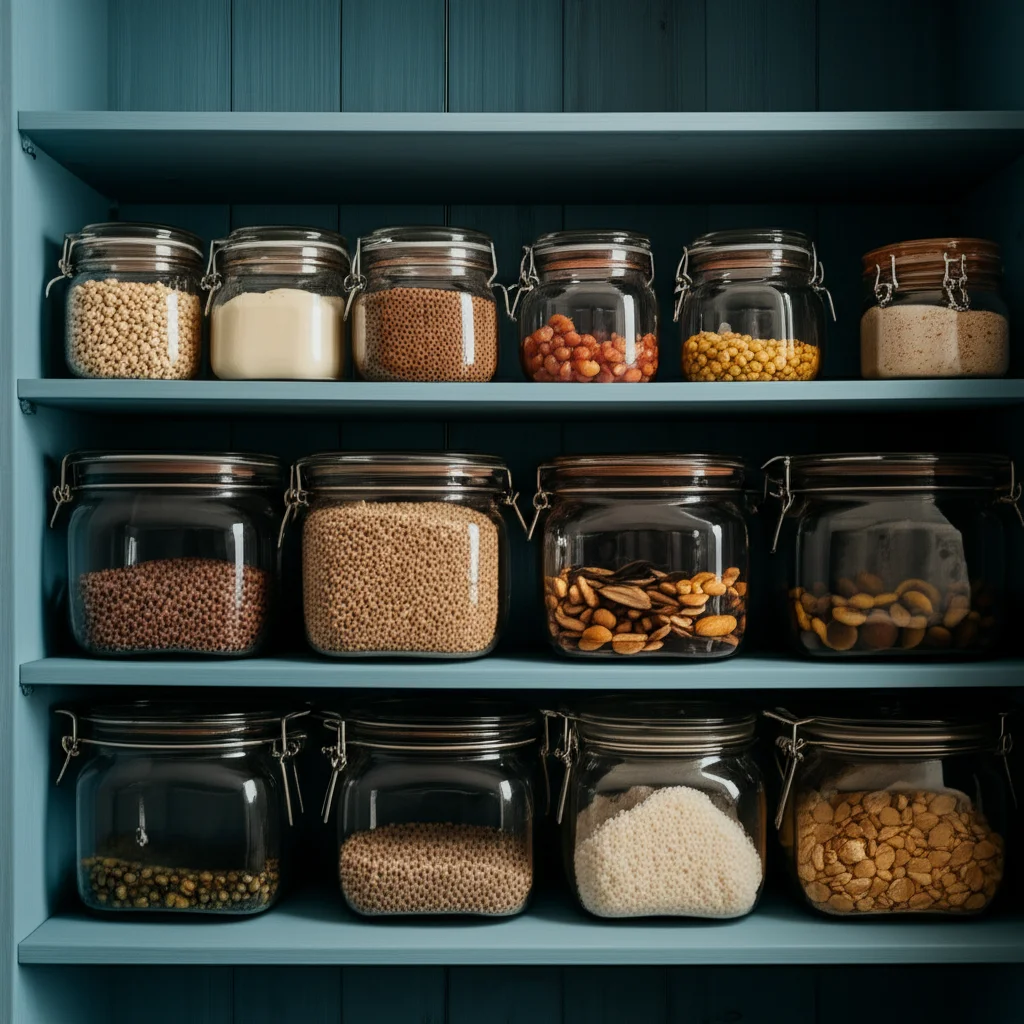
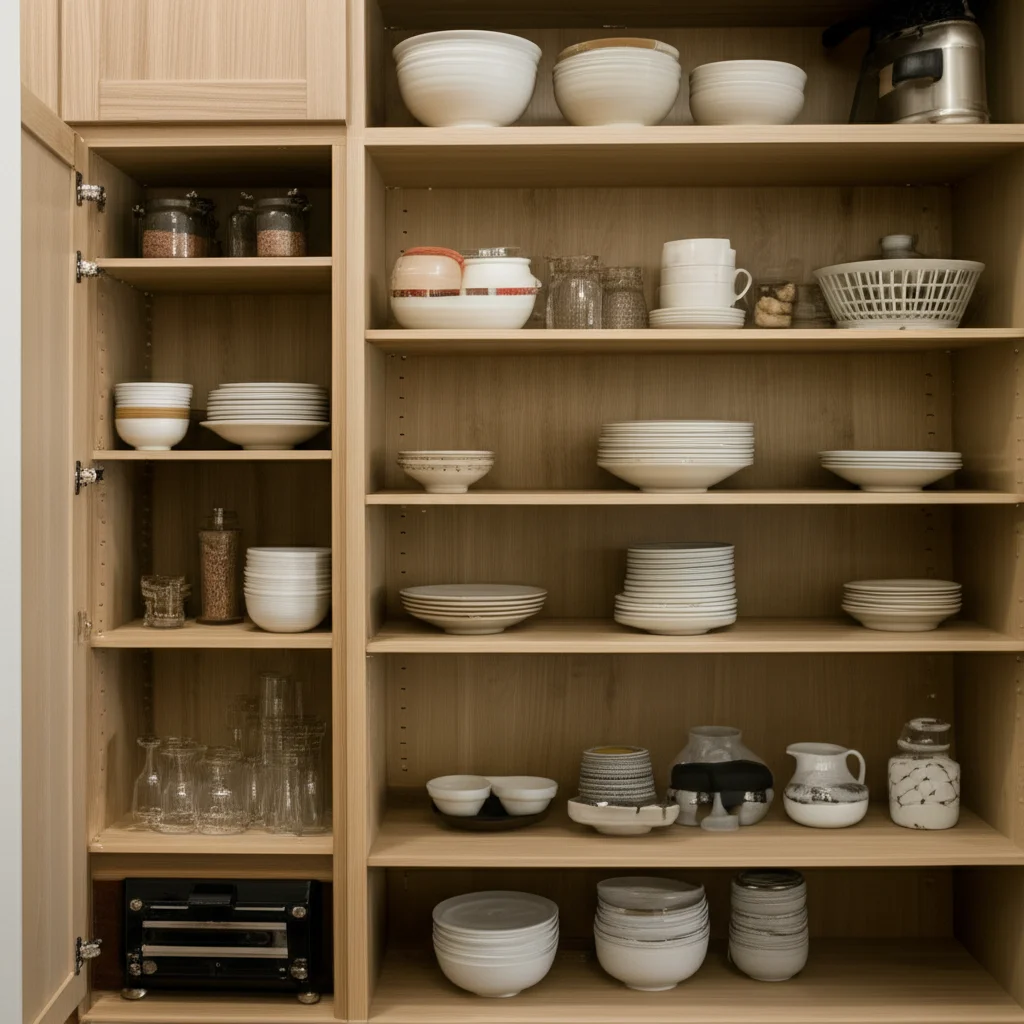
Customizing Interior Storage Solutions
A pantry cabinet’s real value lies in its interior organization. Designing the inside to fit your specific needs will make it highly functional. The most common interior feature is shelving. Adjustable shelves are crucial for versatility. They let you change shelf height to accommodate different sized items like cereal boxes, cans, or large appliances.
To make shelves adjustable, drill a series of evenly spaced holes along the inside edges of the cabinet sides. Use a shelf pin jig for consistent spacing and depth. These holes will hold shelf pins, which support the shelves. I recommend planning your shelf spacing based on common items you store. This includes tall bottles, short cans, or large serving dishes.
Incorporating Specialized Features
Beyond basic shelves, you can add many custom features to maximize space and accessibility:
- Pull-Out Shelves or Drawers: These are excellent for deep pantries. They bring items at the back into easy reach. You mount them on full-extension drawer slides. Measure carefully for these to ensure smooth operation. Learning how to measure a cabinet for a pull-out shelf is essential for this step.
- Door-Mounted Storage: The inside of the doors offers valuable space. You can add shallow shelves for spices, wraps, or small jars. This keeps frequently used items handy.
- Vertical Dividers: For baking sheets, cutting boards, or platters, vertical dividers create organized slots. These prevent items from falling over.
- Baskets or Bins: Incorporate designated areas for baskets. These work well for odd-shaped items like potatoes or onions.
- Lazy Susans: While more common in corner cabinets, a small lazy susan can be useful on a shelf for spices or condiments. For tips on organizing similar spaces, you might explore how to organize a lazy susan corner cabinet.
Consider how you will use the pantry daily. This helps you decide which features will be most beneficial. For instance, if you bake often, dedicated storage for flours and sugars is important. If you buy in bulk, strong, deep shelves are a priority.
Building and Installing Interior Elements
Once you have planned your interior layout, it is time to build and install these elements.
- Cut Shelves: Cut your shelf pieces from the same material as your cabinet. Edge band any exposed raw edges of plywood for a finished look.
- Install Drawer Slides: If adding pull-outs, mark and install the drawer slides precisely. Accuracy here ensures smooth operation.
- Build Pull-Out Boxes: Construct simple box frames for your pull-outs. These do not need backs.
- Drill Shelf Pin Holes: Use your jig to drill shelf pin holes on the cabinet interior. This is best done before assembly of the carcass, but it can be done afterwards if you have a drill guide.
Proper planning and execution of the interior will make your pantry cabinet a joy to use.
Building and Attaching Cabinet Doors
The doors define the look of your pantry cabinet. They transform a simple box into a finished piece of furniture. You have several style options for cabinet doors. Slab doors are flat, simple panels. Shaker doors feature a flat center panel with a raised frame. They offer a timeless, clean look.
If you choose to build shaker style doors, you will need rails (horizontal pieces) and stiles (vertical pieces). These pieces form a frame around a flat center panel. You can make the center panel from thin plywood or MDF. A router table with rail and stile bits helps create strong, professional-looking joints. If you have old flat-front doors you want to repurpose, you can learn how to make shaker cabinet doors from old flat-fronts. This saves material and adds a custom touch.
Measuring for Doors and Hinge Selection
Accurate door measurements are critical. Measure the opening of your cabinet where the doors will go. Determine if you want full overlay (doors cover the entire cabinet face frame) or partial overlay (doors cover only part of the face frame). For a frameless cabinet, the doors typically cover the entire opening. Calculate the door dimensions based on your desired overlay.
Selecting the right hinges is equally important. Concealed hinges, also known as European or cup hinges, are popular for their clean look. They are adjustable, allowing you to fine-tune door alignment. Exposed hinges, like butt hinges or surface mount hinges, offer a more traditional aesthetic. If you choose exposed hinges, knowing how to hang cabinet doors with exposed hinges will be helpful. Make sure the hinges are rated for the weight and size of your doors.
Door Assembly and Attachment
Once your door pieces are cut, assemble them. For shaker doors, apply wood glue to the joints of the rails and stiles. Clamp them tightly and ensure they are square. For slab doors, simply cut them to size. Sand all door surfaces smooth before finishing. This prepares them for paint or stain.
Attaching the doors requires patience and precision.
- Mark Hinge Locations: Use a template or carefully measure where the hinges will attach to both the door and the cabinet. For concealed hinges, you will need a 35mm Forstner bit to drill the cups in the door.
- Attach Hinges to Doors: Screw the hinges securely to the doors first.
- Mount Doors to Cabinet: Hold each door in place on the cabinet. Attach the hinge plates to the cabinet frame. Have a helper steady the door for you.
- Adjust Doors: Most hinges allow for three-way adjustment (up/down, in/out, side-to-side). Adjust the screws on the hinges until the doors are perfectly aligned. They should have even gaps all around. They should also close smoothly without binding.
Properly installed doors make your pantry cabinet look professional and function flawlessly.
Finishing Touches: Painting, Staining, and Hardware
The finishing stage brings your pantry cabinet to life. It protects the wood and adds aesthetic appeal. Careful preparation is key to a durable and beautiful finish. Begin by thoroughly sanding all surfaces of the cabinet carcass and doors. Start with a medium-grit sandpaper (e.g., 120-grit) to remove any imperfections. Then move to a finer grit (e.g., 220-grit) for a smooth surface. Remove all dust with a tack cloth or vacuum before applying any finish. Dust can ruin your final appearance.
If you plan to paint, apply a high-quality primer first. Primer helps the paint adhere better and provides a uniform base. For cabinets, an oil-based primer or a good quality shellac-based primer works well. It blocks stains and ensures a smooth topcoat. Apply two thin coats of paint, allowing ample drying time between coats. Lightly sand with a very fine grit (e.g., 320-grit) between coats for the smoothest finish. Use a roller for large flat surfaces and a brush for edges and details.
Staining and Clear Coat Application
If you prefer a natural wood look, staining is an excellent option. Apply stain evenly with a brush or cloth, following the wood grain. Wipe off excess stain according to the product instructions. This prevents blotchiness. Always test the stain on a scrap piece of wood first to ensure you like the color. After staining, apply a clear protective topcoat. Polyurethane, lacquer, or varnish offer good durability for high-traffic areas like kitchens. Apply several thin coats. Sand lightly between coats for optimal adhesion and smoothness.
Protecting the wood from moisture and wear is essential. A well-applied finish makes your cabinet easy to clean and maintains its beauty for years.
Installing Hardware for Functionality and Style
Hardware is the jewelry of your cabinet. It adds both function and style. You will need to install hinges, handles, and pulls.
- Hinges: If you haven’t already, attach the hinges to the doors and then mount the doors to the cabinet. Ensure they open and close smoothly. Adjust them until gaps are even.
- Handles and Pulls: Choose handles or pulls that complement your kitchen decor. Mark the placement of your handles carefully. Using a jig or a template helps ensure consistent placement. You can even learn how to make a template for cabinet handles for perfect alignment every time. Drill pilot holes slightly smaller than your screw size. Then, screw the handles or pulls into place.
If you are reusing old hardware, consider cleaning it first. You can find tips on how to clean old cabinet hardware to restore its shine. The right hardware completes the custom look of your pantry cabinet.
Installing Your Pantry Cabinet
Proper installation ensures your pantry cabinet is stable, safe, and functions correctly. This step involves securing the cabinet to your wall. It also includes leveling it for optimal performance. Before you begin, identify the wall studs in your desired location. Wall studs provide the strongest anchor points for the cabinet. Use a stud finder to locate them and mark their positions. This ensures a secure attachment.
First, position your cabinet against the wall. Use shims to level the cabinet from side to side and front to back. A long level is essential here. Even a slight tilt can cause doors to swing open or close on their own. Shims are thin pieces of wood or plastic. You place them under the cabinet’s base until it is perfectly level. Once level, ensure the cabinet is also plumb (vertically straight).
Anchoring to the Wall
Securing the cabinet to the wall is a critical safety step. It prevents the cabinet from tipping over, especially when loaded with heavy food items.
- Drill Pilot Holes: Drill pilot holes through the back of the cabinet and into the wall studs. Use a drill bit slightly smaller than your cabinet screws.
- Drive Screws: Drive long cabinet screws (typically 2.5 to 3 inches) through the cabinet’s back and into the wall studs. Use at least two screws per stud, one near the top and one near the bottom. If your cabinet is very wide, use more screws. Countersink the screw heads so they sit flush or slightly below the surface. This allows for easy concealment later.
- Check for Stability: Once secured, push and pull on the cabinet to ensure it is firmly attached. It should not wobble or shift.
If your cabinet has a face frame, you may also screw through the cabinet’s top and bottom rails into the studs. This provides additional stability.
Finishing the Installation
After securing the cabinet, you can add any trim pieces or molding. This gives the cabinet a built-in look. Fill any visible screw holes with wood filler. Sand them smooth and then paint or stain to match the cabinet. If there are any small gaps between the cabinet and the wall, use caulk to fill them. Caulking creates a clean, professional finish. It also prevents dust and debris from accumulating behind the cabinet.
Finally, adjust the doors one last time. Ensure they operate smoothly and close properly. Your newly installed pantry cabinet is now ready for use. You have successfully built and installed a functional and beautiful addition to your kitchen.
Maintaining Your New Pantry Cabinet
Your newly built pantry cabinet will last for years with proper care and maintenance. Regular cleaning keeps it looking its best and ensures a hygienic space for your food. The specific cleaning method depends on the cabinet’s finish. For most painted or stained wood surfaces, a soft cloth dampened with mild soap and water works wonders. Avoid abrasive cleaners, as they can scratch or dull the finish.
Wipe down the exterior of your cabinet doors and sides frequently. This removes dust, fingerprints, and food splatters. For the interior, empty shelves periodically and wipe them clean. This prevents food crumbs or spills from accumulating. If you have glass doors on your pantry, make sure to clean them regularly to keep them sparkling.
Dealing with Spills and Stains
Accidents happen in a kitchen. Spills should be cleaned up immediately to prevent staining or damage to the cabinet finish.
- Liquid Spills: Use a clean cloth to blot up liquid spills quickly. Then wipe the area with a damp cloth and dry it thoroughly.
- Sticky Residues: For sticky messes like syrup or jam, use a damp cloth with a little dish soap. Gently scrub the area. Rinse with a clean, damp cloth and dry completely.
- Grease Stains: Grease can be tricky. A solution of warm water and a small amount of vinegar or a specialized kitchen cleaner can help. Always test cleaners in an inconspicuous area first.
Different parts of your cabinet and kitchen require specific cleaning techniques. For general cabinet cleaning, you can refer to tips on how to clean cabinet. For the doors, check out guides like how to clean doors or specifically how to clean cupboard doors to keep them spotless.
Periodic Checks and Adjustments
Beyond daily cleaning, perform periodic checks on your pantry cabinet to ensure its continued functionality.
- Check Hinges: Over time, hinges can loosen, causing doors to sag or become misaligned. Tighten any loose hinge screws. Readjust the hinge settings if the doors are not closing properly.
- Inspect Shelves: Ensure shelf pins are secure and shelves are level. If you have pull-out shelves or drawers, check that the slides are running smoothly. Lubricate them with a silicone spray if they stick.
- Hardware Tightness: Handles and pulls can also loosen with regular use. Tighten their screws to prevent them from wiggling.
- Address Damage Promptly: If you notice any chips, scratches, or moisture damage, address it quickly. Small touch-ups can prevent minor issues from becoming larger problems. If you encounter a stripped screw hole in the wood, knowing how to fix stripped screw hole in wood cabinet can be very useful.
By following these maintenance tips, your DIY pantry cabinet will remain a beautiful and highly functional asset in your kitchen for many years. It is an investment in your home’s organization and value.
FAQ Section
What type of wood is best for building a pantry cabinet?
Plywood is generally the best choice for cabinet carcasses due to its strength, stability, and resistance to warping. For doors, solid wood offers a classic look, while MDF or plywood are excellent for painted finishes. The choice depends on your budget, desired finish, and durability needs.
How long does it typically take to build a pantry cabinet?
The time frame varies based on your skill level, the complexity of the design, and how many hours you can dedicate. A basic pantry cabinet with doors might take a skilled DIYer 2-3 weekends. A beginner might need 3-4 weekends, including planning and finishing.
What are the essential tools I need for this project?
You will need a tape measure, circular saw (or table saw), drill, pocket hole jig (if using pocket screws), clamps, and safety gear. Additional tools like a router for door making or a miter saw can be helpful but are not always essential for a basic build.
Can I use stock cabinet doors instead of building my own?
Yes, you can absolutely purchase stock cabinet doors. This can save significant time and effort, especially if you are less experienced with woodworking. Just make sure to measure your cabinet opening accurately and order doors with the correct dimensions and hinge boring for your cabinet style.
How much does it cost to build a custom pantry cabinet?
Building a custom pantry cabinet is often more cost-effective than buying a pre-made one. The cost depends on material choices (e.g., plywood vs. solid wood), hardware, and finish. Expect to spend anywhere from $300 to $800+ on materials, not including tools you might already own.
How do I ensure my pantry cabinet is stable and safe once built?
To ensure stability, use strong joinery methods like pocket screws or dadoes, reinforced with wood glue. During installation, anchor the cabinet directly into wall studs using long cabinet screws. Always check for level and plumb, and use shims to correct any imbalances before securing.
Conclusion
Building your own pantry cabinet with doors is a rewarding home improvement project. It transforms your kitchen space, providing much-needed storage and adding a touch of custom design. From the initial planning and precise cuts for the cabinet carcass to the careful crafting of doors and final installation, each step brings you closer to a more organized and functional home.
By following the detailed steps and tips provided in this guide, you can successfully create a durable and beautiful pantry cabinet. This DIY endeavor not only saves you money but also instills a sense of pride in your craftsmanship. Embrace the process, take your time, and enjoy the satisfaction of building a custom pantry cabinet that perfectly fits your needs. Your organized kitchen awaits!
- pantry cabinet
- DIY pantry
- kitchen storage
- cabinet building
- custom cabinets
- woodworking
- home organization

Todd Martin
Senior Writer
With over 15 years of experience in home renovation and design, I started HEG to share what I’ve learned with homeowners who want to create spaces that are both beautiful and functional. I’ve always believed in a hands-on approach, and over the years, I’ve picked up practical solutions that actually work. Through HEG, I aim to make home improvement more approachable, sharing real tips that help you create a home you truly love.