· Todd Martin · Appliance Repair · 22 min read
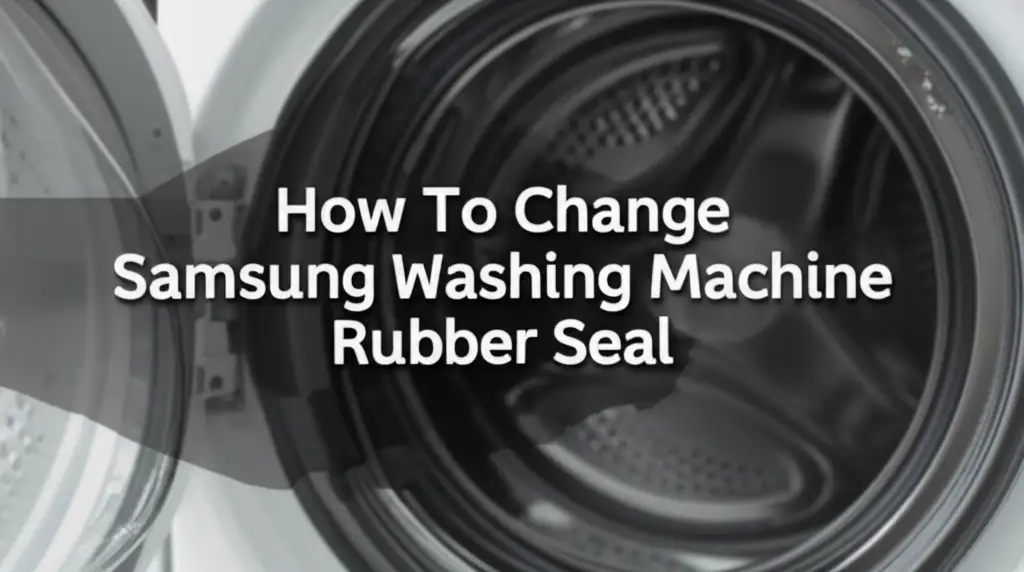
How To Change Samsung Washing Machine Rubber Seal
Easily Change Your Samsung Washing Machine Rubber Seal
Have you noticed puddles around your Samsung washing machine? Perhaps a musty smell is coming from the drum, or you see dark mold growing on the rubber seal. These are clear signs that your washing machine’s rubber door seal, also known as the boot seal, needs attention. Replacing this seal might seem like a daunting task, but I assure you, it is a repair you can handle yourself. This guide will walk you through every step to successfully change your Samsung washing machine rubber seal, saving you money and getting your appliance back in top working order. We will cover identifying the problem, gathering tools, the replacement process, and important maintenance tips to extend your new seal’s life.
Takeaway
- Always unplug your washing machine and turn off the water supply before starting any repair.
- Buy the correct replacement rubber seal for your specific Samsung washing machine model.
- Carefully remove the outer and inner retaining clamps to free the old seal.
- Install the new seal by seating it properly and securing both clamps.
- Run a test cycle to check for leaks after replacement.
- Clean the new seal regularly to prevent mold and extend its lifespan.
Changing your Samsung washing machine rubber seal is a repair many homeowners can complete. It requires specific tools, careful attention to steps, and the correct replacement part. By following proper safety procedures and installation instructions, you can restore your washing machine to optimal, leak-free operation.
Understanding Your Samsung Washing Machine Rubber Seal
The rubber seal, or door boot, on your Samsung front-loading washing machine is a crucial component. It forms a watertight barrier between the drum and the door, preventing water from leaking out during wash cycles. This seal also acts as a flexible connection, absorbing vibrations and keeping items from falling into the machine’s inner workings. Over time, this rubber can deteriorate due to various factors.
Common issues include wear and tear from constant use, exposure to harsh detergents, and the buildup of mold and mildew. Mold often grows in the damp folds of the seal, leading to unpleasant odors and black stains. If left unaddressed, a compromised seal can cause significant water leaks, leading to potential floor damage or even electrical hazards. You might also notice that your clothes do not smell as fresh, or they come out with black streaks. Addressing these issues quickly helps protect your home and keeps your laundry clean. For more insights on why leaks occur, explore common reasons why is my Samsung washing machine leaking from the bottom.
Why Seals Deteriorate
Several factors contribute to the breakdown of your Samsung washing machine’s rubber seal. Constant friction from clothes rubbing against it during cycles wears down the material. Residual moisture trapped in the folds after a wash creates a breeding ground for mold and mildew. Using too much detergent or fabric softener can also leave residue, further encouraging microbial growth and degrading the rubber over time.
Hard water deposits can also make the rubber stiff and brittle. The rubber seal is a component that experiences significant stress and environmental exposure. Regular cleaning helps, but eventually, the material loses its elasticity and integrity. When the seal becomes stiff, cracked, torn, or heavily molded, it no longer performs its job effectively.
Identifying the Right Replacement Seal
Before you begin any repair, you must identify the correct replacement rubber seal for your specific Samsung washing machine model. Samsung produces many washing machine models, and the door seals are often model-specific. Using the wrong seal can lead to improper fit, leaks, or even damage to your appliance. You can usually find the model number on a sticker inside the door frame, on the back of the machine, or sometimes on the control panel.
Once you have your model number, search online for the exact replacement part. Many appliance parts suppliers specialize in Samsung components. It is worth investing in an original equipment manufacturer (OEM) part if possible, as these parts guarantee compatibility and quality. Non-OEM parts may be cheaper, but they might not last as long or fit as perfectly. Ensuring you have the right part prevents frustration and saves time during the installation process.
Gathering Essential Tools and Safety Precautions
Before you begin changing your Samsung washing machine rubber seal, gather all necessary tools. Having everything ready saves time and ensures a smooth repair process. You will need a few basic hand tools that are commonly found in most households. It is important to work in a well-lit area and have enough space around the machine.
Beyond the tools, safety is paramount. Working with appliances that use electricity and water requires careful attention. Always assume wires are live until proven otherwise. Water can cause slips or electrical hazards. Taking proper precautions protects you from injury and prevents damage to your appliance or home. I always recommend wearing gloves when working with appliance parts, as sharp edges or residues might be present. For general guidance on DIY appliance repairs, you may find the article on do it yourself washing machine helpful.
Essential Tools for the Job
Here is a list of the tools you will need:
- Screwdrivers: Both Phillips head and flathead screwdrivers are usually required. You might need various sizes.
- Pliers: Needle-nose pliers are useful for reaching small areas or manipulating spring clamps. Regular pliers also work for some tasks.
- Spring Hook Tool (Optional but Recommended): This specialized tool makes removing and re-installing spring-loaded clamps much easier and safer. If you do not have one, a strong flathead screwdriver can sometimes work, but be careful.
- Gloves: Protect your hands from sharp edges and dirt.
- Towels or Rags: To wipe up any residual water during the process.
- Small Container: To hold screws and small parts, preventing them from getting lost.
Make sure your tools are in good condition. Worn-out tools can slip, causing injury or damage. A clean workspace also helps keep track of small components.
Prioritizing Safety Before Repair
Safety is the first step in any appliance repair. Never work on an electrical appliance without disconnecting its power source. This prevents electric shock, which can be fatal. Water shut-off is equally important to prevent leaks and flooding.
Follow these critical safety steps:
- Unplug the Washing Machine: Locate the power cord and pull it directly from the wall outlet. Do not just rely on turning the machine off at the power button. The physical disconnection is crucial.
- Turn Off Water Supply: Find the hot and cold water faucets behind your washing machine. Turn them clockwise until they are completely closed. This stops water from entering the machine during the repair.
- Drain Residual Water: There might be some water trapped in the drum or the old seal. Have towels ready to absorb any spills. If your machine has a drain pump filter access, you might want to drain it fully beforehand. Some models allow a small amount of water to drain through a hose near the filter. This step helps keep your workspace dry.
- Allow Machine to Cool (if recently used): While not typically an issue for door seals, it is good practice to let the machine sit for a few minutes if it just finished a hot wash cycle.
By completing these safety steps, you create a secure environment for your repair. You are now ready to start the physical process of changing the Samsung washing machine rubber seal.
Removing the Old Samsung Washing Machine Door Seal
With safety measures in place and tools ready, the next step is to remove the old, damaged rubber seal from your Samsung washing machine. This process involves detaching two main retaining mechanisms: an outer clamp and an inner clamp. Each clamp holds the seal securely in place, one around the outer edge of the drum and one around the inner lip. Taking your time with each step prevents damage to other components.
I recommend taking photos as you go. These pictures can serve as a helpful reference when you install the new seal. They will show you how parts connect and their proper orientation. Remembering where everything goes can be tricky, especially with multiple components.
Detaching the Outer Clamp
The outer clamp holds the front portion of the rubber seal to the outer lip of the washing machine’s front panel. This clamp is often a wire hoop with a spring or a screw-tightened mechanism.
Here is how to remove it:
- Locate the Clamp: Look around the outside edge of the rubber seal where it meets the front of the washing machine. You will see a thin wire or metal band.
- Find the Spring or Screw:
- Spring Clamp: If it is a wire spring clamp, locate the spring mechanism. It often sits at the 6 o’clock position, but can vary by model. Use a spring hook tool or a flathead screwdriver to carefully pry open the spring and release the tension. Be careful, as the spring can snap back.
- Screw Clamp: If it is a screw-tightened band, use a Phillips head or flathead screwdriver to loosen and remove the screw. This will allow the band to expand and release its grip.
- Remove the Wire/Band: Once the tension is released, gently pull the wire or metal band off the rubber seal. Keep this clamp safe, as you will reuse it for the new seal.
- Peel Back the Outer Seal: With the outer clamp removed, you can now peel the outer edge of the rubber seal away from the washing machine’s front panel. This exposes the inner workings and prepares you for the next step.
You might find some accumulated dirt, lint, or even mold in this area. This is normal, as the seal traps such debris over time. You might want to clean the exposed surfaces before proceeding. If you are cleaning any rubber components on your washing machine, helpful tips can be found in the article how to clean rubber gasket in washing machine.
Accessing and Removing the Inner Clamp
The inner clamp secures the rubber seal to the washing machine’s drum. This clamp is usually located inside the machine, behind the door opening. Accessing it often requires removing the machine’s front panel or top panel. This step can be the most challenging part of the process, as it involves disassembling parts of your washing machine.
- Remove the Detergent Drawer: Pull out the detergent dispenser drawer completely. There is usually a release tab or button inside the drawer that allows it to slide out.
- Remove the Control Panel (if necessary): Some Samsung models require you to remove the screws holding the control panel in place. These screws are often located under the detergent drawer opening or on the sides of the panel. Gently lift or slide the panel to detach it. You might need to disconnect some wire harnesses from the control board. Take photos of these connections.
- Remove the Front Panel Screws: Look for screws holding the front panel in place. These are often hidden behind the control panel, under the machine’s top, or sometimes along the bottom edge. Remove all visible screws.
- Tilt/Remove the Front Panel: Carefully tilt the front panel forward or remove it completely. Be mindful of any wires or hoses still connected. You might need assistance if the panel is heavy or awkward.
- Locate the Inner Clamp: Once the front panel is moved, you will see the inner clamp holding the rubber seal to the washing machine drum. This is typically another wire spring clamp or a metal band secured with screws.
- Release the Inner Clamp: Use your spring hook tool or pliers to release the tension on the inner spring clamp, or unscrew the metal band. This clamp is often tighter and harder to access than the outer one. Be patient and work carefully.
- Remove the Old Seal: With both clamps removed, you can now fully pull the old rubber seal out of the washing machine. Take note of how it was oriented and any drainage holes or specific markings. This helps when installing the new one. Place the old seal aside for disposal.
Removing these clamps and the old seal can be a bit messy. You might encounter water, lint, and mildew. Cleaning the area thoroughly before installing the new seal is a good practice. This also provides an opportunity to clean any visible parts of your washing machine’s interior that are now accessible. For thorough cleaning of your machine, you can follow guides like how to clean Samsung washing machine.
Installing the New Samsung Washing Machine Rubber Seal
With the old seal removed and the surrounding area cleaned, it is time to install the new Samsung washing machine rubber seal. This step requires precision and patience to ensure the seal sits correctly and forms a watertight bond. The new seal needs to be perfectly seated to prevent future leaks and ensure proper machine operation. I found that a little bit of non-toxic lubricant, like soapy water, can help the seal slide into place more easily, but always check your new seal’s instructions first.
You will need to pay close attention to the orientation of the new seal. Most seals have a top indicator or specific drainage holes that must align with the corresponding features on your washing machine drum. Misalignment can lead to improper drainage, water pooling, or leaks. Do not rush this part of the process.
Seating the New Seal
Properly seating the new rubber seal is critical for a leak-free repair. The seal usually has a groove that fits over the drum’s lip and another groove for the front panel.
Here is the process:
- Identify Orientation: Examine your new rubber seal. It often has a mark (like a triangle or an arrow) indicating the top. Some seals have small drainage holes at the bottom that must align with corresponding holes on the drum or front panel. Ensure you position the seal correctly.
- Attach to the Drum (Inner Side First): Start by fitting the inner lip of the new seal over the drum’s rim. Begin at the top and work your way around, pressing the seal firmly into place. The goal is to get the seal’s groove to sit snugly over the entire circumference of the drum opening. This may take some effort. Make sure the seal is evenly distributed and not twisted.
- Secure the Inner Clamp: Once the inner lip is correctly seated, re-install the inner retaining clamp.
- Spring Clamp: If it is a spring clamp, use your spring hook tool or pliers to stretch the spring and place the wire back into its groove around the seal. Work slowly to ensure the wire settles evenly.
- Screw Clamp: If it is a screw-tightened band, position the band around the groove, ensure it is centered, and then tighten the screw until the seal is secure against the drum. Do not overtighten, but make sure it is snug.
- Reassemble Front Panel and Control Panel: Carefully re-position the washing machine’s front panel. Guide it back into place, ensuring no wires are pinched. Re-attach all screws that held the front panel. If you removed the control panel, re-connect any wire harnesses and secure it back in place with its screws. Re-insert the detergent drawer.
Securing the inner clamp is often the most challenging part of installing a new seal due to limited space and the tension of the clamp. Patience is key here. Ensure the clamp sits fully in the designated groove around the rubber seal.
Attaching the Outer Clamp and Finishing Up
After securing the inner seal and reassembling the machine’s panels, the final step for the seal itself is to attach the outer clamp. This clamp secures the front portion of the rubber seal to the machine’s outer rim, visible from the outside.
- Position the Outer Seal Lip: Pull the outer lip of the new rubber seal over the front edge of the washing machine’s cabinet opening. Ensure it sits evenly and smoothly. You might need to stretch it slightly.
- Re-install the Outer Clamp: Take the outer wire or metal band clamp you removed earlier.
- Spring Clamp: Begin positioning the wire around the seal’s outer groove. When you reach the spring, use your spring hook tool or a flathead screwdriver to stretch the spring and latch it securely into place. Make sure the entire wire is seated firmly in the groove around the rubber seal.
- Screw Clamp: Position the band around the outer groove of the seal. Insert and tighten the screw until the band is snug and holds the seal firmly against the cabinet. Again, do not overtighten.
- Final Adjustments: Inspect the entire circumference of the new seal, both inside the drum and where it meets the machine’s front. Ensure there are no bulges, twists, or gaps. The seal should look evenly seated and smooth. Check that the drainage holes are at the bottom and are not obstructed.
With both clamps securely in place, your new Samsung washing machine rubber seal is now installed. You are almost done. The next step is to test your work and ensure everything functions correctly. This careful installation helps prevent any future issues like leaks.
Testing Your Newly Replaced Seal and Final Checks
After installing the new Samsung washing machine rubber seal, you must test your repair thoroughly. This crucial step confirms that the seal is properly seated and leak-free. Skipping this part can lead to unexpected water damage if the seal was not installed correctly. I always advise running a full cycle, even if it’s just an empty drum, to observe the machine’s performance. It gives me peace of mind knowing the repair holds up.
Besides checking for leaks, a final check involves ensuring all panels are secure and the machine is correctly connected. This comprehensive approach ensures safety and functionality before you return to doing laundry. You want your machine to perform perfectly after all your hard work.
Running a Test Cycle
To check for leaks and proper seal function, run a test cycle without any clothes. This allows you to observe the seal and surrounding areas carefully for any water escape.
Here is how to do it:
- Reconnect Water and Power:
- Turn the hot and cold water supply valves back on behind the washing machine.
- Plug the washing machine back into the electrical outlet.
- Start a Short Wash Cycle: Choose a short wash program, like a rinse and spin, or a quick wash cycle. Do not add any detergent or clothes. The goal is to fill the drum with water and agitate it, putting pressure on the new seal.
- Observe for Leaks: As the machine fills with water and begins to agitate, carefully watch the area around the door seal.
- Look for any drips or trickles of water appearing from under the door or from the bottom of the machine.
- Pay close attention during the agitation and spin cycles, as these put the most stress on the seal.
- Check Under the Machine: After the cycle finishes, pull the washing machine slightly forward and check the floor underneath for any signs of water. Use a dry towel to wipe around the base of the machine to detect any moisture.
If you observe any leaks, immediately unplug the machine and turn off the water supply. A leak means the seal is either not seated correctly, or one of the clamps is not tight enough. You will need to re-examine the seal and clamps, making necessary adjustments. It is better to find a small leak now than a large one later.
Final Inspection and Placement
Once you confirm there are no leaks during the test cycle, perform a final inspection of your Samsung washing machine. This ensures everything is back in its proper place and ready for regular use.
- Check All Panels: Ensure all machine panels you removed or loosened are securely fastened. This includes the front panel, control panel, and any access covers. All screws should be tight.
- Verify Leveling: Make sure the washing machine is level. An unlevel machine can cause excessive vibration, noise, and uneven wear on components, including the seal. Adjust the leveling feet at the bottom of the machine if needed.
- Proper Hose Connections: Double-check that the hot and cold water supply hoses are securely tightened to the faucets and the machine. Also, ensure the drain hose is correctly routed into your standpipe or laundry tub.
- Clear Area: Make sure no tools, screws, or debris are left behind the machine or in its vicinity. A clear area helps prevent future accidents or damage.
With these final checks complete, your Samsung washing machine rubber seal replacement is successful. You can now confidently use your machine for laundry, knowing it is leak-free and functioning properly. Regular maintenance will help keep this new seal in good condition for years to come.
Tips for Maintaining Your Samsung Washing Machine Seal
Replacing your Samsung washing machine rubber seal is a significant step in appliance care. However, the job is not truly done until you adopt practices that extend the life of your new seal. Proper maintenance prevents the common issues of mold, mildew, and premature wear. I learned that a few simple habits can make a huge difference in how long my appliance parts last. These tips not only keep your seal clean but also contribute to the overall hygiene of your washing machine.
A well-maintained seal means less odor, cleaner clothes, and fewer repair worries in the future. It saves you time, money, and hassle. Consistency is key when it comes to appliance maintenance.
Preventing Mold and Mildew Buildup
Mold and mildew are common enemies of washing machine rubber seals. They thrive in damp, dark environments. By minimizing moisture, you can greatly reduce their growth.
Here are effective strategies:
- Wipe Down After Each Use: After every wash cycle, use a clean cloth or towel to wipe down the inside of the rubber seal. Pay special attention to the folds and crevices where water tends to collect. This simple step removes excess moisture and lint.
- Leave the Door Ajar: When the washing machine is not in use, leave the door slightly open. This allows air to circulate inside the drum and dry out the seal and interior. Even a small gap is enough to promote air flow.
- Remove Laundry Promptly: Do not leave wet clothes in the washing machine for extended periods. This creates a humid environment perfect for mold growth. Remove laundry as soon as the cycle finishes.
- Regular Cleaning: Even with daily wiping, periodic deeper cleaning is necessary. At least once a month, clean the rubber seal thoroughly with a mild detergent solution or a specialized washing machine cleaner. You can find detailed instructions on how to clean your Samsung washing machine for a complete cleaning routine. For specific issues like mold, consult how to get rid of mould on washing machine rubber.
Using the Right Detergent and Load Practices
The type and amount of detergent you use also impact the longevity of your rubber seal. Incorrect usage can lead to residue buildup and seal deterioration.
- Use HE Detergent for HE Machines: If you have a high-efficiency (HE) Samsung washing machine, always use HE-specific detergents. These detergents produce fewer suds, which helps prevent excessive foam buildup in the drum and around the seal. Excessive suds can leave a film that promotes mold growth.
- Measure Detergent Correctly: Do not use more detergent than recommended by the manufacturer. Overdosing detergent can leave sticky residue on the seal and in the drum. This residue not only degrades the rubber but also attracts dirt and encourages mold.
- Avoid Overloading: Overloading your washing machine can put unnecessary stress on the rubber seal. Clothes can rub against the seal forcefully, leading to premature wear and tear. Always adhere to the recommended load capacity for your Samsung washing machine.
- Check Pockets: Before washing, always check clothing pockets for small objects like coins, keys, or foreign materials. These items can become lodged in the rubber seal during cycles, causing tears or punctures. Such damage often leads to leaks and necessitates another seal replacement.
By following these maintenance tips, you can significantly extend the life of your new Samsung washing machine rubber seal. This helps ensure your appliance remains efficient, clean, and leak-free for many years. Regular care is an investment in your washing machine’s future.
FAQ Section
How often should I change my Samsung washing machine rubber seal?
The lifespan of a Samsung washing machine rubber seal varies based on usage and maintenance. Most seals last 5 to 10 years. However, you should replace it sooner if you notice visible damage like tears, cracks, excessive mold that cannot be cleaned, or consistent leaks from the door area. Regular inspection helps determine replacement timing.
What causes a washing machine seal to go bad?
Several factors cause washing machine seals to deteriorate. Common reasons include continuous friction from laundry, prolonged exposure to moisture leading to mold and mildew growth, harsh chemical detergents, and foreign objects trapped in the seal. Over time, these elements break down the rubber’s integrity and elasticity, leading to leaks or odors.
Can I use a universal rubber seal for my Samsung washing machine?
No, it is not advisable to use a universal rubber seal for your Samsung washing machine. Washing machine seals are typically model-specific, designed to fit the exact dimensions and features of a particular machine. Using a universal seal can lead to improper fit, gaps, and inevitable leaks, defeating the purpose of the replacement. Always purchase the OEM part number for your specific model.
Is it hard to change a washing machine seal?
Changing a washing machine seal is a moderately difficult DIY task. It requires patience, basic tools, and following step-by-step instructions. The most challenging parts often involve accessing and re-securing the inner retaining clamp, which may require partial disassembly of the machine’s front panel. With the right guidance, many homeowners can complete this repair successfully.
How much does it cost to replace a Samsung washing machine seal?
The cost to replace a Samsung washing machine seal varies. If you do it yourself, the main cost is the replacement part, which can range from $50 to $150, depending on your Samsung model. If you hire a professional technician, you will also pay for labor, which can add $100 to $300 or more, making the total cost significantly higher. DIY saves money on labor.
Conclusion
Changing the rubber seal on your Samsung washing machine is a practical DIY repair that offers significant benefits. We have walked through the entire process, from understanding why seals fail to the detailed steps of removal and installation, and finally, critical maintenance tips.
- Samsung washing machine
- door seal replacement
- rubber gasket
- DIY appliance repair
- front loader seal
- washing machine maintenance
- leak repair

Todd Martin
Senior Writer
With over 15 years of experience in home renovation and design, I started HEG to share what I’ve learned with homeowners who want to create spaces that are both beautiful and functional. I’ve always believed in a hands-on approach, and over the years, I’ve picked up practical solutions that actually work. Through HEG, I aim to make home improvement more approachable, sharing real tips that help you create a home you truly love.