· Todd Martin · DIY Guides · 20 min read
How To Change Whirlpool Dryer To Side Vent
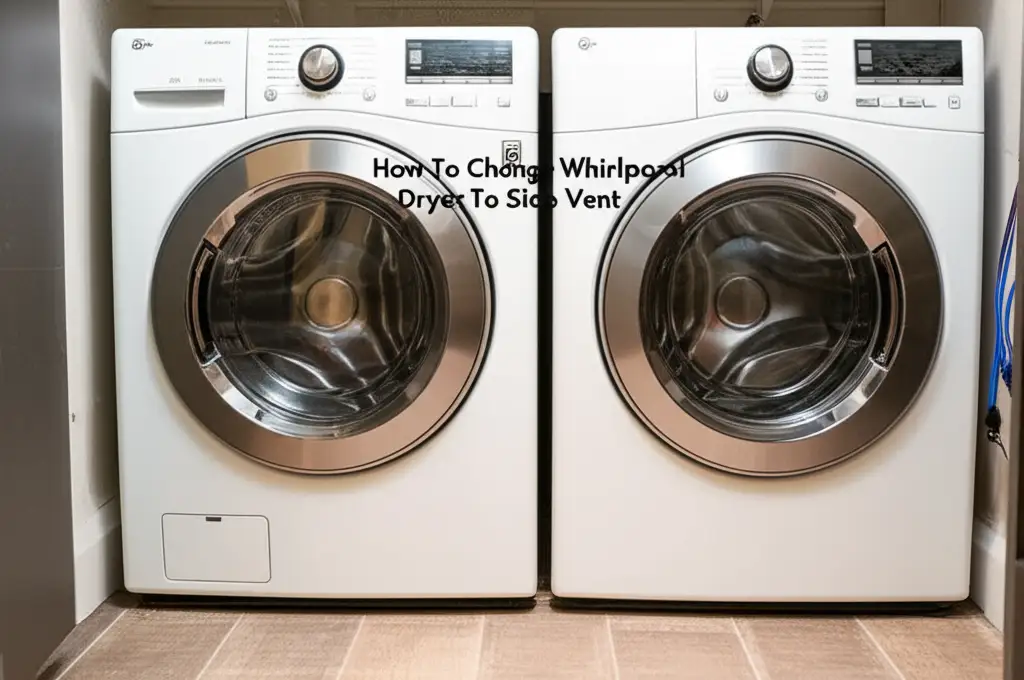
Easily Change Your Whirlpool Dryer to Side Vent
Have you ever looked at your laundry room and wished for a bit more space? Many of us face challenges with appliance placement. The bulky dryer vent sticking out from the back can limit where you put your Whirlpool dryer. This often makes your laundry area feel cramped and hard to organize.
Learning how to change your Whirlpool dryer to side vent can solve this problem. Side venting allows the dryer to sit closer to the wall. This gives you valuable extra inches or even feet in your laundry space. It also provides a cleaner, more efficient vent path. This article will guide you through the process step-by-step. We will cover everything from understanding why side venting helps to the final checks. Get ready to transform your laundry room!
Takeaway
Converting your Whirlpool dryer to side vent is a straightforward DIY project for homeowners.
- It frees up laundry room space.
- It improves vent efficiency.
- The process requires common tools and a Whirlpool vent kit.
- Always prioritize safety by disconnecting power.
- Regular maintenance keeps your new setup working well.
Quick Answer
To change a Whirlpool dryer to side vent, you must disconnect power, remove the dryer’s back panel, relocate the internal vent duct, and install a specific side vent kit. This involves securing the new vent opening and sealing unused holes, then connecting external ductwork.
Why Convert Your Whirlpool Dryer to Side Vent?
Changing your Whirlpool dryer to side vent offers several clear benefits. Most often, people make this change to save space. A dryer vented from the back needs many inches behind it for the vent hose. This pushes the appliance further into the room. A side-vented dryer sits nearly flush against the wall. This can give you an extra 6-12 inches of space. That extra space makes a big difference in smaller laundry rooms or closets.
Beyond saving space, side venting can improve airflow. A straighter, shorter vent path is more efficient. Air moves through it with less resistance. This means your dryer runs more effectively. It can dry clothes faster and use less energy. Better airflow also reduces lint buildup within the ductwork. Lint buildup is a common issue that can restrict airflow and even pose a fire risk. If your Whirlpool dryer has issues with proper venting, like displaying error codes, a conversion might help. You can learn more about this by reading Why does my Whirlpool dryer keep saying check vent.
Many modern Whirlpool dryers are designed to support side venting. They come with knock-out panels on the sides. These panels make the conversion process much simpler. You will not need to cut new holes in the dryer cabinet. Instead, you simply remove the correct panel. Then you redirect the internal vent. This design consideration by Whirlpool makes the DIY conversion practical for homeowners. It adds to the versatility of their appliances.
Consider your laundry room layout carefully. If your current setup forces the dryer into an awkward spot, side venting is a great option. It lets you place the dryer closer to a wall with an existing vent hole. This makes the space more functional and aesthetically pleasing. It gives you more freedom in how you arrange your appliances. It also helps you optimize your laundry workflow.
Essential Tools and Safety for Dryer Vent Conversion
Before you begin to change your Whirlpool dryer to side vent, gather all necessary tools. Having the right equipment makes the job much smoother. You will also need to take important safety steps. This ensures your protection throughout the process. Do not skip these initial preparations.
Here is a list of tools you will likely need:
- Screwdrivers: You will need both Phillips and flathead screwdrivers. These are for removing panels and securing screws.
- Nut Drivers or Socket Wrench Set: Some dryer parts use nuts or bolts.
- Pliers: These help with grasping and pulling wires or clamps.
- Utility Knife or Tin Snips: A utility knife is useful for cutting tape or insulation. Tin snips are for cutting metal if your kit needs it.
- Duct Tape (Foil Type): This strong, heat-resistant tape is essential for sealing vent connections. Do not use standard duct tape.
- Side Vent Kit: You must get a specific Whirlpool dryer side vent kit. These kits contain the necessary duct pieces and hardware. Make sure it matches your specific dryer model number. You might find universal kits, but a brand-specific one is best.
- Work Gloves: Protect your hands from sharp edges on metal parts.
- Safety Glasses: Always wear eye protection when working with tools.
- Flashlight or Headlamp: This provides extra light inside the dryer cabinet.
Safety is paramount when working with appliances. Always follow these rules:
- Disconnect Power: This is the most crucial step. Unplug an electric dryer from the wall outlet. For a gas dryer, turn off the gas supply valve and unplug the power cord. You risk electric shock or a gas leak if you do not do this.
- Ventilation: If working with a gas dryer, ensure good ventilation. This prevents gas buildup if any residue remains.
- Careful Handling: Dryer components can have sharp edges. Be cautious when handling metal panels or ductwork. Wear your gloves.
- Lift Safely: Dryers are heavy. Get help if you need to move the dryer. Lift with your legs, not your back.
- Clear Work Area: Make sure your workspace is clean and free of clutter. This prevents trips and falls.
- Read Instructions: Always read the instructions that come with your specific Whirlpool dryer side vent kit. Every model might have slight differences.
Taking these steps seriously protects you. It also helps you complete the side vent conversion correctly.
Preparing Your Whirlpool Dryer for Vent Conversion
Once you have your tools and safety gear ready, it is time to prepare your Whirlpool dryer. This involves a few key steps to get the appliance ready for its side vent transformation. Proper preparation makes the conversion process much easier and safer.
First, disconnect the power source. For electric dryers, simply unplug the power cord from the wall outlet. If you have a gas dryer, you must turn off the gas supply valve. This valve is usually a quarter-turn handle located behind the dryer where the gas line connects. Then, unplug the power cord. Confirm that both power and gas are off before you proceed. This step is critical for your safety.
Next, you need to move the dryer away from the wall. Pull it out far enough so you can comfortably access the back panel. You will need room to work around the appliance. If your dryer is heavy, ask someone for help. Do not strain your back trying to move it alone. Clear the area around the dryer. You need space to lay down the removed panels and tools.
Now, you will access the dryer’s back panel. Most Whirlpool dryers have a large metal panel on the back. This panel is held in place by several screws. Use your Phillips screwdriver or nut driver to remove these screws. Keep them in a safe place, like a small container, so you do not lose them. Once all screws are out, carefully lift or slide the panel off. Set it aside where it will not get damaged. Accessing the internal components is crucial for the next steps.
With the back panel off, you can see the internal vent ducting. This is usually a metal tube or a flexible hose that leads from the blower housing to the rear vent opening. Take a moment to observe how it is currently configured. Some Whirlpool dryer models have slightly different internal layouts. Understanding the current setup helps you plan the new routing. This initial inspection is important before you start moving parts.
Converting the Venting on Your Whirlpool Dryer Model
Now you are ready for the core part of the process: changing your Whirlpool dryer to side vent. This involves modifying the internal ductwork and installing the new side vent kit. Each Whirlpool model can vary slightly, but the general steps remain consistent. Refer to your kit’s instructions for specific details.
First, identify the knock-out panel for the side vent. Whirlpool dryers typically have pre-scored areas on the left or right side panels (when looking from the back). Choose the side that best suits your laundry room layout. Use a flathead screwdriver and a hammer, or a pair of pliers, to carefully punch out this metal panel. Be careful not to bend or damage the surrounding metal. The metal can be sharp, so wear your gloves. Once the panel is removed, you have a new opening for the side vent.
Next, you will re-route the internal vent duct. The existing duct likely connects to the rear vent opening. You need to detach it from the rear and redirect it to the new side opening. This usually involves:
- Disconnecting the existing duct: There might be clamps or screws holding the duct to the blower housing and the rear vent opening. Loosen or remove these fasteners.
- Removing the rear vent opening: Some Whirlpool models require you to remove the entire rear vent collar. This often involves unscrewing it or prying it off if it’s pressed in. You will likely seal this opening later.
- Attaching the new side vent duct piece: Your Whirlpool dryer side vent kit will include a new duct piece. This piece connects the blower housing directly to the newly opened side panel. Secure it firmly with screws or clamps provided in the kit. Ensure the fit is snug to prevent air leaks.
- Sealing the unused rear opening: The kit often comes with a blank plate or a cover to seal off the original rear vent opening. Attach this plate securely with screws or tape to prevent lint escape and maintain efficiency.
During this process, ensure the internal duct path is as straight and short as possible. Avoid sharp bends or kinks, as these restrict airflow. A smooth path is essential for efficient drying and to prevent lint buildup. This attention to detail will ensure your dryer works well for years.
Sometimes, you may need to install a new internal fan housing or adapter provided in your kit. This is especially true if the original internal duct is not flexible enough. Carefully follow the kit’s instructions for these components. They ensure proper alignment and seal. For a similar process on another brand, you can look at How to install Samsung dryer side vent kit. The principles are similar even if the exact parts differ. Double-check all connections are tight. This prevents air leaks and maintains optimal drying performance.
Connecting the External Ductwork and Final Checks
After you have converted the internal venting of your Whirlpool dryer, the next step is to connect it to your home’s external ductwork. This connection is vital for proper ventilation and efficient drying. It also ensures safety.
First, prepare your external duct connection. The new side vent opening on your dryer needs to align with an existing wall vent. If you do not have a wall vent on that side, you will need to install one. This usually involves cutting a hole in the wall and installing an exterior vent hood. Ensure your ducting is rigid metal or flexible aluminum foil duct, not plastic or vinyl. Plastic ducts are a fire hazard and are often against building codes. All electric dryers must vent outside. You can read more about this at Does an electric dryer vent have to go outside. Also, be aware of where your dryer vent should not go, like into a garage. For more on this, you can check Can I vent my electric dryer into the garage.
Next, connect the dryer to the wall vent. Use a short, straight piece of duct if possible. The shorter and straighter the duct, the better the airflow. Slide one end of the duct over the new side vent collar on the dryer. Secure it with a metal clamp. Then, connect the other end of the duct to the wall vent opening. Secure this end with another metal clamp. For extra sealing, wrap all connections with foil-backed duct tape. Do not use regular cloth duct tape, as it is not heat-resistant enough. Ensure there are no kinks or sharp bends in the flexible duct.
Once connected, it is time for final checks and testing.
- Inspect all connections: Visually check every duct connection. Make sure they are tight and properly sealed. There should be no gaps where air or lint could escape.
- Replace the back panel: Carefully reattach the dryer’s back panel. Insert all the screws you removed earlier. Make sure the panel sits flush and is secure.
- Move the dryer into place: Gently push the dryer back into its desired position. Ensure there is enough clearance behind it for the flexible duct to curve without kinking. Avoid pressing the dryer too tightly against the wall. This can crush the vent hose.
- Reconnect power and gas (if applicable): Plug the electric dryer back into the outlet. For a gas dryer, turn the gas supply valve back on before plugging in the power cord.
- Run a test cycle: Start a short, empty cycle on your dryer. Feel the air coming out of the exterior vent hood. You should feel strong, warm airflow. Check inside the laundry room for any escaping air or strange noises around the dryer’s vent connections. This test ensures the new setup works correctly.
Maintaining Your New Side-Vented Whirlpool Dryer
After successfully changing your Whirlpool dryer to side vent, proper maintenance becomes even more important. A well-maintained vent system ensures your dryer runs efficiently. It also reduces fire risks. Regular cleaning prevents lint buildup. Lint is the main cause of dryer vent issues.
First and foremost, clean the lint filter after every load. This simple habit is the first line of defense against lint accumulation. A clogged lint filter makes your dryer work harder. It also forces more lint into the vent system. Pull out the lint screen and remove all the trapped lint. If you notice a film on the screen, wash it with soap and water to clear it.
Next, regularly inspect and clean the dryer vent ductwork. Even with a clean lint filter, some lint will escape into the vent hose. Over time, this lint builds up. It restricts airflow. This can lead to longer drying times, higher energy bills, and overheating. For a side-vented Whirlpool dryer, the duct run is often shorter. This can mean less lint buildup over a long distance. However, you still need to clean it.
- Frequency: Plan to clean your dryer vent at least once a year. If you use your dryer heavily or have pets that shed a lot, clean it more often, perhaps every six months.
- How to clean: Disconnect the dryer from the wall vent. Use a dryer vent brush kit. These kits come with a long, flexible brush that connects to a drill. Insert the brush into the ductwork from both the dryer end and the wall end. Work the brush back and forth to loosen lint. For a full guide, check out How to clean dryer vent.
Do not forget to check the exterior vent hood. Lint can also build up here. Clear away any lint or debris from the outside flap. Make sure the flap opens and closes freely. A blocked exterior vent cap can cause significant airflow problems. For information on cleaning roof vents, see How to clean dryer vent on roof.
Pay attention to your dryer’s performance. If clothes take longer to dry, or the dryer feels hotter than usual, it is a sign of a restricted vent. Your Whirlpool dryer might even display a “check vent” error message. This means it is time for a thorough vent cleaning. Also, consider cleaning the internal parts of your Whirlpool dryer, like the blower wheel, periodically. This helps ensure optimal performance. You can find tips for general dryer cleaning at How to clean Whirlpool dryer.
Regular maintenance ensures your side-vented Whirlpool dryer operates at its best. It keeps your home safe. It also extends the life of your appliance.
Troubleshooting Common Side Venting Issues
Even after a successful conversion, you might run into minor issues with your side-vented Whirlpool dryer. Knowing how to troubleshoot these common problems can save you time and frustration. Most problems relate to airflow or installation.
One frequent issue is poor airflow or long drying times. This means clothes take much longer than usual to dry. The dryer might also feel very hot to the touch. This often points to a restriction in the vent system.
- Check for kinks: Inspect the flexible duct behind the dryer. Ensure it is not crushed, bent sharply, or kinked. Straighten any kinks.
- Inspect for blockages: Lint buildup is the most common culprit. Disconnect the duct from both the dryer and the wall. Use a vent cleaning brush to clear any lint. Also, check the exterior vent hood for blockages.
- Verify proper sealing: Air leaks at the connections can reduce airflow. Ensure all duct connections are secured with clamps and sealed with foil tape. Check the blanking plate on the unused vent opening. Make sure it is sealed tight.
Another issue can be excessive noise from the dryer. While some operational noise is normal, rattling or unusual sounds can be concerning.
- Check loose parts: Ensure all screws on the dryer’s back panel are tight. Verify that the internal vent components you installed are securely fastened.
- Duct vibration: The flexible duct might be vibrating against the wall or floor. Adjust its position slightly or add padding if needed.
Sometimes, you might notice lint escaping around the dryer. This indicates an air leak.
- Inspect all seals: Carefully re-examine every connection point. This includes the new side vent collar, the blanking plate, and the connections to the wall duct. Any gap, no matter how small, can allow lint to escape. Re-tape or tighten clamps as needed.
- Check the dryer body: Make sure the dryer’s back panel is seated correctly and all screws are tight.
If your dryer still gives a “check vent” error after the conversion, it suggests the airflow problem persists. The dryer’s sensor detects low airflow. This can happen even with a seemingly clear vent.
- Clean the internal blower: Lint can build up inside the blower housing or on the blower wheel itself. This restricts airflow even before the duct. Disconnecting the vent and looking into the blower area can reveal buildup. Cleaning this area may require more disassembly.
- Sensor issues: In rare cases, the sensor itself might be faulty. However, always rule out airflow blockages first.
Always ensure you used the correct side vent kit for your specific Whirlpool model. Using an incompatible kit can lead to fitting issues and airflow problems. If you have tried all troubleshooting steps and the problem continues, consider contacting a professional appliance technician. They can diagnose more complex internal issues or ensure your venting meets local codes.
Advanced Tips for Optimizing Your Side-Vented Dryer
Once your Whirlpool dryer is side-vented, there are a few advanced tips to optimize its performance and longevity. These steps go beyond basic setup and maintenance. They help ensure your dryer works at its best for years.
First, consider rigid metal ductwork over flexible hoses for the main run. While flexible aluminum foil duct is often used for the final connection to the wall, longer runs should use rigid metal. Rigid ducts have a smoother interior surface. This means less friction for airflow. Lint is less likely to stick and build up. Rigid ducts are also more durable and less prone to kinking or crushing. This provides superior airflow and requires less frequent cleaning. If your wall vent is directly behind where the side vent will be, a short, straight piece of rigid duct might be all you need.
Next, minimize turns and length in your vent path. Every bend in your ductwork restricts airflow. Each 90-degree turn is like adding several feet to the duct length in terms of airflow resistance. Keep the vent path as short and straight as possible. This is one of the biggest advantages of side venting. It often allows for a much more direct path to the outside. Avoid long runs of ductwork, especially if they have many turns. Aim for a total equivalent length (including turns) of less than 25 feet for optimal performance.
Install proper vent accessories. Use metal clamps for all connections, not plastic ties or tape alone. The foil-backed duct tape should be used to seal connections after clamping, not to hold them together. On the exterior, ensure your vent hood has a protective screen or grille. This keeps pests out but should also have large enough openings to avoid lint buildup. Choose a hood design that allows for easy cleaning from the outside.
Monitor your drying times and energy usage. After the conversion, you should notice an improvement in drying efficiency. Your clothes might dry faster. Your dryer might run for shorter cycles. If you see drying times getting longer again, it is an early sign of lint buildup. This reminds you that it’s time for another vent cleaning. Keeping an eye on your utility bills might also show reduced energy consumption, especially if your old vent was very inefficient.
Finally, understand your local building codes. While this guide provides general steps, local codes might have specific requirements for dryer venting. These can include minimum duct diameters, maximum lengths, and specific materials. Usually, a licensed professional will know these codes well. For a DIY project, a quick call to your local building department can provide peace of mind. Ensuring your installation meets codes is important for safety and resale value.
By following these advanced tips, you optimize your side-vented Whirlpool dryer setup. You ensure its efficiency, safety, and a long life for your appliance.
FAQ Section
Is changing a Whirlpool dryer vent difficult?
Changing a Whirlpool dryer vent to the side is a moderately difficult DIY project. It requires basic tools and some mechanical aptitude. You must carefully follow instructions, especially concerning power disconnection and duct sealing. It is more involved than just cleaning a lint trap.
Do all Whirlpool dryers support side venting?
Most modern Whirlpool electric dryers are designed to support side venting. They usually have pre-stamped knock-out panels on their sides. Older models or specific gas models might not have this feature. Always check your dryer’s manual or the model number online to confirm compatibility.
What specific tools do I need for this conversion?
You will need screwdrivers (Phillips and flathead), a nut driver or socket set, pliers, a utility knife or tin snips, and foil-backed duct tape. Most importantly, you need a Whirlpool-specific side vent kit for your model. Safety gloves and glasses are also essential.
How often should I clean the side dryer vent?
You should clean your side dryer vent at least once a year. If you use your dryer heavily, have pets, or notice clothes taking longer to dry, clean it more often, perhaps every six months. Regular cleaning prevents lint buildup and maintains efficiency.
Will this conversion void my Whirlpool warranty?
Modifying your appliance, like changing the vent location, can sometimes affect your warranty. It depends on the specific terms of your Whirlpool warranty and how the modification is done. Performing the conversion correctly using an approved Whirlpool kit is best. Check your warranty documentation or contact Whirlpool customer service for clarity.
Conclusion
Transforming your Whirlpool dryer to side vent is a smart upgrade for any laundry space. It frees up valuable room and improves your dryer’s efficiency. By following our clear, step-by-step guide, you can confidently take on this DIY project. We covered everything from choosing the right tools to ensuring the final connections are secure.
Remember to prioritize safety at all times. Disconnect power before you begin. Use a specific Whirlpool dryer side vent kit. Take your time with each step. Regular maintenance, including cleaning your new side vent, will keep your dryer running optimally. This helps prevent lint buildup and extends your appliance’s life. Now you can enjoy a more organized and efficient laundry room. Your Whirlpool dryer will work perfectly in its new configuration.
- Whirlpool dryer
- dryer vent conversion
- side vent kit
- laundry room space
- DIY appliance repair
- dryer maintenance


