· Todd Martin · Beauty & Personal Care · 19 min read
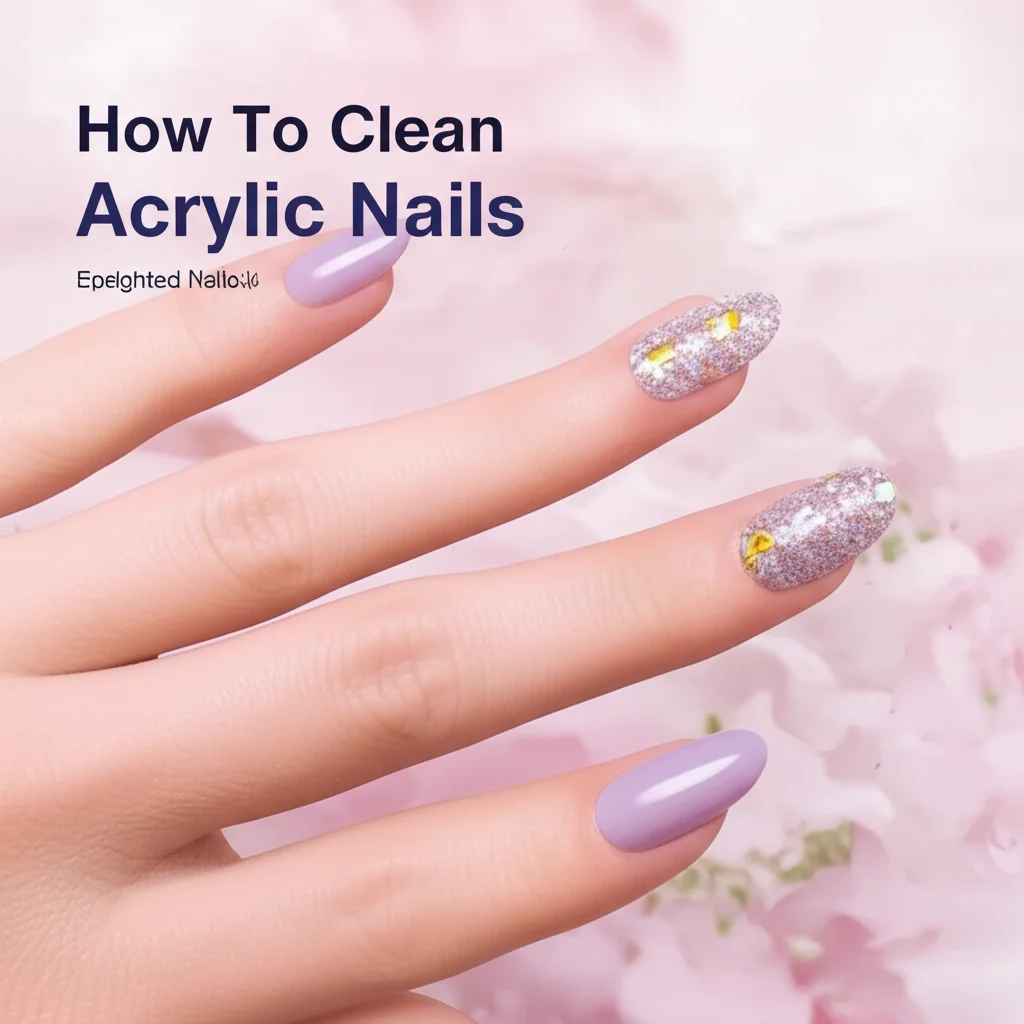
How To Clean Acrylic Nails
Unlock Lasting Shine: How to Clean Acrylic Nails Safely
Keeping your acrylic nails looking fresh and salon-perfect can feel like a challenge. Dirt, oils, and everyday activities can quickly dull their shine and even lead to discoloration. But don’t worry, maintaining beautiful acrylics is easier than you think with the right approach. Knowing how to clean acrylic nails properly ensures they stay vibrant and healthy between fills.
In this article, I will share simple, effective methods to deep clean your acrylic nails at home. We will cover essential tools, step-by-step cleaning processes, and smart tips to tackle common issues like stains and odors. I will also explain how to prevent problems before they start, keeping your manicure looking its best for longer. Get ready to give your acrylics the care they deserve!
Takeaway
- Use gentle, non-abrasive cleansers to avoid damage.
- Clean underneath the nails daily to prevent buildup.
- Address stains and discoloration promptly with targeted methods.
- Proper aftercare extends the life and appearance of your acrylics.
To effectively clean acrylic nails, gently scrub them daily with mild soap and water using a soft brush. For deeper cleaning, soak nails briefly in warm soapy water, then carefully clean around and under the enhancements to remove dirt and residue. Always ensure nails are completely dry afterward to prevent moisture-related issues.
Understanding Your Acrylics: Why Regular Cleaning Matters
Acrylic nails offer a fantastic way to enjoy long, strong, and beautifully shaped nails. They are a durable nail enhancement made by combining a liquid monomer and a powdered polymer. This mixture forms a hard protective layer over your natural nails. Acrylics are popular because they are versatile. You can shape them in many ways.
Even though acrylics are strong, they still need regular cleaning. Daily life exposes your nails to dirt, grime, and oils. These substances can build up on the surface and underneath the nail. This buildup dulls their shine. It can also lead to discoloration over time. Neglecting cleaning can make your acrylics look messy. It can also create an environment for bacteria or fungus. Proper cleaning helps your nails look good. It also promotes overall nail hygiene.
Think of your acrylics as an extension of your body; they need consistent care. Cleaning prevents yellowing or staining from common products. This includes makeup, food, or even certain household cleaners. Regular cleaning maintains the bond between the acrylic and your natural nail. This helps prevent lifting, which is when the acrylic separates from your nail bed. Lifting can trap moisture and debris. This leads to bigger problems like infections. I find that a little effort daily saves a lot of trouble later.
Regular cleaning also helps maintain the integrity of the acrylic material. It keeps the surface smooth and clear. This ensures your polish or design looks its best. Clean nails feel better too. They help you avoid snagging on clothes or other surfaces. Investing time in cleaning your acrylic nails is an investment in their beauty and your nail health. It is a simple step that makes a big difference in how your manicure lasts.
Essential Tools and Gentle Cleansers for Acrylic Nails
Having the right tools and products makes cleaning acrylic nails easy and safe. You do not need many items. Simple, everyday supplies work best. Your goal is to clean without causing damage or weakening the acrylic material. Choose your products carefully to protect your nails.
First, you will need a soft-bristled brush. An old, clean toothbrush works perfectly. You can also use a dedicated nail brush. The bristles should be gentle enough not to scratch the acrylic surface. They must be firm enough to dislodge dirt from crevices. Avoid brushes with hard bristles. These can scratch or dull your nail finish. A soft brush is key for effective and safe cleaning.
Next, select a gentle cleanser. Mild dish soap is an excellent choice. It cuts through grease and grime without being too harsh. You can also use a non-abrasive hand soap or a specialized nail cleanser. Avoid harsh chemicals like acetone, alcohol, or ammonia-based cleaners. These can weaken, dissolve, or discolor acrylics. They also make them brittle. For specific stains, you might consider hydrogen peroxide or white vinegar. These are gentle alternatives. Remember, the rule is always “gentle.”
You will also need a small bowl for soaking your nails. A small towel for drying is also important. Cotton swabs or lint-free cloths are useful for precision cleaning. They help you reach small areas. Always have a good hand lotion or cuticle oil ready. You can use this after cleaning. This helps rehydrate your cuticles and surrounding skin. Cleaning can sometimes dry out the skin. A good moisturizer keeps your hands and nails looking healthy.
Gathering these items before you start saves time. It also ensures you have everything on hand. I always keep a small cleaning kit specifically for my nails. This kit includes a soft brush and a gentle soap. This way, I am always ready to give my acrylics a quick refresh. Proper tools are the foundation of good nail care.
Step-by-Step Guide: Deep Cleaning Acrylic Nails at Home
Cleaning your acrylic nails thoroughly at home is a simple process. Follow these steps for a complete and effective clean. This method removes dirt, prevents buildup, and keeps your nails looking their best. I follow these steps regularly to maintain my acrylics.
Prepare Your Cleaning Area
First, gather all your supplies. You need a soft-bristled brush, mild soap, warm water, a small bowl, and a clean towel. Find a comfortable spot with good lighting. Remove any rings or jewelry from your fingers. This ensures you can clean all parts of your nails without obstruction. Preparing beforehand makes the process smooth.
Gentle Soaking (Optional, but Recommended)
Fill your small bowl with warm water and add a few drops of mild soap. Submerge your hands in the soapy water. Let your nails soak for 5-10 minutes. This helps loosen dirt and soften any residue under and around the acrylics. It also makes the subsequent cleaning steps easier. Soaking is particularly helpful if your nails are very dirty.
Scrubbing the Surface and Underside
Take your soft-bristled brush. Dip it into the soapy water. Gently scrub the top surface of each acrylic nail. Use circular motions to cover the entire nail. Pay attention to the cuticles and side walls. Next, focus on the underside of your nails. This area often collects the most dirt and debris. Gently slide the brush under the free edge of your acrylics. Scrub away any trapped dirt. Be thorough but gentle. Do not push too hard, as this can cause lifting.
Rinsing and Drying Thoroughly
After scrubbing, rinse your hands under clean, lukewarm running water. Make sure to rinse all soap residue from your nails and skin. Soap left behind can leave a dull film. It can also dry out your skin. Once rinsed, dry your hands and nails completely with a clean towel. Ensure there is no moisture left, especially underneath the acrylics. Trapped moisture can lead to fungal growth or lifting. You can air dry for a few minutes or use a blow dryer on a cool setting for extra dryness. I always pat my nails dry very well.
Moisturize Your Cuticles
Finally, apply a cuticle oil or hand lotion to your cuticles and the skin around your nails. This rehydrates the area. It helps prevent dryness that cleaning might cause. Healthy cuticles contribute to the overall appearance and health of your acrylics. Massage the oil or lotion gently into your skin. This step is often overlooked but is crucial for maintaining supple skin around your beautiful nails. This regular cleaning routine will keep your acrylic nails looking impeccable.
Tackling Common Acrylic Nail Problems: Stains, Discoloration, and Odor
Acrylic nails, while beautiful, can sometimes develop issues like stains, discoloration, or unpleasant odors. These problems are usually fixable with targeted cleaning methods. Understanding the cause helps you address them effectively. I have dealt with all these issues myself.
Removing Stains from Acrylic Nails
Stains on acrylic nails often come from everyday activities. Cooking with turmeric, handling newsprint, or using dark dyes can leave marks. The key is to act quickly. For light stains, a mixture of baking soda and water can work wonders. Make a paste and gently rub it on the stained area with a soft cloth. Rinse well.
Another effective solution for stubborn stains is non-gel toothpaste. How to clean nails with toothpaste explains this method. Apply a small amount to the stain. Scrub gently with a soft toothbrush. The mild abrasives in toothpaste can lift the stain without harming the acrylic. Always test a small, inconspicuous area first. Avoid harsh bleach, as it can weaken or discolor your acrylics permanently.
Addressing Discoloration (Yellowing)
Yellowing is a common acrylic nail problem. Sun exposure, smoking, and certain chemicals can cause it. Sometimes, using poor-quality topcoats or polish can also lead to discoloration. For mild yellowing, try a soak in white vinegar and water. Mix equal parts white vinegar and warm water in a bowl. Soak your nails for 10-15 minutes. The vinegar’s acidity can help lighten the yellow tint. Rinse and dry thoroughly.
If the yellowing is severe, it might indicate a deeper issue. It could be due to a poor-quality acrylic product or, in rare cases, a fungal infection. If you suspect an infection, consult a nail professional or dermatologist. Otherwise, consistent cleaning and using good quality products can prevent yellowing. I always use a UV-protective topcoat to prevent yellowing from sunlight.
Eliminating Unpleasant Odors
Odors from acrylic nails usually stem from trapped moisture or bacteria underneath the nail. This happens if nails are not dried properly after washing. It can also happen if lifting occurs, creating pockets for debris. The first step is thorough cleaning. Follow the deep cleaning guide, paying extra attention to drying under the nail.
For persistent odors, a diluted solution of hydrogen peroxide can help. Mix one part hydrogen peroxide with three parts water. Soak your nails for a few minutes. Hydrogen peroxide is an antiseptic and can kill odor-causing bacteria. Another option is a tea tree oil soak. Add a few drops of tea tree oil to warm water. Soak your nails for 10 minutes. Tea tree oil has natural antifungal and antibacterial properties. If the odor persists or comes with pain or swelling, it is crucial to see a professional. This might indicate an infection under the nail. Regular cleaning and drying are your best defense against odors.
Maintaining Sparkle: Daily Care and Prevention Tips for Acrylics
Beyond deep cleaning, daily care and preventive measures are crucial for keeping your acrylic nails sparkling. These habits help extend the life of your manicure and prevent common problems. Small efforts each day make a big difference. I integrate these tips into my routine.
Daily Quick Clean
Make a quick clean part of your daily routine. After washing your hands, take an extra moment to gently scrub under your acrylics with a soft nail brush and mild soap. This removes any fresh dirt or lint before it builds up. Always dry your nails thoroughly afterward. Pay close attention to the area underneath the tip. This simple step prevents major accumulation. It also keeps your nails feeling fresh and looking clean.
Protect Your Nails
Protecting your acrylics from harsh chemicals and excessive moisture is vital. When doing chores like washing dishes or cleaning with household products, wear gloves. Many cleaning agents contain chemicals that can weaken acrylics or cause discoloration. Prolonged exposure to water can also lead to lifting. This is because water can seep between the acrylic and your natural nail. Even hot water can affect the acrylic bond over time. Protect your nails. They will last longer.
Avoid Rough Treatment
Treat your acrylics with care. They are strong, but not invincible. Avoid using your nails as tools to pry open cans or scratch off labels. This can cause them to chip, crack, or lift. Be mindful of how you use your hands. If you are doing activities that put stress on your nails, consider wearing protective gloves. For example, when gardening, wear sturdy gloves. This prevents accidental damage.
Moisturize Regularly
Keeping your cuticles and the skin around your nails hydrated is important. Dry cuticles can crack and look unsightly. They can also affect the health of your natural nail underneath the acrylic. Use a good quality cuticle oil daily. Apply it to the cuticles and gently massage it in. This keeps the skin soft and healthy. Healthy skin around the nail helps maintain the integrity of your manicure.
Choose Quality Products
When applying nail polish or topcoats over your acrylics, choose quality products. Some polishes or removers can react poorly with acrylics. Always use non-acetone nail polish remover. Acetone dissolves acrylic. Look for polishes that are free of harsh chemicals. A good topcoat can also add an extra layer of protection and shine. Consider a topcoat designed for gel nails for added durability, as many are compatible with acrylics.
Address Lifting Promptly
If you notice any lifting (when the acrylic starts to separate from your natural nail), address it immediately. Do not try to glue it down yourself or pick at it. This can worsen the problem. It can also introduce bacteria. Contact your nail technician to have it fixed. They can rebalance the nail or fill the lifted area properly. Prompt attention prevents further damage and potential infections.
Regularly Clean Underneath
Remember that buildup under your nails is a common issue for many types of manicures. Just as you would clean press on nails or natural nails, consistently clean under your acrylics. This prevents bacteria and maintains hygiene. Use a soft brush and gentle soap every day.
By following these daily care and prevention tips, your acrylic nails will maintain their sparkle. They will also stay healthy and beautiful between salon visits. These practices are simple but effective.
Beyond Basic Cleaning: When to Seek Professional Help
While home cleaning can keep your acrylic nails in great shape, some issues require a professional touch. Knowing when to visit your nail technician is crucial for maintaining nail health and the longevity of your manicure. Do not hesitate to seek expert advice.
One primary reason to see a professional is for fills or rebalances. Acrylic nails grow out with your natural nails. This creates a gap between the cuticle and the acrylic. Fills involve adding new acrylic to this gap. Rebalancing reshapes the nail as it grows. Most people need fills every 2-3 weeks. This keeps the nails looking fresh and prevents stress on the natural nail. Regular fills ensure the structure remains strong.
Another reason is significant lifting or breakage. Small lifts can sometimes be managed carefully. However, extensive lifting, especially near the cuticle or if the nail feels loose, needs immediate professional attention. Lifting can trap moisture, leading to bacterial or fungal infections. A professional can properly reattach the acrylic or safely remove and reapply it. Similarly, if an acrylic nail breaks deep into the nail bed or causes pain, a technician can assess the damage. They can fix it without further harm. Attempting to fix severe breaks at home can worsen the problem or lead to infection.
Persistent discoloration or unusual changes in your nails also warrant a professional visit. While we discussed home remedies for yellowing, if your nails show unusual color changes (green, black), severe yellowing, or develop a strange texture, it could indicate an underlying issue. This might be a fungal infection or an allergic reaction. A nail technician can diagnose the problem. They can also recommend appropriate treatment or advise you to see a doctor. They have expertise in nail health.
Furthermore, if you experience pain, swelling, redness, or pus around your acrylic nails, seek professional help immediately. These are signs of infection. A nail technician can often identify these issues early. They will then advise you on the next steps, which may include medical consultation. Do not ignore these symptoms. Your health is most important.
Finally, if you want a complete removal of your acrylics, it is best done by a professional. They use techniques to safely soak off the acrylic. This minimizes damage to your natural nails. Improper removal at home can peel off layers of your natural nail. This makes them weak and brittle. Trusting professionals ensures your natural nails remain healthy after acrylic removal. They also know how to clean acrylic without scratching it.
While home care is essential, recognizing when professional intervention is needed protects your nail health and investment. Your nail technician is a valuable resource. They can keep your acrylics looking their best and address any concerns.
Common Mistakes to Avoid When Cleaning Your Acrylic Nails
Cleaning acrylic nails seems simple, but it is easy to make mistakes that can harm your manicure or natural nails. Avoiding these common pitfalls will save you time and money. It will also keep your acrylics looking flawless. I have learned these lessons over time.
Using Harsh Chemicals
The biggest mistake is using harsh chemicals. Acetone is the primary culprit. While it removes nail polish effectively, it dissolves acrylic. Even non-acetone removers should be used sparingly on acrylics. Bleach, ammonia-based cleaners, and strong disinfectants can also weaken the acrylic structure. They can cause discoloration. Always choose mild, gentle soaps. Stick to products specifically designed for acrylics or general hand washing. Remember, your acrylics are a type of plastic; strong chemicals will react poorly with them.
Over-Soaking Your Nails
While a short soak can help loosen dirt, over-soaking is detrimental. Prolonged exposure to water, especially hot water, can weaken the bond between the acrylic and your natural nail. This leads to lifting. It also makes the acrylic more prone to chipping or breaking. Limit soaking time to 5-10 minutes during deep cleans. For daily cleaning, a quick scrub under running water is enough.
Improper Drying
Failing to dry your nails thoroughly after washing is a common mistake. Moisture trapped underneath the acrylic creates a perfect breeding ground for bacteria and fungi. This can lead to unpleasant odors, discoloration, and even infections. Always pat your nails completely dry with a clean towel. You can also use a cool setting on a hairdryer for extra dryness, especially under the free edge. Ensure every crevice is dry.
Aggressive Scrubbing or Picking
Being too aggressive with your cleaning tools or fingers can damage your acrylics. Using a stiff brush can scratch the surface, making it look dull. Picking at lifted areas or trying to pry off dirt with sharp objects can cause further lifting. It can also damage your natural nail. Always use a soft-bristled brush. Be gentle but firm when cleaning. Precision and gentleness yield better results than force.
Ignoring Early Signs of Problems
Many people ignore small issues like minor lifting, subtle discoloration, or faint odors. These small problems can quickly escalate. A small lift can become a large one, trapping more debris. A minor stain can set in. Addressing issues promptly prevents them from becoming major headaches. Regularly inspect your nails. If you notice anything unusual, address it using the appropriate cleaning methods or by consulting a professional. Early intervention saves your manicure.
Forgetting Cuticle Care
Focusing only on the acrylic surface and forgetting your cuticles is another mistake. Dry, cracked cuticles not only look unsightly but can also lead to hangnails and discomfort. Healthy cuticles are part of healthy nails. Always moisturize your cuticles after cleaning. Use a cuticle oil or a good hand lotion. This keeps the skin around your nails supple and helps maintain the overall health and appearance of your manicure.
By avoiding these common mistakes, you ensure your acrylic nails remain beautiful and healthy for as long as possible. Smart cleaning habits are key to a long-lasting and pristine manicure.
FAQ Section
How often should I clean my acrylic nails?
You should perform a quick clean daily with mild soap and a soft brush. A more thorough deep clean, including a gentle soak, is recommended once or twice a week. Consistent cleaning prevents dirt buildup and maintains hygiene, keeping your acrylics looking fresh. This routine helps prevent issues like discoloration or odor.
Can I use alcohol to clean acrylic nails?
It is best to avoid using alcohol on acrylic nails. While rubbing alcohol can disinfect, prolonged or frequent exposure can dry out the acrylic, making it brittle and prone to cracking or lifting. Stick to mild soap and water for regular cleaning. If disinfection is needed, very diluted hydrogen peroxide is a gentler alternative.
How do I get rid of stains on acrylic nails?
For common stains, try gently scrubbing with a paste of baking soda and water or a non-gel toothpaste. For stubborn yellowing, a soak in equal parts white vinegar and warm water can help lighten the discoloration. Always rinse thoroughly and dry completely afterward to prevent further issues.
What causes lifting in acrylic nails?
Lifting occurs when the acrylic separates from your natural nail. Common causes include improper application, nail growth, excessive moisture trapped underneath, using nails as tools, or exposure to harsh chemicals. Promptly addressing lifting by a professional is important to prevent infections and further damage.
Can I clean under my acrylic nails?
Yes, cleaning under your acrylic nails is crucial for hygiene. Use a soft-bristled brush, like a clean toothbrush, with mild soap and water. Gently scrub underneath the free edge of the nail to remove trapped dirt, lint, and debris. Always ensure the area is completely dry afterward to prevent moisture-related issues.
Are there natural ways to clean acrylic nails?
Yes, natural cleaners like mild dish soap, white vinegar, baking soda, and diluted hydrogen peroxide are effective. These options are gentle on acrylics and less likely to cause damage compared to harsh chemical cleaners. Always dilute strong ingredients like vinegar or hydrogen peroxide before use.
Conclusion
Keeping your acrylic nails pristine is simpler than you might think. By understanding the proper techniques and using the right products, you can maintain their beauty and health. We have covered everything from selecting gentle cleansers to tackling stubborn stains and odors. Regular cleaning, combined with preventive care, ensures your acrylic nails stay beautiful for longer.
Remember to incorporate a daily quick clean and a weekly deep clean into your routine. Always use a soft brush and mild soap, and thoroughly dry your nails afterward. Protect your nails from harsh chemicals and avoid aggressive scrubbing. If you notice persistent issues like severe lifting or unusual changes, do not hesitate to seek professional help. Your nail technician is your best resource for maintaining your acrylic investment. By following these steps, you will enjoy gorgeous, healthy, and long-lasting acrylic nails. Start giving your acrylics the care they deserve today!
- acrylic nail care
- nail cleaning
- nail maintenance

Todd Martin
Senior Writer
With over 15 years of experience in home renovation and design, I started HEG to share what I’ve learned with homeowners who want to create spaces that are both beautiful and functional. I’ve always believed in a hands-on approach, and over the years, I’ve picked up practical solutions that actually work. Through HEG, I aim to make home improvement more approachable, sharing real tips that help you create a home you truly love.