· Todd Martin · Vehicle Care · 19 min read
How To Clean Air Filter Motorcycle

Cleaning Your Motorcycle Air Filter: A Comprehensive Guide
Riding a motorcycle offers freedom and excitement. To keep your ride smooth and engine healthy, regular maintenance is essential. One critical task is knowing how to clean air filter motorcycle. A clean air filter ensures your engine gets enough clean air. This helps with fuel efficiency and prolongs engine life. A dirty filter restricts airflow. This can cause poor performance or engine damage. I will explain everything you need to know about cleaning your motorcycle air filter. This guide covers different filter types, necessary tools, and step-by-step cleaning methods. You will also learn about proper reinstallation.
Takeaway
Keeping your motorcycle’s air filter clean is vital for engine health and performance. Here are the key actionable steps:
- Identify your filter type (foam, paper, or reusable cotton gauze).
- Gather the correct cleaning supplies for your specific filter.
- Carefully remove the air filter from its housing.
- Clean the filter following specific steps for its material.
- Allow the filter to dry completely.
- Re-oil foam and cotton gauze filters as needed.
- Reinstall the clean filter properly.
How to Clean Motorcycle Air Filter
You clean a motorcycle air filter by first removing it. Then you use appropriate cleaning solutions based on its type (foam, paper, or cotton gauze). Finally, you dry the filter completely and re-oil reusable types before reinstalling it.
Why a Clean Motorcycle Air Filter Matters
A clean air filter is like an engine’s lungs. It keeps dust, dirt, and debris out of your engine. Your motorcycle engine needs a constant supply of clean air to mix with fuel. This air-fuel mixture allows for combustion. When the air filter gets dirty, it restricts airflow. This means the engine “breathes” harder.
Restricted airflow leads to several problems. Your engine might lose power. It could consume more fuel than usual. Over time, dirt particles can bypass a clogged filter. These particles enter the engine’s combustion chamber. They cause wear and tear on internal components. This shortens engine life. Regular cleaning prevents these issues. It ensures optimal engine performance and longevity. This simple task saves you money on fuel and costly repairs.
Knowing how to clean air filter motorcycle helps you maintain your bike. It keeps your motorcycle running efficiently. This reduces harmful emissions too. A clean filter is a key part of good engine maintenance. Ignoring this can lead to serious mechanical issues. My own experience shows that a clean filter makes a noticeable difference in throttle response. It just feels better to ride.
Different Types of Motorcycle Air Filters
Motorcycles use various types of air filters. Each type requires a specific cleaning method. Understanding your filter type is the first step. The most common types are foam, paper, and reusable cotton gauze filters. I will explain each type and its characteristics. This helps you determine the correct cleaning process.
Foam Air Filters
Many dirt bikes and some street bikes use foam filters. These filters have an open-cell foam material. This foam is designed to trap dirt. Foam filters are typically oiled. The oil helps to catch fine dust particles. They are very effective at keeping dirt out of the engine. You can clean these filters multiple times. This makes them cost-effective in the long run.
Cleaning foam filters involves a special foam filter cleaner. You also need fresh air filter oil. This oil is sticky and traps dirt. It is important to re-oil the filter after cleaning. This step ensures proper filtration. If you do not re-oil it, dirt can pass through easily. Many riders prefer foam filters for off-road use. They offer good filtration in dusty conditions.
Paper Air Filters
Paper air filters are common in many street motorcycles. They look like pleated paper elements. These filters are often disposable. Most manufacturers recommend replacing them instead of cleaning them. Cleaning a paper filter can damage its delicate structure. This creates gaps where dirt can enter. Trying to clean them might seem like a good idea. However, it usually reduces their effectiveness significantly.
If your motorcycle has a paper filter, check your owner’s manual. It will specify the replacement intervals. Replacing a paper filter is usually a straightforward process. You simply swap the old one for a new one. Some people try to blow out paper filters with compressed air. I advise against this. It can tear the filter media. This compromises its ability to filter air. Always replace paper filters when they are dirty.
Reusable Cotton Gauze (K&N Style) Filters
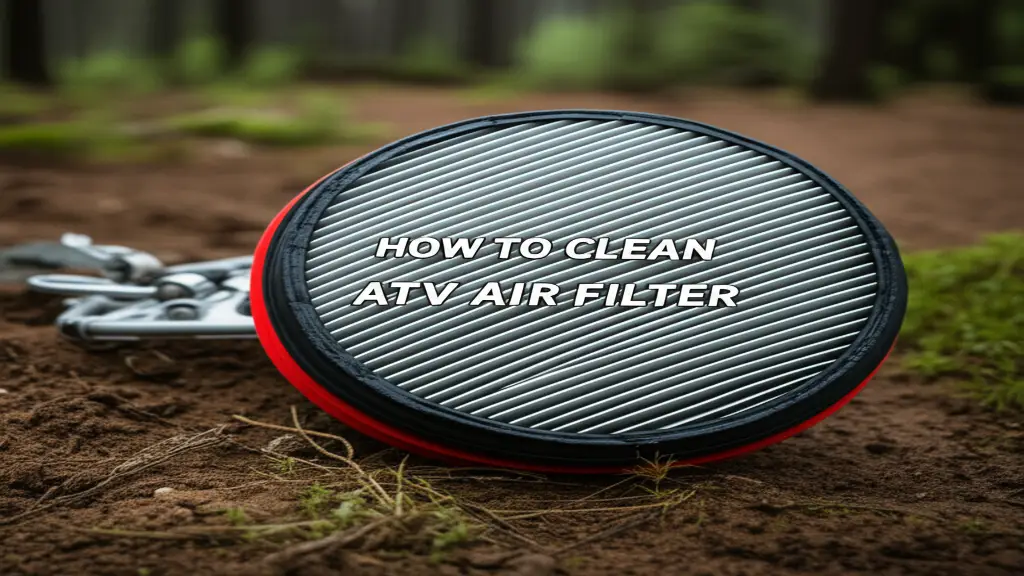
Reusable cotton gauze filters are popular aftermarket options. Brands like K&N make these. They consist of layers of cotton gauze treated with oil. These filters offer high airflow and excellent filtration. They are designed to be cleaned and re-oiled many times. This makes them a long-term investment.
Cleaning K&N style filters requires a specific cleaning kit. This kit includes a cleaner and a special air filter oil. The cleaning process is similar to foam filters but uses different products. It is crucial to use the correct oil. This ensures the filter works as intended. These filters often improve engine performance due to better airflow. They are a great upgrade for many riders. If you have an ATV or a Spectre air filter, the cleaning principles for cotton gauze filters are very similar.
Tools and Materials You Will Need
Before you start cleaning your motorcycle air filter, gather all necessary tools and materials. Having everything ready saves time. It also makes the process smoother. The exact items depend on your air filter type. I always make a checklist before starting any maintenance task.
For All Filter Types:
- Gloves: Protect your hands from dirt and cleaning solutions. Disposable nitrile gloves are good.
- Screwdriver set/socket set: To remove the air filter housing cover.
- Shop rags or old towels: For cleaning up spills and wiping parts.
- Plastic bucket or basin: For cleaning solutions and dirty filters.
- Light source: A flashlight or headlamp helps see inside the airbox.
- Soft brush: For cleaning loose dirt from the airbox.
Specific Materials for Foam Filters:
- Foam air filter cleaner: Specific solvent that removes old oil and dirt. Do not use harsh detergents.
- Foam air filter oil: This is a sticky, special oil. It helps trap dust particles.
- Plastic bag or large zip-lock bag: For oiling the filter cleanly.
Specific Materials for Paper Filters:
- New replacement paper air filter: Remember, paper filters are generally not cleaned. They are replaced.
Specific Materials for Reusable Cotton Gauze (K&N Style) Filters:
- K&N air filter cleaning kit (or similar brand-specific kit): This includes a cleaning solution and oil specifically designed for cotton gauze filters.
- Water hose: For rinsing the filter.
- Spray bottle: For applying cleaner if it does not come in a spray bottle.
Make sure you have a well-ventilated area to work in. Some cleaning solutions have strong fumes. Having all these items ready makes the job simple. It prevents interruptions. I learned this lesson the hard way once. I had to stop in the middle of a job because I forgot a tool.
Step-by-Step Guide to Removing Your Motorcycle Air Filter
Removing the air filter is often the trickiest part. Its location varies by motorcycle model. Some bikes have it easily accessible. Others require removing body panels or the fuel tank. Always consult your motorcycle’s service manual first. The manual provides specific instructions for your model. It shows diagrams and torque specifications.
Locate the Airbox
The airbox usually sits under the fuel tank or seat. It is a large plastic box. It connects to the carburetor or throttle body. Look for it on the side of the engine. It is often secured with bolts or clips. Sometimes it is hidden behind fairings. Be patient if you need to remove bodywork.
Prepare for Removal
First, ensure your motorcycle is cool. Working on a hot engine is dangerous. Place it on a stand if possible. This makes access easier. Gather your tools. Lay out a clean shop towel. This keeps removed parts organized. It also prevents dirt from entering the engine.
Accessing and Removing the Air Filter Housing
- Remove the seat and/or side panels: Many motorcycles require removing the seat. Some models also need side panels to be unbolted. Use the correct screwdriver or socket for these fasteners. Store fasteners safely.
- Disconnect the airbox cover: The airbox cover is usually held by clips, screws, or bolts. Carefully undo these. Some covers may have hoses attached. Be gentle when disconnecting them.
- Take out the air filter: Once the cover is off, the air filter is visible. Carefully lift it out. Note its orientation. It must go back in the same way. Check for any pre-filter screens or cages. These typically stay with the main filter.
Be careful not to drop any dirt into the air intake while the filter is out. This is very important. Cover the air intake opening with a clean rag. This prevents debris from entering the engine. Take your time with these steps. Rushing can lead to broken clips or stripped screws. If you are also cleaning your motorcycle carb, doing the air filter first makes sense. This helps ensure clean air goes into the cleaned carburetor.
Cleaning Different Types of Air Filters
Now that your filter is out, it is time to clean it. Each filter type has a specific cleaning process. Follow these steps carefully for the best results. Using the wrong cleaner can damage your filter.
Cleaning a Foam Air Filter
- Remove excess dirt: Gently tap the filter to remove loose dirt. You can also brush off larger debris with a soft brush.
- Apply foam filter cleaner: Spray or pour the dedicated foam filter cleaner onto the filter. Make sure it saturates all surfaces.
- Work in the cleaner: Gently massage the cleaner into the foam. Squeeze the filter to work the solution through. Do not twist or wring it vigorously. This can tear the foam.
- Rinse thoroughly: Rinse the filter with warm water. Continue rinsing until the water runs clear. Use low pressure.
- Dry completely: This step is crucial. Squeeze out excess water. Let the filter air dry completely in a clean, well-ventilated area. Do not use compressed air or heat guns. These can damage the foam. Drying can take several hours or overnight.
- Oil the filter: Once dry, apply foam air filter oil. Pour some oil into a plastic bag. Place the filter in the bag. Massage the oil evenly into the foam. The filter should be uniformly coated. It should not be dripping wet. Remove excess oil by gently squeezing.
Cleaning a Reusable Cotton Gauze (K&N Style) Filter
- Remove excess dirt: Lightly brush off loose dirt.
- Apply K&N cleaner: Spray the K&N cleaning solution generously onto both sides of the filter. Let it soak for 10-15 minutes. Do not let it dry on the filter.
- Rinse gently: Rinse the filter from the clean side (the inside) outwards. This washes dirt away from the filter media. Use low-pressure water. Rinse until the water runs clear.
- Dry completely: Allow the filter to air dry naturally. Place it on a clean towel or paper. Never use compressed air, a heat gun, or direct sunlight. Heat can damage the cotton fibers. Drying can take several hours.
- Oil the filter: Once completely dry, apply K&N air filter oil. Use the specific oil designed for cotton gauze filters. Apply a light, even coat to the pleats. The oil should wick into the cotton. Do not over-oil. A light, pinkish tint is usually sufficient. Let the oil sit for 20 minutes to wick fully. Apply more if there are dry spots. Too much oil can restrict airflow or contaminate sensors. This process is very similar to how you would clean some types of lawn mower air filters or even a chainsaw air filter if they are reusable. The key is using the right cleaner and oil for the material. For foam types specifically, you can refer to an article on how to clean foam air filter.
Reinstalling Your Clean Motorcycle Air Filter
Reinstalling the air filter correctly is as important as cleaning it. A poorly installed filter can lead to engine damage. Dirt can bypass the filter if it is not sealed properly. I always double-check my work.
Prepare the Airbox
Before putting the clean filter back, inspect the airbox. Clean out any lingering dirt or debris. Use a damp cloth to wipe the inside of the airbox. Make sure there are no loose particles. Check the sealing surfaces. These areas must be clean for a good seal. Any grit here can prevent proper seating of the filter.
Install the Air Filter
- Position the filter: Place the clean, dry, and oiled filter back into the airbox. Ensure it sits correctly. Remember the orientation you noted during removal. The filter typically has a specific way it fits. It should fit snugly.
- Check the seal: Verify that the filter forms a tight seal around its edges. There should be no gaps. This is crucial for preventing unfiltered air from entering the engine.
- Reattach the airbox cover: Carefully put the airbox cover back on. Align all clips, screws, or bolts. Fasten them securely. Do not overtighten screws. This can strip threads or crack plastic.
- Reconnect hoses and panels: Reattach any hoses disconnected earlier. Reinstall side panels or the seat. Ensure all fasteners are tight.
Once everything is back in place, start your motorcycle. Listen for any unusual noises. Take a short test ride. The engine should run smoothly. You might even notice improved throttle response. This indicates the air filter is working well. Proper reinstallation ensures your cleaning efforts were successful.
Maintenance Schedule and When to Clean Your Filter
Knowing when to clean your motorcycle air filter is vital. The cleaning frequency depends on several factors. These include your riding conditions, mileage, and filter type. A general guideline exists, but real-world conditions often dictate more frequent cleaning.
Factors Affecting Cleaning Frequency
- Riding Conditions: If you ride often on dusty roads or off-road trails, your filter will get dirty faster. Desert riding requires much more frequent cleaning. City riding on paved roads is less demanding.
- Mileage: Consult your motorcycle’s owner’s manual for recommended intervals. These are usually in miles or kilometers. For example, some manuals suggest checking every 3,000 miles. They suggest cleaning or replacing every 6,000 to 10,000 miles.
- Filter Type: Reusable foam and cotton gauze filters can be cleaned. Paper filters are replaced. This affects your “cleaning” schedule.
- Visual Inspection: This is your best guide. Visually inspect your air filter regularly. If it looks dirty, clean or replace it. A good rule of thumb is to check it every time you perform an oil change.
General Recommendations
- Foam and Cotton Gauze Filters:
- Every 3,000-5,000 miles for street riding.
- After every dusty ride or race for off-road or dirt riding.
- Inspect every time you check your oil.
- Paper Filters:
- Replace according to your owner’s manual schedule.
- Visually inspect every 3,000-5,000 miles. Replace if visibly dirty or damaged.
It is better to clean or replace your filter too early than too late. A clean filter prevents serious engine issues. It helps maintain performance and fuel economy. Keeping a spare, pre-oiled foam or cotton gauze filter can be useful. This allows for quick swaps if you are on a trip. You can clean the dirty one later. I carry a spare pre-oiled filter for my dirt bike. This saves me time at the track.
Common Mistakes to Avoid When Cleaning
Cleaning your motorcycle air filter is a straightforward task. Still, some common mistakes can damage the filter or your engine. Avoiding these errors ensures a proper cleaning job and extends filter life. I have made some of these mistakes myself, and I learned from them.
Using the Wrong Cleaning Solutions
Never use gasoline, harsh degreasers, or strong detergents to clean foam or cotton gauze filters. These chemicals can degrade the filter material. They can damage the adhesive holding the filter together. Always use products specifically designed for your filter type. Foam filters need foam filter cleaner. K&N style filters need K&N cleaner. Using dish soap on a foam filter might seem okay. However, it can leave residues that repel air filter oil. This reduces filtration.
Improper Drying
Drying is a critical step. Do not use compressed air, heat guns, or direct sunlight to dry filters. Compressed air can force dirt particles deeper into the filter. It can also tear delicate filter media. Heat can warp plastic frames or damage the foam/cotton fibers. Always allow the filter to air dry completely. This takes time, but it is necessary for proper re-oiling and effective filtration.
Over-Oiling or Under-Oiling
- Over-oiling: Applying too much oil can restrict airflow. This makes the engine run rich. It can also cause oil to drip into the airbox or throttle body. Excess oil might even contaminate sensors.
- Under-oiling: Not applying enough oil means the filter cannot trap fine dust effectively. This allows dirt into your engine. Always apply a thin, even coat. Ensure complete coverage without saturation.
Neglecting the Airbox
Cleaning the filter but leaving the airbox dirty is a waste of effort. Dirt inside the airbox can get sucked into the engine once the clean filter is reinstalled. Always wipe down the inside of the airbox. Ensure it is free of dust and debris before putting the filter back.
Improper Sealing
Make sure the filter seats perfectly in its housing. Any gaps allow unfiltered air to bypass the filter. Double-check all clips, bolts, and seals. A loose cover or a misaligned filter can lead to engine damage. I recommend inspecting the sealing surface of the filter itself. Look for any cracks or tears. If you find any, replace the filter. This simple check protects your engine.
The Benefits of a Clean Air Filter on Your Motorcycle
A clean air filter does more than just keep dirt out. It offers several tangible benefits for your motorcycle and your riding experience. Understanding these benefits emphasizes the importance of regular cleaning. It is a small effort with big rewards.
Improved Engine Performance
A clean air filter ensures unrestricted airflow to the engine. This means your engine gets the optimal air-fuel mixture. The result is better throttle response. You will experience smoother acceleration. Your bike will likely feel more powerful across the RPM range. A dirty filter chokes the engine, leading to a noticeable drop in power.
Enhanced Fuel Economy
When the engine “breathes” easily, it operates more efficiently. A restricted air filter forces the engine to work harder. This increases fuel consumption. Keeping your air filter clean helps maintain your motorcycle’s intended fuel economy. You save money at the pump. This benefit is especially noticeable on longer rides.
Prolonged Engine Life
This is perhaps the most critical benefit. The air filter is the engine’s first line of defense. It prevents abrasive particles like dust, sand, and grit from entering the combustion chamber. These particles can cause premature wear on pistons, cylinder walls, and valves. Regular cleaning prevents this wear. It significantly extends the lifespan of your engine. A new engine costs thousands. A clean filter costs very little.
Reduced Emissions
An efficient engine burns fuel more cleanly. This reduces harmful exhaust emissions. A clogged air filter can lead to a richer fuel mixture. This results in incomplete combustion. Incomplete combustion produces more pollutants. Cleaning your filter helps your motorcycle run cleaner. This is better for the environment.
Easier Starting
A choked engine can struggle to start. Especially in cold weather. A clean air filter ensures the engine gets sufficient air for ignition. This leads to easier and more reliable starting. This is a small convenience. It adds to overall riding satisfaction.
Prevent Costly Repairs
Ultimately, regular air filter maintenance prevents costly engine repairs. A few minutes spent cleaning or replacing a filter can save you hundreds or even thousands of dollars. Ignoring this simple task is a gamble. It is not one I would recommend taking with your motorcycle.
Conclusion
Understanding how to clean air filter motorcycle is a fundamental skill for any rider. This simple maintenance task offers significant benefits. It directly impacts your motorcycle’s performance, fuel efficiency, and engine longevity. By following the steps outlined in this guide, you ensure your bike breathes clean air. This allows it to run at its best.
We covered the importance of air filters and different types, from foam to cotton gauze. We also detailed the tools needed and provided step-by-step cleaning instructions for each filter type. Remember to always consult your owner’s manual. It provides specific instructions for your motorcycle model. Regular visual inspection is also key. This ensures you clean or replace your filter when it is truly needed. Make air filter maintenance a regular part of your routine. Your motorcycle will thank you with smooth rides and a long, healthy life. Take action today. Keep your motorcycle running strong for many miles to come.
FAQ Section
Q1: How often should I clean my motorcycle air filter?
The cleaning frequency depends on your riding conditions and filter type. For street riding, inspect foam or cotton gauze filters every 3,000-5,000 miles. Clean them if they appear dirty. For off-road or dusty conditions, clean after every ride. Paper filters should be replaced according to your owner’s manual, typically every 6,000-10,000 miles.
Q2: Can I use dish soap to clean my motorcycle air filter?
No, I do not recommend using dish soap for foam or cotton gauze filters. Dish soap can leave residues that repel air filter oil. This reduces the filter’s ability to trap dirt effectively. Always use dedicated air filter cleaning solutions. These are formulated to safely remove dirt and old oil without damaging the filter material.
Q3: What happens if I do not clean my motorcycle air filter?
If you do not clean your air filter, it will become clogged with dirt and debris. This restricts airflow to the engine. Your motorcycle may lose power, consume more fuel, and experience rough idling. Over time, dirt can bypass the filter. This causes significant wear and tear on internal engine components. This can lead to costly repairs and a shorter engine lifespan.
Q4: How do I know if my motorcycle air filter needs cleaning?
You can tell your motorcycle air filter needs cleaning by visually inspecting it. If the filter media looks dark, dusty, or has visible debris embedded in it, it is time for a cleaning or replacement. Other signs include a noticeable drop in engine performance, reduced fuel economy, or a change in exhaust sound.
Q5: Is it better to clean or replace a motorcycle air filter?
For reusable foam and cotton gauze filters (like K&N), cleaning is the standard practice. These filters are designed for multiple cleanings. This makes them a cost-effective choice over time. For paper air filters, replacement is generally recommended. Cleaning paper filters can damage their delicate structure. This compromises their filtration ability. Always check your motorcycle’s service manual for specific recommendations.
- motorcycle air filter
- air filter cleaning
- motorcycle maintenance
- foam air filter
- K&N filter
- engine performance


