· Todd Martin · Home Maintenance · 21 min read
How To Clean Asphalt Shingle Roof
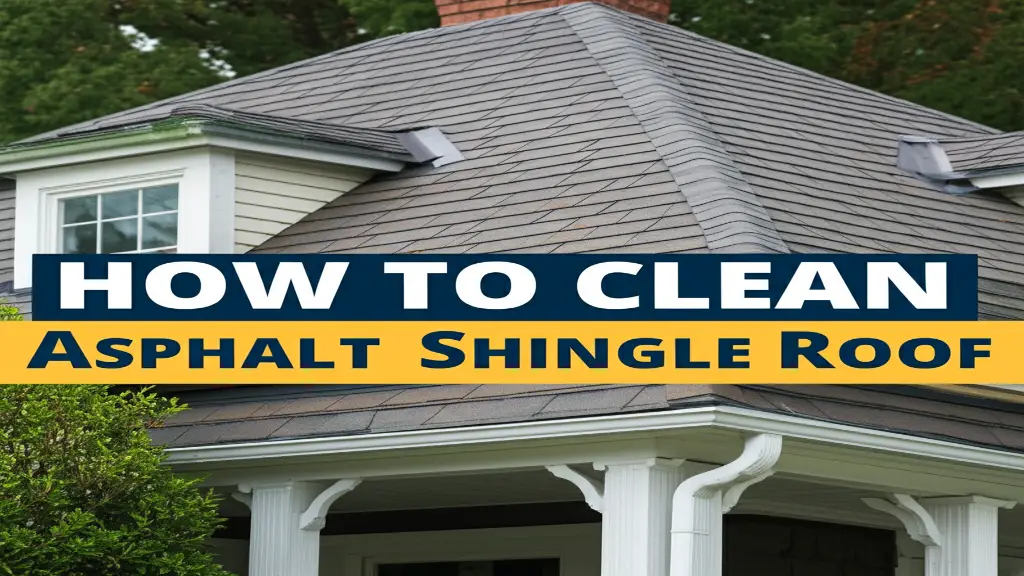
How To Clean Asphalt Shingle Roof Safely and Effectively
A clean roof makes your home look better. It also protects your investment. Over time, asphalt shingle roofs collect dirt, algae, moss, and lichen. These growths not only look bad but can also harm your shingles. They hold moisture, can lift shingles, and cause premature deterioration. Cleaning your asphalt shingle roof properly extends its lifespan and improves your home’s curb appeal. I will guide you through the safest and most effective methods to achieve a sparkling clean roof. We will cover preparation, cleaning solutions, application techniques, and important safety tips.
Takeaway
Cleaning your asphalt shingle roof safely requires a soft wash method, not high-pressure washing.
- Always prioritize safety with proper gear and ladder stability.
- Use a gentle cleaning solution, typically bleach-based, applied with a low-pressure sprayer.
- Thoroughly rinse your roof and protect surrounding plants from chemicals.
- Regular maintenance and preventative measures extend your roof’s cleanliness and lifespan.
To clean an asphalt shingle roof, use a soft wash technique. This involves applying a specialized, low-pressure cleaning solution, often containing bleach, to remove algae, moss, and dirt. Let the solution dwell, then rinse it gently with a garden hose to protect the shingle granules.
Understanding What Stains Your Asphalt Shingle Roof
Have you ever noticed dark streaks or green patches on your roof? These are common problems for asphalt shingle roofs. They are not just dirt. Often, they are living organisms. Knowing what causes these stains helps you clean them effectively.
The main culprit for those unsightly black streaks is a type of algae called Gloeocapsa magma. This resilient organism thrives in moist, shaded areas. It feeds on the limestone filler used in many asphalt shingles. As the algae grow, they create those dark, ugly streaks. These streaks can make your roof absorb more heat, leading to higher energy bills.
Moss and lichen are also frequent invaders. Moss appears as soft, green, carpet-like growths. Lichen look like crusty, grayish-green patches. Both moss and lichen hold moisture against your shingles. This constant dampness can cause granules to loosen and shingles to decay. They can also lift the edges of your shingles. This allows water to get underneath and cause damage to your roof decking.
Cleaning these growths off your roof is important. It improves your home’s appearance immediately. More importantly, it helps your roof last longer. Regular cleaning prevents widespread damage. It keeps your shingles performing as they should.
Common Culprits: Algae, Moss, and Lichen
Black streaks on roofs often come from Gloeocapsa magma algae. This algae is airborne and settles on roofs, especially in humid climates. It thrives on the moisture and the limestone in asphalt shingles. These streaks are not just ugly; they can affect your home’s energy efficiency.
Moss appears as thick, green clumps, often on north-facing slopes or shaded areas. It absorbs and holds water against the shingles. This constant dampness leads to shingle degradation and can lift shingles. Lichen are complex organisms, a combination of algae and fungi, forming hard, crusty growths. They attach strongly to shingles. Removing them without damaging the roof requires careful attention.
The Impact on Your Roof
These growths do more than just look bad. They can significantly shorten your roof’s life. Algae can trap heat, increasing your attic temperature. This raises cooling costs. Moss and lichen can physically damage shingles by lifting them. This makes your roof vulnerable to wind and water infiltration.
The moisture trapped by moss and lichen can also promote wood rot underneath the shingles. This weakens your roof structure. Regular cleaning helps prevent this structural damage. It keeps your roof robust and functional. I believe a well-maintained roof is a key part of a healthy home.
Essential Safety Measures Before Cleaning Your Roof
Cleaning a roof is not a simple task. It carries serious risks, especially when working at heights. Your safety must be the top priority. Before you even think about climbing a ladder, assess the conditions and gather the right gear. Ignoring safety steps can lead to severe injuries or even death. I want you to complete this project safely.
First, always check the weather forecast. You need a calm, dry day with no wind. A wet roof is extremely slippery, even without cleaning solutions. High winds can make ladder work dangerous. Make sure you have clear skies for a few hours after cleaning. This allows your roof to dry properly.
Next, equip yourself with the right personal protective equipment (PPE). This includes non-slip shoes with good grip. Rubber soles are best. Wear long pants and long sleeves to protect your skin from chemicals and roof abrasions. Eye protection, like safety glasses or goggles, is crucial to shield your eyes from spray and debris. Gloves protect your hands from cleaning solutions. Finally, a fall arrest system, including a harness and rope, provides the ultimate protection. It is a good idea to have a helper on the ground. This person can steady the ladder and assist in emergencies.
You must secure your ladder properly. Choose a sturdy, extendable ladder. Position it on a firm, level surface. Extend the ladder at least three feet above the roofline. Secure the base to prevent slipping. You can use stakes or sandbags. Always maintain three points of contact when climbing. This means two hands and one foot, or one hand and two feet, on the ladder at all times. Never overreach from the ladder. Move the ladder instead.
Protecting your home’s surroundings is also important. Cover sensitive plants, shrubs, and flowers with tarps. Wetting them down before and after cleaning helps dilute any chemical overspray. Move patio furniture, vehicles, and anything else you do not want to get wet or sprayed. This proactive step saves you from post-cleaning headaches.
Personal Protective Equipment
Your personal safety gear is non-negotiable. I always start here. Wear comfortable, non-slip rubber-soled shoes. These provide the necessary grip on a sloped surface. Long pants and long-sleeved shirts protect your skin from both the shingles and any cleaning solutions.
Safety glasses or goggles are essential for eye protection. They prevent splashes and debris from entering your eyes. Chemical-resistant gloves shield your hands. For added safety, consider a fall arrest harness. This attaches to a secure anchor point on the roof. It provides a vital safety net in case of a slip.
Ladder Stability and Positioning
A stable ladder is your lifeline. Place your ladder on a firm, level surface. Ensure it extends at least three feet above the roof edge. This provides a handhold when transitioning on and off the roof. Secure the ladder’s base to prevent it from sliding. You can use ladder stabilizers or tie-offs.
Always ascend and descend facing the ladder. Maintain three points of contact: two hands and one foot, or two feet and one hand. Never carry tools in your hands while climbing. Use a tool belt or hoist them up once you are safely on the roof. I always have someone spotting my ladder. This makes me feel more secure.
Protecting Your Surroundings
Chemicals can harm plants and other property. Before you start cleaning, soak all surrounding landscaping with water. This saturates the plants, making them less likely to absorb cleaning solutions. Cover delicate plants with tarps or plastic sheeting. Move any outdoor furniture, vehicles, or grills away from the house.
If you have a metal roof or gutters, be aware of the chemicals you use. Some solutions can corrode certain metals. A thorough rinse of plants and gutters after cleaning is always a good practice. This extra step prevents damage to your landscaping.
Choosing the Right Cleaning Method: Soft Washing vs. Pressure Washing
When it comes to cleaning asphalt shingle roofs, the method you choose makes all the difference. Many people think of pressure washing for tough outdoor cleaning jobs. However, for asphalt shingles, this is a grave mistake. I cannot stress enough the importance of using the correct technique.
High-pressure washing is extremely damaging to asphalt shingles. Shingles are made of a fiberglass mat covered with asphalt and coated with ceramic granules. These granules protect the asphalt from UV rays and provide color. A pressure washer, even at a seemingly low setting, blasts these granules off the shingles. Once the granules are gone, the underlying asphalt is exposed to the sun. This causes rapid deterioration, making your roof brittle and significantly shortening its lifespan. It also voids many shingle warranties. Think of it like sanding down your roof. You are taking away its protective layer.
Instead, the recommended and safest method for asphalt shingles is “soft washing.” Soft washing uses a low-pressure spray, similar to a garden hose, to apply a specialized cleaning solution. This solution does the work of killing and loosening the algae, moss, and lichen. The chemicals break down the organic matter. After a dwell time, you rinse the roof gently with low pressure. This method protects the delicate granules. It also gets rid of the stains effectively.
Soft washing is not just about protecting your shingles. It also provides a more thorough and longer-lasting clean. The chemicals penetrate deep into the organic growth. They kill the spores that cause regrowth. This means your roof stays cleaner for a longer period. High-pressure washing just blasts off the visible growth. It often leaves spores behind. This allows for quicker regrowth. I believe investing in the right method saves you money and hassle in the long run.
The Dangers of High-Pressure Washing
Using a pressure washer on asphalt shingles is a major risk. The powerful stream of water rips off the protective granules from the shingles. These granules are essential for the roof’s durability and UV protection. Losing them leads to accelerated aging of your roof. Your shingles will become brittle and crack. This can cause leaks.
A pressure washer can also force water underneath your shingles. This can damage the underlying roof deck and insulation. It can promote mold growth inside your attic. Many shingle manufacturers explicitly state that pressure washing voids their warranty. This means if you damage your roof with a pressure washer, you will have no coverage. It is a quick way to shorten your roof’s life. Think of it like trying to clean a rug with a pressure washer – while it might seem effective, it can severely damage delicate fibers.
Why Soft Washing is Superior for Shingles
Soft washing uses a gentle approach. It relies on chemical solutions, not brute force, to clean. These solutions typically contain a diluted bleach mixture or specialized detergents. They effectively kill algae, moss, and lichen at a molecular level. This removes the stains without any physical abrasion.
The low-pressure application ensures the cleaning solution covers the entire surface. It does not dislodge granules or force water under shingles. After the solution works, a gentle rinse washes away the dead organic matter. This method protects your roof’s integrity. It ensures a deep clean that lasts longer. It is the only safe way to clean asphalt shingles.
Preparing Your Roof and Environment for Cleaning
Proper preparation is half the battle when cleaning your roof. Skipping these steps can lead to frustration, damage, or an incomplete job. I always make sure everything is ready before I mix a single drop of cleaner. A well-prepared workspace ensures efficiency and safety.
First, clear your roof of any loose debris. This includes leaves, twigs, pine needles, and any accumulated dirt. You can use a leaf blower or a stiff broom for this. Removing debris helps the cleaning solution reach the shingle surface directly. It also prevents clogs in your sprayer. Be careful not to dislodge any shingles during this process. Start from the ridge and work your way down. Collect all debris in bags to dispose of later.
Next, you must protect your landscaping. Your cleaning solution will contain chemicals. These can harm plants if not managed properly. The best way to protect your plants is to soak them thoroughly with water before you start. This saturates their leaves and soil, making them less likely to absorb any overspray. Then, cover any delicate plants, shrubs, and flower beds with plastic tarps or sheeting. You can secure these with rocks or stakes. Move any patio furniture, grills, or vehicles that are near the house. If you cannot move them, cover them too.
Finally, prepare your water source and equipment. You will need access to a garden hose with good water pressure for rinsing. Connect your low-pressure sprayer or garden pump sprayer. Make sure it is clean and functioning correctly. Have all your cleaning solutions ready to mix. Check all hoses and connections for leaks. A little foresight here prevents delays once you begin cleaning.
Pre-Cleaning Your Roof
Start by clearing any loose debris from your roof. Leaves, sticks, and pine needles accumulate over time. Use a leaf blower or a soft-bristled broom. Always work from the top of the roof downwards. This prevents pushing debris back over areas you have already cleared. Be gentle to avoid dislodging any shingle granules. This initial step helps the cleaning solution penetrate directly onto the organic growth. It also prevents sprayer clogs.
Inspect your roof for any damaged shingles or areas that need repair. Address these before you start cleaning. Cleaning a damaged roof can worsen existing problems. This pre-cleaning sets the stage for effective treatment.
Protecting Your Home’s Exterior
Your cleaning solution can be harsh on sensitive surfaces. Protect your landscaping by soaking plants with water. This saturates them, making them less likely to absorb chemicals. Cover delicate plants with plastic tarps or sheeting. Also, cover any painted surfaces, windows, or metal accents you want to protect.
Move all outdoor furniture, grills, and vehicles away from the house. If something cannot be moved, cover it completely with tarps. A quick rinse of all affected areas, including your home’s siding and gutters, immediately after applying the solution helps. This dilutes any stray chemicals.
DIY Soft Washing Solutions for Asphalt Shingles
Now that your roof is ready and safety measures are in place, it’s time to choose your cleaning solution. For effective and safe soft washing, you have a few options. Each has its pros and cons, but the goal is always to kill the organic growth without harming your shingles. I have personally used various solutions, and here are the most effective.
The most common and highly effective solution for black algae (Gloeocapsa magma), moss, and lichen is a bleach-based mixture. This solution works by killing the organisms at a cellular level. A typical mixture uses household bleach (sodium hypochlorite) and water. A good starting ratio is 1 part bleach to 1 part water. You can also add a small amount of dish soap to help the solution stick to the roof. The dish soap acts as a surfactant. For example, if you use 2 gallons of bleach, you would add 2 gallons of water and about 1/4 cup of dish soap. Always mix the solution in a plastic container or sprayer, not metal. Bleach can corrode metal.
Vinegar-based solutions are often considered a more eco-friendly alternative. However, they are generally less effective against widespread, stubborn algae and moss, especially Gloeocapsa magma. Vinegar works best for light mold or mildew spots, or as a follow-up treatment. A mixture of equal parts white vinegar and water can be used. While it is less potent, it is gentler on some plants and less corrosive to metal. If you are dealing with significant black streaks, I recommend the bleach solution for faster and more complete results. For smaller areas of mold or mildew, cleaning mold with vinegar can be a good option. Similarly, mixing vinegar and baking soda creates a fizzing reaction that helps lift some stains, but again, it’s generally not strong enough for widespread roof algae.
You can also buy commercial roof cleaning products. These products are specifically formulated for roof stains. Many are bleach-free. They often contain surfactants and other agents to aid in cleaning. Always read the instructions carefully for commercial products. They will specify dilution ratios and application methods. Some commercial products are designed to be “spray and leave,” while others require rinsing. They can be a good option if you prefer to avoid handling bleach yourself.
No matter which solution you choose, prepare enough to cover your entire roof section. It is better to have too much than to run out halfway. Mix your solution in a pump sprayer or a dedicated soft wash system. Never use a pressure washer’s detergent tank for these solutions, as the high pressure could damage the roof when you switch back to rinse.
Bleach-Based Cleaning Solution
Bleach is the go-to for killing roof algae and moss. It is affordable and highly effective. I find a 50/50 mix of household bleach and water works well. For every gallon of bleach, add a gallon of water. Add a squirt of dish soap to this mixture. This helps the solution cling to the roof surface.
Apply this mix using a low-pressure garden sprayer. Never use a high-pressure washer for application. Ensure good ventilation. Avoid working on a windy day. The bleach solution will start to kill the algae and moss quickly.
Vinegar-Based Solutions (for mold/mildew spots)
For smaller, localized mold or mildew spots, or if you prefer a less harsh chemical, vinegar can be an option. Mix equal parts white vinegar and water in a spray bottle. This solution is milder. It works by altering the pH level, making it difficult for mold to survive.
However, vinegar is generally not strong enough for widespread algae or tough moss. It may require multiple applications. It also takes longer to see results. I typically use vinegar for interior mold removal, like black mold off wood. For extensive roof issues, a stronger solution is more efficient.
Commercial Roof Cleaners
Many commercial roof cleaning products are available. These are formulated to remove algae, moss, and lichen. Some are eco-friendly and bleach-free. Always follow the manufacturer’s instructions for mixing and application. These products often contain specialized surfactants.
Commercial cleaners can be effective, but they are usually more expensive than DIY bleach solutions. They might also require specific application equipment. Check reviews and product specifications before purchasing one. Ensure it is safe for asphalt shingles.
Step-by-Step Guide to Soft Washing Your Asphalt Shingle Roof
Once you have your cleaning solution and equipment ready, it’s time to apply it. This process needs careful attention to detail. Working systematically ensures thorough cleaning and minimizes risks. I follow these steps every time I clean a roof.
Step 1: Start from the Bottom, Work Your Way Up (Application). Begin applying your cleaning solution from the bottom of your roof section. Spray in horizontal strips, overlapping each pass slightly. This method prevents streaking. If you start from the top, the runoff can create clean streaks down the dirty sections. This makes for an uneven look. Apply enough solution to thoroughly wet the organic growth. Do not oversaturate the roof to the point of excessive runoff. Use a garden sprayer or a dedicated soft wash pump system that delivers low pressure. This gentle application is key to protecting your shingles.
Step 2: Allow for Dwell Time. After applying the solution, let it sit on the roof. This is called dwell time. The chemicals need time to work. They need to kill the algae, moss, and lichen. The exact dwell time depends on the severity of the growth and the specific cleaning solution you use. For bleach-based solutions, 15-30 minutes is often sufficient. You should see the dark streaks begin to lighten and the moss start to change color (often turning orange or brown). Do not let the solution dry on the roof. If it starts to dry, lightly mist it with water.
Step 3: Gentle Rinsing. Once the dwell time is complete, it is time to rinse. Use a garden hose with a standard spray nozzle. The goal is to gently rinse away the dead organic matter and cleaning solution. Again, start from the top of the roof and work your way down. This allows the rinse water to carry away the debris. Use sweeping motions. Do not use high pressure. The water pressure should be gentle enough not to dislodge any granules. You will see the black streaks and green patches disappear as you rinse. Ensure all chemical residue is washed away.
Step 4: Re-rinse Surrounding Areas. As you rinse the roof, continue to re-rinse any plants or areas around your home that might have received overspray. This dilutes any remaining chemicals. It protects your landscaping. Pay attention to gutters and downspouts. Make sure they are flowing freely and that no chemical buildup is occurring.
Step 5: Repeat if Necessary. For very heavily stained roofs, you might need to repeat the application and rinse process. Allow the roof to dry slightly between applications. This gives you a clearer view of areas that need more attention. Sometimes, stubborn lichen or moss might require a second, more targeted application. Do not be afraid to re-treat problem spots. Patience results in a cleaner roof.
Applying the Cleaning Solution
Use a low-pressure sprayer, like a garden pump sprayer, to apply the solution. Start at the lower edge of the roof and work your way up. Apply in even, horizontal strips. Overlap slightly to ensure full coverage. Make sure the solution thoroughly wets all affected areas. Avoid applying too much pressure.
The goal is to saturate the organic growth without causing excessive runoff. This method prevents streaks and ensures the solution has enough time to work. Be methodical. Cover one section before moving to the next.
Dwell Time and Rinsing
After application, let the solution sit on the roof for 15-30 minutes. This is called dwell time. During this period, the chemicals kill the algae, moss, and lichen. You should notice the dark streaks and green patches beginning to lighten or change color. Do not let the solution dry completely on the roof. If it starts to dry, lightly mist it with water to re-wet.
Once the dwell time is up, gently rinse the roof with a garden hose. Use a low-pressure nozzle. Start at the ridge and work your way down, rinsing off all the dead organic matter and chemical residue. Ensure a thorough rinse to protect your shingles and the environment.
Post-Cleaning Care and Prevention Tips
Cleaning your asphalt shingle roof is a significant step. But the work is not over yet. Proper post-cleaning care and implementing preventative measures are crucial. These steps ensure your roof stays clean for longer and remains in excellent condition. I always follow up my cleaning efforts with these strategies.
First, after the final rinse of your roof, take time to thoroughly re-rinse all surrounding plants, shrubs, and the immediate ground around your home. Even with protective measures, some cleaning solution might have reached these areas. A good flush with clear water helps dilute any residual chemicals. This protects your landscaping from potential damage. You should also ensure your gutters and downspouts are clear. The cleaning process can dislodge debris. Make sure water flows freely away from your foundation.
Next, conduct a post-cleaning inspection of your roof. From a safe vantage point (or from the ground with binoculars), examine your shingles. Look for any areas you might have missed. Check if all the algae, moss, and lichen are gone. You should see a uniform, clean appearance. Also, look for any dislodged granules or signs of damage. If you notice persistent stains, a second, more targeted application might be necessary in those specific spots. This ensures a complete job.
Preventative measures are vital to keep your roof clean in the long term. One of the most effective ways to prevent future algae and moss growth is to install zinc or copper strips along the ridge of your roof. When rain washes over these metal strips, it carries microscopic particles of zinc or copper down the roof. These metals are toxic to algae, moss, and lichen. They create a hostile environment for regrowth. This method is a passive, long-term solution.
Regular tree trimming is another key preventative step. Overhanging branches create shade, which promotes moisture retention and growth. They also drop leaves and debris onto your roof, providing food for organisms. Trimming branches back at least 10 feet from your roof reduces shade and minimizes debris accumulation.
Lastly, regular inspection of your roof, perhaps twice a year (spring and fall), helps catch new growth early. Early detection allows for spot treatment with a spray solution. This prevents widespread infestations. Removing debris regularly also helps. A clean roof is less inviting to organic invaders. These simple steps extend the life of your asphalt shingles and keep your home looking its best.
Maintaining Your Clean Roof
After cleaning, keep an eye on your roof. Periodically check for any new signs of growth. Small spots of algae or moss can be treated quickly. A quick spray with a diluted cleaning solution from the ground can prevent widespread issues.
Ensure your gutters are always clean and free of debris. Clogged gutters can cause water to back up onto the roof. This creates moist conditions perfect for growth. Regular gutter cleaning is an essential part of roof maintenance.
Preventing Future Growth
Installing zinc or copper strips along the roof ridge is a highly effective preventative measure. As rain washes over these strips, it carries metal ions down the roof. These ions are toxic to algae, moss, and lichen. They inhibit new growth. This creates a lasting barrier against organic invaders.
Trim overhanging tree branches back from your roof. Branches provide shade, which promotes moisture and growth. They also drop leaves and debris onto your roof. This debris provides nutrients
- asphalt shingle roof cleaning
- roof cleaning methods
- shingle maintenance
- soft wash roof
- algae removal roof
- mold on roof
- roof care

Todd Martin
Senior Writer
With over 15 years of experience in home renovation and design, I started HEG to share what I’ve learned with homeowners who want to create spaces that are both beautiful and functional. I’ve always believed in a hands-on approach, and over the years, I’ve picked up practical solutions that actually work. Through HEG, I aim to make home improvement more approachable, sharing real tips that help you create a home you truly love.