· Todd Martin · Tech Maintenance · 19 min read
How To Clean Aux Port
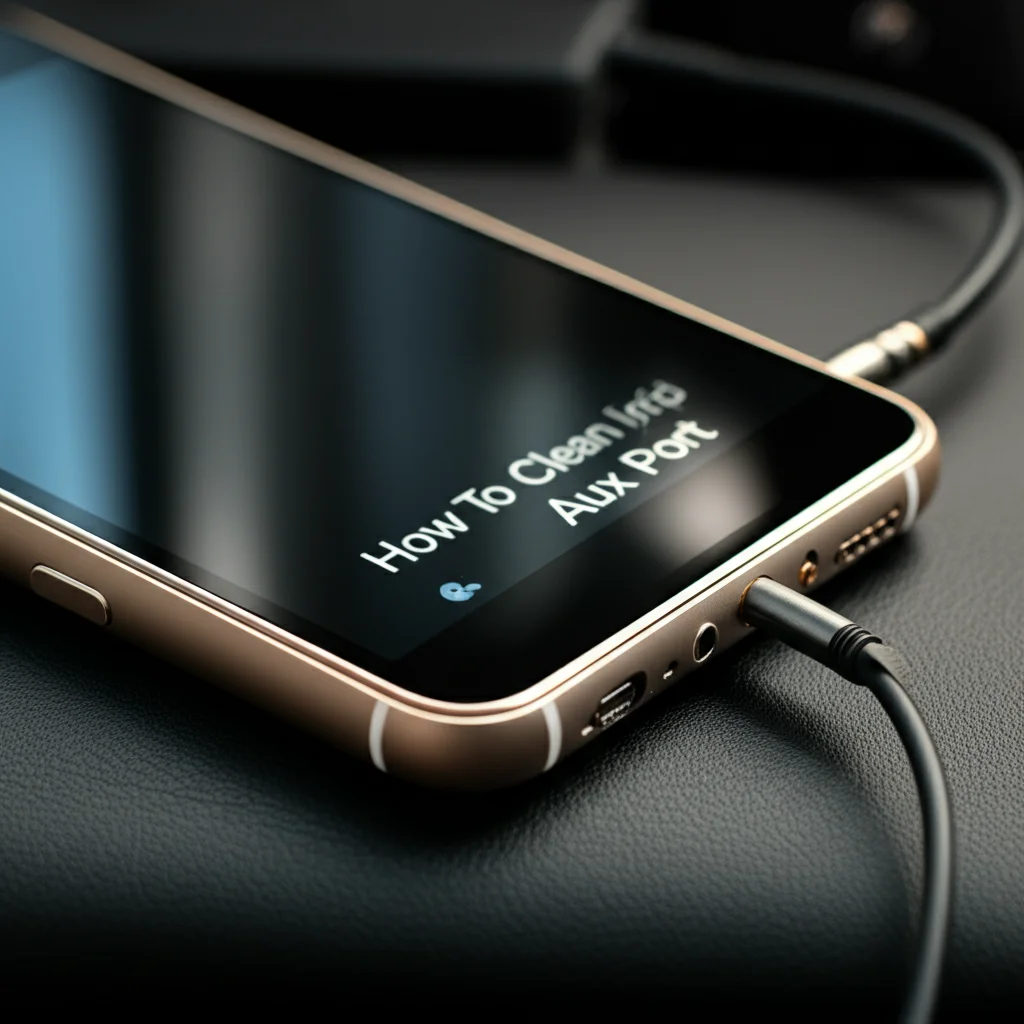
How to Clean Your Aux Port for Clear Audio
Have you ever plugged in your headphones or an auxiliary cable, only to hear static, muffled sounds, or nothing at all? It is a frustrating experience. Often, the problem is not broken wires but a dirty aux port. Lint, dust, and debris collect inside these small openings. This build-up prevents a good connection. Cleaning your aux port can often fix these sound issues. I can help you safely restore clear audio to your devices. This article guides you through the process step-by-step. We will cover the tools you need, the methods to use, and how to keep your port clean in the future.
Takeaway
- Gather the right tools like compressed air, toothpicks, or cotton swabs.
- Always power off your device before cleaning.
- Start with dry cleaning methods to remove lint and dust.
- Use isopropyl alcohol for stubborn grime, applied sparingly.
- Regular maintenance prevents future sound issues.
Concise Answer to Cleaning an Aux Port
You can clean an aux port by first powering off the device. Use a small, non-conductive tool like a wooden toothpick or a blast of compressed air. Carefully remove lint and debris from inside the port. For sticky residue, use a cotton swab lightly dampened with isopropyl alcohol, then let it dry completely.
Understanding Your Aux Port: Why Cleaning Matters
Your aux port, also known as an auxiliary port or a headphone jack, serves as a crucial connection point. It allows you to link your device to external speakers, headphones, or car audio systems. This small opening is essential for good sound. When you use your phone or media player daily, it travels with you everywhere. This constant movement exposes the aux port to many elements. It picks up lint from pockets, dust from surfaces, and tiny bits of dirt from bags. Over time, these small particles build up inside the port. This build-up acts as a barrier. It stops your audio cable from making a full connection with the port’s internal contacts.
When the connection is not strong, sound quality suffers. You might hear crackling noises or experience intermittent audio. Sometimes, you get no sound at all. This happens because the audio signal cannot pass clearly from your device to the cable. Many people assume their headphones are broken or their device has a serious hardware fault. However, a simple cleaning often solves the problem. Understanding this connection is the first step. You save money by not buying new gear. You also extend the life of your current devices. Regular cleaning keeps your audio experience smooth.
The internal design of an aux port is simple but precise. It has several metal contact points. These points must touch the metal plug of your audio cable directly. Lint or dirt fills the space between these contacts. It creates a physical barrier. This barrier interrupts the electrical signal. The result is poor sound or no sound. Dust can also absorb moisture over time. This creates a slightly corrosive environment. This corrosion can further degrade the metal contacts. A clean port ensures a firm, clear connection every time you plug in. This means better sound and a longer life for your device’s audio functions.
Tools and Materials for Safe Aux Port Cleaning
Before you start cleaning your aux port, gathering the right tools is important. Using the wrong tools can damage the delicate internal components. This could make your audio problem worse. We want to clean the port, not break it. I always ensure I have everything ready before I begin. This prevents me from having to stop midway through the process. Safety and precision are key when working with small electronics. The materials you use should be non-conductive where possible. They should also be small enough to fit inside the port without force. Avoid anything metal or sharp that could scratch the contacts.
Essential Cleaning Tools
You need specific items for a safe and effective cleaning. These tools help remove common debris without causing harm. Always check that tools are clean before using them.
- Compressed Air: This is your first line of defense. Use it to blast out loose dust and lint. Make sure to hold the can upright to avoid spraying propellant. Never spray directly into the port for too long. Short, controlled bursts are best. This method is great for light debris.
- Wooden or Plastic Toothpick: A wooden toothpick is excellent for dislodging packed-in lint. Its tip is soft enough not to scratch metal contacts. You can also use a small plastic pick. Avoid metal paperclips or needles, as they can cause damage or short circuits.
- Small Cotton Swab (Ear Swab or Dental Pick with Cotton): Regular cotton swabs are often too large for an aux port. Look for specialized electronics cleaning swabs or use a dental pick and wrap a tiny piece of cotton around its tip. This allows you to reach deep into the port.
- Bright Light (Flashlight or Headlamp): You need to see inside the tiny port. A good light source helps you identify debris. It also ensures you do not miss any spots. Proper visibility prevents accidental damage.
Cleaning Solutions (if any)
Sometimes dry cleaning is not enough. For stubborn grime or residue, you might need a liquid solution. Use these liquids sparingly and with caution.
- Isopropyl Alcohol (90% or higher): This type of alcohol evaporates quickly. It leaves no residue. It is safe for electronics when used correctly. Do not pour it directly into the port. Dampen your cotton swab, do not soak it. This is a common and effective cleaner for electronics. You can also use it to clean an iPhone charging port with alcohol.
- Distilled Water (Optional): If you prefer to avoid alcohol, distilled water can be used on a slightly damp swab. However, it takes longer to evaporate. Ensure the port is completely dry before re-inserting any cable. This option is less common for aux ports.
Remember to turn off your device before starting any cleaning process. This step is critical for safety. It prevents accidental damage from short circuits. Once your tools are ready, you can move on to the actual cleaning steps.
Step-by-Step Guide to Safely Clean an Aux Port
Cleaning an aux port requires patience and a gentle touch. Rushing the process can cause more harm than good. I follow these steps carefully to ensure I do not damage my devices. Remember, the goal is to remove debris without bending or breaking the internal components. This process is similar to how to clean a USB port or even how to clean an iPhone charging port. The principles of gentle, precise cleaning apply across many types of small electronic ports.
Pre-Cleaning Preparations
Before you touch the port, take these safety measures. They protect your device and ensure a smooth cleaning process.
- Power Off Your Device: This is the most crucial step. Turn off your smartphone, tablet, laptop, or audio player completely. Do not just put it to sleep. This prevents accidental short circuits or damage to the internal electronics.
- Remove Battery (If Possible): For some older or modular devices, you can remove the battery. This adds another layer of safety. Most modern phones do not allow battery removal.
- Gather Tools: Have your compressed air, toothpick, cotton swabs, and flashlight ready. Place them on a clean, flat surface.
- Find Good Lighting: Use a bright flashlight or work in a well-lit area. You need to see inside the small port clearly. This helps you target debris accurately.
The Dry Cleaning Method
Always start with dry methods. This is often enough for lint and dust. It reduces the risk of liquid damage.
- Use Compressed Air: Hold the can upright. Deliver short, controlled bursts of air into the aux port. Angle the device so gravity helps dislodge debris. Avoid tilting the can, which can spray liquid propellant. Repeat this a few times. Check the port with your flashlight after each burst.
- Insert Toothpick Carefully: Take a wooden toothpick. Gently insert the very tip into the aux port. Angle it slightly towards the bottom or sides of the port. Lint often collects at the deepest part. Scrape gently along the inside walls. Do not force the toothpick. You are trying to scoop out debris, not jam it in further. Rotate the toothpick as you work. Pull it out slowly to bring out lint.
- Repeat and Inspect: Repeat the toothpick method several times. Use your flashlight to inspect the port after each attempt. Look for remaining lint or dust. Continue until you see no visible debris. The port should look clear.
The Alcohol Method
If dry cleaning does not work, sticky residue might be present. This is when isopropyl alcohol comes in handy. Use this method with extreme caution.
- Dampen a Cotton Swab: Dip the tip of a tiny cotton swab (or a toothpick with a very small piece of cotton wrapped around it) into isopropyl alcohol. Wring out any excess liquid. The swab should be damp, not dripping wet. Excess alcohol can cause damage.
- Clean the Port Gently: Carefully insert the damp swab into the aux port. Gently twist and rotate the swab inside the port. This helps clean sticky residue from the metal contacts. Do not apply too much pressure. Avoid scraping aggressively. The alcohol dissolves grime that dry methods cannot remove.
- Wipe and Dry: After cleaning with the damp swab, use a dry, clean swab to absorb any remaining moisture. Let the port air dry completely for at least 30 minutes to an hour. Do not plug anything into the port until you are certain it is dry. Using a hair dryer on a cool setting from a distance can speed up drying. But avoid heat.
- Test the Port: Once you are sure the port is dry, plug in your audio cable. Test the sound. It should be clear and consistent. If not, you may need to repeat the alcohol cleaning very gently or consider professional help. This careful process can also be applied when you clean a phone charging port or even clean a USB-C charging port. The principles of safety and thorough drying are universal for electronic ports.
Troubleshooting Common Aux Port Issues After Cleaning
Even after cleaning your aux port, you might still experience issues. This can be frustrating. Do not give up just yet. Several factors can cause problems with your audio connection. Understanding these helps you pinpoint the real issue. My goal is to help you get your sound back. Sometimes, the problem is not just dirt. It can be related to the audio cable itself or internal settings. We will explore these common scenarios. We can rule out simple fixes before considering more complex solutions.
Checking Your Audio Cable and Accessories
The problem might not be your device’s port. It could be the cable you are using. Cables wear out over time.
- Test with a Different Cable: Try plugging in a different aux cable or pair of headphones. If a new cable works perfectly, your old cable was the problem. This is a common and easy fix. Always test the cable first.
- Inspect Cable Plug: Look closely at the metal plug of your audio cable. Is it bent? Are there any signs of corrosion or damage? A damaged plug cannot make a proper connection. If the plug looks bad, replace the cable.
- Check Adapters: If you use an adapter (e.g., USB-C to aux), test without it first. The adapter itself might be faulty. Test it with another device if possible. Adapters can also collect debris, similar to how you might need to clean a Lightning port on an iPhone or iPad.
Software and Settings Check
Sometimes, the issue is not hardware. It might be your device’s software. Simple setting changes can restore audio.
- Restart Your Device: A simple restart can fix many minor software glitches. Turn your device off completely, wait a minute, then turn it back on. This clears temporary errors.
- Check Audio Settings: Go to your device’s sound settings. Make sure the volume is turned up. Also, check that the audio output is set correctly. Some devices have options to switch between internal speakers and external outputs.
- Update Drivers/Software: Ensure your device’s operating system and audio drivers are up to date. Outdated software can cause compatibility issues. Visit the manufacturer’s website for driver updates if you are on a computer.
Deeper Hardware Problems
If cleaning and troubleshooting the above steps do not work, the problem might be a hardware issue. These issues are harder to fix yourself.
- Internal Damage: The aux port itself might have internal damage. This can happen from forcing plugs in or from drops. You might not see this damage from the outside.
- Motherboard Issue: In rare cases, the audio circuit on the device’s motherboard can be faulty. This requires professional diagnosis. This is a more serious problem.
- Professional Repair: If all else fails, seek professional help. A qualified technician can diagnose and repair internal hardware issues. They have specialized tools and knowledge. Do not try complex repairs yourself unless you are experienced. This is similar to problems with cleaning an HDMI port – sometimes internal damage means it’s beyond a simple clean.
Remember, a clean port is the first step. If issues persist, systematically check other components. This includes cables, software, and external factors. This approach saves time and money.
Preventive Measures: Keep Your Aux Port Clean Longer
A clean aux port gives you clear sound. Keeping it clean saves you future hassle. Prevention is always easier than repair. I have learned that a few simple habits make a big difference. Think about where you carry your device. Pockets and bags are notorious for lint and dust. Taking small steps now helps avoid build-up later. These practices extend the life of your device’s audio functions. They ensure consistent sound quality. This is similar to how proactive care helps with other electronic ports, such as when you clean a Mac charging port or clean an iPad charger port. Regular attention makes a huge difference.
Use Port Covers or Plugs
One of the best ways to keep debris out is to block it. Port covers are small, inexpensive items. They fit snugly into your aux port.
- Silicone or Rubber Plugs: These plugs are widely available. They come in various sizes to fit different ports. When you are not using the aux port, insert a plug. It creates a physical barrier against lint, dust, and moisture.
- Integrated Case Plugs: Some phone cases come with built-in port covers. These are convenient. They flip open when you need to use the port. They stay closed when you do not. This offers constant protection.
Mind Your Storage Habits
How you store your device matters. Certain places are dust magnets. Being mindful helps reduce debris accumulation.
- Avoid Linty Pockets: Jeans pockets are famous for collecting lint. When you put your phone in a pocket, lint easily enters the aux port. Try to carry your phone in a dedicated compartment. A loose pocket can also contain keys or coins. These items can scratch or damage the port.
- Use a Pouch or Case: A soft pouch or a protective case can shield your device. It keeps the aux port away from direct contact with debris. This is especially true if you toss your device into a bag with other items.
- Keep Away from Dusty Environments: If you work or live in a dusty area, be extra careful. Construction sites, workshops, or even very dusty homes can quickly fill ports with fine particles. Keep your device in a closed drawer or container when not in use.
Regular Gentle Cleaning
Even with preventive measures, some dust will inevitably get in. Scheduled light cleaning can prevent major build-up.
- Monthly Compressed Air Blasts: Once a month, give your aux port a quick blast of compressed air. This helps remove any loose dust before it packs down. It is a very quick and simple habit.
- Quick Visual Inspection: Every now and then, take a flashlight and peek into the aux port. If you see visible lint, remove it promptly. Do not wait for sound issues to start. Early detection prevents worse problems.
- Clean Cables Too: Check the plugs of your aux cables. Sometimes, lint or grime sticks to the plug itself. When you insert the cable, this debris transfers to the port. Wipe cable plugs clean before inserting them.
By adopting these simple habits, you can significantly reduce the need for deep cleaning. You will enjoy consistent, clear audio from your devices. This proactive approach saves time and extends the life of your equipment.
When to Seek Professional Help for Your Aux Port
Sometimes, despite your best efforts, you cannot fix the problem. This is when you should consider professional help. Knowing when to stop your DIY attempts is crucial. Trying to fix something beyond your skill level can cause more damage. This might lead to more expensive repairs later. My goal is to empower you to clean your own port, but I also want you to know your limits. A professional technician has specialized tools and training. They can diagnose problems you cannot see. They can also perform delicate repairs safely.
Signs You Need a Professional
There are clear indicators that a DIY fix is not enough. Pay attention to these signs.
- No Audio After Thorough Cleaning: If you have followed all the cleaning steps carefully and still have no sound, the issue is likely not just dirt. This points to a deeper hardware problem.
- Visible Damage to the Port: Look into the port with a flashlight. If you see bent metal pins, cracks, or loose components, do not try to fix it yourself. These require precise repair. Forcing a plug into a damaged port can cause more harm.
- Intermittent Connection After Cleaning: If the sound cuts in and out, or only works when you hold the cable at a certain angle, it suggests internal contact issues. This may be due to wear, or a connection has become loose. Cleaning cannot fix bent or broken internal parts.
- Device Not Recognizing Cable: If your device does not even register that a cable is plugged in, the data connection may be broken. This is beyond simple cleaning.
- Liquid Damage Suspected: If your device got wet, even a little, corrosion might be eating away at the internal contacts. Cleaning will not reverse corrosion damage. Professionals can assess and sometimes repair this.
What a Professional Can Do
Technicians have resources and expertise that most individuals do not.
- Advanced Diagnostics: They can use specialized testing equipment. This equipment can identify which specific component is failing. They can tell if the problem is the port, a related chip, or the motherboard.
- Precision Tools: Professionals use tiny tools and magnifiers. This allows them to work on delicate components without causing further damage. They can straighten bent pins or re-solder connections.
- Component Replacement: If the aux port is damaged beyond repair, they can replace the entire component. This requires unsoldering the old port and soldering a new one onto the circuit board. This is a complex task.
- Warranty Considerations: For devices still under warranty, attempting self-repair might void it. Taking it to an authorized service center ensures the warranty remains valid. Check your warranty terms before starting any DIY project.
Finding a Reliable Repair Service
Choosing the right professional is important. Look for someone reputable.
- Authorized Service Centers: For major brands (Apple, Samsung, etc.), start with their authorized service centers. They use genuine parts. Their technicians receive specific training for those devices.
- Independent Repair Shops: Many independent shops offer excellent service. Look for shops with good reviews. Ask about their experience with audio port repairs. Get a clear estimate before work begins.
- Ask for Guarantees: A good repair shop will offer a guarantee on their work. This protects you if the problem reappears shortly after the repair.
Remember, a professional repair is an investment. It ensures your device functions correctly and safely. Do not hesitate to seek help when the problem is beyond a simple clean.
FAQ Section
How do I know if my aux port is dirty or broken?
Start by visually inspecting the port with a flashlight. Look for lint or debris. Then, try cleaning it gently with compressed air and a toothpick. If cleaning improves the sound, it was dirty. If sound issues persist after a thorough clean, and you have tested with multiple cables, the port might be broken.
Can I use rubbing alcohol to clean my aux port?
Yes, you can use isopropyl alcohol (rubbing alcohol) with a concentration of 90% or higher. Apply it sparingly to a cotton swab. Do not pour it directly into the port. Ensure the port dries completely before use. Alcohol evaporates quickly and leaves no residue.
What should I absolutely NOT use to clean an aux port?
Never use metal objects like paperclips, needles, or knives. These can scratch or bend the delicate internal contacts. Avoid using water or any other liquids besides high-concentration isopropyl alcohol. Do not use excessive force or attempt to pry components.
How often should I clean my aux port?
It depends on how often you use your device and its environment. If you carry your device in a pocket or a dusty area, inspect the port monthly. Clean it when you notice visible lint or experience sound issues. Proactive light cleaning with compressed air can prevent major build-up.
Can a dirty aux port affect battery life?
A dirty aux port itself does not directly drain battery life. However, if the device constantly tries to detect a connection due to intermittent contact, it might lead to minor, negligible power consumption. The main issue with a dirty port is poor audio quality, not battery drainage.
Will cleaning my aux port void my device’s warranty?
Generally, gentle cleaning with non-conductive tools like toothpicks or compressed air will not void your warranty. However, using sharp metal objects, liquids other than isopropyl alcohol, or causing visible damage during the cleaning process could void the warranty. Always proceed with caution.
Conclusion
A dirty aux port can be a real nuisance. It can prevent you from enjoying clear audio from your favorite devices. However, with the right approach, you can restore full functionality. Learning how to clean an aux port effectively and safely is a valuable skill. It saves you time and money on unnecessary repairs or replacements. You can handle most common issues right at home.
I have walked you through every step. You now know the tools to use, how to perform both dry and alcohol-based cleaning, and what to do if issues persist. Remember to always prioritize safety by powering off your device.
Be gentle with the delicate internal components. Regular preventive measures also make a big difference. Keep your port free from lint and dust. This ensures consistent, high-quality sound. Do not let a little lint silence your music or calls. Take action today and bring back the crisp, clear audio you deserve.
- aux port cleaning
- headphone jack repair
- audio port maintenance

Todd Martin
Senior Writer
With over 15 years of experience in home renovation and design, I started HEG to share what I’ve learned with homeowners who want to create spaces that are both beautiful and functional. I’ve always believed in a hands-on approach, and over the years, I’ve picked up practical solutions that actually work. Through HEG, I aim to make home improvement more approachable, sharing real tips that help you create a home you truly love.