· Todd Martin · Tech Maintenance · 15 min read
How To Clean Beats Studio 3

Keep Your Beats Studio 3 Sparkling: A Cleaning Guide
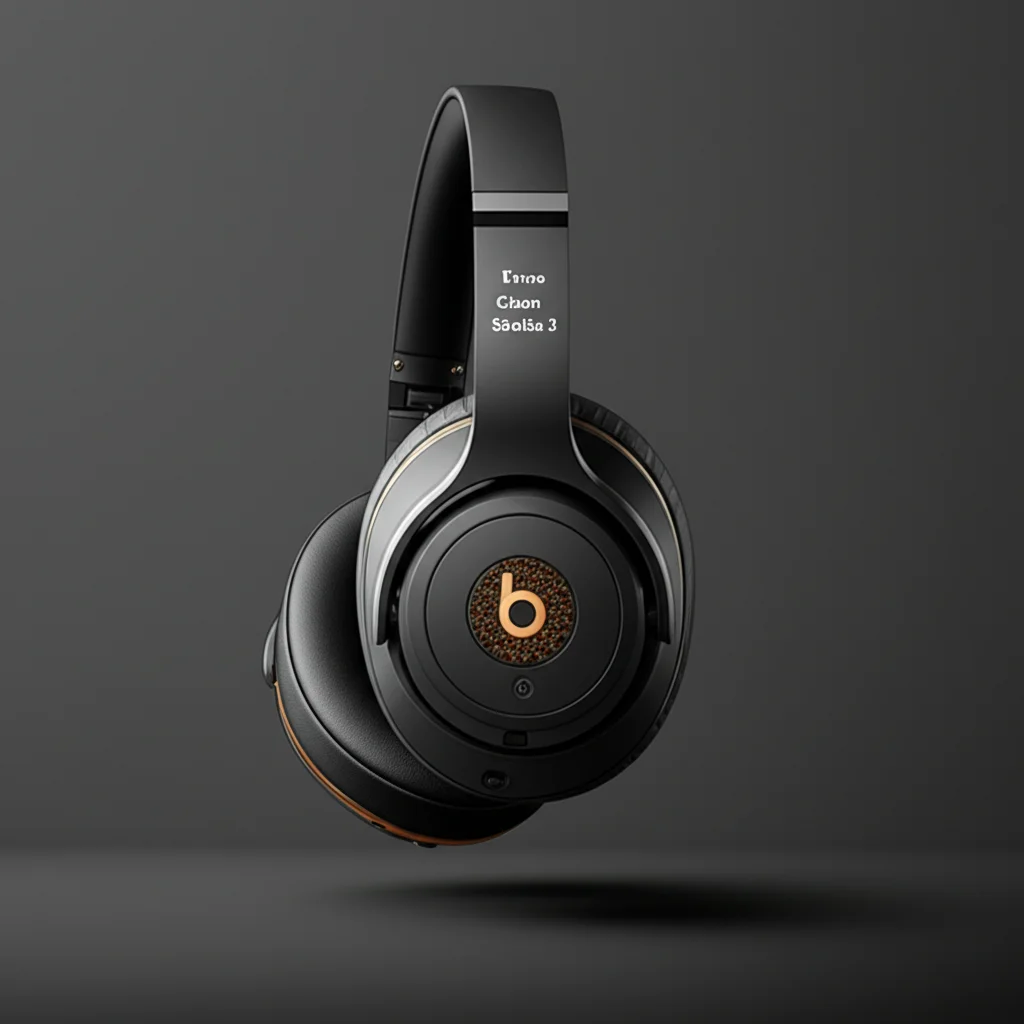
Your Beats Studio 3 headphones are more than just a device; they are your personal sound studio. We take them everywhere: to the gym, on commutes, and during relaxing evenings. Over time, these headphones accumulate dirt, sweat, and grime. This buildup not only affects their appearance but can also impact sound quality and hygiene.
Knowing how to clean Beats Studio 3 headphones properly is essential for their longevity and your health. Regular maintenance keeps your headphones looking new and performing at their best. This guide shows you the best ways to clean each part of your Beats Studio 3 safely. We will cover the ear pads, headband, speaker mesh, and body. You will learn the right tools and methods to use.
Takeaway
To clean Beats Studio 3 headphones, use gentle methods and the right tools.
- Wipe surfaces often: Use a soft, lint-free cloth.
- Clean ear pads carefully: Use mild soap and water, or alcohol wipes.
- Address the headband: Spot clean with a damp cloth.
- Care for speaker mesh: Use a dry cotton swab.
- Avoid moisture: Keep liquids away from openings.
To clean Beats Studio 3 headphones, use a soft, lint-free cloth dampened with a small amount of isopropyl alcohol or mild soapy water. Gently wipe down all surfaces, paying attention to ear pads and crevices. Always ensure the headphones are completely dry before use or storage to prevent damage.
Why Regular Headphone Cleaning Matters
Keeping your Beats Studio 3 headphones clean is more than just about looks. It significantly impacts their performance and your health. Dirt and sweat can build up on ear pads. This creates a breeding ground for bacteria and grime. Regular cleaning prevents these issues.
Neglecting cleaning can lead to unpleasant odors. It can also cause skin irritation. Sweat and oils from your skin degrade materials over time. This makes ear pads crack or peel. Dust and debris can also enter speaker grilles. This might muffle sound quality. By cleaning regularly, you extend the lifespan of your expensive headphones. You also ensure a comfortable and hygienic listening experience every time.
Essential Tools and Materials for Cleaning Beats Studio 3
Before you start cleaning your Beats Studio 3, gather the right tools. Using the correct materials prevents damage and ensures an effective clean. Do not use harsh chemicals or abrasive cloths. These can strip finishes or scratch surfaces.
Here is what you will need:
- Soft, lint-free microfiber cloths: These are perfect for wiping surfaces without leaving residue.
- Small spray bottle: For mixing and applying cleaning solutions lightly.
- Rubbing alcohol (isopropyl alcohol, 70% solution): Excellent for disinfecting and removing stubborn grime. It evaporates quickly.
- Mild soap: A tiny drop of dish soap mixed with water can be used for very dirty areas.
- Cotton swabs: Useful for reaching small crevices and the speaker mesh.
- Toothpick or soft-bristle brush: For dislodging debris from grilles or ports.
- Compressed air (optional): For blowing dust out of ports or grilles. Use it cautiously.
Always power off your Beats Studio 3 before cleaning. Remove any cables. This prevents accidental power on or electrical damage. Take your time with each step.
Step-by-Step Cleaning Process for Beats Studio 3 Ear Pads
The ear pads on your Beats Studio 3 headphones face the most direct contact with your skin. They collect sweat, oils, and makeup. This makes them a prime area for cleaning. Regular cleaning keeps them hygienic and comfortable. It also prevents material breakdown.
Cleaning Vinyl or Protein Leather Ear Pads
Most Beats Studio 3 ear pads are made from a synthetic leather material. This material is often called protein leather or vinyl. Cleaning these requires a gentle touch.
- Remove the ear pads (if possible): Some Beats models allow ear pad removal. Check your specific model’s manual. If they come off easily, remove them for a more thorough clean. If not, clean them while attached.
- Prepare a cleaning solution: Mix a few drops of mild dish soap with distilled water in a small spray bottle. Shake it gently. You can also use a 70% isopropyl alcohol solution. Alcohol is excellent for disinfection.
- Dampen a microfiber cloth: Lightly spray the solution onto a clean microfiber cloth. The cloth should be damp, not wet. Excessive moisture can seep into the headphone’s electronics.
- Gently wipe the ear pads: Wipe the surface of the ear pads in small, circular motions. Pay attention to areas with visible grime or discoloration. If you need to clean paint off leather, a similar gentle approach with a mild cleaner is often effective. However, avoid harsh scrubbing, as this can damage the material. For similar detailed cleaning methods for delicate surfaces, consider how one might clean paint off leather surfaces.
- Wipe with a clean, damp cloth: Use a second microfiber cloth dampened with only plain water. Wipe away any soap residue. This prevents stickiness.
- Dry thoroughly: Use a dry microfiber cloth to absorb all moisture. Allow the ear pads to air dry completely before reattaching them or using the headphones. Never use heat. Air drying is always best for electronics and delicate materials.
Addressing Stubborn Stains or Mildew
If you find stubborn stains or notice any mildew on your ear pads (especially if stored in damp conditions), you need a stronger but still gentle approach.
- Alcohol Wipes: Pre-moistened alcohol wipes (like those used for eyeglasses) can be effective. Test them on a small, hidden area first.
- For mold/mildew: A very diluted solution of white vinegar and water (1 part vinegar to 3 parts water) can help. Dampen a cotton swab or cloth. Gently dab the affected area. Wipe immediately with a plain damp cloth. Ensure thorough drying. For larger areas or persistent issues, understanding how to effectively clean mold off plastic might offer additional perspectives, as the principles of gentle application and thorough drying are similar.
Remember, patience is key. Do not oversaturate the ear pads with liquid. This can cause internal damage.
How to Clean the Headband and Exterior Surfaces
The headband and exterior shell of your Beats Studio 3 headphones also collect dust, oils, and fingerprints. Cleaning these parts helps maintain the overall aesthetic and feel of your device. These surfaces are generally less sensitive than the ear pads but still require careful attention.
Cleaning the Headband
The headband of Beats Studio 3 can be made of various materials, often plastic, metal, and soft-touch rubber or fabric on the underside.
- Dampen a microfiber cloth: Use a microfiber cloth slightly dampened with water or a very dilute mild soap solution. If you prefer a disinfectant, a 70% isopropyl alcohol wipe is also suitable.
- Wipe the entire headband: Gently wipe all surfaces of the headband. Pay attention to the top arch and the underside, where it rests on your head. This area can accumulate hair products, sweat, and skin oils.
- Address stubborn spots: For more stubborn spots, use a cotton swab dampened with alcohol. Gently rub the affected area. Avoid excessive pressure or rubbing.
- Dry completely: Use a dry part of your microfiber cloth to wipe away any moisture. Allow the headband to air dry thoroughly before wearing or storing.
Cleaning the Exterior Shell and Buttons
The exterior of your Beats Studio 3 is typically made of durable plastic. This material is prone to fingerprints and dust.
- Wipe with a dry cloth first: Use a dry microfiber cloth to remove loose dust and fingerprints.
- Slightly dampen the cloth: For deeper cleaning, lightly dampen your microfiber cloth with water or a 70% isopropyl alcohol solution.
- Wipe the shell and buttons: Gently wipe down the outer ear cups, the extendable arms, and around the buttons. Avoid getting liquid into any openings like the charging port or audio jack. The goal is to clean the surface without letting liquid seep inside. When cleaning electronics, it is important to remember that submerging them in water, like washing a jacket, is harmful. It is better to use methods similar to how one might clean a jacket without washing, focusing on spot cleaning and minimal moisture.
- Use cotton swabs for crevices: For the tiny gaps around buttons or seams, a dry cotton swab can remove trapped dust. If necessary, slightly dampen the cotton swab with alcohol.
- Dry thoroughly: Ensure all surfaces are completely dry before using the headphones.
Detailed Cleaning of Speaker Mesh and Charging Port
The speaker mesh and charging port are critical areas that need careful cleaning. These components can accumulate dust, lint, and debris. This can affect sound quality and charging functionality. Cleaning these parts requires precision and caution to avoid damage.
Cleaning the Speaker Mesh
The speaker mesh protects the internal drivers. Over time, it can trap earwax, dust, and tiny fibers. A clogged mesh can reduce sound clarity and volume.
- Use a dry cotton swab: Take a dry cotton swab. Gently swirl it over the speaker mesh. This helps pick up loose debris.
- Light brushing (optional): For more stubborn dirt, you can use a clean, soft-bristle toothbrush (like a baby toothbrush) or a dedicated electronics brush. Gently brush over the mesh to dislodge particles. Do not press hard.
- Compressed air (with caution): If you have compressed air, you can use short, controlled bursts. Hold the can upright and about six inches away. Aim it at the mesh to blow out dust. Be very careful. Too much pressure can push debris further in or damage internal components. Do not spray cold propellant onto the mesh.
- Avoid liquids: Never apply liquid directly to the speaker mesh. Moisture can damage the speaker drivers.
Cleaning the Charging Port and Audio Jack
These ports can collect lint and dust from pockets or bags. A clogged port can prevent proper charging or audio connection.
- Power off: Ensure your Beats Studio 3 are powered off completely.
- Use a toothpick or thin, non-metallic tool: Carefully insert a dry toothpick or a specialized electronics cleaning tool into the charging port (USB-A or USB-C, depending on your model) and the 3.5mm audio jack. Gently scrape along the inside walls to dislodge lint. Do not use metal objects. These can short-circuit pins.
- Flashlight inspection: Use a flashlight to see inside the port. This helps you ensure all debris is removed.
- Compressed air (optional): After dislodging, a quick burst of compressed air can blow out the debris. Again, use short, controlled bursts.
- Test: After cleaning, try connecting your charging cable or audio cable. It should now connect smoothly.
Regular checks of these ports can prevent future issues. A small amount of preventive cleaning goes a long way.
Preventing Future Buildup and Maintaining Hygiene
Cleaning your Beats Studio 3 headphones is important, but preventing dirt buildup in the first place is even better. Good habits extend the life of your headphones and reduce the need for deep cleaning. Maintaining regular hygiene keeps your listening experience fresh.
Good Habits for Headphone Longevity
- Wipe after each use: Get into the habit of quickly wiping down your ear pads and headband with a dry microfiber cloth after each workout or extended listening session. This removes fresh sweat and oils before they dry and cause stains.
- Store properly: When not in use, store your Beats Studio 3 in their protective carrying case. This protects them from dust, dirt, and accidental bumps. Avoid leaving them exposed on a desk or in a bag.
- Avoid extreme conditions: Do not leave your headphones in direct sunlight, hot cars, or extremely humid environments. High temperatures and moisture can degrade materials and foster bacterial growth.
- Handle with clean hands: Try to handle your headphones with clean hands. Oils and dirt from your fingers transfer easily to the surfaces.
Daily and Weekly Maintenance Tips
- Daily Quick Wipe: A quick wipe of the ear pads and exterior with a dry or slightly damp microfiber cloth. This takes less than a minute. It helps remove daily accumulation.
- Weekly Deeper Clean: Once a week, perform a more thorough wipe-down. Use a microfiber cloth lightly dampened with a 70% isopropyl alcohol solution. Focus on ear pads, headband, and common contact areas. Alcohol helps disinfect and remove oils.
- Monthly Port Check: Every month, quickly check the charging port and audio jack for any lint or dust buildup. Use a toothpick or compressed air if needed.
By incorporating these simple steps into your routine, you significantly reduce the amount of dirt, sweat, and grime that accumulates on your Beats Studio 3 headphones. This proactive approach saves you time and effort. It also ensures your headphones remain in top condition for years. Regular cleaning also keeps your headphones performing their best. They will deliver clear, crisp sound for all your audio needs.
When to Consider Professional Headphone Cleaning or Replacement Parts
While regular home cleaning can do wonders for your Beats Studio 3, there are times when professional help or part replacement becomes necessary. Knowing when to seek expert assistance or buy new components can save you money and ensure your headphones remain functional.
Recognizing Signs for Professional Cleaning
Sometimes, issues go beyond simple surface grime.
- Persistent Odor: If a foul smell remains even after thorough cleaning, it might indicate deep-seated bacterial growth. This can happen if moisture has seeped into areas you cannot reach. A professional might have specialized equipment for deep sanitization.
- Deep Grime or Discoloration: If ear pads or headbands have severe discoloration or grime that household methods cannot remove, professionals often have stronger but safe cleaning agents and techniques.
- Internal Debris or Sound Issues: If you notice sound distortion, static, or reduced volume after cleaning the speaker mesh, it might mean debris is inside the drivers. A professional can safely open the headphones and remove internal blockages. This service needs specialized tools and knowledge.
- Water Damage: If your headphones got wet, do not try to clean them yourself. This can worsen the damage. Seek professional repair immediately.
When to Replace Ear Pads or Other Components
Headphone components, especially ear pads, wear out over time.
- Cracked or Peeling Ear Pads: The most common sign is visible wear and tear on the ear pads. If the material is cracking, peeling, or flaking, it is time for new ones. Worn ear pads affect comfort and sound isolation. They also look unappealing.
- Flattened Foam: If the foam inside your ear pads loses its cushioning and becomes flat, it will not provide comfort or proper sound seal. Replacement ear pads restore both.
- Damaged Headband Cushion: If the headband cushion is torn, flattened, or no longer comfortable, replacement might be an option. Check if your Beats Studio 3 model supports user-replaceable headband parts.
- Broken Exterior Parts: If plastic parts are cracked, buttons are stuck, or the charging port is physically damaged, replacing the specific component or seeking repair is the best course.
Many genuine or high-quality aftermarket replacement ear pads are available online. Replacing them is often a straightforward process. It involves twisting and locking new pads into place. This can make your headphones feel brand new again. Always ensure you purchase parts compatible with Beats Studio 3.
Frequently Asked Questions About Cleaning Beats Studio 3
How often should I clean my Beats Studio 3 headphones?
Clean your Beats Studio 3 ear pads and headband with a quick wipe after each use, especially after workouts. Perform a more thorough cleaning weekly or bi-weekly. Check ports monthly for lint buildup. Regular, light cleaning prevents major grime accumulation. This keeps your headphones hygienic and in good condition.
Can I use alcohol wipes to clean my Beats Studio 3?
Yes, you can use 70% isopropyl alcohol wipes. These are safe for disinfecting and cleaning most surfaces of your Beats Studio 3. Use them on ear pads, the headband, and the plastic exterior. Apply the alcohol to a cloth first. Do not spray directly onto the headphones. Ensure the areas dry completely.
What should I avoid using when cleaning my Beats Studio 3?
Avoid harsh chemicals like bleach, abrasive cleaners, or household sprays. Do not use rough cloths or paper towels, as these can scratch surfaces. Never submerge any part of your headphones in water. Avoid using excessive liquid that could seep into internal components. Do not use sharp metal objects for port cleaning.
Can I wash the ear pads in water?
No, you should not submerge or wash Beats Studio 3 ear pads in water. The internal foam and adhesive could be damaged. Instead, use a damp cloth with a mild soap solution or an alcohol wipe. Gently wipe the surface and then dry thoroughly with a separate cloth.
How do I remove earwax from the speaker mesh?
Use a dry cotton swab to gently swirl over the speaker mesh. For stubborn wax, a clean, soft-bristle toothbrush can carefully dislodge it. You can also use short bursts of compressed air from a distance, holding the can upright. Never poke directly into the mesh or use liquids.
Is it safe to use compressed air on my headphones?
Yes, compressed air is generally safe for headphones if used correctly. Use short, controlled bursts. Hold the can upright. Maintain a distance of about six inches from the component (speaker mesh, charging port). Avoid continuous spraying or spraying at close range, as this can push debris further in or cause condensation.
Conclusion
Keeping your Beats Studio 3 headphones clean is a simple yet powerful way to protect your investment. You can easily maintain their performance and hygiene by following these clear steps. We covered everything from cleaning the ear pads and headband to caring for the delicate speaker mesh and charging port. Remember to use the right tools and cleaning solutions. Gentle handling is key to avoiding damage.
Regular cleaning prevents grime buildup. It extends the life of your headphones. This ensures you always enjoy crisp sound and comfortable wear. Make cleaning a routine part of your headphone care. You will appreciate the lasting quality. Now, you can confidently keep your Beats Studio 3 sparkling clean. Enjoy your favorite music without worries.
- Beats Studio 3 cleaning
- headphone hygiene
- ear pad cleaning
- audio equipment care
- Beats Studio 3 maintenance


