· Todd Martin · Home Maintenance · 19 min read
How To Clean Bedjet Filter
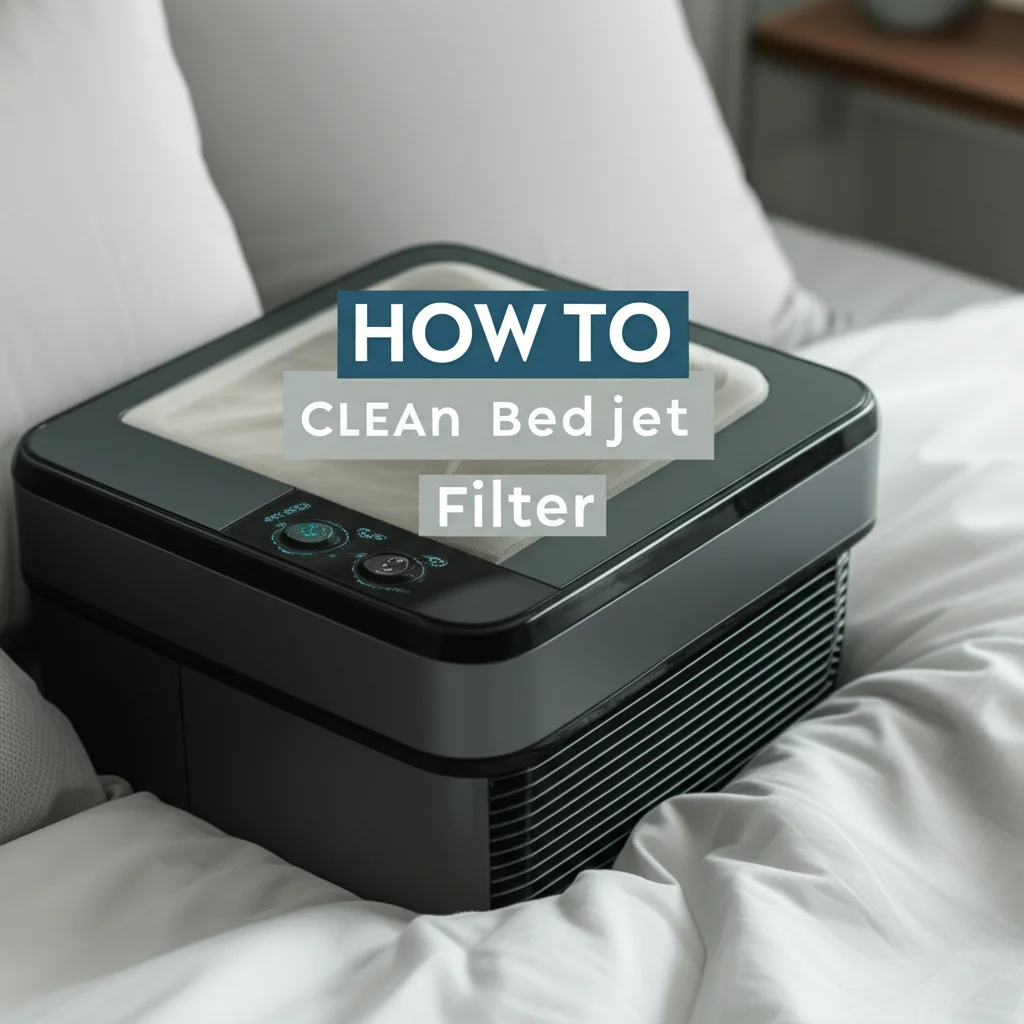
Clean Bedjet Filter for Better Sleep Quality
Imagine slipping into bed and feeling the perfect temperature cocoon around you, providing restful sleep all night long. This comfort often comes from innovative devices like the Bedjet. But what happens when that comforting air feels less fresh or the device performs less efficiently? Often, the answer lies in a neglected component: the air filter. Keeping this filter clean is key to enjoying all the benefits your Bedjet offers.
This article provides a complete guide on how to clean your Bedjet filter. We will discuss why regular cleaning is important for health and device longevity. We will then walk you through each step of the cleaning process. You will also learn how often to clean your filter and common issues to watch for. By the end, you will know exactly how to maintain your Bedjet for optimal comfort.
Takeaway
Regularly cleaning your Bedjet filter improves air quality and device efficiency.
- Clean the filter every 1-3 months or when the device signals.
- Use a vacuum and soft brush to remove dust.
- Wash the filter with water if needed, but ensure it is completely dry before reinstallation.
- A clean filter extends your Bedjet’s life and maintains consistent performance.
To clean your Bedjet filter, first turn off and unplug the unit. Remove the filter, typically located at the rear or side. Use a vacuum cleaner or soft brush to remove dust and debris. If washable, rinse it under cool water and let it air dry completely before putting it back. This simple task improves air quality and keeps your Bedjet running well.
Why Cleaning Your Bedjet Filter Matters for Optimal Comfort
The Bedjet provides personalized climate control for your bed. It delivers warm or cool air directly under your sheets. This device works hard to create your ideal sleeping environment. Its performance relies heavily on one small but mighty part: the air filter. A clean air filter is essential for your comfort and health.
A dirty filter can reduce airflow. This means your Bedjet has to work harder to achieve the set temperature. It might struggle to cool you down on a hot night. It might also fail to warm you up effectively during colder seasons. Reduced airflow leads to less comfort and potentially higher energy bills. Keeping the filter clean helps your Bedjet perform its best.
Clean filters also protect your indoor air quality. The Bedjet draws air from your room. This air often contains dust, pet dander, pollen, and other allergens. The filter captures these particles before they enter your bedding. A clogged filter cannot trap these contaminants effectively. It might even recirculate them back into your breathing space. This can worsen allergies or respiratory issues.
Proper filter care extends the life of your Bedjet. When the filter is dirty, the motor works harder. This extra strain can cause the motor to wear out faster. Overheating can also become a problem. Regular cleaning prevents this strain. It protects internal components from dust buildup. This simple maintenance step saves you money on repairs or replacements later. It ensures your investment in better sleep lasts for many years.
Think of your Bedjet’s filter as the lungs of the machine. Just as our lungs need clean air to function, your Bedjet needs a clean filter. Ignoring filter maintenance compromises the device’s ability to deliver clean, temperature-controlled air. It also reduces the lifespan of the machine. Taking a few minutes to clean the filter regularly provides significant benefits for your comfort, health, and wallet. Maintaining other home filters, like those in your air conditioner or air purifier, also keeps your home environment healthy.
Understanding Your Bedjet’s Air Filtration System
Your Bedjet unit features a critical component known as the air intake filter. This filter acts as the first line of defense. It prevents dust, pet hair, and other airborne particles from entering the device. The Bedjet pulls room air through this filter. It then conditions the air and sends it into your bed. Without this filter, debris would accumulate inside the unit. This could damage internal parts or reduce airflow significantly.
Most Bedjet models use a high-efficiency particulate air (HEPA) filter or a similar electrostatic filter. HEPA filters are known for their ability to capture very small particles. This includes common allergens like pollen, mold spores, and dust mite debris. This high level of filtration helps ensure the air entering your bed is as clean as possible. This is especially important for people with allergies or asthma. Understanding the type of filter helps you clean it properly. Many HEPA filters are not designed for deep washing, only gentle cleaning. For more on HEPA filters, read about how to clean a HEPA filter.
The filter location on your Bedjet is usually easy to find. It is typically at the back or side of the main unit. Some models have a simple snap-on cover. Others might require a slight twist or pull to release the filter housing. Always check your specific Bedjet model’s user manual. The manual provides exact instructions for filter access and removal. It also confirms if your filter is washable or needs replacement after a certain period.
The filter’s purpose is not just to keep the Bedjet clean. It also improves the air quality you breathe while sleeping. Over time, this filter collects a lot of dust and debris. You can often see this buildup when you remove the filter. This visible dirt is a clear sign the filter is doing its job. However, it also indicates it is time for a cleaning. A clean filter allows air to flow freely. This ensures your Bedjet operates efficiently and delivers clean air. Regular checks of the filter status help you maintain your Bedjet well. This simple step keeps your sleep environment fresh and healthy.
Gathering Your Tools for a Clean Bedjet Filter
Before you start cleaning your Bedjet filter, it is wise to gather all the necessary tools. Having everything ready beforehand makes the process quick and easy. You will not need many items for this task. Most of the tools are common household items. Preparing ahead prevents interruptions once you begin.
Here is a list of what you will need:
- A soft-bristled brush or an old toothbrush: This is excellent for dislodging stubborn dust. It works well on the pleats or mesh of the filter. Make sure the bristles are soft enough not to damage the filter material.
- A vacuum cleaner with a brush attachment: This is your primary tool for removing loose dust. The brush attachment helps to gently lift debris from the filter surface. A handheld vacuum works great for this, or a regular vacuum with the appropriate attachment.
- A clean, dry cloth: This cloth is useful for wiping down the filter housing and the exterior of the Bedjet unit. It helps remove any dust that might have escaped the filter.
- Warm water and mild soap (optional): Some Bedjet filters are washable. If your filter is specified as washable by the manufacturer, you might need warm water and a small amount of mild dish soap. Always check your Bedjet manual before washing. Not all filters can withstand water.
- A clean towel or drying rack: If you wash your filter, you will need a place for it to air dry completely. A clean towel helps absorb initial moisture. A drying rack allows for air circulation.
Before you begin, ensure your Bedjet unit is turned off and unplugged from the wall. Safety always comes first when working with electrical appliances. This simple preparation step prevents accidental power-ons. It also protects you from any electrical hazards. With your tools ready and safety measures in place, you are ready to proceed. The actual cleaning process is straightforward. It requires minimal effort but offers significant benefits.
Step-by-Step Guide: How to Clean Bedjet Filter Effectively
Cleaning your Bedjet filter is a simple maintenance task. Performing it regularly ensures your device continues to provide optimal comfort. This step-by-step guide walks you through the process. Follow these instructions carefully for the best results.
Power Down and Disconnect
Safety is always the first priority. Before you touch any part of your Bedjet, ensure it is completely powered off.
- Turn off the unit using the power button on the Bedjet or its remote control.
- Unplug the Bedjet’s power cord from the electrical outlet.
- This step prevents any accidental starts during the cleaning process. It also protects you from electrical shock.
Locate and Remove the Filter
The air intake filter is usually easy to find. It is often located on the back or side of your Bedjet unit.
- Check your Bedjet user manual if you are unsure of the exact location.
- Most filters have a simple latch or a removable cover.
- Gently open the cover or unlatch the filter.
- Carefully slide or pull the filter out of its compartment.
- Take note of how the filter fits into the unit. This will make reinstallation easier later.
Gentle Cleaning for Dust and Debris
Now that the filter is out, you can begin the cleaning process. This step removes most of the accumulated dust and lint.
- Use a vacuum cleaner with a brush attachment.
- Gently vacuum both sides of the filter.
- Move the vacuum nozzle slowly across the filter surface. This pulls out dust embedded in the filter material.
- For stubborn dust or debris caught in pleats, use a soft-bristled brush.
- Brush lightly to loosen the dirt without damaging the filter.
- Shake the filter gently over a trash can to dislodge any remaining loose particles.
- This method is safe for all Bedjet filters, including non-washable HEPA types. For similar processes on other devices, consider how you might clean a Dyson air filter or even a furnace filter.
Drying the Filter Properly
If your Bedjet filter is washable (check your manual!), follow these steps for washing and drying. If your manual says the filter is NOT washable, skip this section entirely.
- Run cool water over the filter. Rinse it from the clean side to push dirt out.
- You can use a very small amount of mild dish soap for heavily soiled filters.
- Gently rub the soap into the filter material with your fingers.
- Rinse thoroughly until all soap residue is gone and the water runs clear.
- Shake off excess water.
- Place the filter on a clean towel or drying rack in a well-ventilated area.
- Allow the filter to air dry completely. This can take several hours, or even a full day.
- Do not use heat from a hairdryer or direct sunlight to speed drying. This can warp or damage the filter material.
- Ensure the filter is bone dry before proceeding. Any moisture can cause mold growth or damage your Bedjet’s electronics.
Reinstalling and Testing
Once the filter is clean and dry, it is time to put everything back together.
- Carefully slide the filter back into its compartment.
- Make sure it fits securely in the same orientation you removed it.
- Close the filter cover or latch it into place.
- Plug your Bedjet back into the electrical outlet.
- Turn on the unit and test its operation.
- You should notice improved airflow and quieter operation.
- The air will also feel fresher. Your Bedjet is now ready to provide comfortable sleep once again.
This thorough cleaning process ensures your Bedjet performs efficiently. It also maintains a healthy sleeping environment. Regular maintenance of your Bedjet filter is a small effort with big rewards.
Frequency and Best Practices for Bedjet Filter Maintenance
Knowing how often to clean your Bedjet filter is crucial for consistent performance. The frequency depends on several factors. These include how often you use your Bedjet, your home environment, and if you have pets. Generally, I find it best to clean the filter every one to three months. However, there are signs that might tell you to clean it sooner.
Here are some indicators that your Bedjet filter needs attention:
- Reduced Airflow: If you notice your Bedjet is not delivering as much air as before, a clogged filter is a likely culprit.
- Unusual Noises: A straining motor, due to a blocked filter, can make new or louder noises.
- Musty Odor: A dirty filter can harbor dust, mold spores, or pet dander. This can lead to an unpleasant smell coming from your Bedjet.
- Visible Dust Buildup: Simply inspecting the filter often reveals a layer of dust or lint. This is a clear sign it needs cleaning.
- Bedjet’s Indicator Light: Some Bedjet models have a maintenance reminder. Pay attention to any warning lights or messages on the display.
Establishing a routine helps you remember to clean the filter. Consider setting a reminder on your phone or marking it on a calendar. For instance, I clean my Bedjet filter at the start of every new season. This ensures it is ready for different temperature needs. If you live in a dusty area, or if you have furry pets, you might need to clean it more often, perhaps monthly.
Beyond regular cleaning, here are some best practices for Bedjet filter maintenance:
- Always Check Your Manual: As mentioned, some filters are washable, while others are not. Your specific Bedjet model’s manual is the definitive guide. Misinformation can damage your filter or unit.
- Avoid Harsh Chemicals: Never use strong cleaning agents, bleach, or abrasive materials on your filter. These can degrade the filter material or leave residues that are harmful to breathe. Plain water and mild soap (if washable) are sufficient.
- Ensure Complete Drying: If you wash your filter, it must be completely dry before reinstallation. Installing a damp filter can lead to mold growth inside your Bedjet. This can also damage electronic components. This is similar to ensuring a pool cartridge filter is thoroughly dry before reuse.
- Consider Filter Replacement: Filters do not last forever, even with regular cleaning. Over time, the material can degrade, losing its effectiveness. Bedjet recommends replacing the filter every 6-12 months, depending on usage. If cleaning no longer improves performance, it is time for a new filter.
- Keep the Surrounding Area Clean: Dust in your room ends up in your Bedjet filter. Regularly dusting your bedroom, vacuuming floors, and cleaning bedding reduces the amount of airborne particles. This lightens the load on your filter. This makes it last longer between cleanings.
By following these best practices, you can maximize your Bedjet’s efficiency and lifespan. You also ensure you breathe cleaner air while you sleep.
Troubleshooting Common Bedjet Filter Issues
Even with regular cleaning, you might encounter some issues related to your Bedjet filter. Understanding these common problems helps you diagnose and resolve them quickly. Sometimes, the problem is not a dirty filter at all, or a simple cleaning is not enough.
One common issue is persistent reduced airflow after cleaning. If you have cleaned your filter thoroughly and the air still feels weak, consider a few things. First, double-check that the filter is installed correctly. A misaligned filter can block airflow. Second, verify the filter is completely dry if you washed it. Moisture can impede air movement. Third, your filter might be old. Over time, filter material degrades and loses its ability to pass air efficiently, even when clean. In this case, filter replacement is necessary.
Another problem is a musty or strange odor that does not go away after cleaning. This often indicates mold or mildew growth within the filter or unit. If the filter is washable, give it a deep wash with mild soap and warm water. Ensure it dries completely. If the smell persists, the mold might be too deeply embedded. This means you need a new filter. If the smell seems to come from inside the unit itself, beyond the filter, contact Bedjet customer support. You might have a deeper internal issue. This is a different scenario from cleaning a dishwasher filter where food odors are common.
Some users report excessive noise from the Bedjet unit. While a dirty filter can make the motor work harder and become louder, other factors can cause noise. Ensure the unit is on a stable, flat surface. Vibrations can cause noise. Check that nothing is obstructing the air intake or exhaust vents. If the noise persists after filter cleaning and checking for obstructions, the issue might be mechanical. This could indicate a fan or motor problem. Contact Bedjet support for assistance.
Finally, you might find that your filter gets dirty very quickly. This is usually a sign of a very dusty environment. If you have pets that shed a lot, or live in an older home, or during high pollen seasons, this is common. You might need to adjust your cleaning schedule to be more frequent. For example, clean it every two weeks instead of every month. Improving your home’s overall air quality can also help. Use an air purifier in your bedroom. Regularly vacuum carpets and dust surfaces. This reduces the amount of airborne particles that your Bedjet filter has to capture. This also helps reduce the frequency of cleaning tasks for other household filters like your Dyson vacuum filter or even your lint filter in your dryer.
Troubleshooting these issues ensures your Bedjet remains effective. It also helps you decide when a simple clean is enough or when a replacement is needed.
Extending Your Bedjet’s Lifespan Through Proper Care
Your Bedjet is an investment in your comfort and sleep quality. Proper care, especially for its filter, is key to making this investment last. Regular maintenance does more than just keep your Bedjet running well day-to-day. It directly impacts the overall lifespan of the device. Think of filter care as a preventative measure. It saves you money and hassle in the long run.
When the Bedjet filter is clean, the unit operates efficiently. Air flows freely through the system. This means the motor does not have to work as hard. Reduced strain on the motor translates to less wear and tear over time. Motors that constantly struggle against resistance burn out faster. They also consume more energy. A clean filter ensures the motor runs smoothly and quietly. This extends the life of this critical component.
Dust and debris are common enemies of electronic devices. The Bedjet filter acts as a barrier, preventing these particles from entering the main unit. If the filter becomes clogged or damaged, dust bypasses it. This dust can then settle on internal circuits, fans, and heating/cooling elements. Dust buildup acts as an insulator, causing components to overheat. Overheating can lead to component failure. It can also pose a fire risk in extreme cases. Keeping the filter clean helps protect these delicate internal parts. This safeguards the Bedjet’s long-term functionality.
Beyond the internal mechanisms, proper filter care maintains the air quality the Bedjet provides. Over time, even the most robust filters can become saturated. They lose their ability to effectively capture new particles. This leads to reduced air purification. Replacing the filter at recommended intervals, in addition to regular cleaning, ensures optimal performance. It also guarantees that your Bedjet continues to deliver clean, allergen-free air into your bed.
Consider the cost of replacing your Bedjet versus the minimal effort of filter maintenance. A new Bedjet unit represents a significant expense. Regular filter cleaning and timely replacements are much more affordable. They represent a small ongoing investment that protects your larger purchase. It is a simple habit that yields substantial returns. This approach applies to many home appliances. For instance, knowing how to clean an under-sink water filter helps prolong its life and ensures clean water for longer periods. Similarly, cleaning your range hood filter ensures proper kitchen ventilation and extends its use.
By dedicating a few minutes every few months to filter care, you are not just cleaning a part. You are performing essential preventative maintenance. This proactive approach ensures your Bedjet remains a reliable source of comfort for years to come. It ensures you continue to enjoy the restful sleep it helps provide.
Common Questions About Cleaning Your Bedjet Filter
How often should I clean my Bedjet filter?
You should clean your Bedjet filter every 1 to 3 months, depending on usage and your home environment. If you have pets or a dusty living space, more frequent cleaning, perhaps monthly, is advisable. Pay attention to signs like reduced airflow or a musty smell. Some Bedjet models also have indicator lights to remind you.
Can I wash my Bedjet filter with water?
It depends on your specific Bedjet model. Some Bedjet filters are washable and can be rinsed under cool water with mild soap. Others are designed for dry cleaning only, using a vacuum or brush. Always consult your Bedjet user manual to confirm if your filter is washable before using water.
What are the signs of a dirty Bedjet filter?
Common signs of a dirty Bedjet filter include reduced air output from the unit, an increase in operational noise as the motor works harder, or a musty or unpleasant odor coming from the device. You might also visibly see a layer of dust and lint accumulated on the filter surface.
Do all Bedjet models have the same filter?
No, Bedjet models may have different filter types or sizes. While the cleaning principles are generally similar, the exact filter design and whether it is washable can vary. Always refer to the user manual that came with your specific Bedjet model for precise filter information and cleaning instructions.
When should I replace my Bedjet filter instead of cleaning it?
You should replace your Bedjet filter when cleaning no longer improves its performance, or if the filter material appears damaged or degraded. Bedjet typically recommends replacing the filter every 6 to 12 months, depending on usage. If odors persist after cleaning, a replacement is often needed.
Conclusion
Taking care of your Bedjet filter is a small task with significant benefits. It is clear that regular cleaning of your Bedjet filter plays a vital role in its performance and longevity. A clean filter ensures optimal airflow, delivering fresh, temperature-controlled air right into your bed. This leads to a more comfortable and healthier sleep environment. Moreover, it protects your Bedjet’s internal components, reducing wear and tear on the motor and extending the life of the entire unit.
I truly believe that simple habits lead to great rewards. By dedicating a few minutes every couple of months to this easy cleaning process, you protect your investment in better sleep. You also maintain good indoor air quality right where you sleep.
So, grab your vacuum and brush, and give your Bedjet the attention it deserves. Your body, your mind, and your Bedjet will thank you. For more tips on keeping your home essentials in top shape, visit Home Essentials Guide for our growing collection of maintenance guides. Maintain your comfort, maintain your peace.
- Bedjet maintenance
- air filter cleaning
- sleep comfort
- home air quality
- appliance upkeep

Todd Martin
Senior Writer
With over 15 years of experience in home renovation and design, I started HEG to share what I’ve learned with homeowners who want to create spaces that are both beautiful and functional. I’ve always believed in a hands-on approach, and over the years, I’ve picked up practical solutions that actually work. Through HEG, I aim to make home improvement more approachable, sharing real tips that help you create a home you truly love.