· Todd Martin · Home Maintenance · 19 min read
How To Clean Ac Unit Inside
Mastering the Inside Clean: How To Clean Your AC Unit Effectively
Imagine walking into a cool, fresh home on a hot day. That comfort depends heavily on your air conditioning unit. But what if your AC unit starts blowing stale air or struggles to cool your space? This often means it’s time to give it a good clean. Keeping your AC unit’s internal parts clean provides many benefits. It makes your home cooler, saves you money on energy bills, and helps you breathe cleaner air.
Many people only think about cleaning the outside of their AC unit. However, the inside components are where most dust, dirt, and even mold can build up. This buildup harms your unit’s performance and affects the air you breathe. This guide will show you exactly how to clean your AC unit inside, step by step. We will cover everything from filters to coils and drain lines. You will learn what tools you need and how to do the job safely and effectively.
Takeaway
- Always disconnect power to your AC unit before any cleaning.
- Clean or replace your AC filters regularly for best air circulation.
- Address evaporator coils and drain lines to stop mold and blockages.
- A clean inside unit boosts air quality and cuts energy costs.
- Following these steps helps extend your AC unit’s life and efficiency.
Clear and Concise Answer to the Main Query
To clean your AC unit inside, first disconnect power. Remove and clean the air filter. Then, carefully clean evaporator coils, the drain pan, and the drain line. Use appropriate cleaners and brushes for specific components, ensuring all parts are dry before reassembly.
Why Your Indoor AC Unit Needs Regular Cleaning
Your air conditioning unit works hard to keep your home comfortable. Over time, dust, pollen, pet dander, and other airborne particles get sucked into the unit. These particles settle on internal components like filters, coils, and the blower fan. This buildup can lead to several problems for your AC system and your home’s air quality.
First, dirty components make your AC unit work harder. When filters are clogged, or coils are coated with grime, airflow reduces. This forces the unit to use more energy to cool your home. More energy use means higher electricity bills for you. A clean unit operates more efficiently, saving you money every month.
Second, internal dirt and moisture create a perfect environment for mold and mildew to grow. Your AC unit removes humidity from the air, creating condensation. This moisture, combined with dust and darkness, allows mold spores to thrive. Mold inside your AC unit can spread spores into your home, causing unpleasant odors and possibly triggering allergies or respiratory issues. Cleaning prevents this mold growth and keeps your indoor air healthy. You can learn more about how to clean mold from your AC unit to keep it fresh and healthy.
Third, consistent cleaning helps extend the lifespan of your AC unit. Dirty components put extra strain on the motor and other parts. This strain can lead to breakdowns and costly repairs. Regular cleaning keeps your unit running smoothly and prevents premature wear and tear. It helps you avoid expensive professional service calls.
Lastly, a clean AC unit cools your home more effectively. When air can flow freely over clean coils, heat exchange happens more efficiently. This means your home reaches your desired temperature faster and stays consistently comfortable. You will feel the difference in comfort right away. This simple maintenance step makes a big difference in your home’s overall environment.
Gathering Your Tools: What You Need to Clean Your AC
Before you begin cleaning your AC unit inside, gather all the necessary tools and supplies. Having everything ready saves time and ensures you do the job right. You do not need many special items, but a few key things are important. Most items you can find around your house or at a local hardware store.
First, you will need a screwdriver set, both Phillips and flathead. These are for opening the AC unit’s casing. You will also need a soft brush or vacuum cleaner with a brush attachment. These items help remove loose dust and debris from filters and coils. Make sure your vacuum is powerful enough to pick up dirt but gentle enough not to damage fins.
Next, prepare your cleaning solutions. A spray bottle filled with a mix of water and mild dish soap works well for general cleaning. For evaporator coils, consider buying a specialized coil cleaner. These cleaners are designed to break down grime without harming the delicate fins. Some coil cleaners are no-rinse, which makes the job easier. For stubborn mold, a solution of distilled white vinegar and water (50/50 ratio) is effective. You can find out more about how to clean mold with vinegar if you encounter it.
You also need a sturdy pair of gloves to protect your hands from dirt and cleaning solutions. Safety glasses are also a good idea, especially when spraying cleaners. Have a few clean cloths or old towels ready for wiping surfaces and soaking up water. A small bucket or pan is useful for catching dirty water, especially when cleaning the drain pan.
Finally, prepare a simple garden hose with a spray nozzle if you are cleaning washable filters or some components outdoors. For detailed work on coils and fins, a fin comb is very helpful. This tool straightens bent fins, which improves airflow. This simple set of tools makes the internal AC cleaning process much smoother and more efficient.
Safety First: Powering Down Before You Clean
Safety must always be your top priority when working with electrical appliances. Before you touch any part of your AC unit, you must ensure the power is completely off. Ignoring this step can lead to serious injury from electric shock. It can also damage your AC unit or even cause a fire. This step is non-negotiable for your safety and the longevity of your appliance.
First, go to your thermostat and switch your AC unit to the “off” position. This stops the unit from running. However, this action alone does not cut the electrical supply to the unit. The main power still flows to the outdoor compressor and the indoor air handler. You need to shut off the main power at your home’s electrical panel.
Locate your main electrical panel, usually in your basement, garage, or a utility closet. Find the circuit breaker labeled for your AC unit or HVAC system. It may also be labeled “furnace” or “air handler.” Flip this breaker to the “off” position. If you are unsure which breaker controls your AC, you can shut off the main breaker for your entire home. This ensures no power reaches the unit during your cleaning.
Once the breaker is off, it is a good practice to double-check. You can try to turn the AC unit on at the thermostat. If the unit does not respond, then you know the power is successfully cut off. This confirms that the unit is safe to work on. You should also wait a few minutes after turning off the power. This allows any residual electricity to dissipate from the system’s capacitors.
Working with electricity can be dangerous. Never skip this safety step. Powering down your AC unit completely protects you from electrical hazards. It also prevents any accidental activation of the unit while your hands are inside. This simple action prepares your unit for a safe and effective cleaning.
Simple Steps to Clean Your AC Unit Filter
Cleaning your AC unit’s air filter is perhaps the easiest and most important part of indoor AC maintenance. The air filter traps dust, dirt, and allergens before they enter your home and settle on your AC’s internal components. A dirty filter blocks airflow, reduces efficiency, and compromises your indoor air quality. I clean my filter every month during peak cooling season.
First, locate your AC filter. It is usually found in the return air duct, often in a slot on the indoor air handler unit or behind a return air vent on your wall or ceiling. Some window AC units have filters directly behind the front grille. You can find specific instructions for how to clean a window AC unit filter or how to clean a windmill AC filter if you have those types. Other common types include filters on Midea AC units.
Once you find the filter, slide it out carefully. Notice how much dust and debris it has collected. If your filter is disposable, simply throw it away and replace it with a new one. Always use the correct size and MERV rating recommended by your AC manufacturer. A higher MERV rating means better filtration but may require more frequent replacement.
If your filter is washable, you can clean it easily. Take the filter outside and gently tap it to dislodge loose dust. Then, rinse it with water, spraying from the clean side to push dirt out. You can use a mild soap and water solution to scrub away stubborn grime with a soft brush. Make sure to rinse it thoroughly until the water runs clear. For specific models, such as how to clean a Midea AC filter, check your unit’s manual.
After washing, allow the filter to air dry completely before putting it back into the unit. Reinstalling a wet filter can lead to mold growth inside your AC. This can cause bigger issues later. Cleaning your AC filter regularly ensures your unit breathes easy and your home stays cool and clean. I personally find this quick task makes a huge difference in my home’s air.
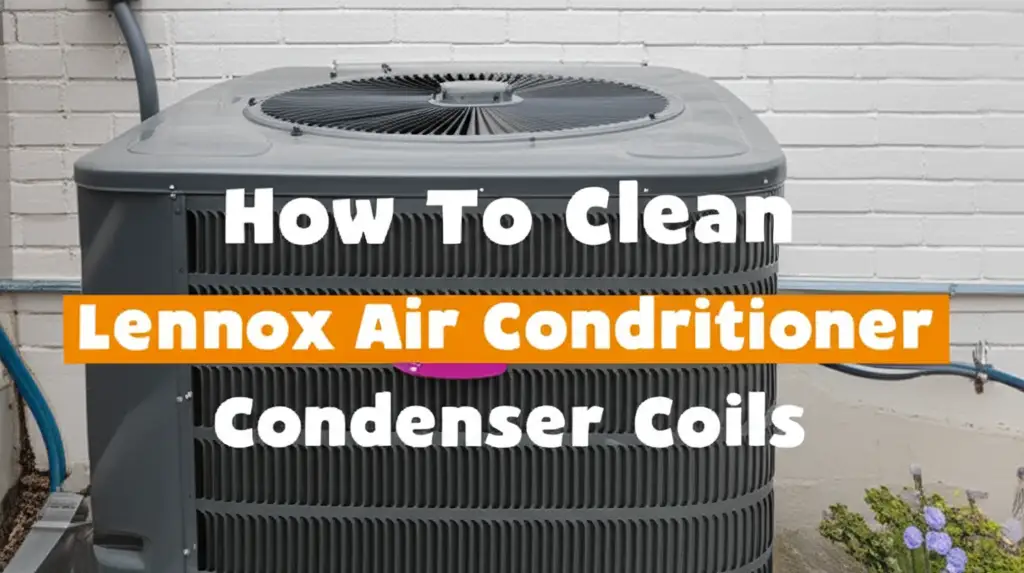
Cleaning the Evaporator Coils and Fins
The evaporator coils are a crucial part of your AC unit located inside the air handler. They absorb heat and humidity from your indoor air. Over time, these coils can accumulate a layer of dirt, dust, and grime, especially if your filter is not cleaned regularly. This buildup acts as an insulator, stopping the coils from doing their job efficiently. Cleaning them is a key step in how to clean your AC unit inside.
Before you begin, ensure the power to your unit is off at the breaker. Locate the access panel for your evaporator coils. This panel is usually on the front or side of your indoor air handler. You might need a screwdriver to remove a few screws to open it. Once open, you will see rows of thin metal fins with tubes running through them. These are your evaporator coils. You can find more details on how to clean coils on a window AC unit if that is your unit type.
First, use a soft brush or a vacuum cleaner with a soft brush attachment to gently remove any loose dust and debris from the coil surface. Be extremely careful not to bend the delicate fins. They bend easily, and bent fins block airflow. If you find any bent fins, you can gently straighten them using a fin comb. This tool is designed to separate and align the fins.
Next, apply a specialized no-rinse evaporator coil cleaner. These cleaners come in a spray can and dissolve the grime. Follow the product instructions carefully. Spray the cleaner evenly across the coil surface. The cleaner will foam up and drip into the drain pan below, carrying the dissolved dirt with it. For areas with visible mold growth, consider using a mold-specific cleaner. For instance, you may need to know how to clean mold from your AC unit or specific ways how to clean mold with vinegar for a natural solution.
Allow the cleaner to work for the recommended time. Most no-rinse cleaners are designed to condense and drain away with the normal condensation process when the unit runs again. This process effectively cleans the coils. Reassemble the access panel once you finish cleaning. This part of the cleaning ensures your AC transfers heat properly and runs efficiently.
Addressing the AC Drain Pan and Drain Line
As your evaporator coils cool the air, they remove moisture from it. This moisture drips into a drain pan located beneath the coils. From the drain pan, a drain line carries this condensate water outside your home or to a floor drain. Over time, algae, mold, and sludge can grow in the drain pan and clog the drain line. This blockage can cause water to back up, overflow the pan, and lead to water damage in your home. It can also create a musty smell.
To access the drain pan, you first need to remove the access panel for the evaporator coils, as discussed earlier. The drain pan sits directly below the coils. You will likely see standing water and perhaps some slimy buildup if it is clogged. Use a wet/dry vacuum to remove any standing water from the pan. Then, wipe the pan clean with a cloth. For stubborn residue or mold, you can use a solution of warm water and a small amount of dish soap. Some people prefer how to clean mold with bleach if they are dealing with a severe mold issue.
Next, address the drain line. This is a PVC pipe that extends from the drain pan. It may have a small access opening near the pan, often capped. Pour a mixture of distilled white vinegar (about one cup) down the drain line. Vinegar is a natural disinfectant and helps break down algae and mold. Wait for about 30 minutes to allow the vinegar to work. If you suspect a major clog, you might need to use a drain line brush, or even an air compressor for stubborn blockages. Learn more about how to clean an AC drain line with an air compressor if the vinegar does not clear it completely.
After the vinegar has had time to work, flush the line with plenty of clean water. You should see the water flowing freely out of the end of the drain line outside your home. If it drains slowly or not at all, the clog is still present. You may need to repeat the vinegar treatment or try a more forceful method. Some people use a solution of how to clean an AC drain line with bleach for persistent blockages, but use it carefully and follow safety warnings. For split AC units, you may also need to know how to clean a split AC drain pipe specifically.
Keeping the drain pan and line clear is important for preventing water damage and mold. This step is critical for your AC unit’s health and your home’s safety. I make sure to check mine regularly, especially after periods of high humidity.
Maintaining the Blower Fan and Wheel
The blower fan, or blower wheel, is responsible for moving air throughout your home. It draws air over the evaporator coils and then pushes the cooled air through your ductwork. Over time, dust, dirt, and pet hair can build up on the fan blades and the blower wheel. This buildup can reduce airflow, create an imbalance that causes noise, and make your AC unit less efficient. Cleaning the blower is a more advanced step but vital for complete indoor AC cleaning.
First, locate the blower housing. It is usually inside the air handler unit, often separate from the evaporator coils but in the same large metal box. You may need to remove additional screws or panels to access it. The blower wheel often looks like a squirrel cage. It has many small blades where dirt collects. Many people find it easiest to clean the blower wheel without removing it, which avoids a complex reassembly process. Find detailed steps on how to clean an AC blower wheel without removing it.
Once you have access, use a soft brush or a vacuum cleaner with a narrow nozzle to remove loose dust from the blower wheel and fan blades. Be gentle to avoid bending the blades. A stiff paintbrush or a specialized coil brush can work well for reaching into tight spaces between the blades. You will be surprised how much grime collects here.
For caked-on dirt, you can spray a mild cleaner onto the blades. A mixture of water and dish soap works fine, or you can use a specialized AC coil cleaner. Spray the cleaner directly onto the blades, allowing it to sit for a few minutes to loosen the grime. Be careful not to get too much moisture on electrical components or the motor. You might want to place towels or a tarp underneath to catch drips.
After applying the cleaner, use a damp cloth or soft brush to scrub the blades clean. You might need to rotate the blower wheel manually to access all sides of the blades. Wipe down any remaining residue. Ensure the blower wheel is completely dry before you close up the unit. You can use a fan or allow plenty of air circulation for drying. A clean blower fan ensures maximum airflow, making your AC unit cool your home faster and more evenly. This simple cleaning step significantly improves your AC’s performance and longevity.
Reassembly and Testing Your Clean AC Unit
After putting in all that effort to clean your AC unit inside, the final steps are to reassemble everything correctly and then test your system. This ensures all components are back in place and that your AC unit operates safely and effectively. Taking your time with these final steps is crucial.
First, check that all access panels you removed are securely reattached. Ensure all screws are tightened. Make sure no tools or debris are left inside the unit. You do not want anything to interfere with moving parts or block airflow. Double-check that your air filter is properly inserted in its slot. If it is wet, ensure it is completely dry before reinstalling it. A damp filter can lead to mold growth.
Next, head back to your home’s electrical panel. Flip the circuit breaker for your AC unit back to the “on” position. This restores power to your indoor air handler and outdoor compressor. Wait a few minutes after turning the power back on before activating the unit. This allows the system to stabilize.
Now, go to your thermostat. Switch your AC system from “off” to “cool.” Set the temperature significantly lower than your current room temperature. This will prompt the unit to turn on and begin cooling. Listen for any unusual noises, like grinding or rattling. These could indicate a problem with reassembly or a loose part. Observe the airflow coming from your vents. It should feel strong and cool.
Check for any leaks around the indoor unit. If you followed the drain line cleaning steps, ensure water is freely dripping from the outdoor end of the condensate drain line. This confirms that the drain line is clear and working correctly. If you notice any issues or your AC unit does not seem to be cooling properly, turn off the power again and recheck your work. If problems persist, it may be time to call a professional technician.
By following these reassembly and testing steps, you can feel confident that you have properly cleaned your AC unit inside. You can now enjoy the benefits of cleaner air, improved efficiency, and a cooler home. This thorough maintenance prepares your unit for reliable performance throughout the seasons.
Frequently Asked Questions
How often should I clean my AC unit inside?
You should clean your AC unit’s air filter every 1-3 months, or more often if you have pets or allergies. A deeper clean of the evaporator coils, drain pan, and blower fan is recommended once a year. This annual cleaning should ideally happen before the peak cooling season begins. Regular maintenance helps keep your system running efficiently.
Can I use bleach to clean my AC unit inside?
While bleach can kill mold, it is generally not recommended for direct use on AC coils or metal parts. Bleach can corrode aluminum fins and copper tubing over time. It can also release harsh fumes indoors. For mold in the drain pan, a diluted bleach solution (1 part bleach to 10 parts water) can be used. For coils, use specialized coil cleaners or vinegar.
What happens if I do not clean my AC unit’s inside parts?
If you do not clean your AC unit’s inside parts, dirt and grime will build up. This buildup reduces airflow and makes your unit work harder. It leads to higher energy bills, poor cooling performance, and a higher chance of breakdowns. Mold and mildew can also grow, leading to unpleasant odors and poor indoor air quality.
Can cleaning my AC unit inside save me money?
Yes, absolutely. A clean AC unit operates more efficiently. When filters, coils, and fans are free of dirt, the unit does not need to exert as much energy to cool your home. This directly translates to lower electricity bills. Regular cleaning also helps prevent costly repairs and extends the overall lifespan of your AC system.
Should I hire a professional for inside AC cleaning?
For basic cleaning tasks like filters and drain lines, you can do it yourself. However, for a very deep clean, especially of hard-to-reach components like the blower wheel or if you suspect major issues, hiring a professional HVAC technician is a good idea. They have specialized tools and knowledge to perform a thorough cleaning and inspection.
Conclusion
Keeping your air conditioning unit clean inside is more than just a chore; it is an investment in your home’s comfort, your family’s health, and your wallet. We have walked through every important step on how to clean your AC unit inside, from powering down safely to tackling filters, coils, drain lines, and even the blower fan. Following these simple, yet powerful, steps will ensure your AC unit runs at its peak performance.
Remember, a clean AC unit means colder air, lower energy bills, and better indoor air quality free from dust and mold. You have the knowledge and tools to take control of your home’s cooling system maintenance. Do not wait for your AC to start struggling. Make indoor AC cleaning a regular part of your home maintenance routine. Start today, and breathe easier knowing your air conditioning system is working for you, not against you. Your home will thank you with refreshing, clean air all season long.
- AC Cleaning
- Indoor AC Maintenance
- Home Air Quality

Todd Martin
Senior Writer
With over 15 years of experience in home renovation and design, I started HEG to share what I’ve learned with homeowners who want to create spaces that are both beautiful and functional. I’ve always believed in a hands-on approach, and over the years, I’ve picked up practical solutions that actually work. Through HEG, I aim to make home improvement more approachable, sharing real tips that help you create a home you truly love.