· Davia Murnell · Home Maintenance · 19 min read
How To Clean Between Window Panes

How To Clean Between Window Panes for Clear Views
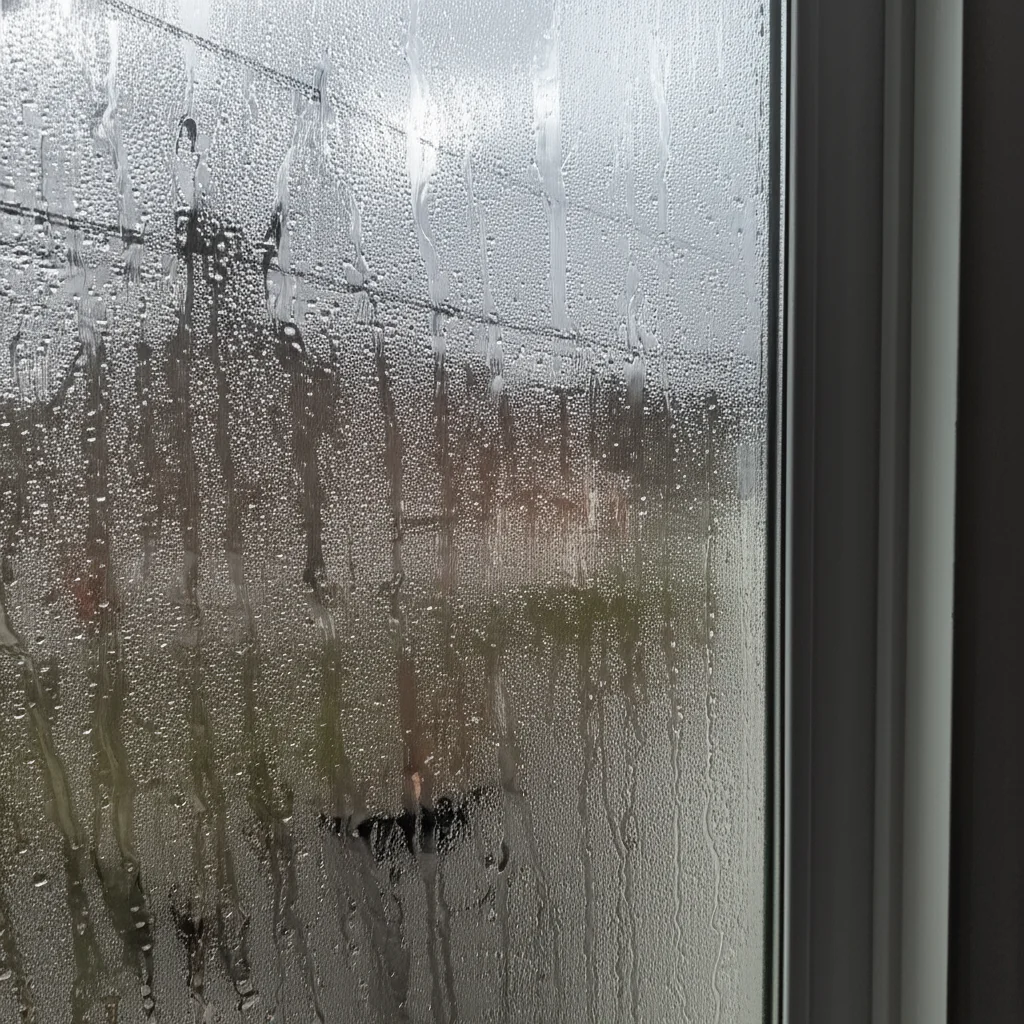
Have you ever looked out your window only to see a hazy, foggy mess between the glass panes? It is frustrating when your windows become clouded. This problem is common in double-pane windows. Dirt, dust, or moisture get trapped inside. It makes your home look less inviting.
Cleaning between window panes seems impossible. The space is sealed. However, some methods allow you to address this issue. You can restore your windows’ clarity. We will explore why this happens. We will then discuss how to clean between window panes using practical DIY methods. We will also cover when to seek professional help. My goal is to give you clear guidance. You can make your windows look brand new again.
Takeaway
- Assess the Problem: Determine if your foggy windows are caused by moisture, dust, or a failed seal.
- Consider DIY Options: Evaluate if methods like drilling tiny holes and cleaning are suitable for you.
- Gather Tools: Collect necessary items like drills, specialized nozzles, cleaning solutions, and sealants.
- Know When to Call Pros: Understand situations where professional repair or replacement is the best choice.
- Prevent Future Issues: Learn how to maintain window seals and reduce moisture buildup.
Foggy windows occur when the seal on double-pane windows fails. This allows moisture or debris to enter the space between the glass. To clean between window panes, you often need to access this sealed area. This may involve drilling small holes or using specialized cleaning techniques designed for this issue.
Understanding the Problem: Why Windows Fog Up Between Panes
Seeing foggy or dirty spots between your window panes is a common issue. It happens mostly with double-pane windows. These windows have two layers of glass with a sealed space in between. This space often contains an inert gas like argon. The gas provides insulation. A desiccant material also sits inside. This material absorbs moisture.
The primary reason windows fog up is a failed seal. Over time, the sealant around the window edges breaks down. This allows outside air and moisture to enter the insulated space. Once moisture gets in, the desiccant material becomes saturated. It can no longer absorb more water. Condensation then forms on the inside surfaces of the glass. This creates a cloudy or dirty appearance.
Sometimes, it is not just moisture. Dust, pollen, or even mold can also get inside. These particles enter through the broken seal. They stick to the glass. This makes your windows look permanently dirty. This issue is not just cosmetic. Failed seals reduce the window’s insulating properties. Your home may lose energy efficiency. Your heating and cooling costs can increase.
Identifying the cause helps determine the best solution. If you see water droplets, it is moisture. If you see streaks or dark spots, it might be dirt or mold. Addressing these problems quickly preserves your window’s function and appearance.
Is DIY Cleaning Between Window Panes Possible?
Many homeowners wonder if they can fix foggy windows themselves. The answer depends on the cause and your comfort level. For minor condensation that appears and disappears, a temporary solution might work. However, if the seal is completely broken, you need a more involved approach. It is important to know that DIY methods carry risks. You could damage the window further. You might void its warranty.
Some specialized kits exist for cleaning between window panes. These kits usually involve drilling small holes into the window. You then spray a cleaning solution inside. After cleaning, you remove the solution. You then seal the holes. This method requires precision. You must be careful not to crack the glass. You also need to re-seal the holes properly. If the holes are not sealed correctly, moisture will return.
Consider the age of your windows. Older windows might be more susceptible to damage during DIY attempts. Newer windows often come with warranties. These warranties typically cover seal failures. A DIY repair might void this protection. Always check your warranty information first.
DIY cleaning is a project for someone with patience and basic tool skills. It is not a quick fix. You must understand the steps fully before starting. Weigh the cost savings against the potential risks. If the problem is severe or you lack confidence, professional help is a better choice.
Gathering Your Tools: What You Need for the Job
Before you try to clean between window panes, gather all the necessary tools and supplies. Having everything ready saves time. It makes the process smoother. The exact tools depend on the method you choose. For the drilling method, you will need specific items.
First, you need a small drill and a very fine drill bit. A drill bit around 1/16 to 1/8 inch is common. This size makes small holes. You will also need safety glasses and gloves. Glass dust can irritate eyes and skin. A shop vacuum is useful for suction. It helps pull out moisture and debris.
For cleaning solutions, a mixture of distilled water and rubbing alcohol works well. Some people use a specialized window cleaning solution. Ensure the solution dries quickly. This prevents new moisture buildup. You will also need small, lint-free cloths or sponges. These must fit through the drilled holes. A flexible wire or specialized nozzle is often used to guide the cloth.
To re-seal the holes, you will need a special sealant. Silicone caulk or specific window sealants are common. Make sure it is clear and weatherproof. Some kits include small plastic vents for the holes. These vents allow some air circulation while preventing moisture re-entry. They also help re-balance the pressure inside the panes.
Remember to protect your work area. Lay down tarps or old sheets. This catches any debris or spills. Having proper tools means you can work efficiently. It helps you achieve the best results.
Method 1: Cleaning Between Panes by Drilling Small Holes
Cleaning foggy windows by drilling small holes is a common DIY approach. This method directly addresses the moisture and dirt trapped inside. It requires careful execution. I want to walk you through each step.
Step 1: Prepare the Window and Drill the Holes
First, clean the outside surfaces of your window. This ensures no external dirt falls into the drilled holes. Choose a discreet spot for drilling. The upper corners of the window are often best. This area is less visible. Use a fine drill bit, usually 1/16 or 1/8 inch. Attach a drill stop to the bit. This prevents drilling too deep. You only want to penetrate the first pane of glass and the spacer.
Place a piece of painter’s tape over the drill spot. This helps prevent the bit from slipping. It also reduces glass splintering. Drill slowly and steadily. Apply light pressure. Do not push too hard. Once the hole is drilled, use a small vacuum. Gently suction any glass dust. Repeat this for a second hole on the opposite side or a lower corner. This creates airflow. It helps with drying.
Step 2: Extract Moisture and Debris
Now, connect a hose or nozzle to your shop vacuum. Insert the nozzle into one of the drilled holes. This creates suction. The suction pulls out loose debris and some moisture. While the vacuum is running, gently tap the window. This helps dislodge any stuck dirt or water droplets.
For stubborn moisture, you might need to insert a fine tube. This tube connects to a small compressor. Blow compressed air into one hole. The air pushes moisture out the other hole. Be careful with air pressure. Too much pressure can damage the seal further. This step focuses on removing existing moisture and loose particles.
Step 3: Introduce Cleaning Solution
Mix your cleaning solution. Distilled water with a small amount of rubbing alcohol works well. The alcohol helps with quick drying. You can also use a mild glass cleaner. Use a sprayer with a fine nozzle. Insert the nozzle into one of the drilled holes. Spray the solution inside the window.
Aim to coat the inner surfaces of both panes. Do not use too much solution. Excess liquid can be difficult to remove. Let the solution sit for a few minutes. This allows it to break down dirt and grime. For larger areas, you may need to spray from both holes.
Step 4: Clean the Inner Surfaces
This is the trickiest part. You need to wipe the inner glass. Some kits include small, flexible wands with microfiber pads. Insert the wand through one hole. Maneuver it to wipe down the glass. Work slowly and thoroughly. You can use a magnet system with a magnet on the outside. This guides an internal cleaning pad.
Make sure to get into the corners. Remove all streaks and dirt. This process requires patience. It can take time to get the glass perfectly clean. The goal is to remove all traces of the initial problem.
Step 5: Dry the Inner Space
Thorough drying is crucial. Any remaining moisture will cause fogging again. You can use a small air compressor. Blow dry air into one hole. The air exits the other hole. This circulates dry air. You can also place desiccant packets near the holes. These absorb residual moisture.
Many people leave the holes open for a day or two. This allows natural air circulation to dry the space completely. Ensure the weather is dry. Humidity will counteract your efforts. Use a fan to blow air towards the holes. This speeds up the drying process. Once completely dry, move to the final step.
Step 6: Re-seal the Holes
When the inner space is perfectly dry, it is time to seal the holes. You can use specialized window sealants. Clear silicone caulk is a common choice. Apply a small amount of sealant into each hole. Ensure it fills the hole completely. Wipe away any excess.
Some kits come with small plastic vents. These vents fit into the holes. They allow for minor pressure equalization. They also prevent moisture re-entry. These vents are designed to be almost invisible. Proper sealing is critical. It maintains the window’s insulating properties. It prevents future moisture issues. After sealing, your window should be clear again.
Method 2: Addressing Condensation (Temporary Fixes & Prevention)
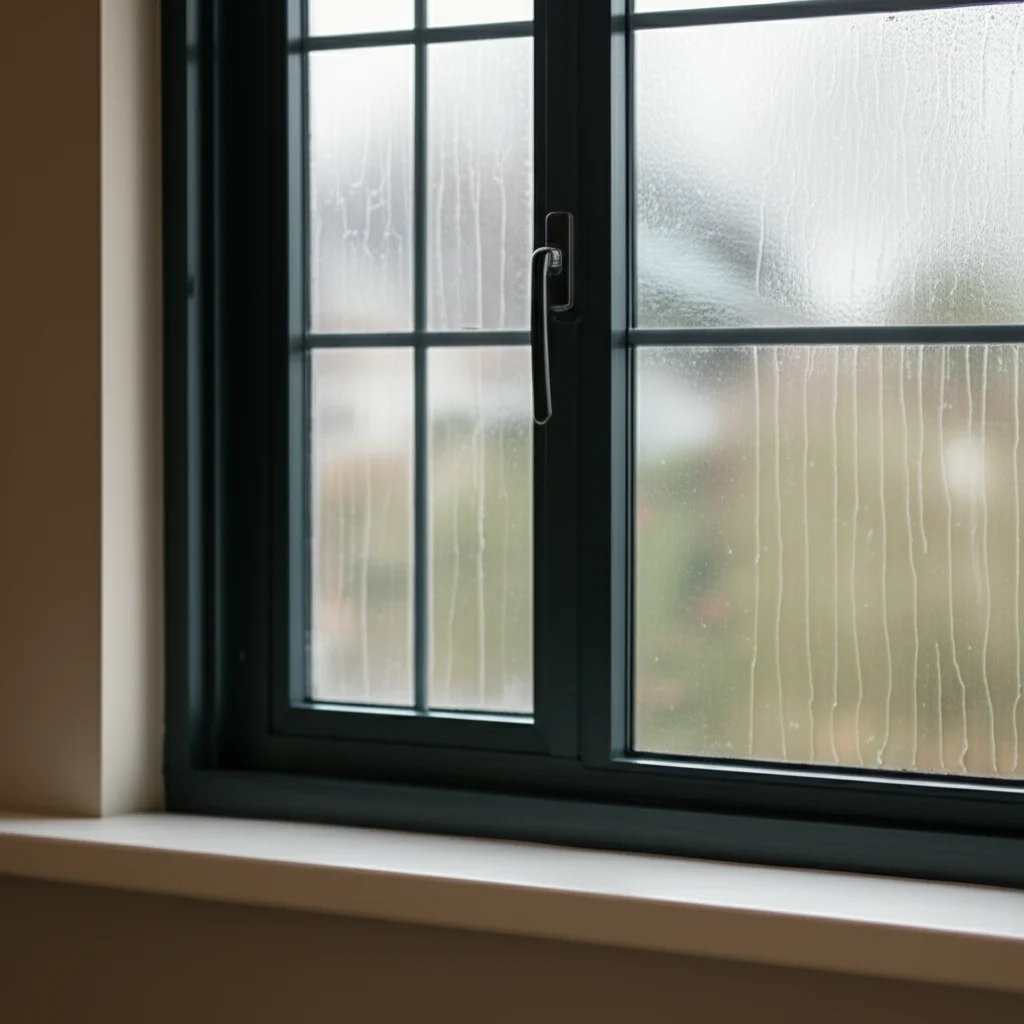
Sometimes, the fogging between window panes is due to high humidity inside your home. This is different from a failed seal. If condensation appears and disappears, it might not be a permanent seal failure. There are temporary fixes and preventative measures you can take. These methods do not involve drilling.
First, identify the source of the moisture. High humidity in kitchens, bathrooms, and laundry areas often contributes. Using exhaust fans during cooking or showering helps. Running a dehumidifier can significantly reduce indoor humidity levels. I find this especially helpful in basements or damp climates. Good air circulation is also key. Open windows for short periods on dry days. This allows fresh air to circulate. It helps reduce trapped moisture.
For existing condensation inside the panes, a temporary defogging solution can be used. These solutions typically involve a chemical that draws out moisture. You apply it to the outer surface of the window. It helps to reduce the appearance of fog. However, this is a cosmetic fix. It does not address the underlying seal issue. If the seal is truly broken, the condensation will return.
You can also use moisture-absorbing products. Placing desiccant packets on your window sills can help. These packets absorb ambient moisture. They reduce the humidity near the windows. This can prevent condensation from forming on the inside. Keeping your home well-ventilated is the best long-term prevention. Regularly check weather stripping and caulking around your windows. Ensure these are in good condition. They prevent drafts and moisture entry. For advice on exterior window elements, you can read about how to clean vinyl window frames.
When to Call a Professional for Foggy Windows
While DIY methods offer a solution for some, there are times when professional help is essential. Knowing when to call an expert saves you time, effort, and potential further damage. Professionals have specialized tools and knowledge. They can fix issues safely and effectively.
If your windows are still under warranty, a professional repair is usually the best option. Many window manufacturers offer warranties that cover seal failure. Attempting a DIY repair might void this warranty. Check your original purchase documents or contact the manufacturer. They may repair or replace the unit for free. This protects your investment.
Extensive damage or persistent fogging points to a bigger problem. If the fogging covers a large area, or if it returns quickly after a DIY attempt, the seal might be severely compromised. In such cases, the desiccant material inside the window is likely saturated beyond recovery. A professional can assess the damage. They might suggest replacing the insulated glass unit (IGU) itself. This involves replacing only the glass panes, not the entire window frame. This is less costly than a full window replacement.
Complex window designs also benefit from professional attention. Bay windows, custom shapes, or very large windows are difficult to work on yourself. These windows often require specific handling. Professionals have the experience to handle these without breaking the glass or damaging the frame. They can also address issues like how to clean mold off window sills, which can occur alongside window fogging.
Finally, if you are uncomfortable with drilling or working with glass, call a pro. Safety is paramount. Glass can be dangerous. Professionals have the right safety gear and training. They ensure the job is done correctly and safely. Investing in professional repair ensures a lasting solution. It restores your window’s clarity and energy efficiency.
Maintaining Window Clarity: Prevention Tips for Lasting Results
After you successfully clean between window panes, you want to keep them clear. Prevention is always better than cure. Taking proactive steps ensures your windows stay in top condition. This maintains both their appearance and energy efficiency.
One key aspect of window clarity is managing indoor humidity. High humidity is a primary cause of condensation. Use exhaust fans in kitchens and bathrooms. Run a dehumidifier in damp areas, like basements. This helps keep indoor moisture levels in check. Adequate ventilation also prevents moisture buildup. Open windows for a few minutes each day. This circulates fresh air.
Regularly inspect your window seals and frames. Look for cracks, gaps, or signs of wear. If you find any issues, re-caulk or replace weather stripping promptly. This creates a tight seal. It prevents moisture and air from entering the space between the panes. You can use various sealants. Some popular cleaning solutions, such as those made from how to clean with vinegar and baking soda, can also be used for general window frame cleaning, but not for sealing.
Clean your windows regularly, both inside and out. Dirt and grime can accumulate on the glass. While this does not cause internal fogging, it makes any internal issues less noticeable. Keep the exterior of your windows clear. This lets you spot problems early. Use a squeegee and glass cleaner for best results.
Protect your windows from extreme temperatures. Direct sunlight can cause seals to degrade faster. Use blinds or curtains during peak sun hours. This reduces thermal stress on the glass. Ensure proper drainage around your windows. Water pooling near the frames can damage the seals over time.
By following these prevention tips, you extend the life of your windows. You keep them clear and beautiful. This reduces the need for extensive cleaning or repairs. Regular maintenance is key to long-lasting window clarity.
Common Misconceptions About Foggy Windows
Many people hold beliefs about foggy windows that are not entirely accurate. It is important to understand the truth behind these common misconceptions. This helps you choose the right solution.
First, a common thought is that foggy windows mean you need a brand-new window. This is often untrue. The issue typically lies with the insulated glass unit (IGU) itself. This unit is the two panes of glass and the sealed space in between. You can often replace just this glass unit. You do not have to replace the entire window frame. This saves considerable money. Frame replacement is only necessary if the frame is damaged or rotted.
Another misconception is that cleaning the outside of the window will fix internal fogging. While cleaning the exterior is good for general maintenance, it does nothing for moisture trapped between the panes. The dirt and moisture are on the inside surfaces of the sealed unit. You cannot reach them with standard cleaning methods. This is why specialized techniques, like drilling, are needed for internal cleaning.
Some believe that fogging only happens to old windows. While older windows are more prone to seal failure, new windows can also fog up. Manufacturing defects or improper installation can cause seals to fail prematurely. Extreme weather conditions also contribute. A sudden temperature change can stress a seal. Therefore, seeing fog in a relatively new window does not necessarily mean it is defective.
Finally, some think that drilling holes is a permanent fix without proper re-sealing. This is false. Drilling creates a way to clean the inside. However, if you do not seal the holes properly, moisture will re-enter. The problem will reappear. Proper sealing is critical for a lasting solution. It helps maintain the window’s insulating value. Understanding these points helps you approach foggy window issues with correct information.
DIY vs. Professional Window Cleaning Between Panes: Weighing Your Options
Deciding between DIY and professional solutions for cleaning between window panes involves weighing several factors. Both options have pros and cons. My goal is to help you make an informed decision based on your specific situation.
DIY Cleaning: The primary advantage of DIY is cost savings. You only pay for tools and materials. This can be significantly cheaper than hiring a professional. For those who enjoy hands-on projects, it offers a sense of accomplishment. You have immediate control over the process. You can work at your own pace. If you have basic handy skills, this might seem like a good choice. You can apply methods such as those used for [how to clean shower head with vinegar] (https://homeessentialsguide.com/how-to-clean-shower-head-with-vinegar) for some internal cleaning solutions, though the application method is very different.
However, DIY comes with considerable risks. You could damage the glass, leading to more expensive repairs. Improper drilling or sealing can worsen the problem. You might void your window warranty. The results might not be perfect. Streaks or residual moisture could remain. This means repeated attempts. DIY is best for minor issues. It suits those with some experience and patience. It is also good for windows past their warranty period.
Professional Cleaning or Repair: Hiring a professional ensures a quality outcome. Professionals have specialized tools. They have expertise in handling glass. They can diagnose the exact cause of the fogging. They offer solutions that range from re-sealing to replacing the glass unit. Many professionals also offer warranties on their work. This provides peace of mind.
The main drawback is cost. Professional services are more expensive than DIY. However, this investment often means a longer-lasting solution. It prevents future problems. It ensures the window retains its energy efficiency. Professional help is ideal for severe fogging. It is best for windows still under warranty. It is also good for complex window types. If you lack confidence or time, a pro is the clear choice.
Ultimately, your decision depends on your budget, skill level, and the severity of the problem. For small, isolated issues, DIY might be worth a try. For widespread or recurring fogging, or if you value professional results and warranty protection, calling an expert is often the wiser choice.
FAQ Section
How long does it take for condensation to disappear after cleaning between window panes?
After cleaning, the drying process is critical. If you use the drilling method, it can take 1-3 days for the inner space to fully dry. This depends on humidity levels and air circulation. Proper air flow or desiccant use speeds up drying. If moisture reappears quickly, the re-seal might not be effective, or the initial cause was not fully addressed.
Can mold grow between window panes?
Yes, mold can grow between window panes. When a window seal fails, moisture and airborne mold spores can enter the insulated space. These spores find a dark, damp environment, which is ideal for mold growth. Cleaning mold from this area is difficult. It usually requires specialized solutions and thorough drying.
What causes condensation inside new double-pane windows?
Condensation inside new double-pane windows often points to a manufacturing defect or improper installation. A faulty seal from the factory can allow moisture to enter. Damage during shipping or installation can also compromise the seal. In such cases, the window is usually still under warranty, and you should contact the manufacturer or installer.
Is it safe to drill into a double-pane window?
Drilling into a double-pane window carries risks. There is a chance of cracking the glass, especially without proper technique and tools. You must use a very fine drill bit and apply light pressure. Always wear safety glasses. This method also voids most window warranties. It is a DIY repair meant for windows where professional repair is not an option or desired.
How do I know if my window seal is broken?
A broken window seal is evident if you see persistent fogging, moisture, or dirt between the glass panes. This condensation or grime does not wipe away from the inside or outside. If the fog appears and disappears, it might just be high humidity, but constant fogging indicates a seal failure. This loss of insulation can also lead to higher energy bills.
Can a broken window seal be repaired without replacing the glass?
Yes, in some cases, a broken window seal can be repaired without full glass replacement. Services exist that can extract moisture, clean the panes, and re-seal the unit. This often involves drilling small holes. However, this method is not always guaranteed to be a permanent solution. The effectiveness depends on the extent of the seal damage and the skill of the repair.
Conclusion
Seeing cloudy or dirty spots between your window panes is frustrating. It impacts your home’s appearance and energy efficiency. We explored the reasons this happens. We also discussed how to clean between window panes. You learned about DIY methods. These include carefully drilling holes to access the sealed space. We also covered temporary fixes for condensation. My goal is to empower you with knowledge. You can choose the best path for your windows.
Remember, a failed seal is the root cause of persistent fogging. While DIY solutions offer a cost-effective alternative, they come with risks. Consider your comfort level with tools. Evaluate the age and warranty of your windows. Sometimes, calling a professional is the smartest choice. They offer specialized tools and expertise. This ensures a lasting solution. Maintaining clear windows contributes to a brighter, more efficient home. With the right approach, you can enjoy clear views again. Take action today. Bring back the sparkle to your windows!
- window cleaning
- foggy windows
- double pane windows
- moisture removal
- home improvement

Davia Murnell
Room Cleaning Expert
Before joining HEG, I spent over a decade running my own window cleaning business, where I perfected streak-free techniques and learned the ins and outs of specialty glass care. Now, I bring that expertise to a broader mission—helping homeowners maintain sparkling windows and beautiful outdoor spaces. From skylights and sliding doors to patio glass and outdoor furniture, I believe every surface deserves attention and care. I share practical tips and proven methods that make even the toughest cleaning jobs feel manageable. Whether you're battling pollen on the porch or smudges on high windows, I’m here to help you see your home in a whole new light—literally.