· Todd Martin · Fish Preparation · 22 min read
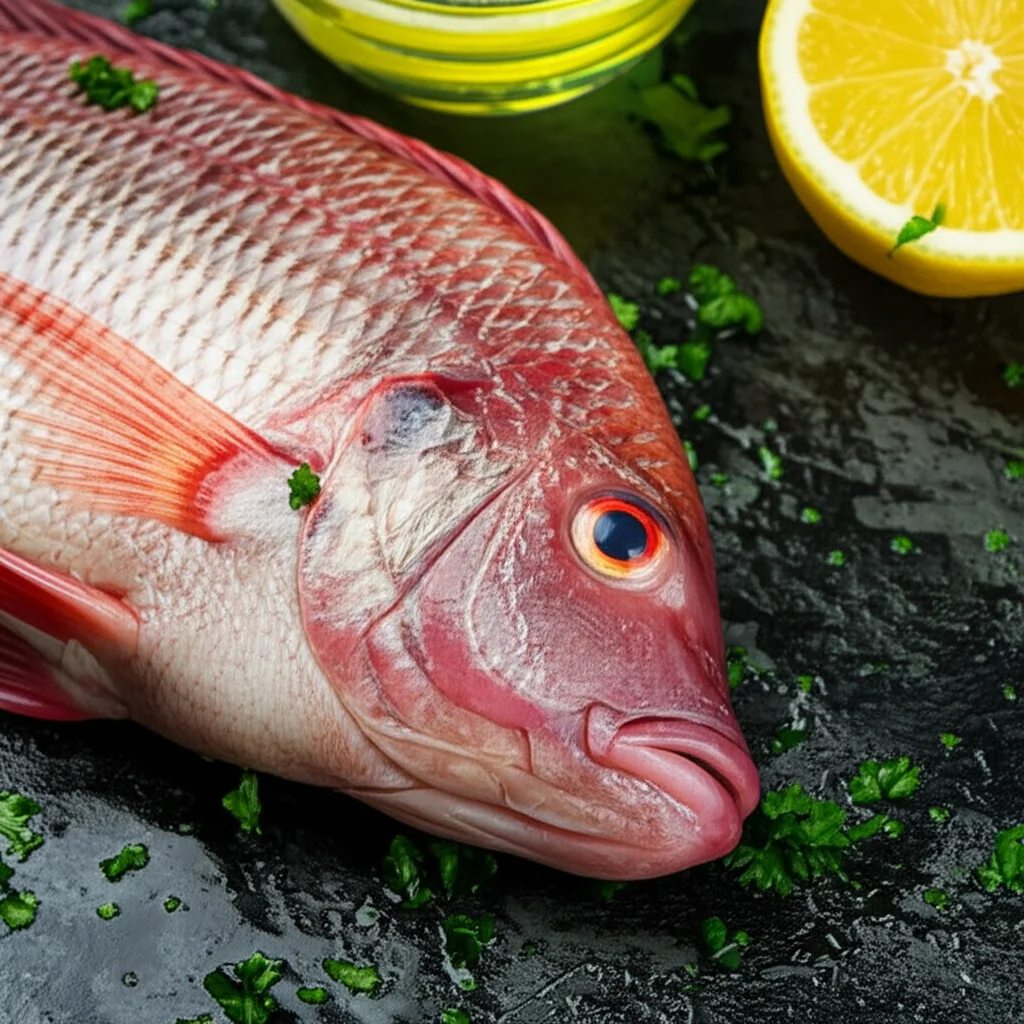
How To Clean Bream

Learn How To Clean Bream for Fresh, Delicious Meals
There is nothing quite like preparing fresh fish at home. If you have just returned from a fishing trip, or found a great deal at the market, you might wonder how to clean bream properly. Cleaning bream ensures you get the best taste and texture from your catch. It removes scales, guts, and bones, leaving you with pure, edible fish.
This comprehensive guide will walk you through every step of cleaning bream. We will cover necessary tools, workspace setup, scaling, gutting, and filleting techniques. You will also learn about preparing whole fish, storage, and crucial safety tips. Master these skills to enjoy delicious bream dinners.
Takeaway
- Gather Tools: Collect sharp knives, a scaling tool, cutting board, and gloves.
- Prepare Workspace: Set up a clean, non-slip surface near a water source.
- Scale Bream: Scrape scales against grain from tail to head.
- Gut Bream: Make a shallow cut from vent to gills and remove entrails.
- Fillet Bream: Cut along the backbone to separate fillets, then remove skin and pin bones.
- Store Properly: Rinse, pat dry, and store bream in ice or airtight containers in the fridge or freezer.
- Practice Safety: Use sharp knives carefully and maintain strict hygiene.
How do you clean bream?
To clean bream, first, gather your tools, including a sharp knife and scaler. Then, scale the fish by scraping against the grain from tail to head. Next, make a shallow cut along the belly from the vent to the gills to remove the entrails. Finally, rinse the fish thoroughly with cold water inside and out, pat it dry, and prepare for cooking or storage.
Gathering Your Tools for Cleaning Bream
Getting ready to clean bream starts with having the right tools. Proper equipment makes the job easier and safer. You want to make sure every tool is clean and sharp. A dull knife is more dangerous than a sharp one because it can slip.
My own experience taught me that good tools save time and effort. I remember struggling with a poor knife once, and it made the whole process frustrating. Having the correct gear ensures a smooth cleaning experience. This section helps you collect what you need before you start.
Essential Gear for Fish Preparation
You do not need many tools to clean bream effectively. A few key items will do the trick. Each tool serves a specific purpose in preparing the fish. Think about comfort and grip when choosing your tools.
- Sharp Fillet Knife: This is your most important tool. A sharp, flexible fillet knife helps you make precise cuts. It will cleanly remove scales, open the belly, and separate meat from bones. Look for a blade around 6 to 8 inches long.
- Scaling Tool or Spoon: A dedicated fish scaler works best for removing scales. If you do not have one, the back of a sturdy spoon can also work. Some people use a knife’s dull side, but this can damage the flesh if not done carefully.
- Cutting Board: Use a large, non-slip cutting board. A plastic board is ideal because it is easy to clean and sanitize. Place a damp towel underneath the board to prevent it from sliding.
- Gloves (Optional but Recommended): Latex or nitrile gloves protect your hands. They offer a better grip on the slippery fish. They also help maintain hygiene and prevent odors from lingering on your hands.
- Large Bowl or Sink: You will need a place to collect scales and guts. A large bowl placed directly under your cutting area keeps the mess contained. A utility sink is also very helpful for rinsing.
- Paper Towels or Clean Cloths: These are for wiping down your hands and tools. They help keep your workspace tidy throughout the cleaning process. Clean cloths are reusable and more environmentally friendly.
Having these tools ready makes the process simple. They help you clean bream efficiently and safely. Each item plays a role in preparing your fish for cooking.
Setting Up a Sanitary Workspace to Clean Fish
Preparing your workspace is just as important as gathering your tools. A clean and organized area ensures hygiene and efficiency. You want to avoid any cross-contamination. A proper setup also helps contain the mess that comes with cleaning fish.
I always make sure my area is ready before I bring out the fish. This simple step prevents a lot of hassle later on. A well-prepared space makes the cleaning process enjoyable, not a chore. This section guides you through setting up your ideal fish cleaning station.
Creating an Efficient Fish Cleaning Station
Your cleaning station needs to be both clean and practical. Consider location, surface, and proximity to water. A good setup helps you move smoothly from one step to the next. It also makes cleanup much easier.
- Choose the Right Location: Pick an area that is easy to clean. A kitchen counter near a sink is a good choice. An outdoor table with access to a hose is also excellent, especially for larger quantities of fish. You want good lighting to see what you are doing.
- Sanitize Your Surfaces: Before you even bring out the fish, wipe down your counter or table. Use a mild bleach solution or an antibacterial spray. This eliminates any existing germs. Cleaning the surface beforehand creates a safe starting point.
- Use a Dedicated Cutting Board: Place your large, non-slip cutting board firmly on the sanitized surface. As mentioned before, a damp towel underneath helps prevent slipping. This dedicated board keeps fish juices from spreading to other areas.
- Prepare Waste Disposal: Have a large bag or bowl ready for scales, guts, and other waste. Position it close to your cutting board for easy disposal. This prevents you from tracking fish parts around your kitchen.
- Access to Running Water: Make sure you have easy access to cold running water. This is crucial for rinsing the fish at various stages. A faucet with a sprayer attachment is very helpful. Rinse your hands and tools often.
- Keep Paper Towels Handy: Have a roll of paper towels within easy reach. You will use these frequently to wipe your hands, the knife, and the cutting board. This keeps your workspace clean during the process.
Setting up a clean and organized workspace prepares you to clean bream efficiently. It reduces mess and keeps your kitchen safe. A good setup means you can focus on the fish.
Mastering the Art of Scaling Bream
Scaling bream is often the first step in cleaning the fish. It removes the outer layer of scales, which are not pleasant to eat. While some chefs prefer to keep the skin on for cooking, most home cooks remove the scales. This process can be messy, but with the right technique, it becomes simple.
I learned that tackling the scales first makes the rest of the cleaning easier. It gets the messiest part out of the way. Plus, a properly scaled fish looks much better on the plate. This section will guide you through the best way to scale your bream.
Step-by-Step Guide to Descaling Your Catch
Scaling is a quick process once you get the hang of it. The goal is to remove all scales without damaging the fish flesh. Be patient, especially with your first few fish. You will become faster with practice.
- Rinse the Fish: Hold the bream under cold running water. This helps to wash off any loose debris. It also moistens the scales, making them easier to remove. Ensure the fish is thoroughly wet.
- Hold the Fish Firmly: Place the bream on your cutting board. Grip the fish tightly by its tail with one hand. You can use a paper towel or a glove for a better grip. Holding it firmly prevents it from slipping during scaling.
- Start Scraping from Tail to Head: Take your fish scaler or the back of a spoon. Begin scraping firmly against the grain of the scales. Start from the tail and move towards the head. Use short, firm strokes. The scales should come off easily.
- Work All Sides: Scale both sides of the fish. Pay extra attention to areas around the fins and gills. Scales often hide in these tight spots. Work methodically to ensure you cover every part of the fish.
- Be Gentle Around Fins: Scales around the fins can be tricky. Use less pressure in these areas. You do not want to tear the delicate fin tissue or the skin. Angle your scaler to get into awkward spots.
- Rinse Again: Once you believe all scales are removed, rinse the fish under cold water once more. Feel the fish with your fingers. If you feel any rough patches, those are missed scales. Go back and scrape those spots again.
- Clean Your Workspace: After scaling, you will likely have scales everywhere. Wipe down your cutting board and surrounding area immediately. This prevents scales from drying and sticking. Place the collected scales into your waste bag.
Mastering the scaling process is a fundamental step. It prepares your bream for the next stages of cleaning. You are now ready to tackle the internal cleaning.
The Essential Steps for Gutting Bream
Gutting bream is the next crucial step after scaling. This process involves removing the internal organs, or entrails, from the fish. It prevents spoilage and ensures the fish is clean and edible. Gutting might seem a bit daunting at first, but it is a straightforward procedure.
I recall my first time gutting a fish; I was nervous about making the right cut. With a little practice, it quickly became routine. Proper gutting keeps the fish fresh and tastes better. This section will guide you through the process clearly.
How to Clean Out the Inside of Your Bream
Gutting should be done carefully to avoid breaking the gallbladder, which contains bitter bile. Work methodically to ensure all internal organs are removed. You will need your sharp fillet knife for this step.
- Position the Fish: Place the scaled bream on your cutting board. Position it with its belly facing you. This gives you the best angle for the cut. Make sure the fish is stable and won’t slide.
- Make the Initial Cut: Take your sharp fillet knife. Make a shallow cut along the belly of the fish. Start from the anal vent (the small opening near the tail) and cut up towards the gills. The cut should be just deep enough to open the skin and muscle layer, but not so deep that you puncture the intestines. You only want to open the belly cavity.
- Open the Cavity: Gently widen the cut with your fingers or the knife tip. Be careful not to rupture any organs. This creates an opening to access the entrails. The cavity should be fully exposed.
- Remove the Entrails: Reach into the cavity with your fingers. Gently pull out all the internal organs. Start near the head and work your way down. You will find the liver, stomach, intestines, and sometimes roe (eggs) or milt. Discard them into your waste bag.
- Scrape Along the Backbone: Run your thumb or a small spoon along the backbone inside the cavity. You will feel a dark, blood-like line, which is the kidney. Scrape this away firmly. Removing this bloodline improves the taste and shelf life of the fish.
- Rinse Thoroughly: Hold the gutted bream under cold running water. Rinse the entire cavity thoroughly. Make sure no bits of entrails or blood remain. You want the cavity to be completely clean. I also recommend checking articles on how to clean crab or how to clean shrimp for related seafood cleaning tips. These techniques, while different, share the common goal of thorough preparation.
- Inspect for Cleanliness: Run your fingers inside the cavity once more. Feel for any remaining bits. The inside should feel smooth and clean. A well-gutted fish will store better and taste cleaner.
Gutting the bream correctly is a vital step. It prepares the fish for whole cooking or for the next stage: filleting. You are now closer to enjoying your fresh catch.
Expert Techniques for Filleting Bream
Filleting bream transforms the whole fish into boneless, skinless portions. This method is preferred for many recipes. It makes eating the fish much easier, especially for children. Filleting can seem challenging, but it is a skill that improves with practice.
I used to be intimidated by filleting. After many attempts, I learned the angles and the feel of the knife against the bone. It is rewarding to produce perfect fillets. This section will break down the process of filleting bream, making it accessible.
Transforming Your Bream into Perfect Fillets
Filleting requires precision and a very sharp knife. The goal is to maximize meat yield while minimizing bones. Take your time, especially when learning. Focus on smooth, deliberate cuts.
- Position the Gutted Fish: Place the scaled and gutted bream on your cutting board. The back of the fish should face you. This provides a good starting point for your first cut.
- Make the First Head Cut: Cut behind the pectoral fin. Angle your knife towards the head. Cut down to the backbone, but not through it. This creates a hinge at the top of the fish.
- Cut Along the Backbone: Turn the fish so its tail faces you. Insert your knife into the initial cut, just above the backbone. Keep the blade flat against the backbone. Slice along the entire length of the fish towards the tail. Use sawing motions if needed. The goal is to separate one fillet from the body.
- Remove the First Fillet: Once you reach the tail, the first fillet should be mostly free. Gently pull it away from the frame. If any small bits remain connected, carefully cut them free.
- Flip and Repeat for the Second Fillet: Flip the fish over. Repeat steps 2-4 for the other side. Make the initial cut behind the fin, then slice along the backbone. You should now have two distinct fillets and a fish frame (bones).
- Remove the Rib Bones (Optional, but Recommended): The fillets will still have rib bones. Place a fillet skin-side down. Feel for the ends of the rib bones. Angle your knife slightly upwards and slice along the curve of the rib cage. Cut out the entire section of rib bones. You can use a pair of kitchen shears for this step if preferred.
- Skinning the Fillet:
- Place a fillet skin-side down on the cutting board.
- Make a small cut at the tail end, just through the skin, without cutting the flesh.
- Grip the skin firmly with one hand.
- Angle your knife slightly downwards. Keep it flat against the cutting board.
- Work the knife between the skin and the flesh, pushing forward while pulling the skin backward. The skin should peel away cleanly.
- Check for Pin Bones: Even after filleting and removing rib bones, small pin bones can remain. Run your finger along the center line of the fillet. If you feel any tiny, sharp bones, pull them out with fish tweezers or pliers.
You now have beautiful, boneless, and skinless bream fillets. These are ready for cooking in any recipe. Compare this process to how you might clean other seafood, like learning how to clean lobster or how to clean clams, where the goal is also to extract edible parts efficiently.
Preparing Bream for Whole Fish Cooking
Sometimes, you do not want to fillet your bream. Cooking a whole fish can be a stunning presentation. It also helps the fish stay moist. This method is popular for baking, grilling, or frying. Even when cooking whole, the bream still needs cleaning.
I find that cooking fish whole imparts a deeper flavor. The bones and head add richness to the dish. It is a simpler cleaning process than filleting. This section will guide you on how to prepare bream when you plan to cook it whole.
Essential Steps for Whole Bream Preparation
When cooking bream whole, the main tasks are scaling and gutting. You keep the head and tail intact. This method is often quicker than filleting. It also leaves less waste.
- Scale the Bream Thoroughly: Just like with filleting, you must remove all scales. Follow the steps outlined earlier: rinse the fish, hold it firmly by the tail, and scrape against the grain from tail to head. Ensure all scales are gone from both sides, around fins, and near the gills. Missed scales can be unpleasant to eat.
- Gut the Bream Carefully: The internal organs must be removed. Make a shallow cut from the anal vent up to the gills along the belly. Gently open the cavity and pull out all entrails. Scrape out the dark bloodline along the backbone. Rinse the cavity thoroughly under cold running water until it is completely clean.
- Trim Fins (Optional): Some people prefer to trim the dorsal fin, anal fin, and pectoral fins. You can use kitchen shears for this. Trimming makes the fish easier to handle after cooking. However, keeping them on is perfectly fine for presentation and flavor. The tail fin is usually left on.
- Remove Gills (Optional, but Recommended): Gills can sometimes add a bitter taste. To remove them, lift the gill cover and snip the top and bottom attachments of the gills with kitchen shears. Pull them out carefully. This is a crucial step for cleaner flavor, especially for larger fish.
- Rinse and Pat Dry: After scaling and gutting, give the entire fish a final, thorough rinse inside and out with cold water. Pat the bream very dry with paper towels. Dryness helps with crisping the skin during cooking.
- Score the Skin (Optional): For baking or grilling, make two or three shallow diagonal cuts on each side of the fish. These cuts should go through the skin and just into the flesh. Scoring helps the fish cook more evenly. It also allows seasonings to penetrate better. It helps the skin get crispy.
Preparing bream whole is a fantastic way to enjoy its full flavor. The simplicity of this cleaning process makes it appealing. Your whole bream is now ready for your favorite recipe.
Proper Storage and Post-Cleaning Care for Bream
After you clean bream, proper storage is vital. Fresh fish spoils quickly if not handled correctly. Proper storage ensures your cleaned bream remains safe and delicious. Whether you plan to cook it immediately or store it for later, certain steps are key.
I have learned that chilling fish quickly after cleaning extends its freshness. There is nothing worse than fresh fish going bad. This section will guide you on how to store your cleaned bream to maintain its quality.
Keeping Your Cleaned Bream Fresh
The goal of post-cleaning care is to keep bacteria at bay. Cold temperatures slow down spoilage. Air exposure can dry out the fish. Knowing the right storage methods makes all the difference.
- Final Rinse and Pat Dry: After cleaning, rinse the bream one last time with cold water. Ensure all remnants of scales, blood, or guts are gone. Then, pat the fish very dry with paper towels. Excess moisture can speed up bacterial growth.
- Immediate Refrigeration: If cooking within 1-2 days, store the bream in the refrigerator.
- Wrap Individually: Wrap each cleaned bream or fillet tightly. Use plastic wrap, wax paper, or aluminum foil. This prevents air exposure and odors.
- Place on Ice: For best results, place the wrapped fish in a shallow dish. Then, bury it in ice. Change the ice daily as it melts. The colder the fish, the longer it stays fresh.
- Use an Airtight Container: If not using ice, place the wrapped fish in an airtight container. This prevents fish odors from spreading to other foods. It also protects the fish from drying out.
- Freezing for Longer Storage: For longer storage, freezing is the best option. Bream can be frozen for several months.
- Vacuum Seal: The best way to freeze fish is using a vacuum sealer. This removes all air, preventing freezer burn.
- Water Glaze (Alternative): If no vacuum sealer, place the fish in a container. Cover it with water and freeze. The ice layer protects the fish from air. This method works well for whole fish or fillets.
- Freezer Bags: Wrap fish tightly in plastic wrap first. Then place it in a freezer-safe bag. Squeeze out as much air as possible before sealing.
- Label and Date: Always label your frozen fish with the date. This helps you use it within its peak quality period. Most fish stay good for 3-6 months in a standard freezer.
- Thawing Frozen Bream: Thaw frozen bream slowly. Transfer it from the freezer to the refrigerator the night before use. This slow thawing maintains texture and flavor. Avoid thawing at room temperature, which can encourage bacterial growth.
- Clean Up Your Tools and Workspace: Immediately after storage, clean all your tools and the workspace. Wash your cutting board, knives, and any bowls with hot, soapy water. Sanitize surfaces to prevent cross-contamination. This is similar to how you would clean your kitchen tools after preparing other meals, such as learning how to clean a skillet or general how to clean cookware. Consistent cleaning habits keep your kitchen safe.
Proper storage after you clean bream ensures you enjoy fresh, safe, and tasty meals. It is a critical step in the overall process of fish preparation.
Safety First: Essential Hygiene Tips for Cleaning Fish
Cleaning bream involves raw food, sharp tools, and a potentially messy process. Ensuring safety and hygiene is paramount. Proper practices protect you from injury. They also prevent foodborne illnesses. Ignoring these tips can lead to unpleasant consequences.
I have always prioritized safety in the kitchen, especially with raw meat. A small cut or improper handling can lead to big problems. This section will cover the vital safety and hygiene measures you must follow when cleaning fish.
Protecting Yourself and Your Food
Maintaining a clean environment and using tools correctly prevents accidents. It also ensures the fish you prepare is safe to eat. Think about every step, from preparation to cleanup.
- Always Use a Sharp Knife: This might seem counterintuitive, but a sharp knife is safer than a dull one. A sharp blade cuts cleanly and requires less force. A dull knife can slip easily, leading to cuts. Always cut away from your body.
- Wear Protective Gloves: Disposable latex or nitrile gloves offer several benefits. They provide a better grip on slippery fish. They protect your hands from cuts and odors. They also prevent cross-contamination from your hands to the fish.
- Use a Non-Slip Cutting Board: A stable cutting surface is crucial. Place a damp cloth or paper towel underneath your cutting board. This prevents it from sliding around while you are working. A moving board can lead to serious knife accidents.
- Wash Hands Frequently: Wash your hands thoroughly with soap and warm water before, during, and after handling raw fish. Do this immediately after touching raw fish and before touching anything else in the kitchen.
- Prevent Cross-Contamination:
- Separate Surfaces: Use a separate cutting board for fish than for other foods, especially ready-to-eat items.
- Separate Utensils: Use different knives and utensils for raw fish than for cooked food.
- Clean As You Go: Wipe down surfaces and tools regularly. This prevents fish juices from spreading to other areas.
- Discard Waste Promptly: Dispose of fish scales, guts, and other waste immediately into a sealed bag. Tie the bag tightly and place it in an outdoor trash can.
- Rinse Fish with Cold Water Only: Never use hot water to rinse fish. Hot water can start cooking the fish protein. It can also encourage bacterial growth. Stick to cold, running water for all rinsing steps.
- Clean All Tools and Surfaces Immediately: As soon as you finish cleaning the bream, wash all knives, cutting boards, and other utensils with hot, soapy water. Sanitize the cutting board and countertops with a bleach solution or antibacterial spray. This is similar to maintaining cleanliness when learning how to clean a steamer or other kitchen appliances.
Following these safety and hygiene tips ensures a safe and clean fish preparation experience. It protects you from injury and keeps your food safe for consumption.
Common Mistakes to Avoid When Cleaning Bream
Cleaning bream can be a rewarding task. However, it is easy to make mistakes, especially for beginners. These errors can affect the quality of your fish. They can also make the cleaning process more difficult or even dangerous. Learning from common pitfalls helps you improve your technique.
I have made my share of mistakes when learning to clean fish. I have left bones, punctured organs, and struggled with dull knives. Recognizing these errors helps others avoid them. This section highlights common mistakes and how to sidestep them.
Pitfalls to Dodge for a Better Bream Cleaning Experience
Awareness of common errors allows for smoother, more effective cleaning. Pay attention to these points to ensure your bream is perfectly cleaned. Your goal is to maximize edible meat and minimize waste.
- Using a Dull Knife: This is perhaps the most common and dangerous mistake. A dull knife requires more force, increasing the risk of slipping and causing injury. It also tears the fish flesh, making for messy cuts.
- Correction: Always ensure your fillet knife is razor-sharp before starting. Sharpen it regularly.
- Not Holding the Fish Firmly: A slippery fish that moves around makes precise cuts impossible. It increases the risk of cutting yourself or damaging the fish.
- Correction: Use a firm grip on the tail. Wear gloves or use a paper towel for better traction. Place a damp cloth under your cutting board.
- Cutting Too Deep When Gutting: Puncturing the intestines or, worse, the gallbladder, releases bitter contents into the fish flesh. This can ruin the flavor.
- Correction: Make shallow, controlled cuts just deep enough to open the belly cavity. Use only the tip of the knife.
- Leaving Scales Behind: Missed scales are unpleasant to eat and can affect the texture of your dish. They often hide around fins and the head.
- Correction: Be thorough when scaling. Use firm, overlapping strokes. Rinse and feel the fish to check for any rough patches.
- Not Removing the Kidney/Bloodline: The dark line along the backbone contains blood and can give the fish a stronger, less appealing flavor.
- Correction: After gutting, firmly scrape this line out with your thumb or a spoon. Rinse the cavity well.
- Wasting Meat During Filleting: Beginners often leave too much meat on the bones or damage the fillets during the filleting process.
- Correction: Keep your knife blade as close to the backbone and rib bones as possible. Practice helps improve yield. Do not rush.
- Improper Storage After Cleaning: Leaving cleaned fish at room temperature or storing it incorrectly speeds up spoilage.
- Correction: Immediately after cleaning, rinse, pat dry, and refrigerate on ice or freeze using airtight methods. Learn how to maintain your cleaned fish properly.
- Neglecting Post-Cleaning Cleanup: Leaving fish residue on surfaces and tools can lead to lingering odors and bacterial growth.
- Correction: Clean and sanitize all tools and surfaces immediately after
- Bream
- Cleaning Fish
- Fish Preparation
- Filleting Fish
- Gutting Fish
- Seafood Prep
- Angling Tips

Todd Martin
Senior Writer
With over 15 years of experience in home renovation and design, I started HEG to share what I’ve learned with homeowners who want to create spaces that are both beautiful and functional. I’ve always believed in a hands-on approach, and over the years, I’ve picked up practical solutions that actually work. Through HEG, I aim to make home improvement more approachable, sharing real tips that help you create a home you truly love.