· Todd Martin · Automotive Care & Detailing · 13 min read
How To Clean Buffing Pad
Get Your Shine Back: How To Clean Buffing Pad
Have you ever finished polishing your car, only to find your buffing pads are caked with old compound and grime? I know the feeling. A dirty buffing pad simply does not perform its job well. It can even damage your car’s paint. Learning how to clean buffing pads is important for anyone doing car detailing. This guide shows you simple ways to keep your pads ready for the next job. We will explore hand washing, machine washing, and how to dry your pads correctly. You will discover the best tools and techniques for different pad types.
Takeaway:
- Clean buffing pads work better.
- Dirty pads can harm your car’s finish.
- Hand washing is good for quick cleans.
- Machine washing saves time for many pads.
- Always dry pads completely to prevent mold.
To clean buffing pads, remove excess compound with a brush, then hand wash with warm water and a dedicated pad cleaner, or machine wash on a gentle cycle with mild detergent. Rinse thoroughly until the water runs clear. Finally, air dry them completely away from direct heat.
Why Cleaning Your Buffing Pads Matters for Your Vehicle
Cleaning your buffing pads is not just a suggestion; it is a necessity. A clean pad delivers the best results when you detail your car. Pads get dirty quickly during use. They collect old polish, wax, and paint residue. This buildup hurts the pad’s ability to correct paint.
Dirty pads can leave swirl marks on your car. They can also scratch the paint you are trying to perfect. Imagine trying to paint with a dirty brush. The results will not be good. The same applies to buffing pads. Clean pads ensure a smooth and even finish.
Proper cleaning also makes your pads last longer. This saves you money over time. Pads are not cheap to replace. Neglecting to clean them cuts their lifespan short. You want your detailing tools to perform at their best. Clean pads are a basic part of effective car detailing. I always make sure my pads are spotless before storage. This helps them stay ready for the next time I need them.
Essential Tools and Supplies for Effective Pad Cleaning
You need the right tools to clean your buffing pads well. These items make the job much easier. First, gather a few buckets. You will use one for soaking and another for rinsing. Warm water is always a good start. It helps loosen caked-on product.
Next, get a dedicated pad cleaner. Many brands make these special solutions. They break down waxes and compounds without harming the pad material. Do not use harsh chemicals. They can damage the foam or wool. A mild detergent can also work, especially for machine washing.
A pad cleaning brush or spur is also very useful. These tools help agitate the surface of the pad. They remove stubborn residue. You can also use a soft-bristled scrub brush. Microfiber towels are great for drying or wiping. They absorb water well and are gentle on the pads.
Consider an air compressor if you have one. It can blow out loose debris. This is good for quick cleaning during a detailing job. Finally, you will need a place to dry your pads. A drying rack is perfect. It allows air to circulate around the pads. This ensures thorough drying. Choosing the right supplies sets you up for success. I find that having everything ready makes the cleaning process simple.
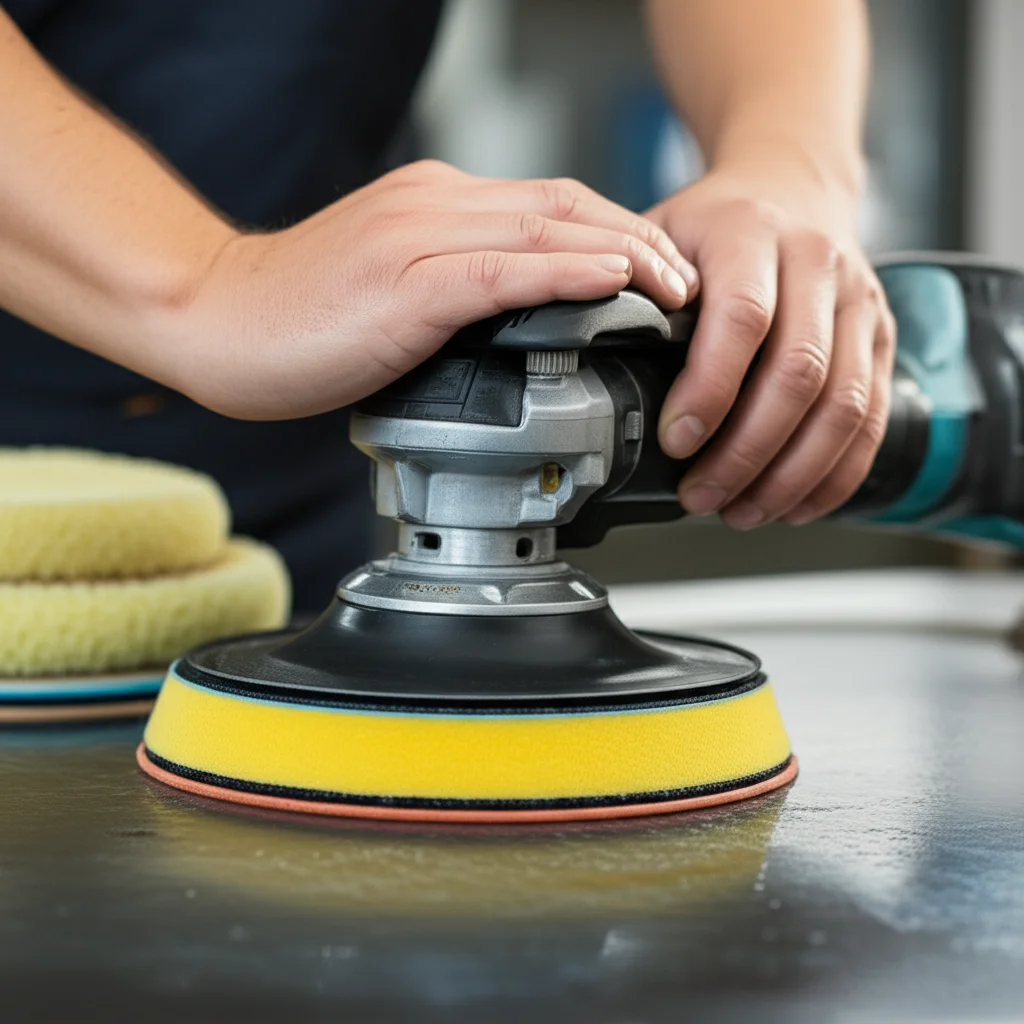
Hand Washing Buffing Pads: A Gentle and Thorough Method
Hand washing is a great way to clean buffing pads. It gives you direct control over the process. This method is good for delicate pads or when you only have a few to clean. It also works well for quick clean-ups after a single use. I often choose hand washing for my favorite pads.
Start by pre-cleaning the pad. Use a pad brush or spur to remove loose compound. Spin the pad on your polisher to sling off excess product. Do this outside or in an area where splatter is not an issue. This step saves a lot of cleaning effort.
Next, fill a bucket with warm water. Add a small amount of pad cleaner or mild detergent. Submerge the buffing pad in the water. Let it soak for a few minutes. This softens the dried-on product. Gently massage the pad with your fingers. Work the cleaner into the foam or wool. Pay attention to heavily soiled areas. You can also use a soft brush to scrub the surface. Be gentle. Do not twist or tear the pad material.
Rinse the pad under running water. Squeeze it repeatedly. Keep rinsing until the water runs completely clear. No soap bubbles should remain. A thorough rinse is very important. Soap residue can affect pad performance later. This gentle approach ensures your pads stay in top condition. Hand washing is also ideal for quickly cleaning a foam buffing pad to reuse it during a long detailing session. It lets you feel the pad and make sure all product is gone.
Machine Washing Buffing Pads: Convenience for Larger Batches
Machine washing offers a convenient way to clean multiple buffing pads at once. It saves time, especially after a big detailing project. This method works well for most foam pads. However, always check the manufacturer’s recommendations first. Some wool pads or very delicate pads may not be suitable for machine washing.
Before placing pads in the washer, rinse off as much excess compound as possible. You can use a hose or a bucket of water for this. This prevents too much product from going into your washing machine. Place the pads inside a mesh laundry bag. This protects them from getting snagged or damaged. It also keeps them from sticking to the washing machine’s drum.
Use cold water and a gentle cycle setting. Hot water can break down the adhesives in the pad. It can also shrink or damage the foam. Add a small amount of mild liquid detergent or a specific pad cleaner. Do not use fabric softener. Fabric softener can clog the open cells of foam pads. This reduces their effectiveness. It makes the pads unable to absorb new product correctly.
I always wash pads separately from other laundry items. This prevents cross-contamination. Once the cycle finishes, promptly remove the pads. Do not let them sit in the washer. This can lead to mold or mildew growth. Machine washing simplifies the cleaning process significantly. You can wash various items in a machine, from shoes to pads, as seen in guides like how to clean shoes in the washer. After washing many pads, I make sure to clean my washing machine regularly. You can find tips on how to clean your washer effectively, for example, by learning how to clean washer with vinegar.
Drying Buffing Pads Properly: The Crucial Final Step
Drying your buffing pads completely is just as important as cleaning them. Improper drying can ruin your pads. It can lead to mold and mildew growth. Moldy pads smell bad and can damage your car’s paint. They also become unusable. Wet pads lose their firmness and can fall apart.
The best way to dry buffing pads is by air drying. After washing, gently squeeze out excess water. Do not twist the pads vigorously. This can tear the foam. Lay them flat on a clean microfiber towel or a drying rack. Place them in a well-ventilated area. Avoid direct sunlight. UV rays can degrade foam over time. A fan can speed up the drying process. Turn the pads periodically to ensure even drying.
Never put buffing pads in a clothes dryer. The high heat will destroy the foam. It can melt the adhesive that holds the pad together. This causes the pad to delaminate. It will then be useless. I learned this lesson the hard way years ago. Patience is key when air drying. It might take several hours or even a full day. The time depends on the pad thickness and humidity.
Once completely dry, store your pads in a clean, dust-free environment. Use a sealed container or a drawer. This keeps them clean until your next detailing job. Proper drying extends the life of your pads. It also ensures they perform their best every time. For example, similar to how moisture can cause issues in areas like a shower, leading to growth you might need to clean by following advice like how to clean mold in shower, pads also need to dry thoroughly to prevent similar problems.
Quick Cleaning Methods During a Detailing Session
Sometimes, you need to clean your buffing pad on the fly. This happens when you are in the middle of a detailing job. You might notice your pad getting clogged with product. Quick cleaning methods help maintain pad performance during use. They prevent you from having to stop completely.
One common tool is a pad spur or a stiff brush. While the pad spins on your polisher, gently press the spur against the pad’s surface. This removes caked-on compound and dust. Do this away from your vehicle. The debris will fly off the pad. This refreshes the pad’s cutting ability. It allows the fresh product to work more effectively.
An air compressor also works wonders for quick cleaning. Hold the pad away from your car. Blast it with compressed air. The air pressure blows out loose particles and dried product. This is a very fast way to de-clog a pad. It helps restore its texture.
You can also use a clean microfiber towel. Simply press the towel onto the spinning pad. The towel will absorb excess product. It helps clean the surface quickly. Some detailers use pad conditioning sprays. These sprays help lubricate the pad. They also prevent product buildup. They keep the pad from drying out too fast.
Knowing when to switch pads is also a quick cleaning strategy. If a pad becomes too saturated, change it out. Have several clean pads ready. This ensures you always work with a fresh surface. Using these quick methods helps you achieve better results. They keep your detailing process smooth.
Specific Considerations for Different Buffing Pad Materials
Buffing pads come in different materials. Each material has unique cleaning needs. Knowing these differences helps you care for your pads correctly. The most common types are foam and wool pads. Each offers specific benefits for detailing.
Foam pads are very popular. They come in various levels of aggressiveness. Open-cell foam pads are porous. They absorb product easily. This also means they can hold a lot of old compound. When cleaning, ensure you squeeze them thoroughly to remove all product. Closed-cell foam pads are less absorbent. They are easier to clean. They do not hold as much product. For foam pads, gentle hand washing or machine washing on a delicate cycle is usually safe. Make sure to use a cleaner designed for pads. If your foam pad has stubborn greasy stains from polishing compounds, you might find useful tips in a guide on how to clean grease stains.
Wool pads offer strong cutting power. They are made from natural or synthetic wool fibers. Wool pads can shed fibers, especially when new. Cleaning wool pads requires care. Do not machine wash natural wool pads. They can shrink or become matted. Hand washing is the preferred method for natural wool. Use a wool-specific cleaner. Gently rinse and squeeze them. Synthetic wool pads are often more durable. Some can handle machine washing, but always check the label.
Hybrid pads combine materials. They might have a foam core with a wool face. Clean these according to the most delicate material. If it has wool, treat it like a wool pad. Always separate pads by type before cleaning. This prevents damage. Also, do not forget to clean the backing plate of your polisher. It can get residue on it too. For any plastic parts that get stained, consider methods like those found in how to clean stains on plastic. Proper care for each material type extends pad life. It ensures optimal detailing performance.
Frequently Asked Questions About Cleaning Buffing Pads
How often should I clean my buffing pads?
Clean your buffing pads after every use. Even if you only used it for a short time, product residue can dry and harden. This makes future cleaning harder. Regular cleaning prevents buildup. It keeps your pads soft and effective. I clean mine as soon as I finish a detailing job.
Can I use dish soap to clean buffing pads?
You can use dish soap in a pinch, but it is not ideal. Dish soap can be too harsh for some pad materials. It might also leave a residue. A dedicated pad cleaner is formulated to break down car care products. It is gentler on the pad’s fibers and foam. I prefer specialized cleaners for the best results.
How do I remove stubborn, dried-on compound from a buffing pad?
For stubborn, dried-on compound, soak the pad longer in warm water with pad cleaner. Use a stiff pad brush or a nylon bristled brush. Gently scrub the affected areas. You may need to repeat the soaking and scrubbing a few times. Patience helps remove tough residue.
Is it okay to use a pressure washer on buffing pads?
No, do not use a pressure washer on buffing pads. The high pressure can damage the foam or wool fibers. It can also delaminate the pad from its backing. This will ruin the pad completely. Stick to gentle hand washing or low-pressure machine washing.
How long does it take for buffing pads to dry?
Drying time varies based on pad thickness and humidity. Thinner foam pads might dry in a few hours. Thicker pads can take 12 to 24 hours. Always ensure pads are completely dry before storing them. A well-ventilated area helps speed up the process.
Can I reuse buffing pads that have molded?
No, do not reuse buffing pads that have mold or mildew. Mold spores can damage your car’s paint. They can also spread to other pads. It is best to discard moldy pads to prevent further issues. Proper drying prevents mold growth from happening.
Conclusion: Keep Your Buffing Pads Ready for the Next Shine
Keeping your buffing pads clean is a simple but vital part of car detailing. We have seen how a clean buffing pad can make a big difference. It helps you get a better finish on your car. It also makes your pads last longer. You can choose between hand washing for a detailed approach or machine washing for convenience. Remember to always dry your pads completely. This prevents damage and mold.
Taking care of your tools means taking care of your results. Dirty pads lead to poor outcomes. Clean pads ensure a professional shine every time. I make cleaning my pads a part of my post-detailing routine. It sets me up for success on the next project. Your car deserves the best. Start by giving your buffing pads the care they need. Make sure you learn How To Clean Buffing Pad properly to achieve outstanding results. Do not let dirty pads hold back your shine. Get cleaning today!
- buffing pads
- car detailing
- pad cleaning
- car polish
- vehicle maintenance

Todd Martin
Senior Writer
With over 15 years of experience in home renovation and design, I started HEG to share what I’ve learned with homeowners who want to create spaces that are both beautiful and functional. I’ve always believed in a hands-on approach, and over the years, I’ve picked up practical solutions that actually work. Through HEG, I aim to make home improvement more approachable, sharing real tips that help you create a home you truly love.