· Todd Martin · Kitchen Care · 20 min read
How To Clean Carbon Steel Pan
Clean Carbon Steel Pan: Your Complete Guide
Your carbon steel pan is a kitchen workhorse. It offers incredible heat retention and develops a natural non-stick surface over time. But, unlike stainless steel or non-stick pans, carbon steel needs specific care. Proper cleaning preserves its crucial seasoning and prevents issues like rust or food sticking. I understand you want your pan to last a lifetime. That means knowing exactly how to clean carbon steel pan effectively. This guide covers everything from daily maintenance to tackling stubborn messes and rust. We will explore the best tools and techniques. You will learn how to keep your pan in top condition.
Takeaway:
- Gentle Cleaning is Key: Avoid harsh soaps or abrasive scrubbers for daily cleaning.
- Hot Water & Scrapers: Use hot water and a pan scraper or stiff brush for most residue.
- Dry Thoroughly: Always dry your pan immediately and completely after washing.
- Re-Season as Needed: Apply a thin layer of oil and heat after deep cleaning or if food sticks.
- Prevent Rust: Moisture is the enemy; ensure your pan is dry and lightly oiled for storage.
To clean a carbon steel pan, scrub it with hot water and a stiff brush or pan scraper to remove food debris. Avoid soap for daily cleaning to preserve seasoning. Rinse the pan thoroughly, then immediately dry it completely on the stovetop over low heat. Finish by applying a thin layer of cooking oil.
Understanding Your Carbon Steel Pan: Why Cleaning Matters
Carbon steel pans are fantastic. They heat up fast and cook food evenly. They get better with age, developing a dark, smooth layer called seasoning. This seasoning is a polymerized oil layer. It makes the pan non-stick and protects the metal from rust. When you clean a carbon steel pan, your goal is to remove food while preserving this seasoning.
Using the wrong cleaning method can strip away the seasoning. This exposes the bare metal. Exposed metal rusts easily. It also makes food stick more often. A well-maintained pan reduces frustration in the kitchen. It also saves you money by extending the pan’s life. Think of cleaning as part of cooking. It prepares the pan for its next use. It also keeps your pan performing its best for years.
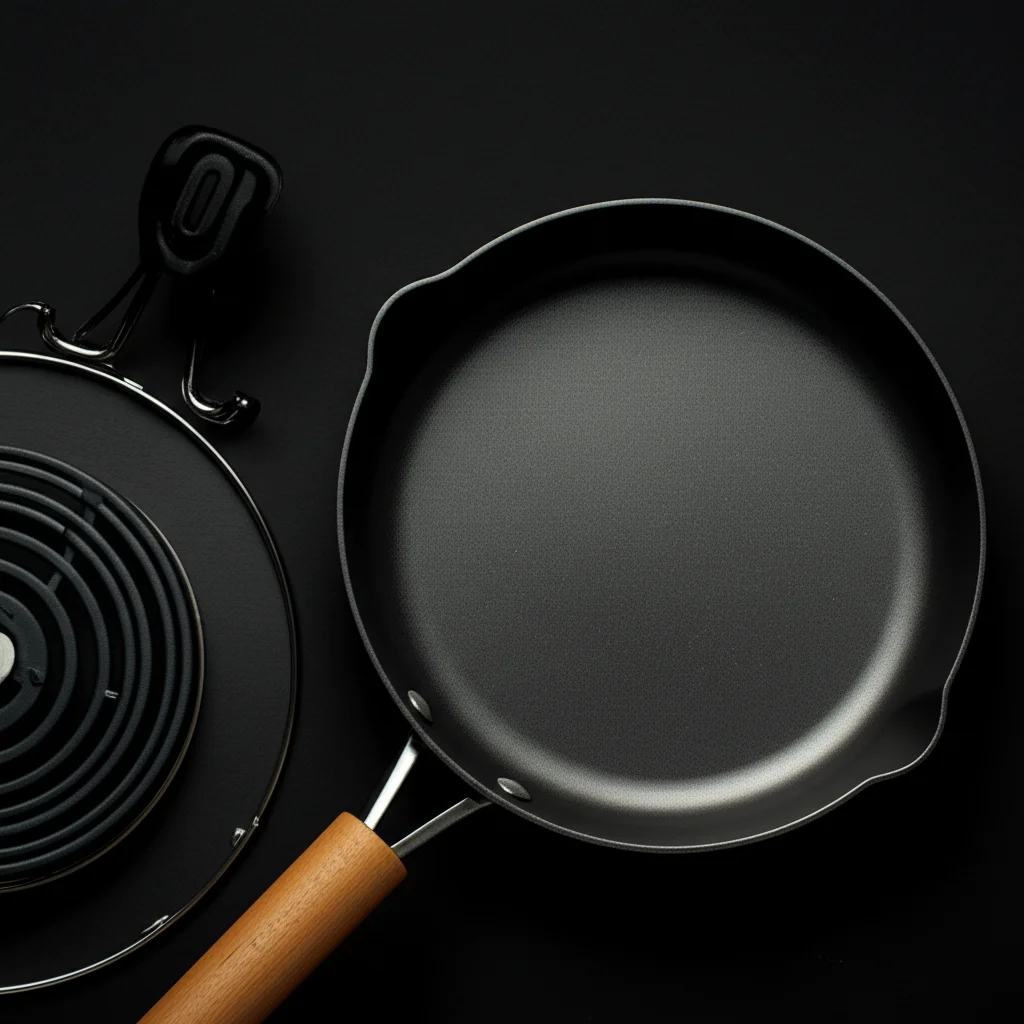
Essential Tools for Carbon Steel Pan Cleaning
You do not need many tools to clean a carbon steel pan. Simple items work best. Having the right tools makes the job easier. It also protects your pan’s seasoning. I rely on these few things daily.
First, hot water is your best friend. It loosens food without chemicals. Second, a stiff-bristled brush or a pan scraper is crucial. These help remove stuck-on bits without scratching the surface. Third, a clean cloth or paper towel is essential for drying. Finally, a small amount of cooking oil is needed for maintenance. Avoid steel wool or harsh scouring pads. These can damage the seasoning.
- Hot Water: Use warm to hot water for all cleaning.
- Pan Scraper: A plastic or silicone pan scraper helps remove stubborn food. This tool is perfect for lifting stuck-on particles without harming the seasoned surface.
- Stiff Brush: A dish brush with firm bristles works well. It cleans the surface without being overly abrasive.
- Sponge (non-abrasive side): Use this for light scrubbing if needed.
- Clean Towel or Paper Towels: For thorough drying.
- Cooking Oil: A neutral oil like grapeseed, flaxseed, or vegetable oil for post-cleaning seasoning.
Daily Cleaning Method: Simple Steps to Preserve Seasoning
Daily cleaning keeps your carbon steel pan healthy. This method focuses on gentle care. It removes food residue without stripping the seasoning. I use this routine after almost every cooking session. It takes only a few minutes.
First, clean the pan while it is still warm. Do not let food dry on it. Second, use hot water and a brush. Scrub away food particles. Avoid soap unless absolutely necessary. Third, dry the pan completely. This prevents rust.
- Clean While Warm: After cooking, let the pan cool slightly. It should still be warm to the touch. This makes food easier to remove.
- Rinse with Hot Water: Place the pan under hot running water. Use a stiff brush or pan scraper. Gently scrub away food residue. Most food should come off easily.
- Avoid Soap (Usually): For everyday cleaning, avoid dish soap. Soap can strip the pan’s seasoning. If you must use soap for very greasy messes, use a minimal amount. Then be prepared to re-season.
- Stubborn Bits: If food is truly stuck, add a small amount of water to the pan. Bring it to a simmer on the stove for a minute. This loosens the food. Then scrape it away.
- Rinse Again: Rinse any remaining bits.
- Dry Thoroughly: This is the most important step. Immediately dry the pan with a clean towel. Then, place the pan on the stove over low heat for 1-2 minutes. This ensures all moisture evaporates. Listen for sizzling water. When it stops, the pan is dry.
- Apply Oil: Once dry, remove the pan from heat. Add a few drops of cooking oil (about half a teaspoon). Use a paper towel to rub a very thin layer of oil over the entire cooking surface. Wipe off any excess. The pan should look matte, not shiny or greasy. This layer protects the seasoning. It also prepares the pan for its next use.
Tackling Stuck-On Food: Simple Solutions
Sometimes, food sticks badly. This happens to everyone. Do not despair. You can clean these messes. You do not need harsh chemicals or abrasive tools. I have found these methods effective. They preserve the pan’s seasoning.
The key is to loosen the stuck food gently. Water and heat are your allies here. Avoid forcing off burnt bits with metal tools. That will scratch your pan. Patience is a virtue when dealing with these situations.
- Water Boil Method:
- Add about an inch of water to the pan.
- Place the pan on the stove. Bring the water to a boil.
- Let it boil for 5-10 minutes. The boiling water helps loosen stuck food.
- Use a wooden spoon or pan scraper. Gently scrape the bottom of the pan while the water boils. The food should lift off.
- Discard the dirty water.
- Proceed with your daily cleaning method.
- Coarse Salt Scrub:
- Pour a tablespoon or two of coarse salt (like kosher salt) into the pan.
- Add a small amount of oil, enough to make a paste.
- Use a paper towel or half a potato. Scrub the pan firmly with the salt paste. The salt acts as a gentle abrasive. It helps lift stuck food without damaging the seasoning.
- Rinse the pan thoroughly with hot water.
- Follow with the drying and oiling steps.
These methods help clean even tough messes. They prepare your pan for continued use.
Restoring Your Pan: Removing Rust from Carbon Steel
Rust can appear on carbon steel. It happens when moisture sits on the pan for too long. If you see red or orange spots, do not worry. You can remove rust. This process requires a bit more effort. It helps bring your pan back to life.
Removing rust is important. Rust can make food stick. It also makes your pan less effective. After removing rust, you must re-season the pan. This protects the metal from future corrosion. I have brought many rusty pans back from the brink.
- Inspect the Rust: First, assess the rust. Light surface rust is easy to remove. Heavy, pitted rust might require more work.
- Abrasive Scrub (Gentle):
- For light rust: Use the coarse salt method described above. Scrub the rusty areas with salt and a little oil. Or, use a stiff brush with hot water.
- For heavier rust: You might need a more abrasive material. Try steel wool (0000 grade) or a fine-grit sandpaper. Be very gentle. Rub only the rusted spots. Your goal is to remove the rust, not deep-scratch the pan. You might also consider using a product like Bar Keepers Friend for tough rust, but use it sparingly and rinse very well. This is similar to how to clean rust off stainless steel.
- Rinse Thoroughly: After scrubbing, rinse the pan completely under hot water. Make sure all rust particles are gone.
- Dry Immediately: Dry the pan completely with a towel. Then, place it on the stove over low heat. Ensure every drop of water evaporates. This step is critical.
- Re-Season the Pan: Rust removal strips the seasoning. You must re-season the pan immediately. Apply a very thin layer of cooking oil. Wipe off any excess. Heat the pan on the stove over medium-low heat until it smokes slightly. Let it cool. Repeat this oiling and heating process 2-3 times. This builds up a new protective layer. See the re-seasoning section below for more details.
Removing rust and re-seasoning protects your pan. It ensures many more years of cooking enjoyment.
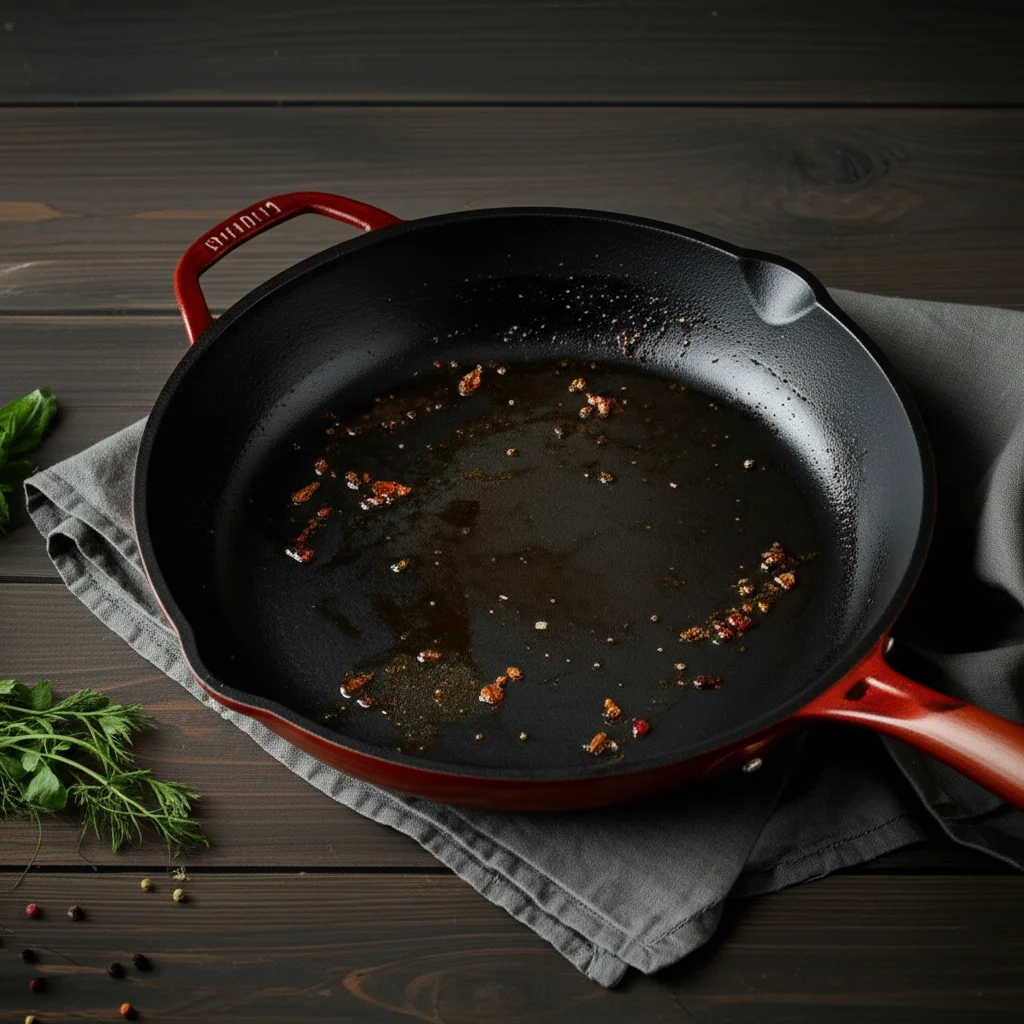
Addressing Burnt Food and Stubborn Stains
Sometimes, you burn food onto your pan. This can leave stubborn black spots. These are not always rust. They are often carbonized food or burnt seasoning. They need attention. You want to remove them. This improves your pan’s performance.
Cleaning burnt areas can be tricky. You need to be firm but not aggressive. The goal is to lift the burnt material without damaging the pan. I have found the water boil method to be very useful here. For truly severe burns, a more robust cleaning is sometimes needed. This is similar to how to clean burnt oil from stainless steel pan.
- Boiling Water and Scrape:
- Fill the pan with about an inch of water.
- Place it on the stove and bring the water to a rolling boil.
- Let it boil for 10-15 minutes. The boiling water helps soften and loosen the burnt bits.
- Use a wooden spoon, silicone spatula, or a pan scraper. Gently scrape the burnt areas. The softened residue should start to lift.
- Discard the water and scrub the pan with a stiff brush under hot water.
- If spots remain, try the coarse salt scrub method.
- Coarse Salt and Potato Scrub:
- Pour a generous amount of coarse salt into the pan, enough to cover the stained areas.
- Cut a potato in half. Use the cut side of the potato as a scrubber. The potato contains oxalic acid, which can help break down burnt material. The salt acts as an abrasive.
- Scrub vigorously in circular motions. Add more salt if needed.
- Rinse the pan thoroughly with hot water.
- Dry completely on the stovetop.
- Deep Cleaning (Last Resort):
- For extremely stubborn, thick carbon buildup, you may need a deeper clean.
- You can use a very small amount of dish soap and a non-abrasive sponge. Scrub the burnt area.
- Alternatively, some people use steel wool (very fine, like 0000) or a mild abrasive cleaner like Bar Keepers Friend for a severe deep clean. Use these with extreme caution. They will strip all seasoning.
- If you deep clean, you must re-season the pan multiple times immediately afterward. This brings your pan back to a usable state.
After any method, always rinse thoroughly. Then, dry completely on the stove. Finally, apply a thin layer of oil. This maintains your pan’s integrity.
Re-Seasoning After Deep Cleaning or Rust Removal
Re-seasoning is vital after a deep clean or rust removal. These processes strip away the pan’s protective layer. A new layer of seasoning must be built. This prevents rust and restores non-stick properties. It is not hard, but it takes time. I always re-season after any major cleaning.
Seasoning involves baking thin layers of oil onto the pan. This process polymerizes the oil. It creates a durable, non-stick surface. Do this process outdoors or with good ventilation. It can produce some smoke.
- Prepare the Pan: Ensure the pan is completely clean and dry. Any rust or burnt bits must be gone. Wipe it thoroughly with a paper towel.
- Apply a Thin Layer of Oil: Pour a very small amount (about half a teaspoon) of high smoke point oil into the pan. Good options include grapeseed, flaxseed, or vegetable oil.
- Rub Oil Over Entire Pan: Use a paper towel to rub the oil all over the pan. Cover the inside, outside, handle, and bottom. Every surface should have a thin coating.
- Wipe Off Excess Oil: This is critical. Use a new, clean paper towel. Wipe the pan down as if you made a mistake and put too much oil on. There should be almost no visible oil. The pan should look matte, not shiny. Too much oil will result in a sticky, gummy surface.
- Heat the Pan:
- Stovetop Method: Place the pan on your stovetop over medium-low heat. Heat until it starts to smoke slightly (this is the oil polymerizing). Turn off the heat and let it cool completely.
- Oven Method (Recommended for first seasoning or full re-seasoning): Preheat your oven to 450-500°F (232-260°C). Place the pan upside down in the oven. Bake for one hour. Turn off the oven and let the pan cool completely inside the oven. This helps with even heating.
- Repeat: For best results, repeat the oiling and heating process 2-3 times. More layers build a stronger seasoning. Each layer adds to the non-stick quality.
After seasoning, your pan is ready for use. Cook something fatty for the first few uses. This continues to build the seasoning. A properly seasoned pan makes cooking a joy.
Common Mistakes to Avoid When Cleaning Carbon Steel
Cleaning carbon steel pans requires a different approach than other cookware. Making common mistakes can damage your pan. They can strip its seasoning or cause rust. I have learned these lessons over time. Avoiding them saves you hassle.
Knowing what not to do is as important as knowing what to do. These missteps can set back your pan’s development. They can also lead to more work later.
- Using Too Much Dish Soap: For daily cleaning, avoid soap. Modern dish soaps are powerful degreasers. They remove the very oil layers that form your pan’s seasoning. If you must use soap for a very greasy pan, use a tiny amount. Then, be prepared to re-season immediately.
- Leaving Water in the Pan: Never let water sit in your carbon steel pan. Water leads to rust very quickly. Always dry your pan immediately and thoroughly after washing. Even a few minutes of standing water can cause problems.
- Air Drying: Do not air dry your carbon steel pan. Towel drying is not enough. Always put the pan back on the stove over low heat. This ensures all moisture evaporates from the pores of the metal. You should see no steam or sizzling.
- Using Abrasive Scrubbers (like steel wool, often): While fine steel wool (0000 grade) can be used for rust, regular steel wool or harsh scrubbers will scratch and strip your seasoning. Use plastic scrapers, stiff brushes, or coarse salt instead. This applies to cleaning similar items like a carbon steel knife.
- Putting it in the Dishwasher: Never put carbon steel in the dishwasher. The harsh detergents and prolonged exposure to hot water will completely strip the seasoning. It will also cause immediate rusting. Dishwashers are for other types of cookware, like your non-stick frying pan.
- Storing While Wet: Always store your pan completely dry. A damp pan will rust, even if you dried it well earlier. A light coat of oil also helps.
- Not Re-seasoning After Deep Clean: If you use soap, steel wool, or remove rust, you have stripped the seasoning. You must re-season the pan multiple times to rebuild its protective layer. Skipping this step leads to sticking food and rust.
Avoiding these common mistakes ensures your carbon steel pan remains a valuable tool. It will serve you well for decades.
Maintaining Your Carbon Steel Pan’s Longevity
Proper cleaning is a big part of maintenance. But other habits help your carbon steel pan last a very long time. Think of it as a living tool. It needs continuous care. I always consider these points when using my pans. They help build and preserve the seasoning.
Longevity comes from consistent care. It means protecting the pan’s core. A well-maintained pan performs better. It also looks better. These tips ensure your pan gets the best treatment.
- Cook with Fats: Regularly cooking with oils and fats helps build and maintain the seasoning. Every time you cook, you add to that protective layer.
- Avoid High Acidity: Highly acidic foods (like tomato sauce or vinegar) can strip the seasoning. Cook them quickly if you must. Then clean and re-season the pan immediately after.
- Store Properly: Store your pan in a dry place. If stacking, place a paper towel between pans. This prevents scratches and absorbs any residual moisture.
- Heat Gradually: Avoid extreme temperature changes. Preheat your pan gradually. This protects the seasoning from cracking. It also prevents warping.
- Regular Use: Use your carbon steel pan often. The more you cook with it, the better the seasoning becomes. A pan that sits unused is more likely to develop rust.
- Occasional Re-Seasoning: Even with daily use, you might need to re-season your pan a few times a year. This helps refresh the non-stick surface. It also reinforces the rust protection. Watch for food sticking or dull spots. These are signs it needs more seasoning.
By following these maintenance tips, your carbon steel pan will develop a beautiful patina. It will become your most reliable piece of cookware.
When to Consider a Deep Clean vs. Daily Care
Knowing when to deep clean is important. Most of the time, daily care is enough. But sometimes, your pan needs more. This happens if the seasoning is damaged. It also happens if rust appears. I judge based on the pan’s performance and appearance.
A deep clean is a reset. It removes everything. Then, you start fresh. Daily care is about gentle preservation. Knowing the difference saves time and effort. It also keeps your pan in top condition.
- Daily Care is For:
- After every use: To remove food residue.
- Maintaining seasoning: To keep the non-stick surface intact.
- Light sticking: When only small bits of food catch.
- Preventing rust: Routine drying and oiling.
- This is your standard procedure for 90% of the time.
- Deep Clean is For:
- Rust formation: When red or orange spots appear. You must remove all rust to stop it from spreading.
- Significant food sticking: If food sticks everywhere, even after cooking with oil. This means the seasoning is compromised.
- Gummy/Sticky Seasoning: If your pan feels sticky to the touch. This means too much oil was applied during seasoning, and it did not polymerize correctly.
- Flaking Seasoning: When patches of seasoning are peeling off. This indicates a poor seasoning layer that needs to be stripped and redone.
- Overly Thick Carbon Buildup: A layer of black, burnt carbon that interferes with cooking. This can lead to uneven heating.
- A deep clean involves removing all old seasoning, rust, or burnt material. Then, you build a new seasoning layer from scratch. This process is more intensive. It takes longer than daily cleaning. Only do it when necessary.
The Science Behind Carbon Steel Seasoning and Cleaning
Understanding the science helps you clean better. Carbon steel pans are iron and carbon. This combination makes them strong. It also makes them reactive. This reactivity is why seasoning is so important. I think about the science. It guides my cleaning choices.
Seasoning is not just a coating. It is a chemical change. This change protects the pan. It also creates a natural non-stick surface.
- Polymerization: When you heat oil on carbon steel, it undergoes polymerization. The oil molecules break down. They form a new, hard, plastic-like layer. This layer bonds to the metal. This is the seasoning. It is what makes the pan non-stick.
- Non-Stick Property: This polymerized layer creates a smooth surface. It fills the microscopic pores in the metal. This reduces the surface area where food can stick. It also makes the pan hydrophobic. Water and food slide off easily.
- Rust Prevention: Iron reacts with oxygen and water to form rust (iron oxide). The seasoning layer forms a barrier. It prevents oxygen and water from reaching the iron. This protects the pan from corrosion. That is why drying and oiling are so vital. They maintain this protective barrier.
- Why Soap Harms Seasoning: Most dish soaps contain powerful surfactants and degreasers. These chemicals break down fats and oils. They are designed to dissolve grease. When they act on your seasoning, they break down the polymerized oil layer. This strips away the non-stick surface and rust protection. That is why soap is usually avoided.
- Thermal Shock: Carbon steel can warp with sudden temperature changes. Heating it gradually allows the metal to expand evenly. Cooling it slowly prevents sudden contraction. This protects the pan’s shape. It also prevents the seasoning from cracking.
- Porous Surface: Carbon steel has microscopic pores. These pores hold the seasoning. They also trap moisture if not dried properly. This is why stovetop drying is essential. It ensures all trapped water evaporates.
Knowing this science helps you make smart decisions. It ensures your carbon steel pan lasts generations.
FAQ Section
Q1: Can I use soap to clean my carbon steel pan? A1: For daily cleaning, avoid soap if possible. Modern dish soaps are powerful degreasers and can strip your pan’s seasoning. If you have a very greasy mess, use a tiny drop of mild soap. Then, make sure to thoroughly rinse, dry, and re-oil your pan immediately to restore the protective layer.
Q2: My carbon steel pan is sticky after cleaning. What went wrong? A2: A sticky pan means too much oil was applied during re-seasoning, or it wasn’t heated long enough. The oil did not fully polymerize. To fix this, scrub the sticky layer off with coarse salt and a little oil. Then, re-season with a much thinner layer of oil, ensuring you wipe off all excess before heating.
Q3: How do I store my carbon steel pan to prevent rust? A3: Always ensure your carbon steel pan is completely dry before storing it. After cleaning and stovetop drying, apply a very thin layer of cooking oil to the entire surface. Store it in a dry cabinet or hung on a rack. If stacking, place a paper towel or cloth between pans to absorb moisture and prevent scratches.
Q4: How often should I re-season my carbon steel pan? A4: You should re-season your carbon steel pan after any deep cleaning, rust removal, or if food starts sticking consistently. For regular daily use, your pan’s seasoning will build up naturally. You might only need to do a full re-seasoning once or twice a year, or when you notice performance issues.
Q5: Is it normal for my carbon steel pan to look discolored? A5: Yes, a dark, uneven discoloration is normal and desirable for carbon steel pans. This dark color is the seasoning. It means your pan is developing a good non-stick surface. Do not try to scrub this discoloration away. It is a sign of a well-used and well-cared-for pan.
Q6: Can I use abrasive pads on my carbon steel pan? A6: Generally, no. Avoid harsh abrasive pads like steel wool for daily cleaning, as they can strip the seasoning. For tough rust or deeply burnt-on carbon, you can use very fine 0000 grade steel wool or a mild abrasive cleaner with extreme caution, knowing you will need to re-season the pan afterward.
Conclusion
Caring for your carbon steel pan might seem different at first. But, it becomes second nature very quickly. Knowing how to clean carbon steel pan correctly ensures its longevity. It preserves its unique cooking properties. We have covered the simple daily care steps. We also discussed how to tackle stubborn issues like rust and burnt food. The key is to be gentle. Always dry your pan thoroughly. Then, always apply a thin layer of oil.
A well-maintained carbon steel pan becomes a joy to cook with. It develops a beautiful, natural non-stick surface over time. It can last a lifetime. In fact, it can become a treasured heirloom. By following these guidelines, you protect your investment. You ensure delicious meals for years to come. Now you have the knowledge to keep your carbon steel pan in perfect condition. Enjoy the journey of cooking with your well-cared-for pan!
- carbon steel
- pan cleaning
- cookware maintenance
- kitchen tips
- pan seasoning
- rust removal

Todd Martin
Senior Writer
With over 15 years of experience in home renovation and design, I started HEG to share what I’ve learned with homeowners who want to create spaces that are both beautiful and functional. I’ve always believed in a hands-on approach, and over the years, I’ve picked up practical solutions that actually work. Through HEG, I aim to make home improvement more approachable, sharing real tips that help you create a home you truly love.