· Todd Martin · Home Cleaning & Maintenance · 20 min read
How To Clean Carpet Shampooer
Cleaning Your Carpet Shampooer: A Complete Guide
My carpet shampooer helps me keep my floors looking their best. It lifts deep dirt and leaves carpets feeling fresh. But what happens when the machine itself gets dirty? Many people forget that the tool cleaning your carpets also needs a good clean. Ignoring this can lead to bad smells, poor performance, and even mold growth. I want to share how to clean your carpet shampooer properly. This guide will walk you through each step, from basic cleaning to deep maintenance. You will learn the simple ways to keep your machine in top shape for years to come. Let’s make sure your carpet shampooer is always ready to tackle tough jobs.
Takeaway:
- Always clean your carpet shampooer immediately after each use.
- Disassemble removable parts for a thorough cleaning.
- Use warm water and mild soap, or a vinegar solution, to remove residue.
- Ensure all components are completely dry before reassembling and storing.
- Regular cleaning prevents odors, mold, and extends machine life.
To clean a carpet shampooer, empty dirty water, rinse tanks, and detach removable parts like nozzles and brushes. Wash these parts with warm, soapy water or a vinegar solution, scrubbing away debris. Flush hoses, wipe the machine’s exterior, and allow all components to dry completely before reassembly to prevent mold and odors.
Why Your Carpet Shampooer Needs Regular Cleaning
Keeping your carpet shampooer clean is very important. This machine pulls dirt and grime from your carpets. Over time, some of that dirt and old cleaning solution stays inside the machine. This buildup can cause many problems if you do not clean it often. It stops your carpet shampooer from working as well as it should.
First, dirty water and residue can create bad smells. Imagine cleaning your carpet with a machine that smells sour or moldy. That smell can transfer to your freshly cleaned carpets. Nobody wants their home to smell like old, dirty water. Regular cleaning removes these odor-causing particles before they become a problem.
Second, buildup can block the nozzles and hoses. When these parts get clogged, the machine cannot spray or suck up water properly. This means your carpets will not get a good clean. They might even stay wetter than they should, leading to new issues like mold on the carpet itself. A clean machine delivers clean carpets.
Third, moisture left inside can lead to mold and mildew. These fungi love dark, damp places. The inside of a carpet shampooer provides the perfect home for them if not dried properly. Mold can damage the machine parts over time. It can also spread spores into your home environment. Cleaning prevents this harmful growth.
Finally, consistent cleaning extends the life of your machine. When parts are free of clogs and corrosive buildup, they work better and last longer. You protect your investment by taking a little time after each use. A well-maintained carpet shampooer will serve you for many years, keeping your home clean and fresh. Ignoring maintenance means you might need to replace your machine sooner than expected.
Tools and Preparations for Cleaning Your Shampooer
Before you start cleaning your carpet shampooer, gather all the tools you will need. Having everything ready makes the process smoother and faster. You do not want to stop halfway through because you are missing something. Proper preparation helps ensure a thorough clean.
Here is a list of common items you will find useful:
- Warm Water: You will use this for rinsing and washing most parts.
- Mild Dish Soap: A small amount helps break down grease and residue. Avoid harsh cleaners that could damage your machine.
- White Vinegar: This is excellent for deodorizing and tackling mineral buildup or mild mold. It is a natural and effective cleaning agent.
- Soft Brushes: An old toothbrush or a small utility brush is perfect for scrubbing tight spaces and stubborn spots.
- Microfiber Cloths or Sponges: These are good for wiping surfaces and absorbing excess water.
- Paper Towels: Useful for quick wipes and drying.
- Bucket or Tub: A place to wash smaller parts or collect dirty water.
- Gloves (Optional): If you prefer not to touch dirty water or cleaning solutions.
Before you begin, make sure the shampooer is unplugged. Safety comes first when dealing with any electrical appliance. Disconnect the machine from the power outlet to prevent accidental startups. Then, find a suitable work area. A laundry sink, a bathtub, or even outdoors on a concrete patio works well. This area should allow for easy water disposal. If you have a Hoover carpet cleaner, or any specific brand, its manual might have unique tips. Always refer to your machine’s user manual for specific cleaning instructions. Some models have unique features or parts that require special care. Following the manufacturer’s guidance helps avoid damage and ensures you clean it correctly.
Empty both the clean water tank and the dirty water tank completely. Rinse them out with plain warm water several times until no more residue comes out. This removes the bulk of the old solution and dirty water, making the deeper cleaning much easier. Once the tanks are rinsed, you are ready to start disassembling the removable parts. This preparation sets you up for a successful and hygienic cleaning process.
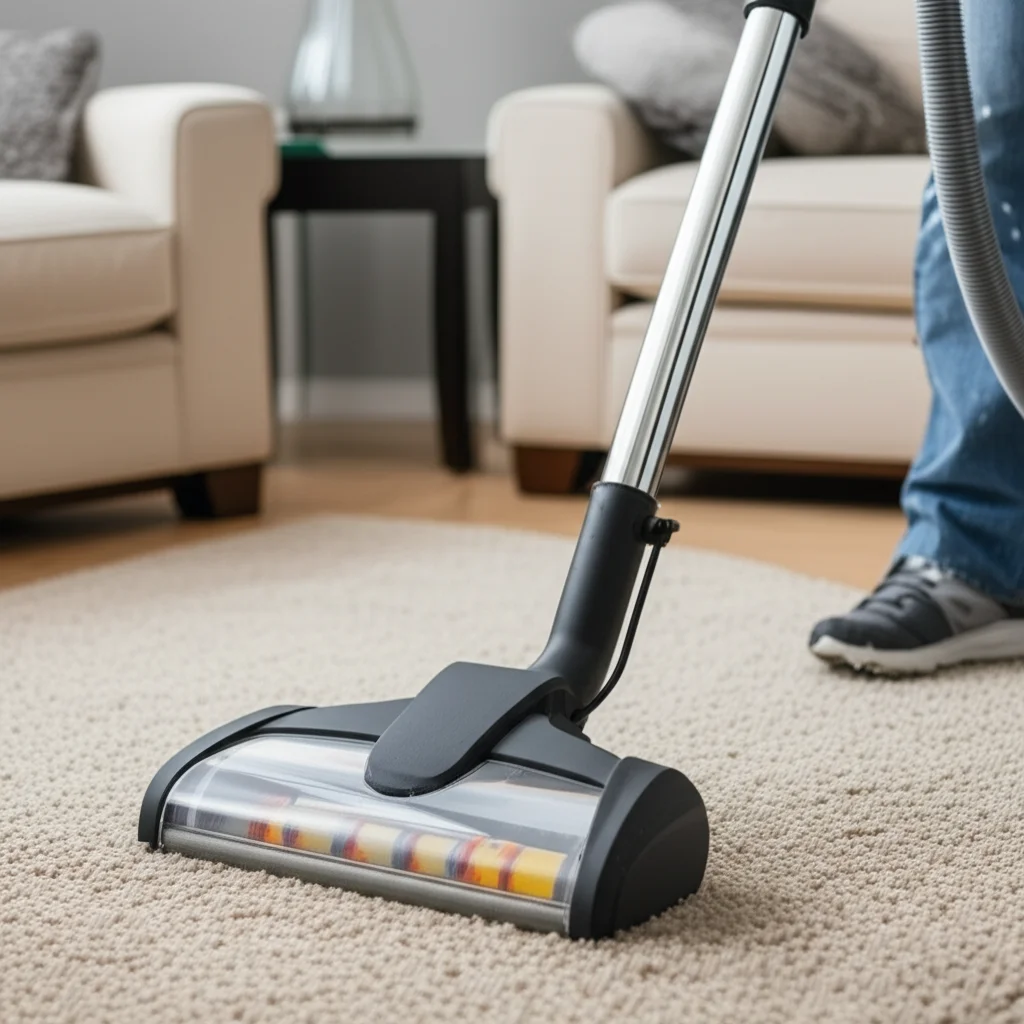
Step-by-Step Guide to Cleaning Removable Parts
Cleaning the removable parts of your carpet shampooer is the most important step. These components handle the water and cleaning solution directly. They are where most of the grime, residue, and potential mold can build up. Taking them apart ensures a deep and effective clean. I will guide you through cleaning each common removable part.
Emptying and Rinsing the Tanks
Start by emptying the dirty water tank. This tank holds all the extracted grime from your carpets. Rinse it thoroughly with warm water. Shake it well and pour out the water until it runs clear. Do the same for the clean water tank, even if it looks empty. Old cleaning solution can still leave a sticky film. You want both tanks to be completely clean before proceeding. For a deeper clean, you can add a cup of white vinegar and some warm water to each tank, shake it, and let it sit for a few minutes before rinsing. This helps break down stubborn residue and odors.
Cleaning the Dirty Water Tank’s Filter or Screen
Many dirty water tanks have a filter or screen. This part catches larger debris, like pet hair or carpet fibers. Carefully remove this filter. Rinse it under running warm water. Use a small brush, like an old toothbrush, to scrub away any trapped hair or gunk. Make sure all openings in the screen are clear. If this filter gets clogged, the machine’s suction power will decrease. A clogged filter makes it harder for your shampooer to pick up dirty water, leaving your carpets too wet.
Washing the Nozzle and Brushes
The nozzle and brushes are crucial for cleaning performance. The nozzle sprays the cleaning solution, and the brushes agitate the carpet fibers. Both can get very dirty. Detach the nozzle assembly from the machine. If your machine has removable brush rolls, take them out too. Wash these parts in a sink or bucket with warm, soapy water. Use a soft brush to scrub the bristles of the brushes. Pay close attention to the nozzle openings. Gunk can easily clog them. You can use a toothpick or a small pin to clear any blocked holes in the spray nozzle. If you notice any stubborn residue or discoloration on the plastic parts, it might be the start of mold. Learning how to clean mold off plastic can be helpful here. Soak these parts in a solution of equal parts white vinegar and warm water for about 15-30 minutes. This helps loosen tough grime and sanitize them. After soaking, scrub again and rinse thoroughly.
Cleaning the Collection Recovery Tank Lid
The lid of the dirty water tank often has a gasket or seal. This seal helps create the suction needed for the machine to work. Remove the lid and inspect the seal. Wipe it clean with a damp cloth. Check for any hair or debris stuck under the seal. Clean any channels or crevices in the lid where dirty water might collect. A dirty or damaged seal can reduce suction, making your machine less effective. Ensure the lid is clean and clear to maintain proper performance.
By cleaning these removable parts well, you ensure your carpet shampooer works its best every time. You also prevent the buildup of odors and mold, keeping your home environment healthier. Take your time with each component.
Cleaning the Machine’s Body and Internal Components
After cleaning the removable parts, it is time to focus on the main body of the carpet shampooer and its internal components. While you cannot fully disassemble the entire machine, there are still crucial areas to address. These areas can harbor dirt, old solution, and moisture, impacting performance and hygiene. Proper care here complements the cleaning of removable parts.
Wiping Down the Exterior
The exterior of your carpet shampooer might not hold dirty water, but it can still get grimy. Dust, spills, and splashes of dirty water can collect on the outside casing. Use a damp microfiber cloth to wipe down the entire exterior. Pay attention to cracks and crevices where dirt might hide. If there are stubborn spots, a little mild dish soap on your cloth can help. Gently scrub any sticky areas. This step keeps your machine looking good and prevents dirt from being transferred to your hands or floors. A clean exterior reflects a well-maintained appliance.
Flushing the Internal Hoses and Channels
Even after emptying the tanks, some dirty water or residue can remain in the machine’s internal hoses and suction channels. These are the pathways the water travels through. To flush them, fill the clean water tank with plain warm water, or a solution of half water and half white vinegar. Run the shampooer as if you were cleaning the carpet, but aim it into a utility sink, bathtub, or outdoors. Let it spray and suction the clean water until the dirty water tank collects only clear water. This flushes out any remaining grime from the internal workings. This step is particularly important for preventing clogs and sour odors that can develop from stagnant dirty water. It helps ensure the machine is truly clean from the inside out.
Cleaning the Suction Path and Squeegee
Many carpet shampooers have a suction path or squeegee bar at the bottom. This part makes contact with the carpet and helps lift the dirty water. Hair, fibers, and sticky residue can get stuck here. Turn the machine over and inspect this area. Use a damp cloth or a small brush to clean any visible gunk. If your model has a removable squeegee, take it off and wash it under warm water. Ensure the suction path is clear and free of blockages. Any obstruction here will greatly reduce the machine’s ability to pick up water, leaving your carpets excessively wet. A clean suction path ensures maximum water recovery.
Cleaning the Motor Housing and Air Vents
The motor housing area, usually near the bottom of the machine, might have air vents. These vents allow the motor to cool down. Dust, dirt, and even pet hair can accumulate here, potentially blocking airflow. Use a dry cloth or a soft brush to gently remove any dust or debris from these vents. Do not use water directly on the motor housing. It is an electrical component. Keeping these vents clear helps prevent the motor from overheating, which can extend the lifespan of your carpet shampooer. Proper airflow is essential for the machine’s safe and efficient operation.
By addressing these internal and external parts, you ensure your carpet shampooer is thoroughly cleaned. This comprehensive approach prevents future issues and maintains the machine’s peak performance. It is a critical step in overall maintenance.
Dealing with Common Issues: Mold, Odors, and Clogs
Even with regular cleaning, you might encounter specific issues like mold, persistent odors, or clogs. These problems can be frustrating, but they are often preventable or treatable with the right approach. Addressing them quickly keeps your carpet shampooer working well and prevents worse problems.
Combating Mold Growth
Mold is a common issue for carpet shampooers if they are not dried completely. It thrives in damp, dark environments. You might see black or green spots on the tanks, hoses, or even inside the machine’s base. Mold not only smells bad but can also spread spores into your home. To combat mold, a strong cleaning solution is needed. Fill the clean water tank with a mixture of equal parts white vinegar and warm water. Run this solution through the machine, cycling it into the dirty water tank. Then, let the machine sit for a few hours with the vinegar solution inside the tanks. For visible mold on removable plastic parts, soak them in the same vinegar solution. Scrub the affected areas thoroughly with a brush. Vinegar is a natural disinfectant and mold killer. After cleaning, rinse all parts with clear water. Ensure all components are completely dry before reassembling. For stubborn mold on plastic parts, sometimes a more targeted approach is needed. You can find helpful information on how to clean mold off plastic to guide you. If mold has gotten into the internal hoses, using a strong vinegar solution run through the machine as if cleaning will help. It’s similar to how you might clean mold in a dishwasher. Prevention is key: always dry your machine thoroughly after each use.
Eliminating Stubborn Odors
A lingering bad smell in your carpet shampooer usually comes from dirty water or cleaning solution left inside. If basic rinsing does not remove the smell, try a vinegar flush. As mentioned for mold, running a white vinegar and water solution through the machine can neutralize odors. Vinegar works by breaking down the odor-causing bacteria. You can also add a few drops of an essential oil, like tea tree oil, to the vinegar solution for a pleasant scent. Another common source of odor can be leftover soap residue. Sometimes, just running plain hot water through the machine a few times can flush out remaining soap. This stops it from becoming stagnant and smelly. If the machine smells very bad, and the dirty water you collected had a strong smell, you might want to look into how to get vinegar smell out of carpet if you use vinegar in your cleaning routine. This is usually only a concern for the carpet itself, not the machine, but it shows the power of vinegar.
Clearing Clogs and Blockages
Clogs are often caused by hair, carpet fibers, or dried cleaning solution. They typically occur in the nozzle, brush area, or suction hose. If your machine is not spraying or suctioning properly, a clog is likely.
- Nozzle Clogs: Use a small pin or paperclip to poke through the spray holes. This will clear any dried residue.
- Brush Clogs: Remove the brush roll if possible. Cut away any tangled hair or fibers with scissors. Clean the brush bristles thoroughly.
- Suction Hose Clogs: If your machine has a separate hose attachment, detach it. Try running water through it from both ends to dislodge the clog. For built-in suction paths, you may need to use a flexible brush or a straightened coat hanger, gently, to clear the obstruction. Always be careful not to damage the internal components.
Regular cleaning prevents most clogs. After each use, take a few moments to check for and remove any visible hair or debris from the brushes and nozzle. This simple step saves you from bigger problems later. Addressing these common issues quickly ensures your carpet shampooer remains an effective cleaning tool.
Drying, Storage, and Long-Term Maintenance Tips
Proper drying and storage are just as important as the cleaning process itself. If you clean your carpet shampooer but do not let it dry completely, you risk mold growth and unpleasant odors. Good storage also protects the machine from damage. Following these long-term maintenance tips will ensure your shampooer is always ready for its next job and lasts for many years.
Ensuring Complete Drying
This is the most critical step after cleaning. Even a small amount of moisture can lead to mold and mildew. After washing all parts, lay them out to air dry.
- Air Dry Components: Place the clean water tank, dirty water tank, nozzle, brushes, and any other removable parts in a well-ventilated area. A sunny spot is ideal as UV light helps kill any remaining bacteria.
- Open Tank Lids: Leave the lids off the tanks to allow air circulation inside. This prevents moisture from getting trapped.
- Wipe Down the Machine Body: Use a dry cloth to wipe down the entire exterior of the main machine body. Pay attention to any crevices or recessed areas where water might collect.
- Drying Time: Allow at least 24 hours for all parts to dry completely. Some thicker plastic parts or intricate areas might need longer. You can even use a small fan to speed up the drying process. Do not rush this step. I always make sure everything feels bone-dry before putting it back together.
Proper Storage Practices
Once your carpet shampooer is completely dry, assemble the parts loosely. Do not seal the tanks tightly. Leaving them slightly open allows for any residual moisture to escape.
- Store in a Dry Place: Choose a storage location that is cool and dry. Basements or garages can be damp, so consider using a dehumidifier if storing there. Avoid areas with extreme temperature changes.
- Protect from Dust: You can cover the shampooer with a sheet or a large plastic bag to protect it from dust. Dust can get into the motor and other internal components over time.
- Store Upright: Always store the machine in its upright position. Laying it on its side can put stress on certain parts or cause trapped moisture to settle in unwanted areas.
Long-Term Maintenance Tips
Beyond cleaning after each use, there are a few other tips for long-term care:
- Use Proper Solution: Always use the carpet cleaning solution recommended by your machine’s manufacturer. Using off-brand or homemade solutions not designed for the machine can cause buildup, damage internal components, or void your warranty.
- Check Hoses and Cords: Before and after each use, inspect the power cord for any fraying or damage. Check hoses for kinks, cracks, or blockages. Damaged parts should be replaced immediately for safety and performance.
- Inspect Seals and Gaskets: Over time, rubber seals and gaskets can wear out or become brittle. Inspect them for cracks or loss of elasticity. Damaged seals can lead to leaks or loss of suction. Replace them as needed.
- Regular Deep Cleanings: Even if you clean after every use, perform a more thorough deep clean every few months, especially if you use the machine often. This involves more detailed scrubbing of all removable parts and flushing the internal system with a vinegar solution. This deeper clean helps to prevent any subtle buildup from becoming a major issue.
- Avoid Overfilling: Do not overfill the dirty water tank. Filling it beyond the max fill line can lead to overflow into parts of the machine not designed for water, potentially damaging the motor or creating excessive moisture.
By dedicating time to proper drying, mindful storage, and regular checks, you ensure your carpet shampooer remains a reliable and effective tool for keeping your carpets spotless. These habits will save you money and headaches in the long run.
Common Cleaning Mistakes to Avoid
Even with the best intentions, it’s easy to make mistakes when cleaning your carpet shampooer. Avoiding these common errors ensures you do not damage your machine or make problems worse. A little awareness goes a long way in maintaining your appliance effectively.
Not Cleaning Immediately After Use
The biggest mistake people make is delaying the cleaning process. Dirty water and cleaning solution left in the tanks and hoses can quickly become a breeding ground for bacteria and mold. It also allows residue to dry and harden, making it much harder to remove later. Always clean your carpet shampooer as soon as you finish using it. This simple habit saves you a lot of effort and prevents bad smells. I always empty and rinse mine right away.
Using Harsh Cleaning Products
It might seem like a good idea to use strong chemicals or abrasive cleaners to tackle tough grime. However, these products can damage the plastic components, rubber seals, and internal mechanisms of your carpet shampooer. Bleach can degrade plastic and rubber over time. Abrasive scrubbers can scratch surfaces, creating tiny nooks where dirt and mold can hide. Stick to mild dish soap, warm water, and white vinegar. These are gentle yet effective for breaking down most residues and odors. For specific cleaning tasks on different materials, understanding how to clean various surfaces, like how to clean mold off concrete, shows that specific cleaners are often needed for specific materials, but for a shampooer, gentle is best.
Neglecting Internal Components
Many people focus only on the tanks and brushes. They forget about the internal hoses, channels, and the machine’s base. Dirty water and residue can easily get trapped in these unseen areas. This leads to hidden mold growth and lingering odors that you cannot get rid of. Always flush the internal system by running clean water (or a water-vinegar mix) through the machine. Tip the machine to drain all remaining water. Ensure all hidden parts dry completely.
Not Allowing Parts to Dry Completely
As discussed, incomplete drying is a prime cause of mold and mildew. Rushing the drying process and reassembling wet components traps moisture inside. This creates a perfect environment for fungi to grow. Always give all parts ample time to air dry, ideally for 24 hours, in a well-ventilated area. If you live in a humid climate, consider using a fan or dehumidifier to speed up drying. I sometimes leave my tanks open overnight.
Forgetting to Check for Clogs and Debris
Hair, carpet fibers, and dried cleaning solution can easily clog the spray nozzles, brush rolls, and suction ports. If you do not regularly inspect and clear these areas, your machine’s performance will suffer. It might stop spraying evenly or lose its suction power. Before putting the machine away, take a quick moment to clear any visible debris. Use a small tool like a toothpick for nozzle holes or scissors for tangled hair on brushes. This small step prevents bigger problems during your next cleaning session.
Avoiding these common mistakes ensures your carpet shampooer remains efficient, odor-free, and long-lasting. Proper cleaning involves attention to detail and patience.
Conclusion
Keeping your carpet shampooer clean is not just about appearances; it is crucial for its performance, longevity, and for truly fresh carpets. We have covered the importance of immediate cleaning, gathering the right tools, and a detailed guide on how to clean carpet shampooer parts, both removable and internal. From tackling stubborn mold and unpleasant odors with simple solutions like vinegar to preventing clogs by clearing debris, each step contributes to a healthier cleaning routine.
Remember the key takeaways: always clean your machine right after use, make sure all components dry completely before storage, and use gentle cleaning agents. Avoiding common mistakes like using harsh chemicals or neglecting hidden parts will save you time and money in the long run.
A well-maintained carpet shampooer will deliver consistent, powerful cleaning results. It will ensure your carpets are not only visually clean but also truly hygienic. By following these steps, you will extend the life of your appliance.
Your home will always have that clean, fresh scent after every use. Go ahead, give your carpet shampooer the care it deserves, and enjoy beautifully cleaned carpets for years to come.
- carpet cleaner maintenance
- shampooer cleaning tips
- deep cleaning machine

Todd Martin
Senior Writer
With over 15 years of experience in home renovation and design, I started HEG to share what I’ve learned with homeowners who want to create spaces that are both beautiful and functional. I’ve always believed in a hands-on approach, and over the years, I’ve picked up practical solutions that actually work. Through HEG, I aim to make home improvement more approachable, sharing real tips that help you create a home you truly love.