· Todd Martin · Home Maintenance · 20 min read
How To Clean Central Air Conditioner Evaporator Coils
Cleaning Your Central AC Evaporator Coils: A Homeowner’s Guide
Have you ever wondered what keeps your home cool and comfortable during scorching summers? Your central air conditioner works hard, and its evaporator coils play a key role. These coils sit inside your indoor unit, often in your furnace or air handler, and absorb heat from your home’s air. Over time, dust, dirt, and mold build up on these coils. This buildup makes your AC less efficient. It can also reduce indoor air quality. Learning how to clean central air conditioner evaporator coils is a smart skill. It helps you save money on energy bills and keeps your home comfortable. This article provides a comprehensive guide. We will walk you through the process, ensuring your AC runs smoothly.
Takeaway
- Improve Efficiency: Clean coils allow your AC to cool more effectively. This reduces energy consumption.
- Extend Lifespan: Regular cleaning prevents strain on your system. It helps your AC last longer.
- Enhance Air Quality: Removing dirt and mold from coils prevents them from circulating into your home.
- Prevent Costly Repairs: Dirty coils can cause issues like freezing or leaks. Cleaning avoids these problems.
- DIY Empowerment: You can perform this maintenance yourself with the right tools and steps.
What is the main benefit of cleaning central AC evaporator coils?
Cleaning central air conditioner evaporator coils ensures your system runs efficiently. It improves indoor air quality. It also prevents common AC problems like freezing or poor airflow. Regular cleaning helps extend the lifespan of your unit, saving you money on repairs and energy bills.
Understanding Your Central Air Conditioner’s Evaporator Coils
Your central air conditioner has two main sets of coils: condenser coils and evaporator coils. The condenser coils are outside your home. They release heat. The evaporator coils are inside. They absorb heat from your home’s air. The evaporator coils are a critical part of your AC’s cooling cycle. Warm air from your home passes over these cold coils. The coils then absorb the heat from the air. This cools the air down. The cooled air then circulates back into your living spaces.
The surface of these coils is often wet from condensation. This moisture, combined with airflow, makes them perfect traps for airborne particles. Dust, pet dander, pollen, and even mold spores can cling to the coil fins. Over time, this buildup forms a thick layer of grime. This layer acts as an insulator. It prevents the coils from absorbing heat efficiently. Think of it like wearing a heavy coat on a hot day. The coil cannot do its job as well. This reduces your AC system’s ability to cool your home. It also increases your energy consumption. Regular cleaning of these coils is essential for maintaining optimal system performance.
Knowing where these coils are located helps you understand the cleaning process. Evaporator coils are typically found in the indoor unit. This unit is often part of your furnace or air handler. It might be in your basement, attic, or a utility closet. You may need to remove a service panel to access them. Understanding their function and location is the first step. This prepares you for proper maintenance. Cleaning all parts of your air conditioner, including the condenser unit outside, contributes to overall system health. You can learn more about how to clean air conditioner coils, both inside and out, to ensure your entire system is running at its best. Maintaining a clean system keeps your home comfortable and your energy bills low.
Why Dirty Evaporator Coils Cause Problems
Dirty evaporator coils do more than just make your air conditioner work harder. They can lead to a range of significant problems for your system and your home. When coils are covered in a layer of grime, they cannot absorb heat effectively. This means your AC unit runs longer to reach the set temperature. This increased runtime wastes energy. It also drives up your electricity bills. Your system struggles to cool your home properly. This results in warm spots or a lack of comfort, even when the AC is on. It is a common reason why your central air conditioner might not be blowing hard.
Beyond efficiency and comfort, dirty coils can lead to mechanical issues. The most common problem is coil freezing. When coils are dirty, airflow over them becomes restricted. The coils get too cold because the heat exchange is poor. This causes moisture in the air to freeze onto the coil surface. A frozen coil cannot absorb heat at all. This stops the cooling process entirely. If your central air conditioner line is freezing up, dirty evaporator coils are a likely cause. This situation can stress your compressor. It is the most expensive part of your AC system. Continued stress can lead to premature failure.
Another issue is water leakage. Evaporator coils produce condensation as they cool the air. This water usually drips into a drain pan. It then exits through a condensate drain line. Dirt and mold from the coils can clog this drain line. When the drain line clogs, the water has nowhere to go. It overflows the drain pan. This water can then leak into your home. This causes water damage to ceilings, walls, or flooring. It is a common reason why your central air conditioner is leaking water inside. This water damage can be extensive and costly to repair. It can also promote mold growth inside your home. Dirty coils can also make your unit work so hard it becomes unusually loud. This often means something is wrong. Understanding these issues highlights the importance of regular coil cleaning. It helps prevent minor problems from becoming major headaches.
Safety First: Preparing for Evaporator Coil Cleaning
Before you begin any work on your central air conditioner, safety must be your top priority. Working with electrical appliances without proper precautions can lead to serious injury or even death. Always start by completely disconnecting power to your AC unit. You need to turn off power at two locations. First, find your thermostat and set it to “off.” This stops the unit from cycling on. Second, locate the circuit breaker that controls your indoor air handler or furnace. Flip the breaker switch to the “off” position. If you are unsure which breaker it is, turn off the main breaker for your home. This ensures no electricity reaches the unit while you are working.
Once the power is off, gather all the necessary tools and supplies. Having everything ready before you start will make the process smoother and more efficient. Here is a list of items you will likely need:
- Screwdriver set: You will need this to remove access panels.
- Shop-Vac or wet/dry vacuum: For vacuuming loose debris and water from the drain pan.
- Stiff brush or coil fin comb: To gently clean fins and straighten bent ones.
- Coil cleaner spray: Specifically designed for evaporator coils. Look for non-acidic, self-rinsing types.
- Bleach (optional): For cleaning the drain pan and condensate line.
- Gloves and safety glasses: To protect your hands and eyes from dirt and cleaning chemicals.
- Work light or flashlight: For better visibility in dark spaces.
- Rags or old towels: To wipe up spills and clean surfaces.
- Bucket: To catch water if you flush the drain line.
- Mask: To avoid inhaling dust and mold spores.
Wearing appropriate personal protective equipment (PPE) is crucial. Gloves protect your skin from sharp coil fins and cleaning solutions. Safety glasses shield your eyes from dust, debris, and chemical splashes. A mask prevents you from breathing in airborne particles, especially if mold is present. Remember, some spaces where evaporator coils are located can be tight or dimly lit. Take your time, use adequate lighting, and never rush. Your safety is more important than speed. If you feel uncomfortable or unsure at any point, consider calling a qualified HVAC professional.
Step-by-Step Guide to Clean Central AC Evaporator Coils
Cleaning your central air conditioner’s evaporator coils might seem intimidating, but it is a manageable DIY task. Following these steps carefully will ensure a thorough and safe cleaning process. Remember, I am here to help you through each part.
Locating the Evaporator Coil
Your evaporator coil is part of your indoor HVAC unit. This unit is usually found in your basement, attic, or a utility closet. It is often connected to your furnace. Look for the large metal box where your air ducts connect. The coil is typically housed within this air handler or furnace cabinet. There will be a return air duct leading into it and supply ducts leading out.
Accessing the Coil
Once you locate the unit, you need to gain access to the coils.
- Turn off Power: As mentioned earlier, turn off the thermostat and the circuit breaker for your unit. Verify power is off before proceeding.
- Remove Access Panels: The coil is usually behind a removable access panel. These panels are often secured with screws or clips. Use your screwdriver to remove the screws. Carefully set the panels aside.
- Look for the A-Coil: You will usually see the coil shaped like an “A” or an “N” (often called an A-coil). It will be covered in metal fins.
Cleaning the Drain Pan and Line
The drain pan sits directly beneath the evaporator coil. It collects condensed water. This water then flows out through a condensate drain line. This area often collects sludge and can become a breeding ground for mold.
- Inspect and Clear Debris: Use your Shop-Vac to remove any standing water, sludge, or debris from the drain pan.
- Clean the Pan: Wipe down the drain pan with a rag. You can mix a solution of 1 part bleach to 16 parts water to disinfect the pan. Pour this solution into the pan and let it sit for 15-20 minutes.
- Clear the Condensate Drain Line: Locate the condensate drain line. It is usually a PVC pipe exiting the drain pan area. It might have a small cap or opening you can access. Pour a cup of the bleach solution (or specialized condensate line cleaner) down the line. This helps clear any clogs caused by algae or mold. If the line is severely clogged, you might need to use the Shop-Vac to suck out the clog from the outdoor end of the pipe. If your AC is leaking water inside, a clogged drain line is often the culprit.
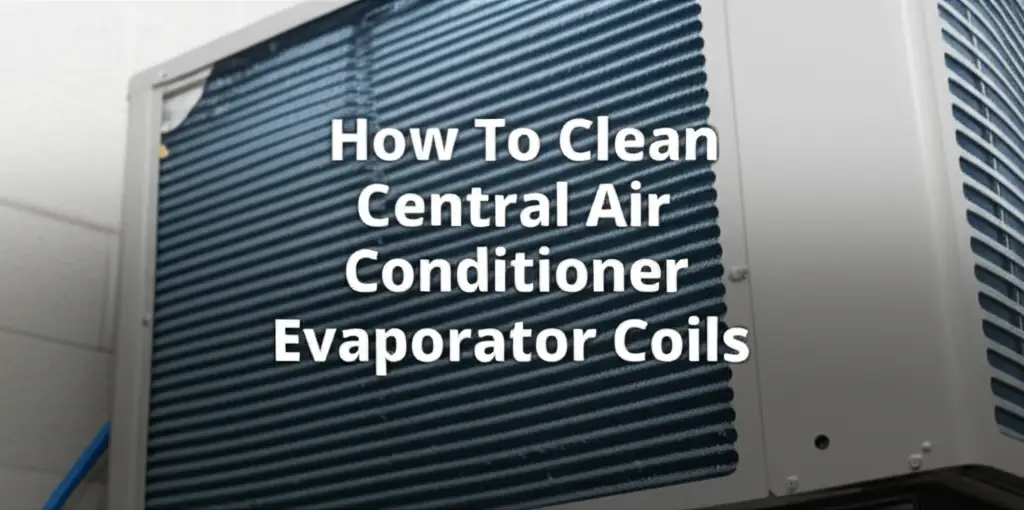
Cleaning the Evaporator Coil Itself
This is the main event. The goal is to remove the accumulated dust and grime from the coil fins.
- Vacuum Loose Debris: Use your Shop-Vac with a brush attachment to gently vacuum any loose dust, dirt, or lint from the coil fins. Be careful not to bend the delicate fins.
- Straighten Bent Fins: If you notice any bent fins, use a coil fin comb. Gently slide the comb through the fins to straighten them. Straight fins allow for better airflow and heat exchange.
- Apply Coil Cleaner: Use a non-acidic, self-rinsing evaporator coil cleaner. Shake the can well. Spray the cleaner evenly over the entire surface of the coil. Start from the top and work your way down. Ensure good coverage. Most cleaners are designed to foam up and then slowly drip into the drain pan, taking the grime with them. Follow the product instructions for dwell time. Usually, you do not need to rinse it with water, as the condensation from normal AC operation will rinse it over time.
- Allow to Dry: Give the cleaner ample time to work and the coil to air dry. This might take 15-30 minutes, or longer depending on the product.
Reassembly and Testing
Once the coil is clean and dry, you are ready to put everything back together.
- Replace Access Panels: Securely reattach all access panels you removed. Ensure all screws or clips are in place.
- Restore Power: Go back to your circuit breaker and flip the switch back to the “on” position.
- Turn on Thermostat: Set your thermostat back to “cool” and set your desired temperature. Listen for your AC to kick on.
- Monitor Performance: Check that your AC is blowing cold air strongly. You should also observe that no water is leaking from the unit. If your central air conditioner was not blowing hard before, you should notice a significant improvement in airflow and cooling performance. This is a good time to observe if your central air conditioner is still turning on and off unusually, which could indicate other issues beyond just coil cleanliness.
By following these steps, you will have successfully cleaned your central AC evaporator coils. This routine maintenance helps prevent many common AC problems.
Choosing the Right Evaporator Coil Cleaner
Selecting the right cleaner for your central AC evaporator coils is important for both effectiveness and safety. There are several types of coil cleaners available, each with its own characteristics. Knowing the differences helps you make an informed choice.
Types of Coil Cleaners:
No-Rinse (Self-Rinsing) Cleaners: These are perhaps the most popular choice for DIY homeowners. You spray them onto the coils, and as the AC operates, the condensation that forms on the coils gradually rinses the cleaner and dissolved grime into the drain pan. They are convenient because they eliminate the need for manual rinsing with water, which can be messy and difficult in tight spaces. Most no-rinse cleaners are non-acidic and safe for residential use. They effectively break down dirt, dust, and light mold.
Foaming Cleaners: Many no-rinse cleaners are also foaming cleaners. The foam helps lift dirt and debris from between the coil fins. This makes it easier for the condensation to wash it away. The visual aspect of the foam working can be reassuring.
Rinse-Required Cleaners: These cleaners are often stronger and may be acidic or alkaline. They are very effective at cutting through heavy grease and grime. However, they require thorough rinsing with water after application. Using them incorrectly or failing to rinse properly can damage your coils or leave corrosive residues. These are generally best left for professional HVAC technicians who have the right equipment and experience for proper application and rinsing.
Enzyme-Based Cleaners: These cleaners use natural enzymes to break down organic matter like mold, mildew, and slime. They are often biodegradable and more environmentally friendly. They are good for persistent mold issues in the drain pan and on the coils.
DIY Solutions vs. Commercial Cleaners:
While some homeowners might consider using simple solutions like warm water with a mild dish soap, commercial coil cleaners are formulated specifically for AC coils. They contain agents that effectively dissolve dirt, grease, and even mold without damaging the delicate aluminum fins. They are designed to be safe for your system’s components.
- Avoid Harsh Chemicals: Never use household cleaners like strong bleaches, oven cleaners, or general-purpose degreasers on your evaporator coils. These can be corrosive to the coil’s metal. They can also produce harmful fumes.
- Check for HVAC-Specific Labels: Always look for products specifically labeled for “evaporator coil cleaning” or “HVAC coil cleaner.” Read the instructions carefully. Ensure the cleaner is safe for aluminum and copper.
- Consider Manufacturer Recommendations: If you know your AC unit’s brand, check if the manufacturer recommends a specific type of cleaner. For example, if you have a Lennox unit, you might research if there are recommended cleaning products for Lennox air conditioner evaporator coils.
When applying any cleaner, ensure you have good ventilation. Wear gloves and eye protection. Spray evenly, following the product’s directions. A good cleaner, combined with proper application, will make your coil cleaning efforts much more effective.
Maintaining Clean Evaporator Coils for Lasting Performance
Cleaning your central AC evaporator coils is a significant step in maintaining your system. However, it is not a one-time fix. Regular maintenance prevents future buildup and ensures lasting performance. Think of it as ongoing care for a vital appliance.
One of the easiest and most impactful maintenance tasks is regularly changing your air filter. Your air filter is the first line of defense against dust and debris reaching your evaporator coils. A dirty filter blocks airflow and allows more particles to bypass it and accumulate on the coils. I change my filter every 1-3 months, depending on usage, pet presence, and overall air quality in my home. If you have pets or allergies, more frequent changes are wise. This simple habit dramatically reduces the amount of dirt that reaches your coils.
Beyond filter changes, consider the frequency of coil cleaning. For most homes, cleaning evaporator coils annually is sufficient. The best time to do this is typically in the spring, before you heavily rely on your AC for the summer. This ensures your system starts the cooling season clean and efficient. If you live in a very dusty area, have multiple pets, or notice your AC performance dipping, you might need to clean the coils more often, perhaps twice a year. Some general advice on how often should a central air conditioner be serviced often includes coil cleaning as part of that routine.
Professional HVAC tune-ups also play a crucial role. While you can clean your evaporator coils, a professional technician performs a deeper inspection and cleaning. They have specialized tools and knowledge. They can access parts of your system you might not be able to reach. They also check refrigerant levels, electrical connections, and other components. These annual check-ups ensure your entire system is running optimally. They can catch minor issues before they become expensive repairs.
Other general AC maintenance tips contribute to cleaner coils. Keeping the area around your outdoor condenser unit clear of debris helps the entire system breathe better. You can also learn how to clean your central air conditioner condenser unit outside. Ensuring your home’s air ducts are clean reduces the amount of dust circulating. This means less dust can settle on your evaporator coils. By combining regular filter changes, annual coil cleaning, and professional servicing, you maximize your AC’s efficiency and lifespan. You also help prevent common AC problems, like your central air conditioner keeping on and off frequently. This proactive approach saves you money and keeps your home comfortable for years to come.
When to Call a Professional for Evaporator Coil Cleaning
While cleaning your central AC evaporator coils can be a rewarding DIY task, there are specific situations where calling a professional HVAC technician is the best course of action. Knowing when to seek expert help can save you from potential damage to your system or even personal injury.
One primary reason to call a professional is if you encounter heavy mold growth on your coils. While a little bit of surface mold can be handled with a DIY cleaner, extensive mold can indicate a larger moisture problem within your system. It also poses health risks if not handled properly. Professionals have specialized equipment and stronger, safer chemicals to effectively remove severe mold infestations. They can also identify and address the root cause of the excessive moisture, preventing future mold problems. If you see black, fuzzy growth covering a large portion of your coils, it is time to call an expert.
Another situation is if the evaporator coil is difficult to access. In some HVAC setups, the coil might be tucked away in a cramped space, behind multiple panels, or in an awkward orientation. Trying to force your way into these areas can damage ducts, wires, or the coil itself. A professional technician has the experience and specific tools to safely reach and clean coils in challenging locations. They can disassemble and reassemble parts of your air handler if needed, without causing damage.
Furthermore, if you are unsure about any step of the cleaning process, or if you feel uncomfortable working with electrical components, do not hesitate to call for help. Safety is paramount. It is better to pay for professional service than risk injury or damage to your expensive AC unit. If you follow all the DIY steps but your central air conditioner still struggles, or if you notice new problems after cleaning, a professional can diagnose underlying issues. For instance, if your central air conditioner is still so loud after cleaning, it points to another mechanical problem. Dirty coils can sometimes mask other malfunctions. A technician can perform a thorough diagnostic check of the entire system. This includes refrigerant levels, fan motors, and electrical connections. They can determine if the coil issues are part of a larger problem. For example, they can check if a component failure is why your central air conditioner is not turning on.
Finally, consider the overall health of your HVAC system. If your central air conditioner is older, or if it has not had professional maintenance in a long time, a comprehensive tune-up might be more beneficial than just a coil cleaning. A technician can assess the system’s age and condition. They can advise you on overall lifespan and necessary repairs. This can include checking if your central air conditioner keeps running excessively or if other parts are failing. Regular professional servicing helps ensure your unit lasts for many years.
Frequently Asked Questions (FAQs)
How often should I clean my central AC evaporator coils?
You should aim to clean your central AC evaporator coils at least once a year. The best time is typically in the spring, before the cooling season begins. However, if you have pets, allergies, or live in a dusty environment, you might consider cleaning them twice a year for optimal performance and air quality.
Can I use water to clean evaporator coils?
Most modern evaporator coil cleaners are “no-rinse” or “self-rinsing” formulas. These are designed to be left on the coils, with condensation during operation doing the rinsing. Using a hose or large amounts of water to rinse manually can be messy and risks getting water into electrical components or areas not designed for water exposure, potentially causing damage. Stick to the product instructions.
What happens if I don’t clean my evaporator coils?
If you neglect cleaning your evaporator coils, they will accumulate dirt and grime. This buildup reduces your AC’s efficiency, making it work harder and consume more energy. It can lead to common issues like frozen coils, reduced airflow, water leaks from the drain pan, and even premature system failure. Dirty coils also negatively impact indoor air quality.
Is coil cleaning a DIY job or for professionals?
Basic evaporator coil cleaning can be a DIY job for most homeowners who are comfortable with simple tools and following instructions. However, if you encounter extensive mold, struggle with accessing the coils, or prefer not to work with your HVAC system, it’s best to call a professional. They have specialized tools and expertise for more complex situations.
What are signs of dirty evaporator coils?
Signs of dirty evaporator coils include reduced cooling performance (your home feels less cool than usual), higher energy bills, a musty or moldy smell coming from your vents, water leaking from your indoor unit, or your AC coil freezing up. If you notice any of these symptoms, inspecting and cleaning your coils should be one of your first troubleshooting steps.
Conclusion
Taking the time to clean central air conditioner evaporator coils is a valuable investment. It significantly improves your home’s comfort and your system’s longevity. We have covered the importance of these coils, the problems dirty coils cause, and how to safely clean them. You now know the step-by-step process. You also understand when to choose a professional cleaner over a DIY approach. Remember, a clean coil leads to better efficiency. This means lower energy bills and consistent cooling.
Regular maintenance, including changing air filters and annual coil cleaning, keeps your AC running smoothly. Do not wait for your system to struggle. Proactive care saves you from costly repairs and ensures your indoor air is clean. I encourage you to add this essential task to your home maintenance routine. Your central air conditioner works hard for you. Give it the care it deserves. By following these guidelines, you will enjoy a cooler home and a more efficient AC system for years to come.
- central AC cleaning
- evaporator coil maintenance
- AC efficiency
- DIY AC repair
- HVAC cleaning

Todd Martin
Senior Writer
With over 15 years of experience in home renovation and design, I started HEG to share what I’ve learned with homeowners who want to create spaces that are both beautiful and functional. I’ve always believed in a hands-on approach, and over the years, I’ve picked up practical solutions that actually work. Through HEG, I aim to make home improvement more approachable, sharing real tips that help you create a home you truly love.