· Todd Martin · Home Maintenance, Appliance Care, Cleaning Tips · 18 min read
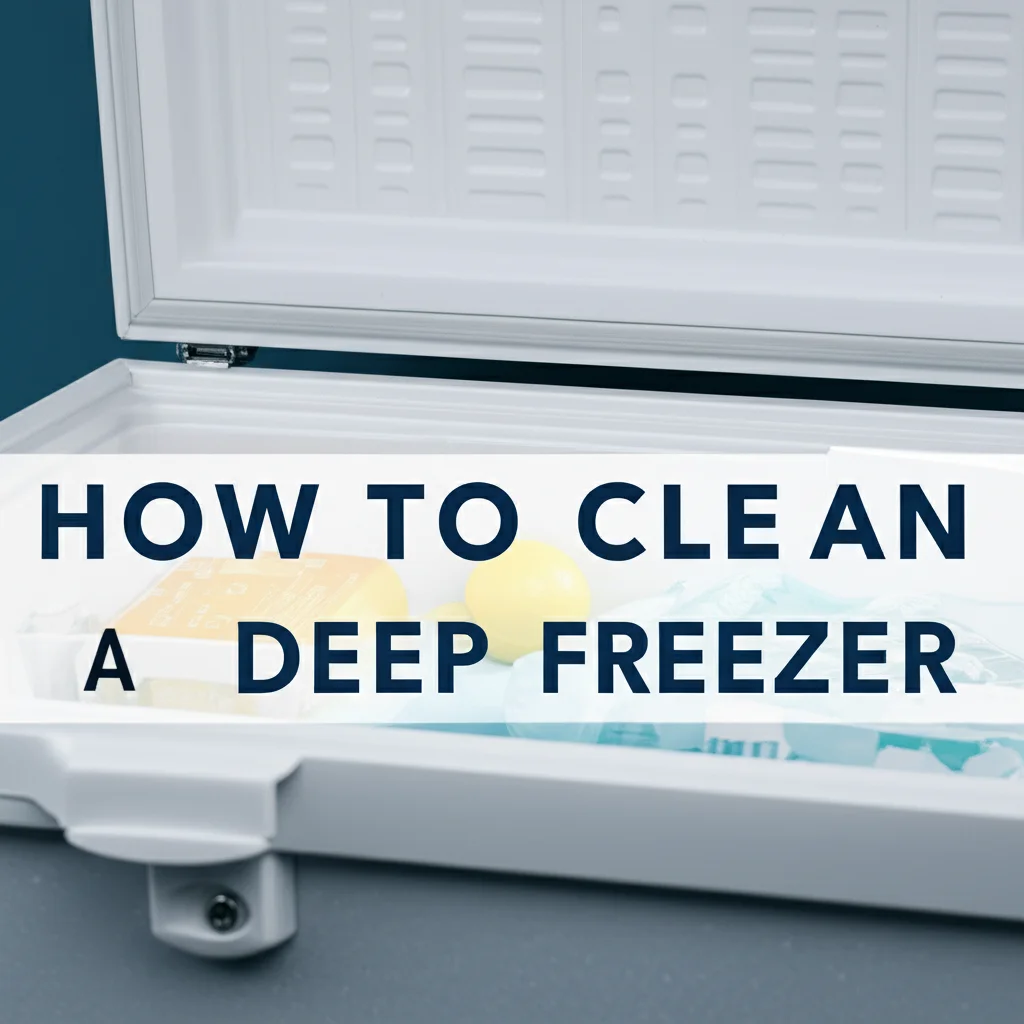
How To Clean Chest Freezer
Beyond the Basics: How to Deep Clean Your Chest Freezer
A chest freezer is a helpful appliance in many homes. It stores bulk food items and keeps them frozen for long periods. However, like any other appliance, it needs regular cleaning. A dirty freezer can harbor bacteria, develop unpleasant odors, and lose efficiency. Cleaning your chest freezer helps maintain food safety. It also extends the life of your appliance. I know the thought of cleaning a freezer full of food can feel daunting. But, it is a task worth doing.
This guide will show you how to clean your chest freezer step-by-step. We will cover everything from emptying its contents to tackling stubborn odors. You will learn about safe defrosting methods and effective cleaning solutions. We will also share tips for maintaining a sparkling clean freezer. This information helps you keep your freezer running its best. Let’s make your chest freezer a clean and efficient food storage solution.
Takeaway
- Prepare Safely: Unplug your freezer and safely store all food items before starting.
- Defrost Fully: Allow all ice to melt completely for easy and thorough cleaning.
- Clean Naturally: Use mild, non-toxic cleaners like vinegar and baking soda for a fresh interior.
- Dry Completely: Ensure the freezer is bone dry to prevent immediate ice buildup and mold.
- Maintain Regularly: Clean spills quickly and establish a cleaning schedule to keep your freezer efficient.
To clean a chest freezer, first unplug it and empty all contents into coolers. Allow the freezer to defrost completely. Then, wipe down the interior with a solution of warm water and mild soap or vinegar. Rinse the surfaces, dry them thoroughly, and clean the exterior and coils before plugging it back in.
1. Preparing Your Chest Freezer for Cleaning
Cleaning a chest freezer begins with proper preparation. This first step ensures your safety and protects your stored food. Do not skip any part of this process. It lays the groundwork for an effective cleaning job. I always make sure I have enough time for this stage.
Emptying and Storing Contents Safely
The first task is to remove all food items from your chest freezer. This might seem like a lot of work. However, it is essential for a thorough clean. Place all frozen food into coolers. Add ice packs or dry ice to keep items frozen. This prevents food from thawing. A large cooler works best for this. Consider using multiple smaller coolers if you have a lot of food. Labeling your food before removal can also help with re-organizing later.
Next, remove any baskets, dividers, or shelves. These items will need separate cleaning. Set them aside. They can soak in warm water while you clean the freezer’s interior. This makes cleaning them much easier.
Unplugging and Defrosting the Freezer
Safety is very important here. Always unplug your chest freezer from the wall outlet before cleaning. This removes any risk of electric shock. Once unplugged, open the freezer lid. Let the ice begin to melt naturally. Defrosting can take several hours, depending on the amount of ice.
For faster defrosting, you can place bowls of hot water inside the freezer. Close the lid for a few minutes. The steam helps melt the ice more quickly. You can also use a fan directed into the open freezer. Never use sharp objects to chip away ice. This can damage the freezer’s interior. This step is a key part of how to clean a chest freezer effectively. A well-defrosted freezer is much easier to clean. It also helps in preventing immediate ice buildup after the cleaning process. If you want more details on general deep freezer cleaning, you can read our guide on how to clean a deep freezer.
Place towels or old blankets around the base of the freezer. This catches any melting ice water. Have a mop and bucket ready to handle larger puddles. Some chest freezers have a drain plug at the bottom. Open this plug to let water drain out. Place a shallow pan or bucket under the drain to catch the water. This step helps manage the water runoff.
2. Gathering Your Cleaning Arsenal: Tools and Solutions
Before you start scrubbing, gather all your cleaning supplies. Having everything ready saves time and effort. You likely have most of these items at home already. Using the right tools and solutions makes the cleaning process simple. I like to lay everything out before I start.
Gentle Cleaning Agents You Already Have
You do not need harsh chemicals to clean your chest freezer. In fact, it is better to avoid them. Harsh cleaners can leave strong odors behind. These odors can then transfer to your food. Natural solutions are safe and effective.
- White Vinegar: This is a versatile cleaner and deodorizer. Mix equal parts white vinegar and warm water in a spray bottle. This solution cuts through grime and helps sanitize surfaces. Vinegar also works wonders in eliminating lingering smells. It’s a natural choice for a sparkling clean. You can also use it to get rid of odors.
- Baking Soda: Baking soda is another excellent natural cleaner. It is abrasive enough to help scrub away stubborn spots. Yet, it is gentle enough not to scratch surfaces. Mix baking soda with a little water to form a paste. This paste works well on sticky residues. Baking soda also absorbs odors. You can leave an open box of baking soda in the freezer after cleaning to keep it fresh.
- Mild Dish Soap: A few drops of mild dish soap in warm water create a basic cleaning solution. This works well for general wiping. It helps lift dirt and grease. Make sure to rinse thoroughly afterwards to avoid any soap residue. Choose an unscented variety if possible. This prevents any soapy smell from lingering.
These simple ingredients are powerful enough for cleaning. They are also safe for food storage areas. If you are dealing with any mold issues, a vinegar solution is often recommended. For general mold cleanup, understanding how to clean mold with vinegar can be helpful.
Tools for a Thorough Clean
Beyond your cleaning solutions, you will need a few basic tools. These items help you reach every corner. They also assist in effective scrubbing and drying.
- Soft Cloths or Sponges: Use these for wiping down surfaces. Microfiber cloths are great because they are absorbent and lint-free. Sponges help with light scrubbing.
- Small Scrub Brush: A small, soft-bristled brush can help clean crevices. It gets into tight spots. It works well on textured surfaces inside the freezer.
- Spray Bottle: This is perfect for applying your vinegar and water solution. It ensures an even spray over large areas.
- Bucket: You will need a bucket for your cleaning solution. It also helps collect melting water during defrosting.
- Dry Towels: Have plenty of clean, dry towels ready. You will need them to dry the interior thoroughly. Drying is a crucial step to prevent new ice buildup.
- Rubber Gloves: Protect your hands from cold water and cleaning solutions. This also keeps your hands clean during the process.
With these supplies on hand, you are ready to tackle the main cleaning steps. Having everything organized makes the job go much smoother.
3. The Step-by-Step Interior Deep Clean
Now that your chest freezer is empty and defrosted, it’s time for the deep clean. This is where you remove grime, sanitize surfaces, and prepare the interior for food storage. Taking your time here ensures a truly clean freezer. I always start from the top and work my way down.
Tackling Melted Ice and Debris
First, remove any remaining melted ice and debris. Use a sponge or towel to sop up water from the bottom of the freezer. Pay attention to corners and edges. Use a plastic scraper to gently remove any stubborn ice chunks. Remember, never use metal tools. They can scratch or puncture the freezer lining.
Wipe away any loose food particles. Small crumbs or spills can become sticky. Removing them now makes scrubbing easier. Use paper towels for this initial sweep. This prevents spreading dirt around.
Washing Walls, Floor, and Removable Baskets
Now, apply your chosen cleaning solution. For most chest freezers, a mixture of warm water and mild dish soap is good. You can also use the vinegar and water solution. Spray or wipe the solution onto the interior walls. Then, clean the floor of the freezer. Focus on getting into every crevice. A clean interior is vital for hygiene. For more specific advice on cleaning the base of your freezer, our article on how to clean a freezer floor offers more insights.
Use a soft cloth or sponge to scrub all surfaces. Pay extra attention to any sticky spots or dried spills. For tough grime, let the solution sit for a few minutes. This helps loosen the dirt. Rinse your cloth frequently in clean water. This prevents reapplying dirt.
Do not forget the removable baskets and shelves. Wash these in a sink with warm soapy water. Use a brush to clean any stubborn bits. Rinse them thoroughly. Set them aside to air dry completely. These parts often collect crumbs and small spills. Cleaning them ensures the entire freezer system is hygienic.
Addressing Stubborn Stains and Odors
Sometimes, even after wiping, stains or lingering odors remain. This happens often with spills that sat for a while. Do not worry; there are effective ways to handle these.
For stubborn stains, make a paste with baking soda and a little water. Apply this paste directly to the stain. Let it sit for 15-30 minutes. The baking soda will help lift the stain. Then, gently scrub with a soft brush or sponge. Rinse with a damp cloth. This method is safe for plastic surfaces. If you want to know more about cleaning stains from plastic, you might find our guide on how to clean stains on plastic useful.
For odors, vinegar is your best friend. After cleaning, spray the interior with your vinegar and water solution. Let it air dry. The vinegar smell will dissipate as it dries. For very strong odors, you can place an open box of baking soda or a bowl of activated charcoal inside the empty, unplugged freezer for a day or two. Close the lid. These absorb odors effectively. This helps eliminate any lingering smells before you put food back in.
4. Cleaning the Exterior and Condenser Coils
A comprehensive clean means addressing the outside of your chest freezer too. The exterior might not hold food, but it collects dust and grime. Moreover, the condenser coils play a vital role in your freezer’s efficiency. Neglecting them can lead to higher energy bills.
Wiping Down the Exterior Surface
The exterior of your chest freezer can gather dust, fingerprints, and smudges. Use a damp cloth with mild soap and water to wipe down all outer surfaces. This includes the lid, sides, and front. Pay attention to the handle, which often collects dirt from frequent touching.
For stainless steel exteriors, use a specialized stainless steel cleaner. Apply it with a soft cloth. Wipe in the direction of the grain to avoid streaks. Always check the manufacturer’s instructions for specific care. Keeping the exterior clean makes your kitchen or storage area look tidier. If your freezer has a stainless steel finish, our article on how to clean stainless steel provides detailed steps.
Ensure you also clean around the seal of the lid. Food particles and dust can collect here. Wipe it down with a damp cloth. This helps maintain a good seal. A tight seal is crucial for keeping cold air inside the freezer.
Maintaining Condenser Coils for Efficiency
The condenser coils are usually located on the back or bottom of your chest freezer. They release heat from the refrigerant. Over time, dust, pet hair, and lint can build up on these coils. This buildup acts as an insulator. It prevents the coils from releasing heat effectively. As a result, your freezer has to work harder. This uses more energy and increases your electricity bill.
To clean the coils, first, ensure the freezer is unplugged. Use a vacuum cleaner with a brush attachment. Carefully vacuum away any dust and debris from the coils. For hard-to-reach areas, a coil brush or a stiff bristled brush can be helpful. Be gentle when cleaning. Do not bend or damage the coils.
Clean the area around the coils as well. This prevents new dust from accumulating quickly. Cleaning the condenser coils every 6-12 months is a good practice. This simple maintenance step improves your freezer’s energy efficiency. It also extends the lifespan of your appliance. Keeping the coils clean is a key part of how to clean a chest freezer for optimal performance.
5. Drying, Powering Up, and Smart Organization
You have cleaned every inch of your chest freezer. Now comes the important final steps. Proper drying and thoughtful organization are crucial for a successful cleaning. This ensures your freezer works well and stays clean longer. I always double-check these steps.
Ensuring Complete Dryness
Before plugging your freezer back in, ensure the interior is completely dry. This is very important. Any moisture left inside will quickly turn into ice once the freezer cools down. This defeats the purpose of your deep clean. Use clean, dry towels to wipe down all surfaces. Pay special attention to corners and seams where water might collect.
You can also leave the freezer lid open for an hour or two. This allows air to circulate. It helps any remaining moisture evaporate. A small fan can speed up this process. Make sure there are no water droplets anywhere. A dry interior prevents mold growth and excessive ice buildup. This step contributes significantly to the efficiency of your freezer.
Powering Up and Reloading
Once the freezer is completely dry, you can plug it back in. Allow the freezer to cool down for at least 2-4 hours before putting food back in. This gives the appliance time to reach its optimal freezing temperature. Placing food into a warm freezer can cause it to thaw partly. It also makes the freezer work harder to cool everything down.
Use a freezer thermometer to check the temperature. Aim for 0°F (-18°C) or colder. Once it reaches the correct temperature, you can start reloading your food. This patient approach ensures food safety. It also helps your freezer maintain its temperature effectively.
Tips for Smart Organization
Reloading your chest freezer is an opportunity to organize it better. A well-organized freezer makes finding items easier. It also helps you use your food more efficiently. This can prevent food waste.
- Use Baskets and Dividers: If your freezer came with baskets, use them. They help group similar items together. You can also buy clear plastic bins or dividers. These make it easier to lift out contents without digging.
- Label Everything: Label all packages with the item name and date. This helps you identify what you have. It also ensures you use older items first. Use permanent markers on freezer bags or containers.
- Group Similar Items: Keep meats together, vegetables together, and baked goods together. This system makes it simple to locate what you need. It also helps you see what you have in stock.
- First-In, First-Out (FIFO): Place newer items at the bottom or back. Keep older items on top or in front. This ensures you use food before it passes its prime. This method reduces food waste.
- Create Zones: Designate specific areas for different food categories. For example, one side for meats, another for produce, and a third for prepared meals. This organization reduces rummaging time.
Smart organization helps keep your freezer tidy. It also optimizes cold air circulation. This means better energy efficiency. A well-organized freezer is a happy freezer.
6. Maintaining a Clean Freezer: Prevention Tips
Cleaning your chest freezer is a big job. But, you can make future cleanings easier with regular maintenance. Prevention is always better than a cure. By adopting a few simple habits, you can keep your freezer clean and efficient year-round. I find these small efforts make a huge difference over time.
Regular Maintenance Schedule
Establish a cleaning schedule for your chest freezer. A full deep clean, including defrosting, is often recommended every 6-12 months. This depends on how much you use it and how quickly ice builds up. However, you can do smaller maintenance tasks more often.
- Monthly Wipe-Downs: Once a month, take a few minutes to wipe down the easily accessible interior surfaces. Use a damp cloth with a little vinegar solution. This prevents small spills from becoming tough stains.
- Check the Seal: Periodically check the freezer door seal (gasket). Make sure it is clean and not cracked or damaged. A damaged seal lets cold air escape. It also allows warm, humid air in. This leads to faster ice buildup. Clean the gasket with warm, soapy water.
- Monitor Ice Buildup: If you notice ice forming quickly, it could indicate a problem with the seal. Address it promptly. Excessive ice reduces usable space and energy efficiency.
Regular checks and quick cleanups prevent small issues from becoming big problems. This proactive approach helps maintain your chest freezer’s efficiency.
Proper Food Storage Practices
How you store food inside your freezer impacts its cleanliness and efficiency. Good storage practices minimize spills and odors. They also help maintain food quality.
- Use Air-Tight Containers: Always store food in air-tight, freezer-safe containers or bags. This prevents freezer burn. It also stops food odors from spreading throughout the freezer.
- Wrap Food Properly: Ensure all food is well-wrapped before freezing. Use freezer-grade plastic wrap, foil, or bags. This protects food from exposure to cold, dry air. It also reduces the chance of spills.
- Avoid Overpacking: Do not overfill your chest freezer. While it might seem efficient, overpacking restricts air circulation. This makes the freezer work harder. Leave some space for air to move freely around items.
- Cool Food Before Freezing: Never place hot or warm food directly into the freezer. This raises the internal temperature. It makes the freezer work overtime. It also can cause condensation and ice buildup. Let food cool down completely before freezing.
These simple habits extend food freshness. They also contribute to a cleaner freezer. They are essential for optimal freezer performance.
Dealing with Spills Quickly
Spills are inevitable in any food storage appliance. The key is to address them immediately. A fresh spill is much easier to clean than a dried, frozen one.
- Immediate Action: If you notice a spill, wipe it up right away. Use a paper towel or a clean cloth. This prevents it from freezing solid. It also stops it from spreading.
- Use a Mild Cleaner: For sticky spills, a little warm water and mild dish soap can help. Follow up with a vinegar solution for sanitizing.
- Check Surrounding Areas: Spills can sometimes drip or spread. Check nearby items and surfaces to ensure they are also clean.
Quickly dealing with spills saves you from more intensive cleaning later. It also prevents odors and potential bacterial growth. This diligence is a core aspect of maintaining a hygienic chest freezer. Regular attention keeps your chest freezer running efficiently. It also ensures it stays a safe place for your food.
Frequently Asked Questions
How often should I clean my chest freezer?
You should deep clean your chest freezer, including defrosting, every 6 to 12 months. This depends on how much you use it and how quickly ice accumulates. Regular spot cleaning and checking the door seal monthly can help extend the time between full deep cleans.
Can I use harsh chemicals to clean my freezer?
No, it is best to avoid harsh chemicals. They can leave strong odors that transfer to food. They might also damage interior surfaces. Instead, use natural, food-safe solutions like a mixture of warm water and mild dish soap, white vinegar, or baking soda. These are effective and safe.
How do I get rid of bad smells in my chest freezer?
After cleaning, for persistent odors, place an open box of baking soda or a bowl of activated charcoal inside the empty freezer. Close the lid and leave it for a day or two. These absorb odors effectively. A final wipe with a vinegar-water solution also helps neutralize smells.
What is the best way to defrost a chest freezer quickly?
To speed up defrosting, unplug the freezer and place bowls of hot water inside. Close the lid for short periods to trap steam. You can also use a fan directed into the open freezer. Always avoid using sharp objects to chip ice. This can damage the freezer liner.
Why is ice building up quickly in my chest freezer after cleaning?
Rapid ice buildup after cleaning often means moisture was left inside before plugging it back in. It can also point to a faulty or dirty door seal. Check the seal for cracks or debris, and make sure it closes tightly. Ensure the interior is bone dry before restarting the freezer.
Can I put food back in immediately after cleaning?
No, wait until your freezer has reached its optimal freezing temperature. This usually takes 2-4 hours after plugging it back in. Placing food in a warm freezer can cause partial thawing. It also makes the appliance work harder to refreeze items. Use a freezer thermometer to confirm the temperature.
Conclusion
Cleaning your chest freezer might seem like a daunting chore. However, it is an essential part of home maintenance. A clean chest freezer helps keep your food safe and fresh. It also ensures your appliance runs efficiently. This saves you money on energy bills and extends the life of your freezer. I have found that a little effort goes a long way.
By following the steps in this guide, you can confidently tackle this task. From safe defrosting to using natural cleaning agents, you now have the tools. Remember to prepare thoroughly, clean meticulously, and dry completely. Implementing regular maintenance tips will keep your chest freezer in top condition. Take pride in knowing your food storage is clean and effective. A well-maintained chest freezer is a valuable asset in any home. Keep your home running smoothly with these valuable cleaning insights.
- chest freezer cleaning
- defrost freezer
- freezer maintenance
- eliminate odors
- food storage tips

Todd Martin
Senior Writer
With over 15 years of experience in home renovation and design, I started HEG to share what I’ve learned with homeowners who want to create spaces that are both beautiful and functional. I’ve always believed in a hands-on approach, and over the years, I’ve picked up practical solutions that actually work. Through HEG, I aim to make home improvement more approachable, sharing real tips that help you create a home you truly love.