· Todd Martin · Kitchen Care · 12 min read
How To Clean Chicken Livers
Mastering the Art: How To Clean Chicken Livers
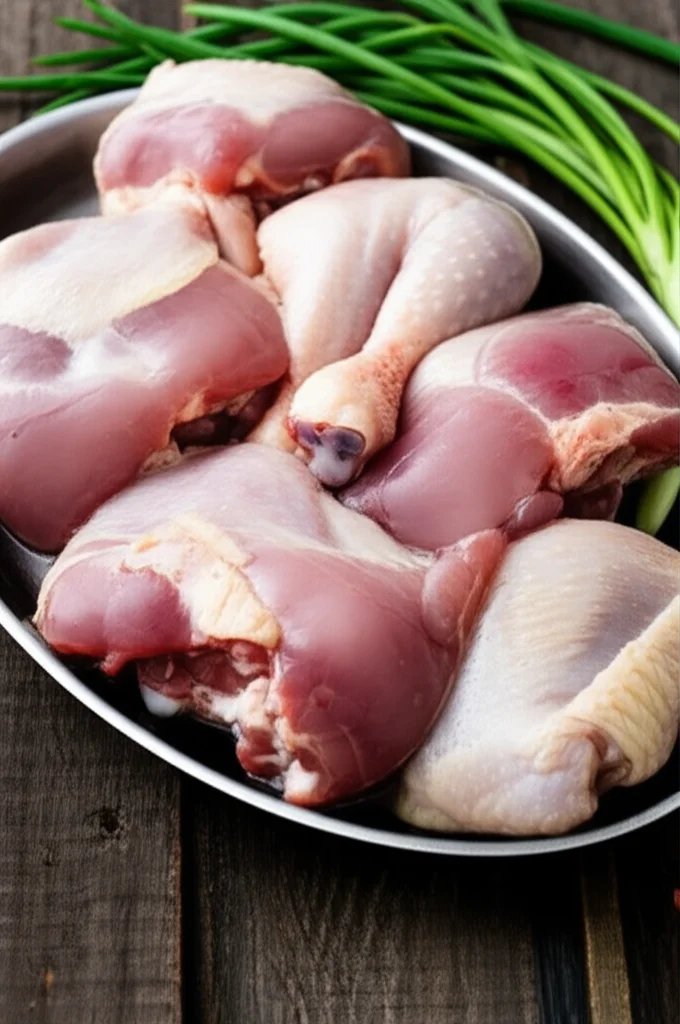
Chicken livers offer a unique flavor and many nutrients. They are a versatile ingredient in various dishes, from pâtés to sautéed meals. However, before cooking, you must properly clean chicken livers. This step is important for both taste and food safety.
Learning how to clean chicken livers makes a big difference. It removes any unwanted bits like connective tissue, fat, or bile, which can give an off-flavor. This guide will walk you through the process. We will cover the tools you need and simple steps to prepare your chicken livers. You will also learn about crucial food safety practices. By the end, you will feel confident preparing this ingredient for any recipe.
Takeaway
- Rinse thoroughly: Always wash chicken livers under cold running water to remove surface impurities and blood.
- Trim carefully: Use sharp kitchen shears or a knife to remove any green bits (bile ducts), tough connective tissue, or excessive fat.
- Soak for flavor: Consider soaking livers in milk or an acidic solution to mellow their strong flavor and improve texture.
- Practice food safety: Clean all surfaces, utensils, and your hands after handling raw chicken livers to prevent cross-contamination.
- Store correctly: Store cleaned livers in an airtight container in the refrigerator for immediate use or freeze for longer storage.
To clean chicken livers, rinse them thoroughly under cold water. Then, carefully trim away any green bile ducts, tough membranes, and visible fat. This ensures a clean taste and proper texture. You may also soak them to reduce strong flavors.
Why Clean Chicken Livers? Understanding the Benefits
Cleaning chicken livers is a vital step before cooking. Many people skip this process, but it impacts your dish. A properly cleaned liver tastes better and has a better texture. It also removes parts that can make the liver bitter.
Raw chicken livers often come with impurities. These can include small bits of fat, connective tissue, and sometimes tiny green bile ducts. Bile ducts, if left on, can make the liver very bitter. Removing them is essential for flavor. Connective tissue makes the liver tough. Trimming it ensures a tender dish.
Beyond flavor, hygiene is key. Raw poultry, including livers, carries bacteria. Rinsing them helps remove surface bacteria and any lingering blood. This initial rinse is part of safe food handling. It prepares the livers for cooking.
Cleaning also improves the appearance. You get uniform pieces ready for your recipe. This small effort makes a big difference in the final meal. It ensures a high-quality cooking experience.
Essential Tools for Cleaning Chicken Livers
Having the right tools makes cleaning chicken livers simple. You do not need many items. Basic kitchen tools work best for this task. I find these items in my kitchen helpful every time.
First, you need a clean cutting board. Use one specifically for raw meat. This helps prevent germs from spreading to other foods. Plastic or glass boards are good because you can clean them easily. I always have a dedicated board for poultry.
Second, sharp kitchen shears or a small, sharp paring knife are important. These tools help you remove unwanted parts from the liver. Shears are great for snipping away tough bits. A small knife gives you precision for delicate trimming. Having both gives you options.
Third, you need a colander. This is for rinsing the livers under cold water. A colander lets water drain away quickly. It keeps the livers contained. You can use a fine-mesh one to prevent small pieces from escaping.
Finally, prepare a bowl for soaking. If you plan to soak the livers, a medium-sized bowl works well. This bowl should be clean. It will hold the livers and your chosen soaking liquid. Always make sure your tools are clean before you start.
Step-by-Step Guide: How to Clean Chicken Livers Properly
Cleaning chicken livers is a straightforward process. I follow these steps every time I prepare them. This ensures they are clean and ready for cooking. Pay close attention to each part.
Rinsing the Livers
Start by placing the raw chicken livers in a colander. Put the colander under cold running water. Rinse each liver piece thoroughly. I gently move them around with my hand. This helps wash away any blood clots or surface impurities. Continue rinsing until the water runs clear. This initial rinse is important for removing loose debris.
After rinsing, let the livers drain in the colander for a few minutes. You want them to be as dry as possible before the next step. Excess water can make them harder to handle. I sometimes pat them dry with paper towels to absorb more moisture. This helps later during trimming.
Trimming Away Unwanted Parts
Now, transfer the rinsed livers to your clean cutting board. This is where you will trim them. Look closely at each liver piece. You will see different parts to remove.
- Greenish Bits (Bile Ducts): These are small, sometimes barely visible, green or yellowish spots. They are bile ducts and taste very bitter. Use your sharp knife or kitchen shears to carefully cut these out. Remove them completely. If you find yourself cleaning other offal, remember similar precision is needed when you how to clean chicken hearts or even how to clean chicken gizzards.
- Connective Tissue: Livers often have thin, stringy, or tough membranes. These are connective tissues. They do not soften much during cooking. Snip or slice these away. You want a smooth, uniform piece of liver.
- Excess Fat: Some livers might have a bit of yellowish fat attached. You can trim this off if you prefer. Too much fat can change the texture or flavor of your dish. I usually remove most of it.
Take your time with this step. Proper trimming ensures the best flavor and texture for your cooked dish. Once trimmed, your chicken livers are almost ready.
Soaking Chicken Livers for Better Flavor and Texture
Some people find chicken livers have a strong, metallic flavor. This is normal. Soaking them can significantly improve their taste. It also helps to tenderize them. I often do this step, especially if I want a milder liver taste.
One common method involves soaking in milk. Milk helps to draw out impurities and reduce the strong iron taste. Place the cleaned and trimmed chicken livers in a bowl. Pour enough milk over them to cover completely. You can use any type of milk. I typically use whole milk.
Let the livers soak in the refrigerator for at least 30 minutes. You can even soak them for up to 2 hours. Some chefs recommend soaking overnight. The longer they soak, the milder the flavor becomes. After soaking, drain the milk and rinse the livers thoroughly again under cold water. Pat them dry before cooking.
Another option is to soak livers in an acidic solution. This can be water with a splash of vinegar or lemon juice. The acid helps break down some of the proteins. This can make the liver more tender. A quick soak of 15-20 minutes is usually enough for acidic solutions. For example, how to clean chicken with lemon might offer more insights into using lemon in poultry preparation. Again, rinse well after this type of soak. Soaking makes your chicken livers ready for delicious recipes.
Ensuring Food Safety After Handling Raw Chicken Livers
Food safety is very important when you handle raw poultry. Chicken livers are no different. Bacteria can spread easily from raw meat to other surfaces. This is called cross-contamination. I always take specific steps to prevent this. Your health depends on it.
First, clean your work area immediately. All surfaces that touched raw chicken livers need cleaning. This includes your cutting board, countertop, and sink. Use hot, soapy water to scrub them. Then, sanitize them with a bleach solution or a commercial kitchen sanitizer. This kills any remaining bacteria. It is critical to how to clean sink after raw chicken properly.
Next, wash your utensils. Any knives, shears, or bowls used with the livers must be washed well. Put them in hot, soapy water. Scrub them thoroughly. You can also run them through a dishwasher on a hot cycle. It is important to know how to clean dishes that touched raw chicken to ensure safety. Do not let them sit unwashed.
Finally, wash your hands. This is perhaps the most critical step. Wash your hands with warm water and soap for at least 20 seconds. Do this after touching raw livers and before touching anything else in your kitchen. Dry your hands with a clean towel. Following these steps helps keep your kitchen and food safe.
Storing Cleaned Chicken Livers for Freshness
Proper storage keeps your cleaned chicken livers fresh and safe. After cleaning, you might not use all of them right away. Knowing how to store them correctly prevents spoilage. This is a simple but important step.
If you plan to cook the livers within a day or two, store them in the refrigerator. Place the cleaned livers in an airtight container or a resealable plastic bag. Make sure the container is sealed well. This prevents any juices from leaking out. It also keeps odors contained. Place the container on the lowest shelf in your refrigerator. This helps prevent any drips from contaminating other foods.
For longer storage, freezing is the best option. You can freeze cleaned chicken livers for up to 3-4 months. To freeze them, first pat the livers very dry. Then, arrange them in a single layer on a baking sheet lined with parchment paper. Freeze until solid. This prevents them from sticking together.
Once frozen solid, transfer the livers to a freezer-safe bag or container. Squeeze out as much air as possible before sealing. Label the bag with the date. When you are ready to use them, thaw the livers slowly in the refrigerator. Never thaw them at room temperature. Proper storage ensures you have fresh livers whenever you need them.
Tips for Perfect Liver Preparation and Cooking
Cleaning is the first step, but proper preparation goes further. After you clean chicken livers, a few extra tips make them even better. These steps ensure a delightful cooking experience and a tasty meal. I use these tips to get the best results every time.
First, ensure the livers are very dry before cooking. After rinsing and soaking, pat them with paper towels. Excess moisture can prevent browning. Dry livers will sear nicely. They form a delicious crust when cooked.
Second, consider portioning them. If your livers are large, you might cut them into smaller, uniform pieces. This helps them cook evenly. Uniform size means all pieces finish cooking at the same time. This prevents some pieces from being overcooked while others are still raw.
Third, season your livers well. Livers have a strong flavor. Salt and pepper are essential. You can also add herbs like sage or thyme. A little garlic or onion powder works well too. Proper seasoning enhances the natural taste. It also balances the richness of the liver.
Finally, do not overcook them. Chicken livers cook very quickly. Overcooked livers become tough and dry. They lose their creamy texture. Cook them until they are just firm and slightly pink in the center. This keeps them tender and juicy. A quick sauté usually takes only a few minutes. Serve them right away for the best taste.
FAQ Section
Q1: Can I skip cleaning chicken livers?
You should not skip cleaning chicken livers. This step removes bitter bile ducts, tough connective tissue, and excess fat. It also helps rinse away blood clots and surface impurities. Cleaning ensures a better taste and texture for your cooked dish. It is a key part of safe and quality food preparation.
Q2: Why do some recipes recommend soaking chicken livers in milk?
Soaking chicken livers in milk helps to reduce their strong, metallic flavor. Milk’s mild acidity and fat content draw out impurities that contribute to the strong taste. This process also helps tenderize the liver, resulting in a milder and creamier texture. Always rinse the livers thoroughly after soaking.
Q3: How do I know if the bile duct is completely removed?
The bile duct is a small, sometimes green or yellowish, tube-like structure. It is usually found on the surface or tucked into a crevice of the liver. Ensure you cut away any part that looks discolored or feels tough and stringy. Remove it completely to prevent bitterness in your dish.
Q4: What if I don’t have kitchen shears for trimming?
If you do not have kitchen shears, a small, sharp paring knife works well for trimming chicken livers. The key is to use a sharp blade for precise cuts. This helps you remove unwanted bits cleanly. Be careful when handling the knife.
Q5: How long can cleaned chicken livers be stored in the refrigerator?
Cleaned chicken livers can be stored in an airtight container in the refrigerator for 1 to 2 days. For longer storage, it is best to freeze them. Freezing maintains their quality and safety for up to 3 to 4 months. Always label containers with the date.
Q6: Can I reuse the water or milk used for soaking livers?
No, you should never reuse the water or milk used for soaking raw chicken livers. These liquids will contain impurities and potentially harmful bacteria drawn from the raw meat. Dispose of the soaking liquid immediately after use. Always rinse the livers thoroughly after soaking.
Conclusion
Cleaning chicken livers is a simple yet vital step. It ensures your dishes taste great and are safe to eat. You now know how to clean chicken livers properly. We covered rinsing, careful trimming, and optional soaking methods. Remember, removing bile ducts and connective tissue greatly improves flavor and texture.
Practicing good food safety habits is crucial. Always clean your tools, surfaces, and hands after handling raw poultry. Store your cleaned livers correctly, whether in the fridge or freezer. These practices prevent cross-contamination and keep your kitchen safe. With these steps, you are ready to cook delicious chicken liver dishes. Go ahead and try making something new with your perfectly prepared chicken livers. Your taste buds will thank you!
- chicken livers
- clean offal
- food safety
- cooking chicken
- poultry preparation
- liver recipes

Todd Martin
Senior Writer
With over 15 years of experience in home renovation and design, I started HEG to share what I’ve learned with homeowners who want to create spaces that are both beautiful and functional. I’ve always believed in a hands-on approach, and over the years, I’ve picked up practical solutions that actually work. Through HEG, I aim to make home improvement more approachable, sharing real tips that help you create a home you truly love.