· Todd Martin · Home Care · 20 min read
How To Clean Clay Pot
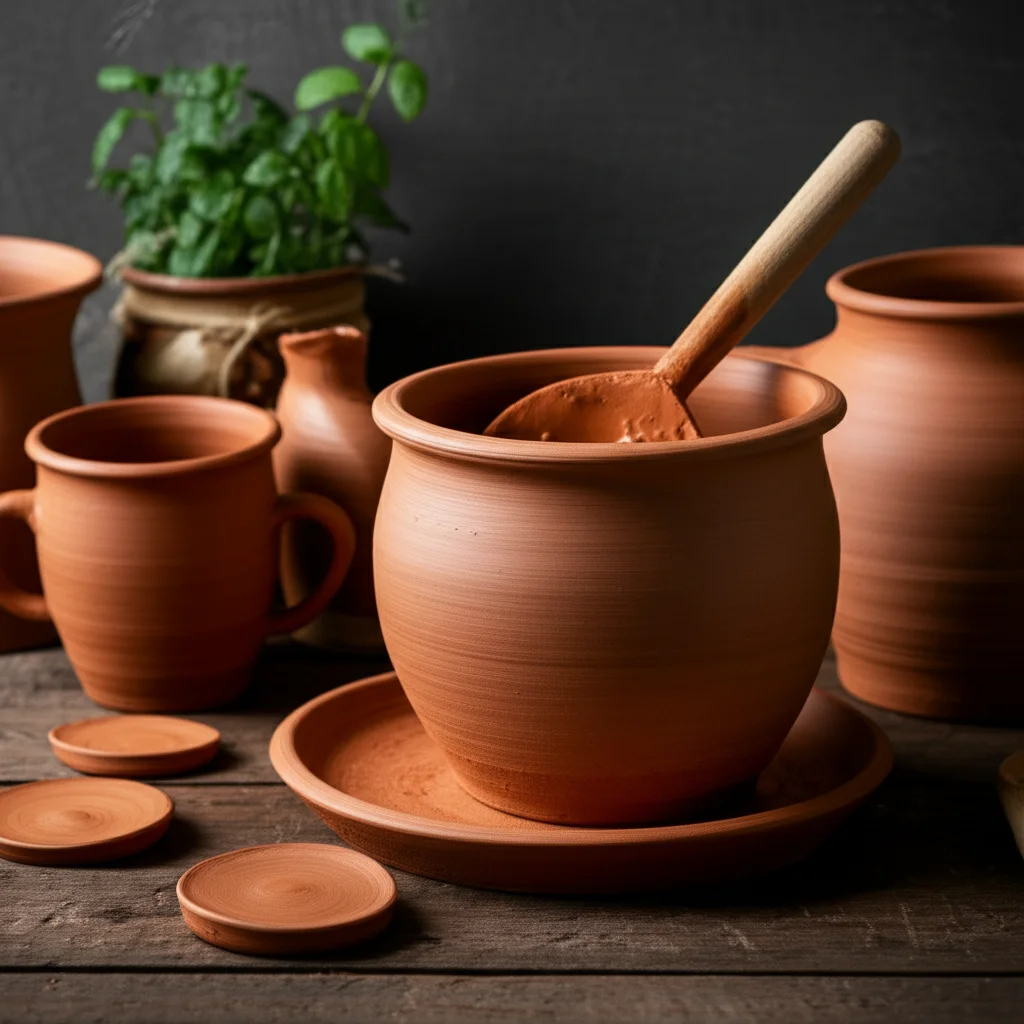
Master the Art of Cleaning Clay Pots for Longevity
Clay pots bring a unique charm and functionality to our homes, whether they are cooking vessels infusing flavors or garden planters nurturing greenery. Their porous nature makes them wonderful for slow cooking or proper plant drainage, but it also means they need specific care. Regular cleaning is important to keep them in good shape. It prevents mold growth, removes food residue, and ensures they last a long time.
This guide provides a comprehensive approach to cleaning clay pots effectively. You will learn about different types of clay, essential tools, and step-by-step instructions for various cleaning challenges. We will cover everything from routine washes to deep cleaning methods for stubborn stains and odors. Get ready to extend the life of your beloved clay pots.
Takeaway
Keeping your clay pots clean is easy with the right approach.
- Always hand wash clay pots; dishwashers are not suitable.
- Use gentle tools and natural cleaning solutions like baking soda or vinegar.
- Ensure clay pots dry completely to prevent mold and mildew.
- Store pots properly to maintain their cleanliness and integrity.
Clay pots need special cleaning due to their porous nature. For unglazed pots, soak them in warm water, then scrub with a stiff brush and water, avoiding soap. For glazed pots, use mild dish soap and warm water with a soft sponge. Always rinse thoroughly and dry completely to prevent moisture-related issues.
Understanding Your Clay Pot: Glazed vs. Unglazed
Before you start cleaning, it is important to know what kind of clay pot you have. Clay pots come in two main types: unglazed and glazed. Each type has different properties that affect how you should clean it. Knowing the difference helps you choose the right method.
Unglazed Clay Pots: The Porous Workhorses
Unglazed clay pots are made of pure, natural clay that has been fired but not coated with a glassy finish. This includes most terracotta pots used for gardening and some traditional cooking vessels. These pots are highly porous. This means they breathe, allowing air and moisture to pass through their walls.
This porosity is great for certain cooking techniques, like slow braising, as it helps regulate temperature and moisture. In gardening, it helps prevent root rot by allowing excess water to evaporate. However, this porosity also means they absorb flavors, odors, and moisture from their surroundings. This makes them more susceptible to staining and mold growth. When cleaning unglazed pots, you must avoid harsh detergents. These can get absorbed into the clay and leach into your food or plants later. Similarly, understanding how to handle and clean other porous items can be helpful, for instance, learning how to clean a baking stone which shares some similarities in material and care needs.
Glazed Clay Pots: The Non-Porous Companions
Glazed clay pots have a liquid coating applied to their surface, which is then fired at high temperatures. This creates a smooth, non-porous, and often colorful finish. Examples include many types of ceramic cookware, decorative pottery, and some planters. The glaze acts as a protective barrier.
This barrier makes glazed pots much easier to clean because liquids and food residues do not soak into the clay itself. They are also less prone to staining and do not absorb odors. Glazed pots are generally safe to clean with mild dish soap and water. However, you should still avoid abrasive scrubbers that could scratch the glaze. Scratches can dull the finish or create tiny crevices where food or dirt can hide. For general pot cleaning, knowing the difference between surfaces can prevent damage, similar to learning how to clean a coffee pot that often has a mix of materials.
Understanding these differences is the first step to successful clay pot cleaning. It ensures you use the correct method for your specific pot. This helps preserve its function and appearance for years.
Essential Tools and Gentle Cleaning Solutions
Having the right tools and cleaning agents is crucial for effective and safe clay pot cleaning. You do not need a lot of fancy equipment. Simple items from your kitchen or cleaning cabinet work best. The key is to choose gentle options that will not harm the porous nature of clay.
Must-Have Cleaning Tools
You will find a few basic tools invaluable for scrubbing and wiping your clay pots.
- Stiff-bristled brush: A good brush is essential for unglazed pots. It helps dislodge caked-on food or dirt without the need for harsh chemicals. Look for brushes with natural bristles or durable synthetic ones. Make sure they are stiff enough to clean effectively but not so abrasive that they scratch.
- Soft sponge or cloth: These are perfect for glazed clay pots. They can wipe away residues without marring the shiny surface. A microfiber cloth is also a good choice for polishing.
- Plastic scraper or spatula: For truly stubborn, stuck-on bits, especially inside cooking pots, a plastic scraper can gently lift the residue. Avoid metal scrapers, which can damage both glazed and unglazed surfaces.
- Large basin or sink: You will need a spacious area to soak your clay pots. This helps loosen dirt and food particles before scrubbing. A utility sink or a large plastic tub works well.
Safe and Effective Cleaning Agents
Chemicals can harm clay pots, especially unglazed ones. Natural and mild solutions are always the best choice.
- Warm water: This is your primary cleaning agent. Soaking in warm water helps to soften any hardened food or dirt. For unglazed pots, plain warm water is often all you need.
- Baking soda: This is a versatile and gentle abrasive. It helps remove stains and neutralize odors without scratching surfaces. You can make a paste with baking soda and water for tough spots. It is also excellent for absorbing smells.
- White vinegar: Vinegar is acidic and great for dissolving mineral deposits, hard water stains, and killing mold. It also neutralizes odors. You can use it diluted with water or full strength for tougher jobs. Understanding how to use vinegar for cleaning glass or vinegar for cleaning mold offers similar insights into its effectiveness.
- Coarse salt: For unglazed cooking pots, salt can act as a gentle abrasive for scrubbing. You can sprinkle it directly onto a damp pot and scrub with a brush. It helps lift residue without leaving a chemical taste.
- Mild dish soap (for glazed pots only): A small amount of gentle, unscented dish soap is suitable for glazed clay pots. Make sure it is truly mild and rinse thoroughly to avoid any residue. Avoid strong degreasers. For tough grease, you can also look into general tips for how to clean grease stains which might offer helpful principles.
Always remember: never put unglazed clay pots in a dishwasher. The harsh detergents and high heat can cause them to crack or absorb soap, which can then leach into your food. Hand washing is always the safest method for all clay pots.
Step-by-Step Guide to Cleaning Unglazed Clay Pots
Unglazed clay pots, including terracotta, require specific care due to their porous nature. You cannot treat them like regular kitchenware. Following these steps will ensure your unglazed pots are clean and ready for their next use without absorbing harmful substances.
Pre-Cleaning Soak: Loosening Grime
The first and most important step for unglazed clay pots is a thorough soak. This process helps to rehydrate the clay and loosen any dried-on food or dirt. It is very similar to how you might pre-soak other stubborn cookware.
- Submerge the pot: Find a large basin or sink that can fully submerge your clay pot. Fill it with warm water. Place the pot into the water, ensuring it is completely covered.
- Soak duration: Allow the pot to soak for at least 30 minutes. For heavily soiled pots or those with burnt-on food, you can soak them for several hours, or even overnight. This extended soak helps everything soften.
- Why soaking is key: The clay absorbs the water, which helps to push out impurities and soften food residues. This makes scrubbing much easier and reduces the risk of scratching the clay. It also helps prevent the pot from cracking during scrubbing.
Scrubbing Away Stubborn Residue
Once the pot has soaked, it is time to remove the loosened grime. Remember, no soap is usually needed for unglazed clay pots. Water and mechanical action are your best friends here.
- Use a stiff brush: Take your soaked pot and drain the water. Using a stiff-bristled brush, scrub the inside and outside of the pot thoroughly under running warm water. Pay extra attention to any areas with stuck-on food or visible stains.
- For tough spots: If you encounter particularly stubborn residue, sprinkle a generous amount of coarse salt or baking soda directly onto the damp area. Use the brush to scrub the salt or baking soda into the residue. The abrasive nature of these natural cleaners helps to lift the grime without damaging the clay. This technique is effective for burnt-on food, much like learning how to clean burnt rice from a pot involves specific scraping and soaking.
- Avoid soap: Traditional dish soap can be absorbed by the porous clay. This can lead to soapy flavors leaching into food when cooking. If you feel you absolutely must use soap for a very greasy pot (e.g., a planter that had oily residue), use the tiniest drop of very mild, unscented soap and rinse for an extended period. For most unglazed cooking pots, water and scrubbing are sufficient.
Rinsing and Drying Properly
Proper rinsing and drying are critical steps that often get overlooked. Inadequate drying can lead to mold and mildew growth.
- Thorough rinse: After scrubbing, rinse the pot thoroughly under warm running water. Ensure all residues, salt, or baking soda are completely washed away. Continue rinsing until the water runs clear and feels clean.
- Air dry completely: This is the most crucial step. Never store a clay pot when it is still damp. Place the clean pot in a well-ventilated area to air dry completely. This can take 24 to 48 hours, depending on humidity. You can place it on a drying rack or prop it up to allow air circulation around all surfaces.
- Sunlight helps: If possible, let it dry in direct sunlight. Sunlight acts as a natural disinfectant and helps speed up the drying process.
- Check for dryness: Before storing, feel the pot all over. It should feel completely dry to the touch, both inside and out. Any lingering moisture can lead to mold. This is similar to how you would ensure a terra cotta pot is fully dry after cleaning to prevent issues.
By following these steps, you can keep your unglazed clay pots clean and ready for years of use, whether in the kitchen or garden.
How to Clean Glazed Clay Pots Effectively
Glazed clay pots are simpler to clean than their unglazed counterparts because their non-porous surface does not absorb liquids or odors. However, they still require careful handling to protect their shiny finish. You want to avoid scratching the glaze.
Gentle Washing for Glazed Surfaces
Routine cleaning of glazed clay pots is very straightforward. You can treat them much like regular ceramic dishes.
- Use warm water and mild soap: Fill your sink with warm water and add a small amount of mild dish soap. Submerge the glazed pot in the soapy water.
- Wipe with a soft sponge or cloth: Use a soft sponge or a non-abrasive cloth to gently wipe down all surfaces of the pot. Most food residues and dirt will come off easily. You can wipe inside and outside the pot.
- Avoid abrasive scrubbers: Do not use steel wool, abrasive scouring pads, or harsh powdered cleansers. These can scratch the glaze, dulling its shine and potentially creating micro-fissures where food particles can stick.
- Rinse thoroughly: After washing, rinse the pot under warm running water. Make sure all soap residue is gone. Soap film can leave streaks or a dull finish if not fully rinsed.
Tackling Stains on Glazed Clay
Even though glazed pots are less prone to staining, some stubborn marks might appear. These could be from hard water, certain foods, or general use.
- For hard water spots: If you see white mineral deposits or hard water stains, use a solution of equal parts white vinegar and water. Soak a cloth in this solution and wipe the affected areas. The acid in the vinegar will help dissolve the mineral buildup. You can also let the pot soak in this solution for 15-30 minutes for more severe buildup. This method is effective for various surfaces, similar to how one might consider how to clean the bottom of a pan if there are mineral deposits or burnt-on grease.
- For stubborn food stains: If a food stain persists, try making a paste of baking soda and a small amount of water. Apply the paste to the stain and let it sit for 10-15 minutes. Then, gently scrub with a soft sponge or cloth. The mild abrasive action of baking soda helps lift the stain without harming the glaze.
- For discoloration: Sometimes, a general dullness or discoloration might appear over time. A quick wipe with a cloth dampened with a little rubbing alcohol can sometimes restore shine, but always test in an inconspicuous area first. For issues like how to clean coffee stains, these principles of gentle abrasion and acidic solutions are often key.
Always ensure the pot is completely dry before storing it. While glazed pots are less prone to mold, residual moisture can still lead to mildew in humid environments, especially if stored in a closed cabinet. A soft towel can quickly dry the surface.
Deep Cleaning and Reviving Neglected Clay Pots
Sometimes, regular cleaning is not enough. Clay pots can develop stubborn issues like mold, strong odors, or mineral deposits, especially if they have been stored improperly or used heavily. Deep cleaning can revive these neglected pots and make them usable again.
Removing Mold and Mildew from Clay
Mold and mildew thrive in damp, dark environments. Clay pots, particularly unglazed ones, are susceptible to fungal growth if not dried properly. Black, green, or white fuzzy patches are clear signs of mold.
- Isolate the pot: First, move the moldy pot away from other items to prevent spores from spreading.
- Prepare a vinegar solution: White vinegar is an excellent natural fungicide. For unglazed pots, mix equal parts white vinegar and water in a large basin. For glazed pots, a stronger solution of two parts vinegar to one part water can be used. Learning how to clean mold with vinegar is a broadly applicable skill for various household items.
- Soak and scrub: Submerge the unglazed pot completely in the vinegar solution for at least 30 minutes, or up to an hour for severe mold. For glazed pots, you can simply wipe the moldy areas vigorously with a cloth soaked in the vinegar solution. Use a stiff brush for unglazed pots to scrub away the mold. For glazed pots, use a soft sponge.
- Rinse and dry thoroughly: Rinse the pot very well under running water. Ensure all vinegar smell is gone. Then, let the pot air dry completely in a well-ventilated area, preferably in direct sunlight, for 24-48 hours. Sunlight helps kill any remaining spores. If you’re dealing with a general mold issue, similar principles apply to how to clean mold from grout or other surfaces.
Eliminating Stubborn Odors
Clay pots, especially unglazed cooking pots, can absorb strong odors from food. Garlic, onions, or spices can linger even after cleaning.
- Baking soda paste: Make a thick paste using baking soda and a small amount of water. Spread this paste liberally inside the pot, covering all surfaces. Let it sit for several hours, or even overnight. Baking soda is known for absorbing odors.
- Baking method (for cooking pots): For unglazed cooking pots, after applying the baking soda paste, you can sometimes bake the pot at a low temperature (around 250°F / 120°C) for an hour or two. This helps the baking soda absorb deeper odors and ensures the pot is thoroughly dry. Let it cool completely.
- Charcoal trick: Place a few pieces of activated charcoal inside the pot and cover it. Let it sit for a few days. Activated charcoal is highly absorbent and can pull out lingering smells.
- Fresh air: After any of these treatments, leave the pot uncovered in a well-ventilated area for a day or two to air out naturally.
Addressing Mineral Deposits and White Stains
Hard water can leave white, chalky mineral deposits on both unglazed and glazed clay pots. These are typically calcium and lime.
- Vinegar bath: For extensive mineral buildup, fill a basin with a solution of equal parts white vinegar and water. Submerge the pot and let it soak for an hour or two. The acid in the vinegar will break down the mineral deposits.
- Scrubbing: After soaking, use a stiff brush for unglazed pots or a soft sponge for glazed pots to scrub away the loosened deposits. You may need to repeat the soaking and scrubbing for very thick buildup.
- Lemon juice alternative: For smaller areas or if you prefer a different natural acid, lemon juice can also be effective. Apply it directly to the stains, let it sit, and then scrub.
- Rinse thoroughly: Always rinse the pot thoroughly after using vinegar or lemon juice to ensure no acidic residue remains. Dry completely as usual.
Deep cleaning can bring your neglected clay pots back to life. With a little time and the right natural cleaners, you can restore their beauty and functionality.
Preventing Issues and Maintaining Clay Pot Hygiene
Consistent care is the best way to avoid major cleaning headaches. By adopting a few simple habits, you can keep your clay pots in excellent condition. This section covers daily maintenance, proper storage, and when it might be time to replace a pot.
Proper Storage for Clay Pots
How you store your clay pots significantly impacts their cleanliness and longevity. Improper storage can lead to mold, odors, or damage.
- Ensure complete dryness: This is the golden rule. Never store a clay pot, especially an unglazed one, if it feels even slightly damp. As discussed, moisture is the primary cause of mold and musty odors. Allow ample time for air drying, sometimes up to 48 hours, especially in humid climates.
- Store in a well-ventilated area: Choose a storage location that allows for air circulation. Avoid airtight containers or cabinets where moisture can get trapped. Open shelves, wire racks, or even just leaving them on a countertop in a dry room are good options.
- Prevent absorption (for unglazed pots): If storing unglazed cooking pots, consider placing a small piece of parchment paper or a clean, dry cloth between nested pots. This prevents them from absorbing any residual moisture or odors from each other.
- Protect from dust and damage: While allowing air circulation, also protect your pots from excessive dust buildup, especially if they are cooking vessels. You can loosely cover them with a breathable cloth. For glazed pots, stack them carefully with cloth or felt protectors to prevent scratches.
Regular Maintenance Tips
A little effort after each use goes a long way in preventing the need for deep cleaning.
- Clean immediately after use: Do not let food dry and harden inside your cooking pots. The sooner you clean, the easier it is to remove residue. For planters, promptly remove dead leaves or excessive soil buildup.
- Gentle daily wipe: For glazed pots, a quick wipe with a damp cloth and mild soap (if needed) after each use is usually sufficient.
- Quick rinse for unglazed: For unglazed cooking pots, a simple rinse with warm water and a light scrub with a brush after each use can often prevent buildup. Avoid soap for routine cleaning.
- Inspect periodically: Take a moment to inspect your pots for any signs of mold, stains, or damage. Addressing small issues early prevents them from becoming bigger problems.
- Re-season unglazed cooking pots: Some unglazed cooking pots benefit from occasional re-seasoning, which involves soaking them in water and then baking them empty. This helps maintain their non-stick properties and strengthens the clay. Always follow the manufacturer’s specific instructions for your pot.
When to Retire a Clay Pot
While clay pots are durable, they do not last forever. Knowing when to replace them is important for hygiene and safety.
- Deep cracks or chips: Small chips on the rim of a planter are often harmless. However, deep cracks that extend through the pot can compromise its integrity. For cooking pots, deep cracks can harbor bacteria and lead to breakage during use, especially with heat.
- Persistent odors or stains: If a pot, especially an unglazed cooking pot, consistently retains strong, unpleasant odors even after deep cleaning, it might be time to let it go. This indicates that the odors have deeply penetrated the clay. Similarly, if stains are impossible to remove and affect food quality, consider replacement.
- Excessive mold recurrence: If a pot repeatedly develops mold, despite thorough cleaning and drying, it might have developed a persistent mold issue within its pores that cannot be eradicated. This is particularly true for unglazed pots.
- Glaze damage (for glazed pots): If the glaze on a cooking pot is extensively chipped, cracked, or flaking, it can expose the porous clay beneath, making it harder to clean and potentially allowing food to get trapped. For general pot maintenance, understanding when to replace a damaged item is key, as is knowing how to clean other types of kitchenware like how to clean burnt stainless steel pot or how to clean caramel out of a pot.
By prioritizing proper drying, sensible storage, and regular attention, you can enjoy your clay pots for many years.
Frequently Asked Questions About Cleaning Clay Pots
Can I put my clay pot in the dishwasher?
No, you should not put most clay pots in the dishwasher. Unglazed clay pots are especially vulnerable. The harsh detergents and high heat of a dishwasher can cause them to crack or absorb soap residues. This soap can then leach into your food or plants later. Even glazed pots are better off hand-washed to preserve their finish and prevent damage. Hand washing ensures longevity and safety for all types of clay pots.
Is it okay to use dish soap on all clay pots?
Using dish soap depends on the type of clay pot. For unglazed clay pots, it is best to avoid dish soap entirely. Their porous nature can absorb the soap, leading to lingering chemical tastes or residues. Plain warm water and a stiff brush are usually sufficient. For glazed clay pots, a small amount of mild, unscented dish soap is generally safe. Always rinse thoroughly to remove all soap film.
How do I remove tough stains from my clay pot?
For tough stains on unglazed pots, make a paste of baking soda and water, apply it, let it sit, then scrub with a stiff brush. Coarse salt can also act as an abrasive. For glazed pots, a baking soda paste or a solution of equal parts white vinegar and water often works. Apply, let sit, and then gently scrub with a soft sponge. Never use abrasive scrubbers that could scratch the surface.
How can I prevent mold from growing on my clay pot?
Preventing mold is mostly about proper drying and storage. Always ensure your clay pot is completely dry before storing it. Air dry for 24-48 hours in a well-ventilated area. If possible, let it dry in direct sunlight. Store pots in a place with good air circulation. Avoid stacking damp pots or putting them in enclosed, humid spaces.
Do I need to season my unglazed cooking clay pot after cleaning?
Some unglazed cooking clay pots benefit from occasional re-seasoning, especially after a deep clean. Seasoning involves soaking the pot in water, then slowly drying it and sometimes baking it at a low temperature. This process helps to strengthen the clay and improve its non-stick qualities. Always check the manufacturer’s specific instructions for your particular unglazed cooking pot.
Conclusion
Cleaning your clay pots does not have to be a daunting task. By understanding the unique properties of unglazed and glazed clay, and by using the right tools and natural cleaning solutions, you can easily maintain their beauty and functionality. We have covered everything from simple daily washes to deep cleaning methods for mold, odors, and stubborn stains. Remembering to use gentle hands and natural ingredients will keep your clay in prime condition.
Proper care extends the life of these
- clay pot cleaning
- terracotta care
- kitchenware maintenance
- natural cleaning
- pottery cleaning

Todd Martin
Senior Writer
With over 15 years of experience in home renovation and design, I started HEG to share what I’ve learned with homeowners who want to create spaces that are both beautiful and functional. I’ve always believed in a hands-on approach, and over the years, I’ve picked up practical solutions that actually work. Through HEG, I aim to make home improvement more approachable, sharing real tips that help you create a home you truly love.