· Todd Martin · Home Maintenance · 20 min read
How To Clean Doors
How To Clean Doors: Achieve a Spotless Home
Imagine walking into a home where every surface gleams, including the often-overlooked doors. Doors see daily use. They collect fingerprints, dust, and grime. Keeping them clean makes a big difference in your home’s appearance.
Knowing how to clean doors properly extends their life. It also improves your home’s overall hygiene. This guide will walk you through the steps. We will cover different door materials and common cleaning challenges.
You will learn the best methods and products. Get ready to transform your doors and boost your home’s sparkle. I will share practical tips to make door cleaning simple and effective.
Takeaway
- Identify your door material before cleaning.
- Gather the right tools and cleaning solutions.
- Clean from top to bottom to avoid drips.
- Address specific issues like mold or scuffs carefully.
- Maintain doors regularly for lasting beauty.
To effectively clean doors, first identify the door’s material. Use a gentle all-purpose cleaner for most surfaces, warm water, and soft cloths. For wood, use wood-specific cleaners. For glass, use a glass cleaner. Always wipe from top to bottom and dry immediately to prevent streaks. Regular cleaning keeps doors looking their best.
The Importance of Regular Door Cleaning
Doors are a central part of any home. They are not just functional. They add to your home’s style. Over time, doors can collect a lot of dirt. This includes dust, smudges, and bacteria. Regular door cleaning stops dirt buildup. It helps keep your home looking its best. Clean doors also make a good first impression on guests. I find that a quick wipe-down can instantly brighten a room.
Neglecting doors can lead to damage. Dirt can scratch finishes. Moisture can cause warping or mold. This is especially true for exterior doors. These doors face harsh weather. Keeping them clean protects them from the elements. It helps them last longer. I always make sure my exterior doors are well-maintained. This prevents costly repairs later on. A little effort now saves a lot of trouble.
Clean doors also promote a healthier living space. Door handles and surfaces are high-touch areas. They can harbor germs. Regular cleaning reduces the spread of bacteria. This is important for families. It helps keep everyone healthy. I recommend regular disinfection, especially on doorknobs. This small step can make a big difference. It is part of creating a truly clean home.
Finally, clean doors boost your home’s value. A well-maintained home looks better. It shows attention to detail. This appeals to potential buyers if you sell. Sparkling doors contribute to overall curb appeal. They reflect a home that is cared for. I believe that every detail counts when maintaining a home. Clean doors are a key part of that overall picture.
Essential Tools and Supplies for Effective Door Cleaning
Having the right tools makes any cleaning job easier. This is very true for door cleaning. You do not need many special items. Most supplies are likely already in your home. I always gather everything before I start. This saves time and effort. It helps me clean more efficiently.
Here are the basic items you will need:
- Soft Cloths or Microfiber Towels: These are gentle on surfaces. They prevent scratches. Microfiber cloths trap dirt well. They leave no lint behind. I prefer them for streak-free results.
- Bucket(s): One bucket for cleaning solution. Another for clean rinse water. This keeps your cleaning solution effective. It avoids spreading dirt.
- Mild Dish Soap or All-Purpose Cleaner: These work for many door types. They remove general dirt and grime. Always check the label for specific materials. I dilute them with water.
- Warm Water: It helps dissolve dirt and cleaning agents. Warm water makes cleaning more effective. It is gentle on most finishes.
- Vacuum with Brush Attachment: Useful for removing loose dust and cobwebs. It reaches corners and crevices easily. I use it before wet cleaning.
- Small Soft Brush or Toothbrush: Perfect for cleaning crevices. It cleans around door handles and hinges. These areas collect a lot of grime.
- Sponge: A soft sponge can help apply solutions. It can also gently scrub away dirt. Make sure it is not abrasive.
- Rubber Gloves: Protect your hands from cleaning solutions. They also help maintain grip. I always wear them.
For specific door types, you may need additional supplies:
- Wood Cleaner/Polish: For natural wood doors. It cleans and nourishes the wood. It helps preserve its luster.
- Glass Cleaner: Essential for glass panels. It ensures streak-free transparency. You can learn more about how to clean glass doors for specialized tips.
- Metal Cleaner: For specific metal doors like iron or brass. It targets rust or tarnish. Refer to guides on how to clean iron doors for detailed methods.
- Vinegar: A natural cleaning agent. It works well on many surfaces. It is good for general cleaning. It is also good for tackling mild mold.
- Baking Soda: Useful as a gentle abrasive paste. It can tackle stubborn stains. I mix it with water for a paste.
Having these items ready makes the cleaning process smooth. It ensures you have the right tool for every task. You can clean all your doors effectively.
General Steps for Cleaning Most Doors
Before tackling specific materials, there is a general cleaning routine. This routine works for most door types. It ensures you remove loose dirt first. It also prevents streaks and damage. I follow these steps for a thorough clean. This universal method is a good starting point.
Step 1: Prepare the Area
First, clear the space around the door. Move any furniture or decor. This gives you room to work. Lay down old towels or a drop cloth. This protects your floors from drips. I always do this to avoid extra cleanup. It is a small step that saves effort.
Step 2: Remove Loose Dust and Debris
Begin by removing any surface dust. Use a vacuum cleaner with a brush attachment. Go over the entire door surface. Pay attention to crevices and decorative molding. A soft duster or dry microfiber cloth also works well. This step prevents mud when you introduce water. I find this crucial for a streak-free finish.
Step 3: Prepare Your Cleaning Solution
Fill one bucket with warm water. Add a few drops of mild dish soap. Stir until suds form. For a natural alternative, use a mix of equal parts warm water and white vinegar. This solution works for many common door materials. Always test any new solution in a hidden area first. I always do a spot test to be safe.
Step 4: Clean the Door Surface
Dip a soft cloth into your cleaning solution. Wring it out well. The cloth should be damp, not dripping. Start cleaning from the top of the door. Work your way down in sections. This prevents dirty water from running onto already clean areas. Wipe down the door panel by panel. Do not forget the edges and the top.
For painted doors, a gentle approach is best. Use minimal moisture. If you need to know how to clean painted doors, remember that too much water can damage the paint. For white doors, extra care helps prevent yellowing or staining.
Step 5: Rinse the Door (if needed)
If you used a soapy solution, a rinse might be necessary. Fill a second bucket with clean, warm water. Dip a clean cloth into this water. Wring it out thoroughly. Wipe down the door again, removing all soap residue. This step prevents dullness or sticky residue. I always rinse when using soap.
Step 6: Dry the Door Thoroughly
Immediately after rinsing, dry the door. Use a clean, dry microfiber cloth. Wipe down all surfaces. Drying prevents water spots and streaks. It is especially important for wood or metal doors. Water can cause damage or rust over time. I always dry quickly to ensure a perfect finish.
Following these general steps will give you a clean foundation. Now, we can explore specific door materials in more detail. Each material has unique needs.
Cleaning Specific Door Materials for Optimal Results
Different door materials require different cleaning methods. What works for wood might harm glass. Understanding these differences is key. I approach each material with its specific needs in mind. This ensures a deep clean without damage.
Cleaning Wood Doors
Wood doors add warmth and beauty to any home. They can be painted, stained, or natural. Each finish needs a specific touch.
- Painted Wood Doors: For painted wood, use a mild soap and water solution. Dampen a soft cloth. Wipe gently from top to bottom. Avoid abrasive cleaners. These can scratch or dull the paint. For white painted doors, a mixture of baking soda and water can tackle scuff marks. Gently rub the paste on the mark. Then wipe clean. Always dry painted doors immediately. This prevents water damage to the paint. Learn more about how to clean painted doors for detailed guidance.
- Stained or Natural Wood Doors: These doors need specialized care. Use a wood cleaner or a furniture polish designed for wood. Apply it with a soft cloth. Rub in the direction of the wood grain. This helps lift dirt and nourish the wood. Avoid harsh chemicals or excessive water. Water can warp wood or damage the finish. For deeper cleaning, some experts recommend a very diluted vinegar solution (1 part vinegar to 10 parts water). Always test in an inconspicuous area first. After cleaning, use a wood conditioner. This protects the wood and gives it a nice shine.
Cleaning Glass Doors
Glass doors, including those with glass panels, add light to a room. They also show every smudge and streak. Regular cleaning keeps them sparkling.
- For General Glass Cleaning: Mix equal parts white vinegar and water in a spray bottle. Spray the solution onto the glass. Wipe it with a clean microfiber cloth. Wipe in straight, overlapping lines. This prevents streaks. Old newspapers can also provide a streak-free shine. However, ink can transfer. I prefer microfiber cloths for best results. For detailed steps, check out how to clean glass doors.
- Dealing with Stubborn Spots: For hardened grime or sticky residue, use a gentle scraper. Hold it at a shallow angle. Be careful not to scratch the glass. You can also apply rubbing alcohol to a cotton ball. Gently rub the spot until it dissolves. Always wipe down with glass cleaner afterward. This ensures no residue remains.
Cleaning Metal Doors (Iron, Steel, Aluminum)
Metal doors are durable but can rust or tarnish. Cleaning methods vary by metal type.
- Iron Doors: Wrought iron doors can be prone to rust. Dust them regularly. For cleaning, use a mild soap and water solution. Apply with a soft brush or cloth. Rinse lightly with clean water. Dry thoroughly immediately. Applying a wax or sealant afterward can protect against moisture. For comprehensive tips, see how to clean iron doors.
- Steel and Aluminum Doors: These are often painted or powder-coated. Use a mild all-purpose cleaner. A mixture of warm water and dish soap works well. Wipe with a soft cloth. Rinse with clean water. Dry completely to prevent water spots. For stubborn marks, a non-abrasive scrub pad can be used gently. Avoid harsh chemicals. They can damage the finish.
Cleaning Vinyl and Fiberglass Doors
Vinyl and fiberglass doors are known for being low maintenance. They are very durable.
- General Cleaning: These materials respond well to mild soap and water. Use a soft cloth or sponge. Wipe down the entire surface. Rinse thoroughly with clean water. Dry with a clean cloth. These doors are usually quite resistant to stains.
- For Deeper Stains: A paste of baking soda and water can be applied. Gently scrub the stain. Then rinse it clean. For severe marks, a specialized vinyl or fiberglass cleaner might be needed. Always follow product instructions.
By understanding your door’s material, you can choose the correct cleaning approach. This protects your investment. It keeps your doors looking good for years.
Tackling Common Door Problems and Stains
Doors face many challenges daily. Scuff marks, fingerprints, and even mold can appear. Knowing how to address these specific problems helps restore your doors. I have faced many of these issues myself. Here are my go-to solutions.
Removing Scuff Marks and Fingerprints
Scuff marks are common on doors, especially near the bottom. Fingerprints show up on handles and around edges.
- Scuff Marks: For light scuff marks on painted or vinyl doors, a magic eraser works wonders. Dampen it slightly and gently rub the mark. Do not press too hard. Test it in an hidden area first. For darker marks, a paste of baking soda and water can be effective. Apply it with a soft cloth. Rub gently. Then wipe clean. I find this method works well on most surfaces without damaging the finish.
- Fingerprints: Fingerprints are usually oily residues. For most doors, a damp cloth with a little dish soap will remove them. For glass or glossy surfaces, a glass cleaner or a mix of white vinegar and water is best. Spray directly onto the fingerprints. Wipe with a microfiber cloth until clear. This ensures no oily streaks remain.
Dealing with Mold and Mildew on Doors
Mold and mildew can grow on doors in damp areas. They appear as dark spots. They can be harmful. Act quickly to remove them.
- Preparation: Wear gloves and a mask. This protects you from spores. Ensure good ventilation. Open windows if possible.
- Cleaning Solution: Mix one part white vinegar with one part water in a spray bottle. Vinegar is a natural mold killer. For tougher mold, a solution of bleach and water (1 part bleach to 10 parts water) can be used on non-porous surfaces. Always test in an inconspicuous area. Do not mix bleach and vinegar. This creates dangerous fumes.
- Application: Spray the moldy area with your chosen solution. Let it sit for 10-15 minutes. This allows the solution to work.
- Scrub and Rinse: Scrub the area with a soft brush or cloth. Remove all visible mold. Rinse the area with clean water. Dry thoroughly to prevent regrowth. For porous materials like unfinished wood, mold might penetrate deeper. You might need professional help for severe cases.
Removing Stubborn Stains
Different stains need different approaches. General cleaners may not always work.
- Grease Stains: For grease on non-porous doors, apply a small amount of liquid dish soap directly to the stain. Let it sit for a few minutes. Then wipe with a damp cloth. The dish soap cuts through grease.
- Ink or Crayon Marks: For ink or crayon, rubbing alcohol can often dissolve the mark. Apply a small amount to a cotton ball. Blot the stain carefully. Do not rub vigorously. This can spread the stain. Always test alcohol in an hidden spot first. It can remove some finishes.
- Water Marks: On wood doors, water marks can be tricky. For fresh water rings, rub a non-gel toothpaste or mayonnaise onto the spot. Let it sit for an hour. Wipe away. The oils in mayonnaise or the mild abrasive in toothpaste can lift the mark. For older, deeper marks, sanding and refinishing might be necessary.
- Adhesive Residue: For sticky residues from tape or stickers, use rubbing alcohol or a specialized adhesive remover. Apply to a cloth. Gently rub the residue until it lifts.
Always test any stain removal method in a hidden spot first. This prevents accidental damage to your door’s finish. Patience and the right product are key to tackling stubborn stains.
Cleaning Door Hardware and Hinges
While cleaning the door surface, do not forget the hardware. Doorknobs, handles, hinges, and locks also collect dirt. They are high-touch areas. They need regular cleaning too. Keeping them clean adds to the door’s overall look. It also ensures smooth operation. I make sure to give these parts attention. For specific guidance on hinges, you can find more information on how to clean hinges on doors.
Cleaning Doorknobs and Handles
Doorknobs and handles are touched constantly. They can harbor germs and show fingerprints quickly.
- Frequency: Clean these daily or every other day, especially in high-traffic areas.
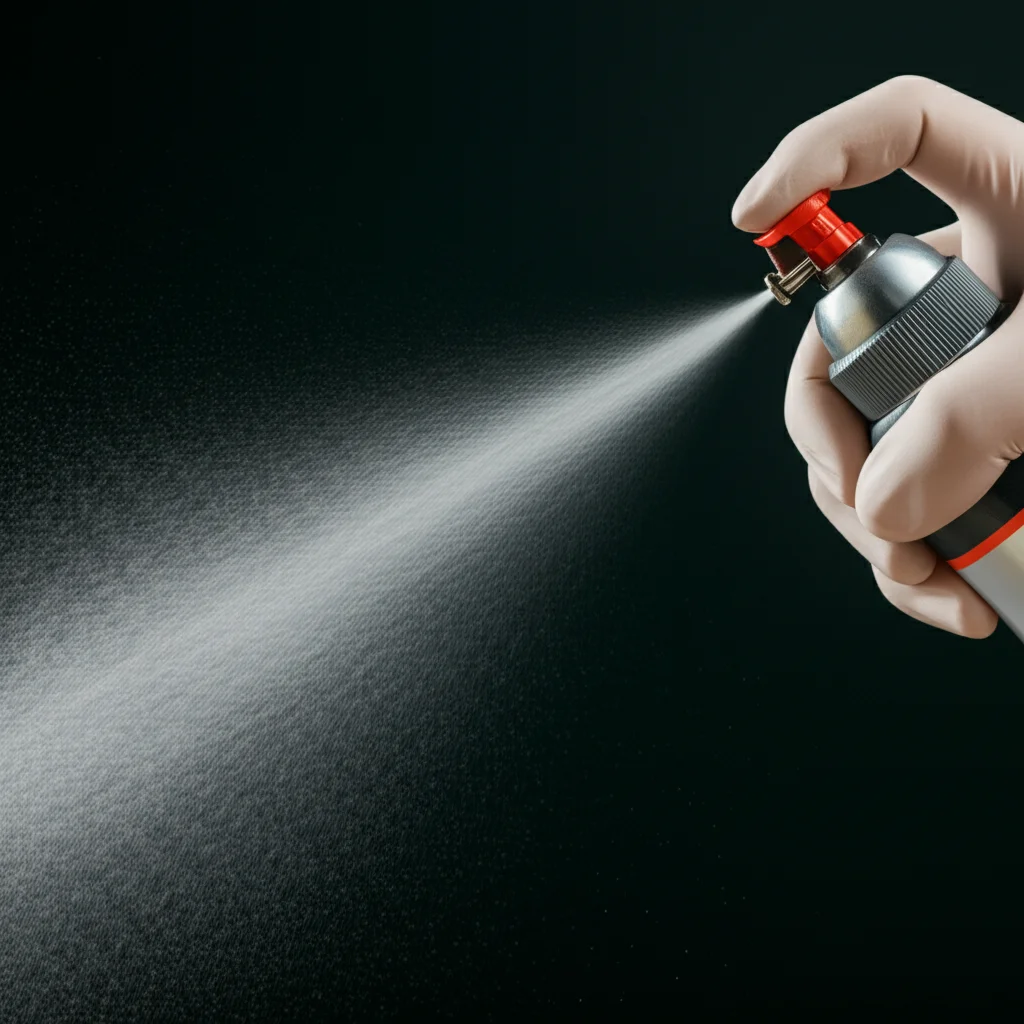
- Method: For most materials (brass, chrome, stainless steel, painted), a mild soap and water solution works well. Dampen a soft cloth. Wipe down all surfaces of the knob and handle. For disinfection, use an alcohol-based wipe or a disinfectant spray. Spray onto a cloth, not directly onto the hardware, to avoid dripping.
- Polishing: For brass or chrome, use a specific metal polish after cleaning. Follow the product instructions. This restores shine and protects the finish. I love seeing the hardware sparkle.
Cleaning Hinges
Hinges are often overlooked. They can accumulate dust and grime. This can even affect how the door opens and closes.
- Dust Removal: Use a vacuum cleaner with a brush attachment to remove loose dust. A soft brush or an old toothbrush can reach into the hinge crevices.
- Wipe Down: Dampen a cloth with mild soap and water. Wipe down the hinges thoroughly. Remove any visible dirt.
- Lubrication: After cleaning, consider lubricating the hinges. Use a silicone-based spray lubricant or a few drops of household oil. This keeps them moving smoothly. It prevents squeaks. Wipe off any excess lubricant immediately. This prevents dust attraction.
Cleaning Lock Mechanisms
Locks are important for security. Keeping them clean prevents dirt from affecting their function.
- Exterior Locks: These are exposed to the elements. Dust them regularly. If they look dirty, wipe them with a damp cloth. A small brush can clean around the keyhole. Avoid spraying liquid cleaners directly into the lock. This can gum up the mechanism.
- Interior Locks: These typically only need dusting. If they become sticky, a tiny puff of graphite lubricant can help. This is a dry lubricant. It won’t attract dirt.
Regular care of door hardware extends its life. It also keeps your doors looking their best. It is a small but important part of overall door maintenance.
Maintaining Your Doors for Long-Term Beauty and Durability
Cleaning your doors is a great start. But proper maintenance ensures they stay beautiful. It also helps them last for many years. Regular upkeep can prevent major issues. It saves you money in the long run. I consider maintenance just as important as cleaning.
Regular Dusting and Spot Cleaning
The easiest way to maintain doors is regular dusting. Dust accumulates quickly.
- Weekly Dusting: Use a soft, dry microfiber cloth or a feather duster. Go over all door surfaces. Include the top edge and any molding. This prevents heavy dirt buildup.
- Daily Spot Cleaning: Keep a spray bottle with a mild cleaner nearby. Wipe away fingerprints or smudges as they appear. This stops small marks from becoming set-in stains. I do this often on high-traffic doors.
Protecting Your Doors from Wear and Tear
Protection helps doors resist damage. It preserves their finish.
- Exterior Doors: Apply a protective finish. For wood, use a UV-resistant clear coat or paint. For metal, consider a rust-inhibiting primer and paint. Reapply these as needed. This shields doors from sun, rain, and temperature changes. It prevents fading and cracking.
- Interior Doors: Consider door stoppers. These prevent doorknobs from hitting walls. They protect both the door and the wall. Use felt pads on the bottom of doors if they drag on floors. This prevents wear on the door and floor.
- Avoid Harsh Cleaners: Always use gentle, appropriate cleaners. Harsh chemicals can strip finishes. They can cause discoloration. Always read product labels carefully.
Addressing Minor Issues Promptly
Small problems can become big ones if ignored. Prompt attention is key.
- Loose Hardware: Tighten loose screws on hinges, knobs, or strike plates. This prevents rattling. It ensures proper function. A simple screwdriver is usually all you need.
- Squeaky Hinges: Lubricate squeaky hinges. Use a silicone spray or a few drops of household oil. This improves door operation. It also reduces wear on the hinges.
- Chips and Scratches: Touch up minor paint chips or scratches. Use matching paint or a wood repair kit. This protects the underlying material. It prevents further damage. It also keeps your doors looking pristine.
- Weatherstripping: Check weatherstripping around exterior doors. Replace it if it is cracked or worn. This improves energy efficiency. It also keeps out drafts and moisture.
By adopting these maintenance habits, your doors will look their best. They will continue to function properly for many years to come. This commitment to care benefits your entire home.
Advanced Tips and Tricks for Door Cleaning
Beyond the basics, some advanced tips can make door cleaning even more effective. These methods use common household items. They target specific, often difficult, cleaning challenges. I have used these tricks to great success.
Using Natural Cleaners Effectively
Many common pantry items are powerful cleaners. They are often safer than harsh chemicals.
- White Vinegar: As mentioned, white vinegar is excellent. It cuts through grease, removes mild mold, and leaves streak-free glass. Use it diluted with water for general cleaning. For extra shine on vinyl or fiberglass doors, a vinegar-water rinse can work wonders.
- Baking Soda: Baking soda is a gentle abrasive. It is perfect for scrubbing away scuffs and stains without scratching. Mix it with a little water to form a paste. Apply it to the dirty area. Rub gently. Then wipe clean. It is also good for deodorizing.
- Lemon Juice: Lemon juice has natural bleaching and degreasing properties. Mix it with baking soda for a powerful, natural scrub. Use it on stubborn stains or for brightening white doors. Always rinse thoroughly afterward.
- Olive Oil (for Wood): After cleaning natural wood doors, a tiny amount of olive oil can condition the wood. Apply a drop or two to a clean cloth. Rub into the wood. This enhances its natural luster. It helps repel dust.
Tackling Specific Stains and Issues
Sometimes, a general cleaner is not enough. You need specific solutions.
- Removing Stickers or Tape Residue: Apply rubbing alcohol, nail polish remover (non-acetone), or a specialized adhesive remover. Let it soak for a minute. Then gently scrape off the residue with a plastic scraper. Be cautious with painted surfaces. Test first.
- Cleaning Textured or Paneled Doors: These doors have many nooks and crannies. Use a soft brush, like an old toothbrush, to get into these areas. For really tough spots, a cotton swab dipped in cleaning solution can work.
- Shining Hardware: For metal hardware that has lost its shine, a dab of toothpaste (non-gel) can work as a mild polish. Rub it on with a cloth. Then buff clean. This works surprisingly well on chrome and stainless steel.
- Addressing Pet Nose Prints: Pets often leave nose and paw prints. For quick removal, a damp microfiber cloth is usually enough. For dried-on marks, a mild all-purpose cleaner will do the trick.
These advanced tips help you go beyond basic cleaning. They allow you to address specific problems with confidence. Your doors will look their absolute best. They will stay cleaner for longer.
Safety Precautions for Door Cleaning
Cleaning can involve chemicals and water. Safety should always be your top priority. Taking simple precautions prevents accidents and protects your health. I always think about safety before starting any cleaning task.
Protect Yourself
- Wear Gloves: Cleaning solutions, even mild ones, can irritate your skin. Wear rubber gloves to protect your hands. This is especially important if you have sensitive skin or use stronger cleaners.
- Eye Protection: When using sprays or strong chemicals, safety glasses protect your eyes. Splashes can cause serious injury. This is a simple step that offers great protection.
- Ventilation: Ensure good airflow in the area you are cleaning. Open windows and doors if possible. This disperses fumes from cleaners. Good ventilation reduces inhalation risks. It also helps surfaces dry faster.
Protect Your Home and Doors
- Test Cleaners: Always test any new cleaning solution in an inconspicuous area first. This applies to store-bought products and homemade solutions. It ensures the cleaner does not damage or discolor your door’s finish. Wait a few minutes after applying the test spot. Check for any adverse reactions.
- Avoid Over-Wetting: Too much water can damage doors. This is especially true for wood, laminate, and painted surfaces. Use damp cloths, not dripping wet ones. Always dry surfaces immediately after cleaning. Excess moisture can lead to warping, bubbling, or mold growth.
- Read Labels: Follow the instructions on all cleaning product labels. Pay attention to warnings and usage guidelines. Some products are not suitable for certain materials. Mixing cleaners can be dangerous. Never mix bleach with ammonia or vinegar. This creates toxic fumes.
- Proper Storage: Store all cleaning supplies safely. Keep them out of reach of children and pets. Store them in original containers. This prevents accidental ingestion or misuse.
Prevent Slips and Falls
- Watch for Wet Floors: Cleaning can make floors wet and slippery. Place “wet floor” signs if available. Use towels or drop cloths to catch drips. Be careful when moving around wet areas.
- Use Stable Stepladders: If you need to reach the top of tall doors, use a sturdy stepladder. Do not stand on chairs or unstable objects. Ensure the ladder
- door cleaning
- home maintenance
- cleaning tips
- how to clean doors
- door care
- house cleaning

Todd Martin
Senior Writer
With over 15 years of experience in home renovation and design, I started HEG to share what I’ve learned with homeowners who want to create spaces that are both beautiful and functional. I’ve always believed in a hands-on approach, and over the years, I’ve picked up practical solutions that actually work. Through HEG, I aim to make home improvement more approachable, sharing real tips that help you create a home you truly love.