· Todd Martin · Home Maintenance · 19 min read
How To Clean Spray Nozzle
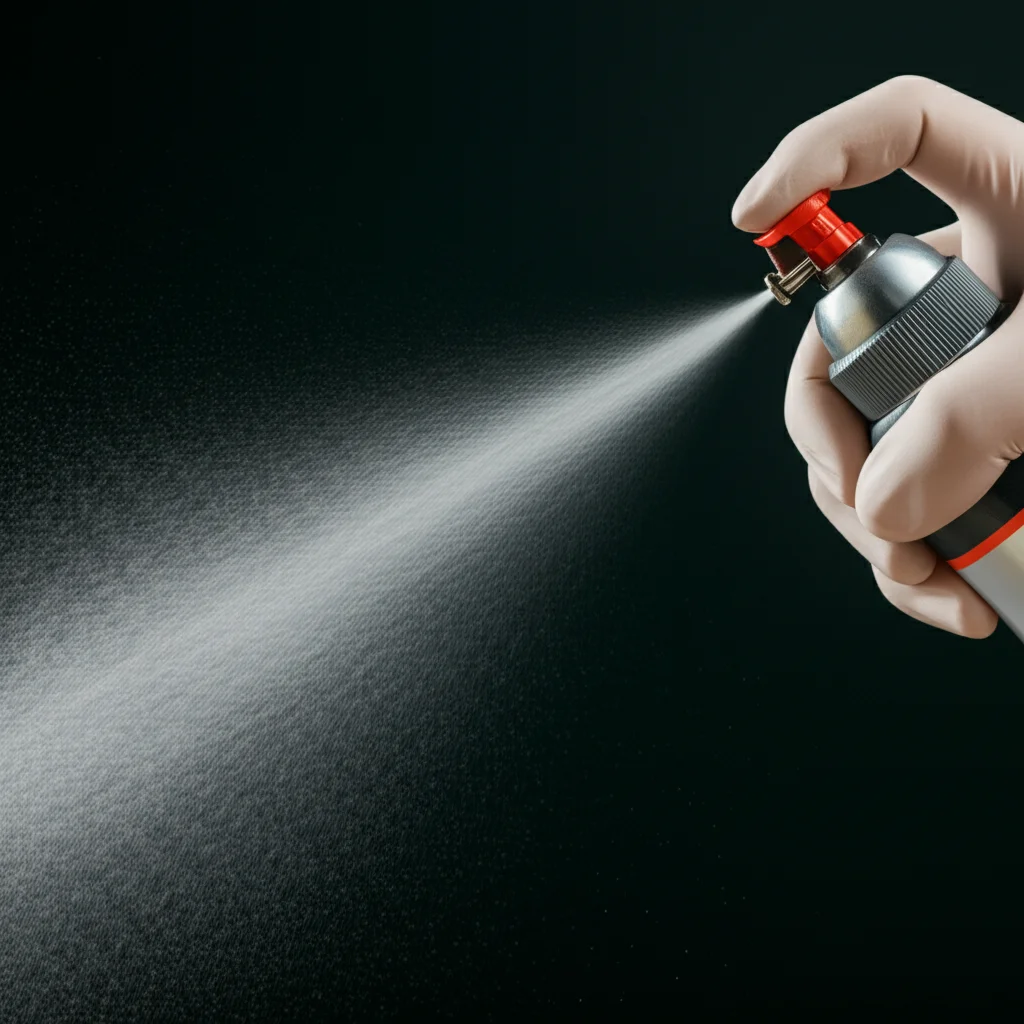
Achieve Perfect Spray with a Clean Nozzle
A clogged spray nozzle stops you cold. It messes up your cleaning tasks or painting projects. I know the frustration of a faulty spray. Learning how to clean spray nozzle parts correctly makes a huge difference. This guide will show you simple ways to restore proper function. We will cover different nozzle types, necessary tools, and easy step-by-step methods. You will learn to tackle everything from common household sprays to stubborn paint clogs.
Takeaway
- Identify Nozzle Type: Know if your nozzle handles water-based, oil-based, or specialized fluids.
- Gather Tools: Collect warm water, soap, cleaning brushes, and possibly solvents or vinegar.
- Disassemble Carefully: Take the nozzle apart gently to reach all clogged areas.
- Soak and Scrub: Use appropriate cleaning solutions to loosen clogs, then scrub away residue.
- Rinse Thoroughly: Ensure all cleaning agents and debris are flushed out before reassembly.
- Perform Regular Maintenance: Prevent future clogs with quick cleaning after each use.
To clean a spray nozzle, first detach it from the bottle. Rinse it under warm water. If clogs persist, soak the nozzle in warm, soapy water or a suitable solvent for the material sprayed. Use a small brush or needle to clear blockages, then rinse and test for proper function.
Why a Clean Spray Nozzle Matters
A spray nozzle is a small but important part of many tools. It ensures liquids come out in a fine mist or targeted stream. When a nozzle clogs, it stops working right. This causes uneven application or no spray at all. Cleaning your spray nozzle helps it work like new. It also extends the life of your spray bottle or tool.
A clean nozzle delivers consistent results. Think about cleaning windows. A clean spray nozzle gives you streak-free glass. A clogged one can leave splatters or big drops. This means more work and a poor finish. For garden sprays, a clean nozzle ensures even coverage of plants. It protects your garden from pests effectively. A dirty nozzle might miss spots. This can leave your plants unprotected.
Dirty nozzles can also waste products. If the nozzle does not spray well, you might use more product than needed. You might think you need to spray more. This wastes money and resources. A clean nozzle delivers the right amount every time. It saves you money and product. Regular cleaning prevents dried gunk from building up. This gunk can damage the internal parts of the nozzle. It can also permanently block the tiny opening. Taking a few minutes to clean it saves you time and money later. It keeps your tools in good working order.
Understanding Different Spray Nozzles for Targeted Cleaning
Spray nozzles come in many forms. Each type handles different liquids. Understanding the nozzle type helps you clean it best. Common types include household spray bottle nozzles, paint spray gun nozzles, and garden hose nozzles. Each has unique features and cleaning needs.
Household spray bottle nozzles are for water-based cleaners. These are common in your home. They spray glass cleaner, kitchen degreaser, or bathroom disinfectants. Their clogs often come from dried soap or mineral deposits. These nozzles usually break down easily. This makes them simple to clean with warm water and soap. Sometimes, vinegar helps with mineral buildup. Cleaning glass with vinegar can also be effective for the nozzle.
Paint spray gun nozzles handle thicker, often oil-based, liquids. These include paints, stains, and lacquers. Paint dries quickly and forms tough clogs. These clogs are harder to remove than soap residue. Paint nozzles often have smaller openings and more internal parts. You need stronger solvents for paint. These solvents match the type of paint used. For example, mineral spirits for oil paint or water for latex paint. Cleaning these nozzles right after use prevents serious blockages. This is very similar to how you would clean a spray foam gun.
Garden hose nozzles handle water. They get clogged by mineral deposits from hard water or dirt. These nozzles often have multiple spray patterns. This means more internal components can collect buildup. Soaking them in vinegar helps dissolve mineral deposits. Scrubbing with a small brush removes dirt. For other types of nozzles, like those on your kitchen faucet, the principle is similar. You might need to clean a kitchen faucet spray head with similar methods. Knowing the liquid the nozzle sprays guides your cleaning method. It ensures you use the right tools and solutions.
Essential Supplies to Clean Your Spray Nozzle
Gathering the right supplies makes cleaning a spray nozzle easy. You do not need many items. The exact tools depend on the type of nozzle and the clog. Most cleaning involves common household items. Some specialized clogs might need specific solvents.
Here is a list of essential items:
- Warm Water: This is your primary cleaning agent. Warm water helps loosen many types of clogs. It works especially well for water-based residues.
- Dish Soap: A few drops of dish soap in warm water create a powerful cleaning solution. Soap breaks down grease and grime. It helps lift stuck-on dirt from the nozzle.
- Small Brushes: You will need brushes with fine bristles. Old toothbrushes work well. You can also use pipe cleaners or small detail brushes. These reach into tiny openings. They scrub away residue inside the nozzle.
- Needle or Pin: A thin needle or safety pin can clear stubborn blockages. It pushes out dried material from the nozzle’s tiny opening. Use caution to avoid scratching the nozzle.
- Vinegar: White vinegar is excellent for mineral deposits. It dissolves hard water buildup. Soaking the nozzle in vinegar can free it from calcium and lime. This is a common method for many household fixtures. This is similar to how you might clean a shower head or even clean a bidet nozzle.
- Solvents: For oil-based paints or spray foams, you need a specific solvent. Mineral spirits or acetone work for paint. Consult the product label for the correct solvent. Always use solvents in a well-ventilated area.
- Safety Gear: Wear gloves to protect your hands from cleaning solutions. Safety glasses are wise when working with strong chemicals or clearing stubborn clogs. This protects your eyes from splashes.
Having these items ready saves time. It ensures you can tackle any spray nozzle clog effectively. Always choose a solvent that matches the material sprayed. This prevents damage to the nozzle.
Cleaning Water-Based Spray Nozzles: A Simple Guide
Cleaning water-based spray nozzles is straightforward. These nozzles usually get clogged by dried soap, detergents, or mineral deposits. Regular household spray bottles fall into this category. I often clean mine after using a thick cleaner. This simple method keeps them working perfectly.
Here are the steps to clean your water-based spray nozzle:
- Remove the Nozzle: First, unscrew the spray nozzle from its bottle. Turn it counter-clockwise until it detaches. Make sure the bottle is upright to prevent spills.
- Rinse Under Warm Water: Hold the detached nozzle under warm running water. Let the water flow through all openings. Squeeze the trigger repeatedly while rinsing. This helps flush out loose debris and liquid residue.
- Disassemble the Nozzle (If Possible): Some spray nozzles can be gently pulled apart. Look for a small cap or tip that can be twisted or pulled off. If your nozzle comes apart, separate its components. This allows for a deeper clean.
- Soak in Warm Soapy Water: Fill a small bowl with warm water. Add a few drops of dish soap. Place the nozzle, and any disassembled parts, into the soapy water. Let them soak for 15-30 minutes. This softens and dissolves dried gunk.
- Scrub and Clear Openings: After soaking, use a small brush, like an old toothbrush, to scrub the outside of the nozzle. Pay attention to the tiny spray hole. For the spray hole, use a thin needle or pin. Gently insert it into the opening to dislodge any blockage. Do not force the needle.
- Rinse Again Thoroughly: Rinse all parts under clean, warm running water. Squeeze the trigger multiple times. Ensure no soap residue or dislodged particles remain. The spray should come out clear and even.
- Reassemble and Test: Put the nozzle back together if you disassembled it. Screw it back onto the bottle. Fill the bottle with clean water. Test the spray pattern. It should be consistent and clear. If not, repeat the soaking and scrubbing steps.
This method works for most household cleaners. It gets your spray bottles ready for the next task. A clean nozzle makes your cleaning jobs easier and more effective.
Handling Oil-Based and Paint Spray Nozzles: Advanced Methods
Oil-based and paint spray nozzles require more aggressive cleaning. Paint and oil dry hard and sticky. They create stubborn clogs. Standard water and soap will not dissolve them. You need specific solvents. Cleaning spray paint from a nozzle requires different chemicals. I learned this the hard way after ruining a few nozzles.
Here is how to clean these tougher nozzles:
- Consult Product Instructions: Before you start, check the label of the paint or oil product. It will recommend the correct solvent for cleanup. Common solvents include mineral spirits, acetone, paint thinner, or lacquer thinner. Always use the recommended solvent.
- Wear Safety Gear: Always protect yourself. Wear chemical-resistant gloves and safety glasses. Work in a very well-ventilated area. Open windows and doors. Use a fan if possible. Fumes from solvents can be harmful.
- Disassemble the Nozzle: Take the nozzle completely apart. Carefully unscrew or unclip all removable components. This includes the tip, needle, and air cap. Lay the parts out on a clean surface.
- Rinse Excess Product: Before soaking, wipe off as much wet paint or oil as you can. Use paper towels or rags. This reduces the amount of solvent needed. It also makes the soaking step more effective.
- Soak in Appropriate Solvent: Place all disassembled nozzle parts into a small container. Pour the recommended solvent over the parts. Ensure all paint-contacting surfaces are submerged. Let them soak for at least 30 minutes, or longer for very dried paint. Overnight soaking can help with old, stubborn clogs.
- Scrub and Clear with Brushes: After soaking, use a stiff brush or dedicated cleaning brushes. Scrub all surfaces and internal channels. Pay special attention to the tiny spray hole. Use a fine wire brush or a specialized nozzle cleaning needle. Gently push through the opening to clear any remaining dried material. Do not scratch the delicate parts. This is similar to cleaning an Ender 3 nozzle, which also deals with stubborn clogs in a tiny orifice.
- Rinse with Solvent, Then Water: Once clean, rinse the parts thoroughly with fresh solvent. This removes loosened debris. Then, if the solvent is water-miscible (like denatured alcohol for some latex paints), rinse with warm water. Otherwise, just let the solvent evaporate completely.
- Dry and Reassemble: Allow all parts to air dry completely. Ensure no solvent remains. Reassemble the nozzle carefully. Test it with clean water or the appropriate liquid. It should spray evenly. Repeat cleaning if needed.
Proper cleaning of paint and oil nozzles extends their life. It ensures your projects look professional. Neglecting this step can lead to expensive replacements.
Overcoming Stubborn Nozzle Clogs and Mineral Deposits
Sometimes, regular cleaning is not enough. Stubborn clogs or heavy mineral deposits need extra effort. These can make a nozzle spray poorly or not at all. Hard water causes most mineral buildup. Old, dried product creates the toughest clogs. I have faced many such challenges. Here is how I tackle them.
For Mineral Deposits (Hard Water Buildup):
- Vinegar Soak: White vinegar is an acid. It dissolves mineral deposits like calcium and lime. Remove the nozzle. Submerge it completely in a bowl of undiluted white vinegar. Let it soak for several hours or overnight. For severe buildup, you might see bubbles. This shows the acid is working.
- Boiling Method (for Heat-Safe Nozzles): For very stubborn mineral deposits, you can boil the nozzle. Ensure the nozzle material is heat-safe, usually plastic or metal. Place the nozzle in a pot of water. Add a generous amount of white vinegar. Bring the mixture to a boil. Simmer for 15-30 minutes. The heat and acid work together. This softens tough deposits. Always be careful with hot liquids.
- Scrub and Poke: After soaking or boiling, use a small brush. Scrub the nozzle aggressively. Use a needle or paperclip to poke through the tiny spray hole. This dislodges softened mineral chunks. Rinse thoroughly with clean water. This method is effective for many household items that deal with water, like when you clean plastic shower heads or nozzles.
For Stubborn Product Clogs (Dried Paint, Glue, etc.):
- Longer Solvent Soaks: If standard 30-minute solvent soaks fail, extend the time. Let the nozzle sit in the appropriate solvent for 24 hours. Change the solvent if it becomes cloudy. Fresh solvent is more effective.
- Ultrasonic Cleaner: An ultrasonic cleaner uses sound waves. These waves create tiny bubbles. The bubbles collapse, creating scrubbing action. This can reach tiny crevices. Place the disassembled nozzle parts in the cleaner. Add the appropriate cleaning solution or solvent. Run the cleaner for 10-20 minutes. This is very effective for hard-to-reach clogs.
- Heat Application (with Caution): For some materials, gentle heat can help. For metal nozzles with dried paint, a heat gun on a low setting might soften the clog. Be extremely careful. Do not overheat plastic nozzles. This can melt them. Always use the correct solvent immediately after heating.
- Specialized Nozzle Cleaning Kits: Some spray tools, like paint sprayers, have cleaning kits. These kits include specific brushes, needles, and wrenches. They are designed for their particular nozzle. These tools help with precision cleaning.
Always reassemble and test the nozzle after clearing clogs. A successful cleaning restores full spray power. This saves you from buying a new nozzle.
Maintaining Your Spray Nozzles: Prevention is Key
Preventative maintenance saves you from stubborn clogs. It keeps your spray nozzles working reliably. A little care after each use goes a long way. I always take a few moments to do this. It stops future headaches.
Here are simple steps for nozzle maintenance:
- Flush with Water After Use: This is the most crucial step for water-based products. After each use, spray plain warm water through the nozzle. Do this until the spray runs clear. This flushes out remaining product. It prevents it from drying inside. For paint sprayers, always flush with the correct solvent or water immediately after use. This is just like how you might clean a gas can after emptying it, flushing out any residual fuel to prevent buildup.
- Release Pressure: For aerosol cans, point the nozzle away from yourself. Press the nozzle until no more product comes out. This releases any trapped pressure. It also clears the nozzle.
- Store Properly: Store spray bottles upright. This prevents liquid from seeping into the nozzle mechanism. It also reduces leaks. Keep aerosol cans in a cool, dry place. Extreme temperatures can affect product consistency. This can lead to clogs.
- Cap or Cover Nozzle: If your spray bottle has a cap or cover, use it. This protects the nozzle from dust and debris. It also prevents the product from drying out on the tip. For aerosol cans, some have a small cap that goes over the nozzle. Use this to prevent accidental sprays and protect the nozzle.
- Do Not Store with Thick Products: If you use very thick products, consider transferring them. Store them in a different container. Do not store them in the spray bottle for long periods. Thick products are more likely to clog. This especially applies if the nozzle will not be used for a while.
- Regular Deep Cleaning: Even with daily flushing, do a deeper clean occasionally. For household nozzles, a monthly soak in warm soapy water helps. For paint sprayer nozzles, a complete disassembly and solvent soak after major projects is wise. This prevents buildup over time.
- Inspect Regularly: Before each use, quickly check the nozzle. Look for any dried residue or damage. A quick wipe or rinse can prevent a full clog. Catching problems early makes them easier to fix.
By following these simple steps, you extend the life of your spray nozzles. You ensure they are always ready when you need them. Prevention truly is better than cure.
Safety First: Protecting Yourself While Cleaning Nozzles
Cleaning spray nozzles can involve chemicals and small parts. Safety is paramount. Protecting your eyes, hands, and lungs is important. I always make sure to put on my safety gear before starting. It protects me from splashes or fumes.
Here are key safety precautions:
- Wear Gloves: Always wear chemical-resistant gloves. This protects your skin from cleaning solutions. Solvents like mineral spirits or acetone can irritate skin. Dish soap can dry out your hands. Gloves provide a barrier.
- Use Eye Protection: Safety glasses or goggles are a must. When clearing clogs, dislodged particles can fly out. Cleaning solutions can splash. Eye protection shields your eyes from chemicals and debris.
- Ensure Proper Ventilation: Work in a well-ventilated area. This is especially true when using strong solvents. Open windows and doors. Use a fan to circulate air. Fumes from solvents can be harmful if inhaled. They can also cause dizziness or nausea. Never clean with solvents in a closed space.
- Avoid Mixing Chemicals: Never mix different cleaning solutions. Combining certain chemicals, like bleach and vinegar, creates dangerous fumes. Always use one product at a time. Rinse thoroughly between different solutions.
- Read Product Labels: Always read the cleaning product or solvent label. It will provide specific safety instructions. It will also tell you how to dispose of the product. Follow all warnings and directions.
- Handle Small Parts Carefully: Nozzles have tiny components. Be careful when disassembling and reassembling them. Avoid dropping small parts. They can be hard to find. Use a clear workspace. This helps keep track of all pieces.
- Dispose of Waste Properly: Do not pour solvents or chemical waste down the drain. This pollutes water. Check local regulations for proper disposal of hazardous waste. Many communities have collection sites for paints and chemicals.
- Keep Away from Children and Pets: Store all cleaning supplies safely. Keep them out of reach of children and pets. Chemicals can be toxic if ingested. Lock cabinets if necessary.
Following these safety tips protects you. It also keeps your home safe. Cleaning nozzles correctly includes staying safe.
Troubleshooting Common Spray Nozzle Issues
Even after cleaning, a spray nozzle might not work perfectly. Sometimes, the problem goes beyond a simple clog. Knowing common issues helps you troubleshoot effectively. I have encountered these problems many times.
Here are some common spray nozzle issues and their solutions:
- Uneven Spray Pattern:
- Cause: Partial clog or damaged tip.
- Solution: Re-clean the nozzle thoroughly. Pay extra attention to the tiny spray hole. Use a needle or a fine brush. Check for any physical damage to the tip. If the tip is bent or cracked, replacement might be necessary.
- Dripping or Leaking:
- Cause: Worn seals, loose components, or internal blockage.
- Solution: Check all connections. Make sure parts are screwed on tightly. Inspect rubber gaskets or O-rings for wear or damage. Replace them if they look brittle or cracked. Sometimes, a stubborn internal clog can cause back pressure, leading to drips. A deeper soak and cleaning might resolve this.
- No Spray at All (but bottle has liquid):
- Cause: Complete blockage, broken pump mechanism, or disconnected tube.
- Solution: First, ensure the dip tube inside the bottle is attached. It must reach the bottom of the liquid. If the tube is fine, the nozzle has a full clog. Follow advanced cleaning methods with soaking and aggressive scrubbing. If it is still not working, the pump itself might be broken. This often means replacing the entire spray mechanism.
- Weak Spray:
- Cause: Air leak, partial blockage, or low product level.
- Solution: Check the bottle cap and nozzle connections for tightness. Any air getting in reduces pressure. Ensure the dip tube is fully submerged in liquid. A partial clog can also restrict flow, leading to a weak spray. Re-clean the nozzle, focusing on flushing out any partial blockages.
- Product Comes Out in a Stream, Not a Mist:
- Cause: The misting mechanism is clogged or damaged.
- Solution: This is often a tiny clog in the final misting orifice. Use a very fine needle or pin to gently clear this specific hole. If the nozzle has adjustable settings (stream to mist), try turning it. Make sure it is not stuck on “stream.”
- Difficulty Pumping:
- Cause: Stiff pump mechanism, dried product in the pump, or damaged spring.
- Solution: Remove the nozzle. Soak the pump mechanism (the part that goes into the bottle) in warm soapy water. Work the pump up and down while submerged. This helps loosen dried product. If the spring is damaged, the pump often needs replacement.
Troubleshooting saves you from buying new equipment. Most spray nozzle issues are solvable with careful inspection and cleaning.
FAQ Section
Q1: How often should I clean my spray nozzle?
A1: Clean your spray nozzle immediately after using oil-based paints or sticky products. For water-based household sprays, a quick flush with warm water after each use is good. Perform a deeper clean every few weeks or whenever you notice a reduced or uneven spray pattern. Regular flushing prevents clogs from forming.
Q2: Can I use hot water to clean all spray nozzles?
A2: Warm water is generally safe for most spray nozzles. Avoid very hot or boiling water for plastic nozzles, especially those on aerosol cans. Extreme heat can deform or melt plastic parts. Always use caution and check the material before applying heat.
Q3: What if my spray nozzle is still clogged after cleaning?
A3: If your spray nozzle remains clogged, the blockage might be very stubborn or deep. Try a longer soak in the appropriate solvent or vinegar. Use an ultrasonic cleaner if available. Ensure all internal parts are accessible for cleaning. If severe damage or a broken pump exists, replacement may be necessary.
Q4: Is it safe to use a needle to clear the spray hole?
A4: Yes, a thin needle or pin can clear the spray hole. Use it gently. Avoid forcing the needle. This can scratch or enlarge the opening. A damaged opening results in an uneven spray pattern. Only use a needle for the tiny exterior spray orifice.
Q5: Can I prevent spray nozzles from clogging in the first place?
A5: Yes, prevention is key. Always flush the nozzle with water (for water-based products) or the correct solvent (for oil-based products) immediately after use. Store bottles upright with caps on. Avoid storing thick products in spray bottles long-term. This simple routine drastically reduces clogs.
Conclusion
Cleaning a spray nozzle makes a big difference. It extends the life of your tools. It ensures your projects look their best. You now have the knowledge to tackle any spray nozzle clog. We covered essential tools. We explored simple steps for water-based nozzles. We also discussed advanced methods for paint and oil. Remember to use the right solvent for the job. Do not forget important safety precautions.
Preventative maintenance is your best friend. A quick rinse after each use saves much effort later. If you face a stubborn clog, consider a long soak or an ultrasonic cleaner. Troubleshooting common issues helps you identify the real problem. My personal experience shows that a little care keeps things running smoothly. Take control of your spray nozzles today. Restore their perfect function. Your next project will thank you. Get out there and clean those nozzles!
- spray nozzle cleaning
- clogged spray nozzle
- cleaning tips
- home maintenance
- DIY cleaning

Todd Martin
Senior Writer
With over 15 years of experience in home renovation and design, I started HEG to share what I’ve learned with homeowners who want to create spaces that are both beautiful and functional. I’ve always believed in a hands-on approach, and over the years, I’ve picked up practical solutions that actually work. Through HEG, I aim to make home improvement more approachable, sharing real tips that help you create a home you truly love.