· Todd Martin · Home Maintenance · 14 min read
How To Clean Garbage Disposal
Restore Freshness: How To Clean Your Garbage Disposal Effectively
Do you notice a lingering smell in your kitchen? Often, the culprit is your garbage disposal. Food particles can get trapped inside, leading to unpleasant odors and reduced efficiency. Learning how to clean garbage disposal units properly is essential for a fresh-smelling and hygienic kitchen. This guide will walk you through various methods to clean your disposal, prevent future issues, and maintain its optimal performance. We cover everything from simple daily steps to deep cleaning techniques. You will find practical advice and natural solutions to keep your kitchen sink area sparkling clean.
Takeaway
- Always prioritize safety by disconnecting power before any deep cleaning.
- Regular use of cold water and ice helps keep disposal blades sharp and clear.
- Natural cleaners like baking soda, vinegar, and citrus are effective for odor control.
- Proper disposal habits prevent most clogs and smells.
- Address persistent issues promptly to avoid larger problems.
Cleaning your garbage disposal involves using natural agents like baking soda, vinegar, and citrus peels, along with cold water and ice. These steps work to dislodge food particles, sharpen blades, and neutralize odors effectively. Regular maintenance prevents clogs and keeps your kitchen smelling fresh.
Understanding Your Garbage Disposal: The Basics of Cleaning
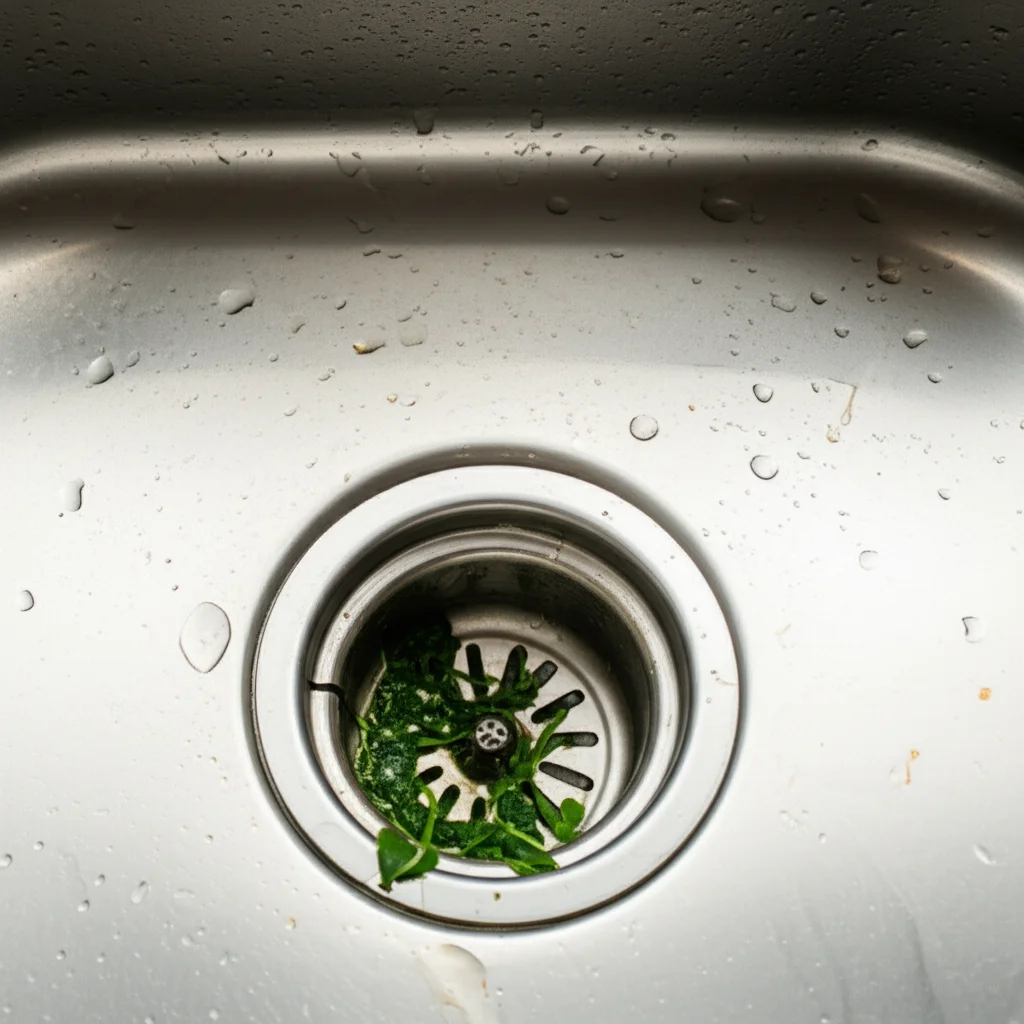
Your garbage disposal works hard. It grinds food waste into tiny pieces, sending it down the drain. Over time, food bits, grease, and grime accumulate inside. This buildup causes bad smells and can reduce the disposal’s grinding power. Cleaning it regularly prevents these problems.
Before you clean, safety comes first. Always turn off the power to your disposal at the circuit breaker. This step prevents accidental activation while your hand is near the blades. Never put your hand into the disposal without disconnecting the power. You can also unplug the unit if it has a plug under the sink.
Regular cleaning extends the life of your disposal. It keeps the blades sharp and prevents internal corrosion. A clean disposal runs more efficiently. It handles food waste better and avoids clogs. Keeping your disposal clean ensures your kitchen stays fresh. Ignoring cleaning leads to more stubborn problems.
A clean disposal helps maintain kitchen hygiene. It stops bacteria from growing inside the unit. This growth is a common cause of foul odors. Understanding how your disposal works helps you clean it better. You can then tackle specific issues like smells or slow draining.
Simple Steps for Daily Garbage Disposal Freshness
Keeping your garbage disposal fresh does not require much effort. Simple daily habits make a big difference. These steps prevent food buildup and keep odors away. Start by using cold water. Run cold water for about 30 seconds before and after using the disposal. This helps flush food particles through.
Ice cubes are another simple tool. Drop a cup or two of ice cubes into the disposal. Turn on the cold water and the disposal. The ice helps dislodge grime from the grinding components. It also helps sharpen the blades. Do this a few times a week for best results. This method is safe and effective.
Citrus peels add a pleasant scent. After using ice, toss in a few citrus peels like lemon, lime, or orange. Run the cold water and the disposal again. The peels clean the inner walls of the disposal. They also leave a fresh, natural scent in your kitchen. This is a great way to use leftover fruit rinds.
For specific guidance on using citrus, you can explore detailed methods. Check out how to effectively use how to clean garbage disposal with lemon for a brighter clean. These daily steps contribute to a healthy disposal. They reduce the need for deep cleaning. They also keep your kitchen smelling clean and inviting.
Tackling Stubborn Odors: Natural Cleaning Solutions
Persistent smells from your garbage disposal mean it needs a deeper clean. Food particles and grease often cling to the grinding chamber. Natural solutions are effective and safe for this task. They break down buildup and neutralize bad smells. One popular method uses baking soda and vinegar.
First, pour half a cup of baking soda into the disposal. Let it sit for 15-30 minutes. Baking soda is a natural deodorizer. It absorbs odors and helps loosen grime. Next, pour a cup of white vinegar down the drain. You will see a fizzing reaction. This foam helps scrub the inside of the disposal.
Let the baking soda and vinegar mixture sit for another 15-30 minutes. This allows it to work on the toughest grime. After the waiting period, flush the disposal with hot water. Hot water helps wash away the loosened debris. Finish by running cold water and the disposal for about 30 seconds. This ensures everything clears out.
For a comprehensive guide on dealing with unpleasant smells, read about how to clean smelly garbage disposal. You can also find more information on using these specific ingredients. A detailed guide on how to clean disposal with baking soda offers additional tips. These natural cleaning solutions are powerful. They can remove even the most stubborn odors.
Beyond the Basics: Deep Cleaning Your Disposal
Sometimes, daily habits and natural flushes are not enough. A deep clean can address built-up grime you cannot easily reach. This goes beyond just pouring things down the drain. It targets hidden areas where food particles hide. The rubber splash guard is one such place.
The splash guard sits at the top of your disposal opening. It stops food and water from splashing back. Over time, gunk and mold grow on its underside. Carefully pull up the rubber splash guard. You can use a brush or an old toothbrush to scrub both sides. Use a little dish soap or a vinegar solution. Clean it thoroughly, then push it back into place. This small part holds many trapped food particles.
You can also use a long, stiff brush to clean inside the disposal. Do this only after you turn off the power at the circuit breaker. Brush around the grinding chamber. Reach as far down as you can. This helps dislodge any stubborn food residue stuck to the sides. Rinse with cold water and turn the power back on. Run the disposal for a minute.
Specialized disposal cleaners are also available. These often come in packets or tablets. Follow the product instructions carefully. Most involve dropping a tablet into the disposal and running water. Use these products sparingly. Natural methods are often sufficient and less harsh. Deep cleaning ensures no hidden grime remains. It helps keep your disposal running efficiently.
What NOT to Put Down Your Garbage Disposal
Knowing what not to put down your garbage disposal is as important as knowing how to clean it. Certain items can cause severe clogs and damage the unit. Avoid putting fats, oils, and grease (FOG) into the disposal. These substances solidify in pipes, creating sticky blockages. Scrape greasy plates into the trash instead.
Fibrous foods are also problematic. Celery stalks, corn husks, onion skins, and artichokes have tough fibers. These fibers can wrap around the grinding components. This causes jams or can even burn out the motor. Always discard these items in the trash or compost.
Hard items pose a risk to the blades and motor. Avoid bones, fruit pits, and seafood shells. These items are too hard for the disposal to grind effectively. They can dull the blades or damage the motor. Dispose of them separately. Even small items like cherry pits can cause issues.
Starchy foods absorb water and expand. Pasta, rice, and potato peels can create a thick, glue-like sludge. This sludge easily clogs drains and the disposal itself. Always throw these items into the trash. Coffee grounds are another common culprit. They do not fully dissolve and can accumulate, forming a dense sludge in your pipes.
By avoiding these items, you reduce strain on your disposal. You also prevent costly repairs and frequent clogs. Proper disposal habits lead to a healthier kitchen plumbing system. Teach everyone in your household these simple rules. Prevention is the best medicine for your garbage disposal.
Troubleshooting Common Garbage Disposal Issues
Even with regular cleaning, your garbage disposal might face issues. Knowing how to troubleshoot common problems saves you time and money. One frequent issue is a minor clog. If water drains slowly or not at all, a clog is likely. First, turn off the power. Never use chemical drain cleaners in a disposal, as they can harm the unit. Try using a plunger. Fill the sink with a few inches of water. Place the plunger over the drain and plunge vigorously. This often dislodges small clogs.
If your disposal hums but does not grind, it is probably jammed. Again, turn off the power immediately. Look inside with a flashlight. You might see the item causing the jam. Use tongs or pliers to carefully remove it. Never use your hand. If you cannot see anything, check the reset button. Most disposals have a small red button on the bottom. Press it firmly. If it pops back out, wait 10 minutes and try again. For more stubborn jams, use the hex wrench that came with your disposal. Insert it into the hole at the very bottom center of the unit. Wiggle it back and forth to manually free the motor. Then press the reset button.
Leaks are another common problem. Check the connections under the sink. Leaks often occur at the top where the disposal connects to the sink flange or at the drain pipe connections. Tighten any loose nuts. If the leak comes from the body of the disposal, the unit itself may be cracked or have a damaged seal. In this case, you might need a professional or a new unit.
These troubleshooting steps help address most common issues. If problems persist or seem complex, do not hesitate to seek professional help. Addressing issues promptly prevents further damage. It keeps your kitchen running smoothly.
Maintaining a Healthy Disposal: Regular Habits for Longevity
Maintaining your garbage disposal properly ensures its longevity and peak performance. It is more than just cleaning; it is about establishing smart habits. Always run cold water before, during, and after using your disposal. Cold water keeps fats and grease solid, allowing the disposal to grind them up before they can stick to pipes. It also flushes food particles through the drain effectively.
Regularly using ice cubes is a simple yet powerful maintenance trick. Drop a handful of ice cubes into the disposal once or twice a week. The ice scours the grinding chamber and blades. This action helps to remove any food residue that might be building up. It also helps to keep the grinding components sharp, making the disposal more efficient. This habit prevents odors and minor clogs.
Adding citrus peels periodically not only makes your kitchen smell good but also helps clean the disposal. The natural oils in citrus peels can break down grease. Their abrasive texture helps scrub the interior. Use lemon, lime, or orange peels after using ice. This leaves a fresh scent and a cleaner disposal.
Consistently avoid putting problematic foods down the drain. This includes fibrous vegetables, large bones, coffee grounds, and starchy items. As discussed earlier, these items are major culprits for clogs and damage. Make it a household rule to dispose of these items in the trash. These preventive measures are far easier than dealing with a broken or clogged disposal. A little effort each day saves you from major headaches later.
When to Consider Professional Help for Your Disposal
While many garbage disposal issues are solvable with DIY methods, some problems require a professional. Knowing when to call an expert saves you time and prevents further damage. If you have a persistent clog that resists plunging and home remedies, it is time for a professional. Deep clogs can be far down the pipe. They might need specialized tools or expertise to clear.
Major leaks are another sign you need a plumber. If water pools under your sink from the disposal unit itself, the internal seals might be broken. A cracked housing also causes leaks. These issues are difficult to fix without professional knowledge and replacement parts. Ignoring them can lead to significant water damage to your cabinets and floor.
Motor issues indicate a serious problem. If your disposal makes a loud grinding noise but does not turn, or if it hums and stops, the motor might be failing. This could mean a motor burnout or a severe jam that you cannot clear. Professionals can diagnose and often repair or replace motors. They have the tools and experience for these complex repairs.
Strange, unusual noises from the disposal are also a red flag. Rattling or clanking sounds often mean a foreign object is loose inside the grinding chamber. While you might try to remove it yourself after turning off the power, if you cannot locate it, a professional can. If the unit stops working entirely and the reset button does not help, the wiring or internal components might be faulty. A plumber can assess the situation and recommend whether repair or replacement is the best option. Do not hesitate to call a professional for complex or recurring issues.
FAQ Section
How often should I clean my garbage disposal? You should clean your garbage disposal regularly to prevent odors and buildup. Daily habits like flushing with cold water and using ice cubes are great. A more thorough cleaning with baking soda and vinegar is good once a week or every two weeks. Deep cleaning the splash guard can be done monthly or as needed.
Can I use bleach in my garbage disposal? No, you should not use bleach in your garbage disposal. Bleach can corrode the metal components of the disposal over time. It can also damage the rubber seals. More importantly, bleach can react dangerously with other cleaning products or chemicals already in your pipes. Stick to natural cleaners like baking soda, vinegar, and citrus.
Why does my garbage disposal smell even after cleaning? If your disposal still smells after cleaning, food particles might be trapped in hard-to-reach areas. Check the underside of the rubber splash guard for grime. A deep clean using baking soda, vinegar, and ice might be needed. Also, ensure you are not putting problematic foods like grease or coffee grounds down the drain, as these can accumulate quickly.
Is it safe to put ice down my garbage disposal? Yes, it is very safe to put ice down your garbage disposal. Ice cubes help dislodge stuck food particles and clean the grinding components. The ice also helps to sharpen the blades, making the disposal more efficient. Always run cold water while the disposal is grinding the ice.
What can I use if I don’t have lemons for cleaning? If you do not have lemons, you can use other citrus fruits like limes, oranges, or grapefruits. Their peels contain natural oils that help clean and deodorize. You can also use a mixture of baking soda and white vinegar. This combination creates a fizzing action that effectively scrubs the disposal.
How do I know if my garbage disposal is broken or just clogged? If your disposal hums but does not grind, it is likely clogged or jammed. Check the reset button and use a hex wrench to free the motor. If there is no sound at all, check the circuit breaker. If the motor runs but nothing drains, it is a severe clog. If the unit is leaking from its body, it might be broken.
Conclusion
Keeping your garbage disposal clean is a simple yet crucial task for any home. We have explored various effective methods to clean garbage disposal units, from everyday freshness routines to deep cleaning techniques. By regularly flushing with cold water, using ice cubes, and applying natural solutions like baking soda, vinegar, and citrus, you can prevent odors and maintain efficiency. Remember to avoid putting problematic foods down the drain, as this prevents most clogs and costly repairs.
A well-maintained garbage disposal ensures your kitchen remains a fresh and hygienic space. If you encounter persistent issues, do not hesitate to seek professional assistance. Embrace these cleaning habits today. Enjoy a cleaner, fresher kitchen environment every day. Your nose and your plumbing system will thank you!
- garbage disposal cleaning
- kitchen cleaning
- odor removal

Todd Martin
Senior Writer
With over 15 years of experience in home renovation and design, I started HEG to share what I’ve learned with homeowners who want to create spaces that are both beautiful and functional. I’ve always believed in a hands-on approach, and over the years, I’ve picked up practical solutions that actually work. Through HEG, I aim to make home improvement more approachable, sharing real tips that help you create a home you truly love.