· Todd Martin · Gardening · 21 min read
How To Clean Garden Gloves
How To Clean Garden Gloves: A Guide to Keeping Them Fresh
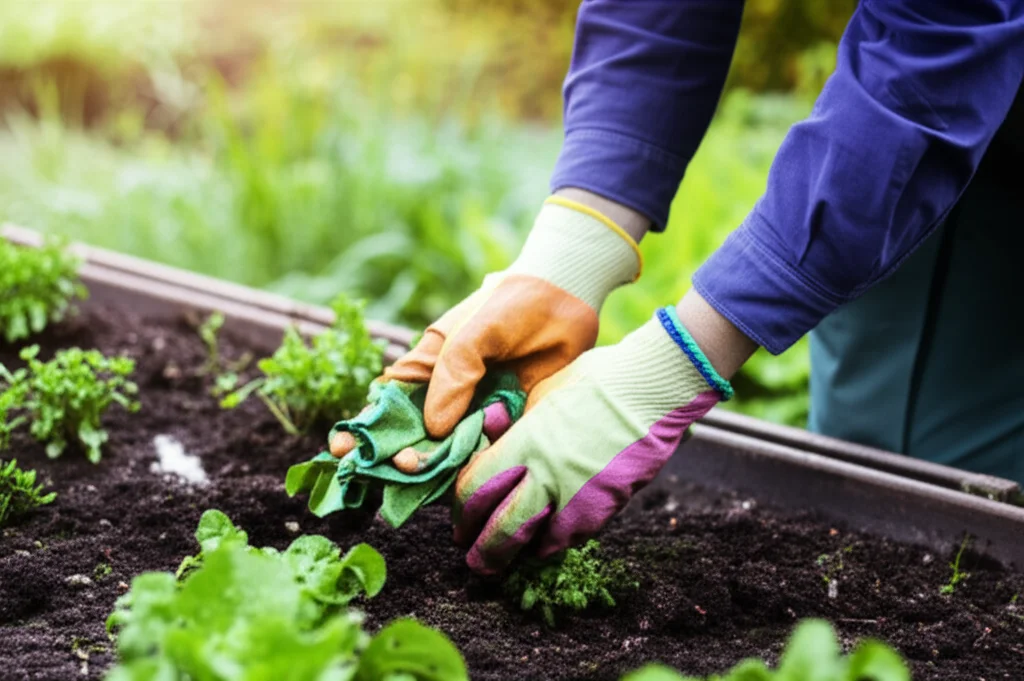
After a rewarding day in the garden, your hands might be clean, but what about your garden gloves? Those trusty protectors bear the brunt of dirt, sweat, sap, and sometimes even a little mud. Many gardeners simply toss dirty gloves aside, unaware that a little cleaning can greatly extend their life. Dirty gloves not only look bad but can harbor bacteria and reduce their protective qualities. Keeping your garden gloves clean is simple and helps them last longer.
This article shows you how to clean garden gloves of all types. We will explore methods for fabric, leather, and synthetic materials. You will learn how to remove tough stains and unwanted odors. Proper drying and storage tips will help you keep your gloves in top shape. Get ready to give your gardening gear the care it needs.
Takeaway
- Wash gloves based on material: Fabric, leather, and synthetic gloves need different cleaning methods.
- Remove loose dirt first: Always brush or shake off dry debris before washing.
- Dry gloves completely: Air dry gloves away from direct heat to prevent damage and odor.
- Store gloves properly: Keep them in a cool, dry place to maintain their shape and function.
To clean garden gloves, first shake off loose dirt. For fabric gloves, machine wash or hand wash with mild soap and warm water. Leather gloves need gentle wiping with a damp cloth and special leather cleaner. Synthetic gloves can be hand washed. Always air dry all types of gloves completely before storing them to prevent mold and prolong their use.
Why Cleaning Your Garden Gloves Matters
Garden gloves are essential tools for any gardener. They protect your hands from thorns, dirt, chemicals, and blisters. Over time, gloves collect a lot of dirt, sap, and sweat. This buildup is not just unsightly; it can reduce the glove’s effectiveness. Unclean gloves can also become stiff, uncomfortable, or even harbor germs.
Regular cleaning helps maintain the glove material. It stops dirt from breaking down fibers or leather. This means your gloves stay flexible and strong. Cleaning also removes potential irritants like pesticides or plant sap. Clean gloves feel better on your hands. They also last much longer, saving you money in the long run. Just as you clean your garden tools after use, your gloves deserve similar attention.
Beyond extending their lifespan, cleanliness impacts your health. Soil contains bacteria and fungi. Transferring these from dirty gloves to your skin or other surfaces is possible. Proper cleaning reduces this risk. It keeps your hands and your garden safer. Think of cleaning your gloves as part of your garden cleanup routine. It is a simple step with big benefits.
Understanding Different Glove Materials
Garden gloves come in many materials. Each material needs a specific cleaning approach. Knowing your glove type helps you clean them correctly. Using the wrong method can damage the material. It can also shorten your glove’s life. Always check the care label if your gloves have one.
Different materials offer different levels of protection and flexibility. Some are breathable, others are waterproof. Understanding these differences guides your cleaning choices. You would not wash a delicate silk shirt the same way you wash sturdy denim jeans. The same rule applies to your garden gloves.
Fabric and Cotton Gloves
Fabric and cotton gloves are common. They are soft, breathable, and affordable. These gloves often have a knit wrist or a simple cuff. They offer good dexterity for planting and weeding. However, they absorb dirt and moisture quickly.
These gloves can become very stained. They might also hold onto unpleasant smells from sweat or soil. Fabric gloves are generally the easiest to clean. Many types can go right into the washing machine. Others do well with a simple hand wash.
Leather and Suede Gloves
Leather and suede gloves offer superior protection. They are durable, puncture-resistant, and comfortable. Leather is great for heavy-duty tasks like pruning roses or moving rocks. Suede gloves are softer but less water-resistant. Both materials are natural. They need gentle care to prevent drying and cracking.
Water can strip natural oils from leather. This makes it stiff and brittle. Suede is even more sensitive to water and stains easily. Cleaning these gloves requires special attention. You cannot just throw them in a washing machine. Special leather cleaners and conditioners help keep them soft and strong.
Synthetic and Rubber-Coated Gloves
Synthetic gloves include materials like nylon, polyester, and spandex. They often have coatings on the palms and fingers. These coatings are usually rubber, nitrile, or polyurethane. Such gloves offer grip and water resistance. They are good for various tasks, from light weeding to handling wet soil.
These gloves are generally quite tough. They resist shrinking and stretching better than natural fibers. The synthetic materials often dry faster too. The rubber or nitrile coating makes them easy to wipe clean. They are less absorbent than cotton. Cleaning synthetic gloves is usually straightforward.
Step-by-Step Cleaning Methods for Fabric Gloves
Fabric garden gloves are often machine washable. This makes them convenient to clean. However, hand washing is also an option. It can be better for very delicate fabric gloves. Both methods effectively remove dirt and grime.
Choosing the right method depends on how dirty your gloves are. It also depends on the fabric type. Always try to shake or brush off loose dirt before washing. This prevents the dirt from settling deeper into the fabric during the wash. A stiff brush works well for dried mud.
Hand Washing Fabric Garden Gloves
Hand washing is a gentle way to clean your fabric gloves. This method is good for lightly soiled gloves. It is also suitable for gloves made from more delicate fabrics. You have more control over the cleaning process. This helps preserve the glove’s shape and integrity.
Follow these steps for hand washing:
- Rinse off loose dirt: Hold gloves under running water. Use a hose or a sink to rinse away any large pieces of soil or debris.
- Prepare a cleaning solution: Fill a basin or bucket with warm water. Add a small amount of mild liquid detergent. A gentle dish soap or laundry detergent works well. You can also use a small amount of vinegar for cleaning.
- Soak the gloves: Place your fabric gloves into the soapy water. Let them soak for 10-15 minutes. This helps loosen stubborn dirt.
- Scrub gently: Rub the gloves together. Focus on particularly dirty areas like the fingertips and palms. A soft brush or old toothbrush can help with tough spots. For stubborn stains, you might pre-treat with a stain remover or a paste of baking soda and water.
- Rinse thoroughly: Rinse the gloves under clean, cool running water. Squeeze out excess soap until the water runs clear. Make sure no soap residue remains. Soap left behind can stiffen the fabric or irritate your skin.
- Squeeze out water: Gently squeeze out as much water as possible. Do not wring the gloves harshly. This can distort their shape.
Machine Washing Fabric Garden Gloves
Machine washing saves time and effort. It is ideal for most cotton or synthetic fabric gloves. Always check the care label first. Some gloves might have specific washing instructions. Use a laundry bag for smaller items. This protects them in the wash cycle.
Here is how to machine wash your fabric gloves:
- Pre-treat heavy dirt: Shake off loose soil. For very muddy gloves, rinse them under a hose first. This prevents dirt from clogging your washing machine.
- Load into machine: Place your gloves into a mesh laundry bag. This protects them from tangling or getting lost. It also keeps any remaining grit contained. If cleaning other items like shoes in the washer, you can often combine them.
- Add detergent: Use your regular laundry detergent. Do not use bleach unless the gloves are white and specifically allow it. Bleach can weaken fabric fibers.
- Select cycle: Choose a gentle cycle with cold or warm water. Hot water can cause some fabrics to shrink. A “delicate” or “hand wash” setting is usually best.
- Wash: Start the washing machine. Let the cycle complete.
- Remove and dry: Take the gloves out immediately after the cycle. Follow the drying instructions below to prevent shrinkage or damage.
Cleaning Leather and Suede Garden Gloves Properly
Leather and suede gloves require careful cleaning. Water can damage these natural materials. Direct soaking can strip their oils. This leads to cracking and stiffness. Always use specific cleaning products for leather or suede. These products help maintain the material’s softness and strength.
Avoid harsh chemicals. Do not put leather or suede gloves in a washing machine. The tumbling and detergents are too rough. Proper care helps these valuable gloves last for years. Treat them like you would fine leather shoes or a jacket.
Spot Cleaning Leather Garden Gloves
Spot cleaning is best for light dirt or small stains. It minimizes the amount of moisture introduced to the leather. This helps prevent damage and keeps the gloves supple. Act quickly when you notice dirt or sap. Fresh spots are easier to clean.
Follow these steps for spot cleaning:
- Brush off dry dirt: Use a soft brush or cloth to remove any loose dirt or dust. Do this gently to avoid scratching the leather.
- Damp cloth wipe: Dampen a clean, soft cloth with plain water. Wring it out very well. The cloth should be barely damp, not wet.
- Wipe dirty areas: Gently wipe the soiled areas of the glove. Do not rub too hard. Avoid saturating the leather with water.
- Dry immediately: Pat the cleaned area dry with a separate, dry cloth. Let the gloves air dry completely. Do not use heat.
- Apply leather conditioner: Once dry, apply a small amount of leather conditioner. This restores moisture to the leather. It keeps it soft and prevents cracking. This is similar to how you might clean and condition leather shoes.
Deep Cleaning Leather Garden Gloves
For heavily soiled leather gloves, a deeper clean might be needed. This process is more involved but essential for restoring heavily used gloves. It helps remove embedded dirt without damaging the material. Always test any cleaner on a small, hidden area first.
Here is how to deep clean your leather gloves:
- Remove surface dirt: Brush off all loose soil and debris. This prepares the surface for cleaning.
- Use a specialized leather cleaner: Apply a small amount of leather cleaner onto a clean cloth. Do not apply it directly to the gloves. Choose a cleaner specifically for the type of leather you have.
- Gently wipe the gloves: Wipe the entire surface of the gloves with the cloth. Work in small sections. Use light, circular motions. The cleaner will lift dirt from the leather.
- Wipe off cleaner: Use a separate, slightly damp cloth to wipe off any excess cleaner. Ensure no residue remains.
- Air dry completely: Allow the gloves to air dry naturally. Place them away from direct sunlight or heat sources. Stuff them with paper towels to help maintain their shape. Change the paper towels if they become damp.
- Condition the leather: Once the gloves are fully dry, apply a generous amount of leather conditioner. Massage it into the leather. This step is crucial. It replenishes the natural oils lost during cleaning. This prevents the leather from becoming stiff or cracking over time.
For suede gloves, use a specific suede cleaner and a suede brush. Brush gently in one direction. Avoid water as much as possible.
Washing Synthetic and Rubber-Coated Gloves
Synthetic and rubber-coated gloves are often the easiest to clean. Their materials are generally water-resistant and durable. This makes them perfect for muddy or wet gardening tasks. They do not absorb water like cotton or leather. This also means they dry faster.
You can usually clean these gloves with simple soap and water. They resist shrinking and stretching. This makes their care less demanding. They are a good choice for gardeners who want low-maintenance gear.
Follow these simple steps:
- Rinse off loose dirt: Hold the gloves under a running tap or hose. Wash away any large chunks of mud or plant debris. Use your hands to rub off any clinging dirt.
- Prepare soapy water: Fill a sink or bucket with warm water. Add a small amount of mild dish soap or liquid hand soap.
- Wash the gloves: Put the gloves into the soapy water. Use a soft brush or your hands to scrub the coated areas. Pay attention to the fingertips and palms where dirt collects most. The rubberized coating usually wipes clean easily.
- Rinse thoroughly: Rinse the gloves under clean running water. Make sure all soap residue is gone. Squeeze out excess water gently.
- Air dry: Hang the gloves to air dry. Synthetic materials dry quickly. Make sure they are completely dry before storing them. This prevents any mildew from forming.
Removing Stubborn Stains and Odors from Garden Gloves
Garden gloves face many challenges beyond just dirt. Sap, grass stains, mold, and persistent odors are common issues. Tackling these specific problems requires targeted solutions. Regular cleaning helps prevent many of these issues from becoming severe. However, some situations need extra effort.
Acting quickly on stains improves your chances of removal. The longer a stain sits, the harder it becomes to remove. Odors also set in over time. Knowing specific remedies can save your favorite pair of gloves.
Dealing with Mud and Soil Stains
Mud and soil are the most common culprits for dirty garden gloves. While a simple wash often works, sometimes stains remain. Especially if the mud has dried and deeply embedded itself.
Here is how to deal with stubborn mud and soil stains:
- Dry first: Let the mud dry completely on the gloves. Do not try to wash wet mud immediately. Wet mud often spreads the stain.
- Scrape or brush off: Once dry, use a stiff brush or a dull knife to carefully scrape off as much dried mud as possible. Do this over a trash can or outside.
- Pre-treat (for fabric): For fabric gloves, apply a laundry pre-treatment spray or a paste of baking soda and a little water directly onto the stain. Let it sit for 15-30 minutes. Baking soda is effective for various stains on plastic and other materials.
- Wash: Follow the appropriate washing method for your glove material (hand wash or machine wash for fabric; wipe for leather/synthetic).
- Repeat if necessary: If the stain persists after the first wash, repeat the pre-treatment and washing steps.
Removing Sap and Grime
Tree sap, plant resins, and other sticky grime can be tough to remove. These substances can make gloves feel sticky and uncomfortable. They can also attract more dirt.
Try these methods for sap and grime:
- Rubbing alcohol: For non-leather gloves, dampen a cotton ball or cloth with rubbing alcohol. Gently dab the sap. The alcohol helps dissolve the sticky residue. Test in an inconspicuous area first, especially on colored gloves, to ensure it does not remove color.
- Oil-based solution: For leather gloves, a small amount of mineral oil or even olive oil on a cloth can help loosen sap. Gently rub the sap, then wipe it clean with a damp cloth. Follow with leather conditioner. This method is similar to how you might remove grease stains from other surfaces.
- Ice: For very stubborn, hardened sap, try rubbing an ice cube over it. This makes the sap brittle. You can then gently chip it off. Be careful not to damage the glove material.
- Dish soap paste: For synthetic or rubber-coated gloves, mix a little dish soap with warm water to form a paste. Apply it to the grime. Let it sit for a few minutes, then scrub with a soft brush and rinse.
Combating Mold and Mildew
If your gloves stay damp for too long, mold and mildew can grow. These fungi cause unpleasant smells and can degrade the glove material. They often appear as black, green, or white fuzzy spots.
Here’s how to combat mold:
- Isolate the gloves: Do not wash moldy gloves with other laundry. Mold spores can spread.
- Vinegar solution: For most fabric and synthetic gloves, mix equal parts white vinegar and water. Soak the gloves in this solution for an hour. Vinegar is a natural antifungal and effectively kills mold. This method is similar to how you might remove mold off shoes or mold off plastic.
- Scrub the mold: After soaking, use a brush to scrub the moldy areas. Remove all visible mold.
- Wash thoroughly: Wash the gloves using their appropriate cleaning method. Ensure all vinegar smell is rinsed out.
- Sunlight: After washing, dry the gloves in direct sunlight if possible. UV rays from the sun are natural mold killers.
- For leather: For mold on leather, mix a small amount of rubbing alcohol with water (1:1 ratio). Lightly dampen a cloth with this solution. Wipe the moldy area gently. Do not saturate the leather. Wipe dry and apply leather conditioner. This is a common way to deal with mold on various surfaces, including mold with vinegar.
Eliminating Odors
Sweat, soil bacteria, and dampness can leave gloves smelling foul. Even after cleaning, a lingering odor can be annoying.
Here are ways to eliminate odors:
- Baking soda soak: For fabric gloves, soak them in a solution of warm water and a cup of baking soda. Let them sit for several hours or overnight. Baking soda absorbs odors.
- Vinegar rinse: After washing, rinse fabric or synthetic gloves in a solution of water and half a cup of white vinegar. The vinegar helps neutralize odors. Do a final plain water rinse to remove the vinegar smell.
- Activated charcoal: Place dried, clean gloves in a sealed bag with a few pieces of activated charcoal. Leave them for a day or two. Activated charcoal is a strong odor absorber.
- Sunlight: As mentioned, sunlight helps kill odor-causing bacteria. Always dry gloves in a well-ventilated area, preferably in direct sunlight.
- Tea Tree Oil (for moldy smell): For persistent moldy smells, add a few drops of tea tree oil to the wash water (for fabric/synthetic). Tea tree oil has natural antifungal properties.
Drying and Storing Your Garden Gloves for Longevity
Proper drying and storage are as important as cleaning. Incorrect drying can shrink or damage gloves. Poor storage can lead to mold, odors, or loss of shape. Following these steps helps maintain your gloves. It ensures they are ready for your next gardening session.
Air drying is almost always the best method. Avoid high heat from dryers or direct sunlight for too long. High heat can cause materials to crack, shrink, or melt. This is especially true for synthetic and rubberized gloves.
Effective Drying Methods
- Air dry naturally: After washing, gently squeeze out excess water. Hang fabric or synthetic gloves to air dry. Use clothespins to hang them on a line or rack. Ensure good air circulation around them. You can also lay them flat on a clean towel.
- Avoid direct heat: Do not put gloves in a clothes dryer. Avoid placing them on radiators, near fireplaces, or in direct hot sunlight for extended periods. This heat can stiffen leather, melt synthetic coatings, or shrink fabrics.
- Stuff for shape: For leather gloves, or if you want to maintain the shape of any glove type, gently stuff them with crumpled paper towels or old newspaper. This absorbs moisture from the inside. Change the paper when it becomes damp.
- Dry inside out: If your gloves have a lining, turn them inside out after the initial drying. This helps the interior dry completely. Linings often take longer to dry.
- Check for complete dryness: Ensure gloves are completely dry before storing. Even slight dampness can lead to mold or mildew growth. This is similar to how you would dry your bathroom rugs or towels to prevent mildew.
Smart Storage Tips
- Cool, dry place: Store your clean, dry garden gloves in a cool, dry area. Garages, sheds, or utility closets are good options. Avoid damp basements or areas with fluctuating temperatures.
- Ventilated storage: Do not cram gloves into a sealed container. Allow for some air circulation. This helps prevent any residual moisture from causing issues.
- Keep shape: You can store gloves flat. Or, if they have a stiff cuff, stand them upright. Some people use glove shapers or stuff them lightly with paper to help them retain their form.
- Pair them up: Keep glove pairs together. You can clip them with a clothespin or tie them with a string. This saves time searching for a matching glove later.
- Separate dirty from clean: Never store dirty gloves with clean ones. Dirt and moisture from uncleaned gloves can transfer to clean ones. This can cause mold or odors to spread.
When to Replace Your Garden Gloves
Even with the best cleaning and care, garden gloves do not last forever. Knowing when to replace them is important. Using worn-out gloves reduces protection. It also makes gardening less comfortable. Replacing gloves at the right time ensures your hands remain safe. It also means you always have effective gear.
Inspect your gloves regularly. Before and after each significant gardening session is a good habit. Pay attention to key areas of wear. This helps you catch issues early. A well-maintained pair can last for years. A neglected pair might only last a single season.
Here are signs it is time for new garden gloves:
- Holes or tears: Any holes in the palms or fingers defeat the purpose of protective gloves. They allow thorns, dirt, or chemicals to reach your skin. Small tears can quickly become large holes.
- Thinning material: Even without a visible hole, if the material on the palms or fingertips becomes very thin, it offers less protection. You might feel small pokes or pressure more easily.
- Loss of grip: If the coated parts of your gloves wear away, you lose essential grip. This makes holding tools or plants more difficult and potentially unsafe.
- Stiffness or cracking: Leather gloves, despite conditioning, might eventually become stiff or crack badly. This happens especially if they were repeatedly wet and dried without proper care. Stiff gloves are uncomfortable and reduce dexterity.
- Persistent odors: If, after thorough cleaning and airing, your gloves still have a strong, unpleasant odor, it might be time to let them go. The smell often indicates deeply embedded bacteria or mold that is hard to remove.
- Irreparable damage: Some damage is too severe to fix. If the stitching comes undone significantly, or if there is major structural damage, new gloves are the better choice. Attempting to repair some types of damage can be more trouble than it’s worth.
- Reduced comfort: Gloves that no longer fit well or feel uncomfortable after cleaning should be replaced. Comfort is key for long gardening sessions.
- Safety Compromise: Ultimately, if the gloves no longer provide the level of protection you need, it’s time to replace them. Your hand safety should always be the priority.
Frequently Asked Questions About Cleaning Garden Gloves
How often should I clean my garden gloves?
Clean your garden gloves after every few uses, or whenever they get visibly dirty or start to feel stiff. For heavy daily use, clean them weekly. For light, occasional use, monthly cleaning is fine. Regular cleaning extends their life.
Can I put leather garden gloves in the washing machine?
No, never put leather garden gloves in a washing machine. The harsh detergents and tumbling action will strip natural oils from the leather. This causes it to dry, crack, and become stiff. Always hand clean leather gloves with specialized leather cleaner.
What should I do if my gloves smell after washing?
If gloves still smell after washing, soak fabric or synthetic gloves in a solution of warm water and baking soda for several hours. You can also add half a cup of white vinegar to the rinse cycle. For all gloves, ensure they are fully air-dried in a well-ventilated area, preferably in sunlight.
How do I remove tree sap from my gardening gloves?
For non-leather gloves, dab tree sap with rubbing alcohol or hand sanitizer. For leather gloves, use a small amount of mineral oil or olive oil. Gently rub the sap until it dissolves. Always test a small area first. Then clean and condition the gloves as usual.
Can I dry my garden gloves in a clothes dryer?
It is best to air dry garden gloves. High heat from a clothes dryer can shrink fabric gloves, melt synthetic coatings, or stiffen and crack leather. Hang them or lay them flat in a well-ventilated area away from direct heat.
What kind of soap is best for cleaning garden gloves?
Use a mild soap like dish soap, liquid hand soap, or gentle laundry detergent for fabric and synthetic gloves. For leather gloves, use a specialized leather cleaner. Avoid harsh chemicals or bleach, as they can damage most glove materials.
Conclusion
Keeping your garden gloves clean is a simple but important task. It helps your gloves last longer. It also protects your hands from dirt, germs, and discomfort. We have covered methods for different glove materials, from machine-washable fabric to delicate leather. You now know how to tackle stubborn stains and unpleasant odors.
Remember to shake off loose dirt before washing. Use the right cleaning method for your glove material. Always ensure your garden gloves are completely dry before storing them. This prevents mold and keeps them fresh. Taking a few moments to care for your gloves after each gardening session pays off. Your hands will thank you. Well-maintained gloves mean more comfortable and safer gardening for you. Give your gloves the attention they deserve. They are an essential part of your gardening success.
- cleaning garden gloves
- garden glove care
- washing gardening gloves

Todd Martin
Senior Writer
With over 15 years of experience in home renovation and design, I started HEG to share what I’ve learned with homeowners who want to create spaces that are both beautiful and functional. I’ve always believed in a hands-on approach, and over the years, I’ve picked up practical solutions that actually work. Through HEG, I aim to make home improvement more approachable, sharing real tips that help you create a home you truly love.