· Todd Martin · Home Maintenance · 13 min read
How To Clean Gas Heater Burners

How to Clean Gas Heater Burners: Boost Efficiency & Safety
Cold weather is coming, and you want your home warm. A gas heater is a reliable source of heat. Over time, dust and debris build up on your gas heater burners. This build-up affects how well your heater works. It can also create safety risks.
Cleaning these burners keeps your heater running smoothly. It makes sure your home stays comfortable and safe. This guide will walk you through the simple steps. You will learn how to clean gas heater burners effectively. We will cover safety, tools, and the cleaning process. Get ready to improve your heater’s performance.
Takeaway
- Regularly clean gas heater burners to ensure efficient and safe operation.
- Always prioritize safety by shutting off gas and power before starting.
- Use appropriate tools like brushes, vacuums, and compressed air to remove debris.
- Inspect burners for damage and reassemble carefully after cleaning.
- Know when to call a professional for complex issues or annual maintenance.
Cleaning gas heater burners involves safely shutting off gas and power, disassembling components, gently removing dust and debris with a soft brush, vacuum, or compressed air, and ensuring proper reassembly for efficient and safe operation. This process improves performance and reduces risks.
Why You Should Clean Your Gas Heater Burners
Maintaining your gas heater is important. Dirty burners cause many problems. They reduce your heater’s ability to warm your home. Cleaning them is a simple task with big benefits.
When dust and grime collect on the burners, they block the gas flow. This leads to an uneven flame. An uneven flame means less efficient heating. Your heater has to work harder. This increases your energy bills.
Beyond efficiency, safety is a major concern. Clogged burners can produce carbon monoxide. This gas is colorless and odorless. It is very dangerous. Regular cleaning helps prevent this hazard. It ensures safe operation for your family.
Clean burners also extend your heater’s lifespan. Less strain on components means less wear and tear. You will save money on repairs and replacements. A clean heater runs more quietly too. It provides consistent warmth without issues.
Essential Safety Measures Before You Start
Safety comes first when working with gas appliances. Before you touch anything, you must take precautions. Ignoring these steps can lead to serious accidents. Your well-being is the top priority.
First, turn off the gas supply to your heater. Locate the main gas shut-off valve. This valve is usually near the heater itself. Turn the handle to the “off” position. This stops gas from flowing to the burners.
Next, disconnect the electrical power. Find the circuit breaker for your heater. Flip it to the “off” position. If you are unsure, turn off the main breaker for your home. This prevents accidental startup during cleaning.
Ensure the area is well-ventilated. Open windows and doors in the room. This helps clear any residual gas odors. It also improves air quality while you work. Remember, working with gas requires extreme care. If you experience a gas smell, exit the area and call your gas company immediately. For information on handling gas incidents, you can refer to our guide on how to clean up gas spill.
Always wear appropriate safety gear. Gloves protect your hands from grime and sharp edges. Safety glasses shield your eyes from dust or debris. Having a fire extinguisher nearby is also a good idea. These simple steps ensure a safe working environment.
Tools and Materials You Will Need
Having the right tools makes the job easier. It also ensures a thorough cleaning. You likely have most of these items already. Gather everything before you begin. This prevents interruptions during the process.
You will need a screwdriver set. Different screws hold heater panels in place. A flat-head and Phillips-head screwdriver are essential. You might also need a nut driver or socket set for some models. Check your heater’s manual for specific fastener types.
A soft-bristle brush is crucial for cleaning the burners. An old toothbrush works well for small spaces. A stiff wire brush is useful for stubborn rust or carbon deposits. However, use caution not to damage the burner ports. A vacuum cleaner with a hose attachment is perfect for removing loose dust. A shop vac can handle larger debris.
Compressed air is highly effective for clearing burner ports. You can use a can of compressed air. A small air compressor with a nozzle also works. Just make sure the pressure is not too high. Too much pressure can damage delicate components.
Finally, gather a flashlight for better visibility. You will be looking into dark areas of the heater. A small container is useful for holding screws. This prevents losing small parts during disassembly. Clean cloths or rags are also helpful for wiping surfaces.
Step-by-Step Guide to Cleaning Gas Heater Burners
Cleaning your gas heater burners is a detailed process. Follow these steps carefully. This ensures a safe and effective cleaning. Take your time with each stage.
Disconnecting and Accessing Burners
Start by ensuring all safety precautions are in place. The gas supply must be off. The electrical power must be disconnected. Confirm that the heater is completely cool. Never work on a hot appliance.
Locate the heater’s access panels. These panels usually have screws or clips. Use your screwdriver to remove them. Carefully set the screws aside in your container. Remember where each screw came from. This makes reassembly easier.
Once the panel is off, you will see the burner assembly. It might be hidden behind other components. Take a photo of the layout if you need to. This visual reference helps with reassembly. Some models may require removing more parts to get to the burners. Refer to your heater’s manual for exact instructions.
Carefully disconnect any wires or tubes attached to the burner assembly. Label them if necessary. Gently lift or unbolt the burners from their position. Some burners slide out easily. Others are bolted down. Be careful not to bend or damage any parts.
Removing Debris and Soot
With the burners removed, you can begin cleaning. Use your soft-bristle brush. Gently brush away loose dust and soot. Pay close attention to the burner ports. These are the small holes where the gas comes out. Blocked ports lead to inefficient flames.
For more stubborn grime, use the wire brush. Be gentle but firm. Avoid scratching the burner material. If you clean gas stove burners, you use a similar technique. For more details on cleaning stovetop burners, you can read our guide on how to clean burners on gas stove. Similarly, cleaning a gas grill involves tackling carbon buildup on burners. Check out tips for how to clean burners on gas grill for additional insight.
After brushing, use your vacuum cleaner. Suck up all the loose debris. Get into crevices around the burner assembly. Make sure no particles remain. A clean surface is important for proper reassembly.
Now, use compressed air to clear the burner ports. Hold the nozzle close to each port. Blast air through them. This pushes out any remaining dust or small blockages. Work your way across all the ports. This step is critical for even flame distribution. You may also want to clean the igniter while you have the burner accessible. A dirty igniter can cause ignition problems. Learn more about cleaning gas stove igniters in our article on how to clean igniter on gas stove.
Inspecting for Damage
After cleaning, carefully inspect each burner. Look for any signs of damage. Cracks or corrosion indicate a problem. Bent or warped burners also need attention. Damaged burners can be unsafe.
Check the burner ports closely. Are they all clear and uniform? Any misshapen ports might affect gas flow. Also, examine the igniter and pilot light if your model has one. Make sure they are clean and intact. Cleaning the pilot light is a common maintenance task for gas appliances, similar to fireplaces. For steps on this, see our guide on how to clean pilot light on gas fireplace.
Look for any signs of rust. Minor surface rust can be brushed off. Extensive rust might mean the burner needs replacement. Rust can weaken the metal. It can lead to gas leaks or burner failure. If you find significant damage, do not attempt to repair it yourself. This is a job for a professional.
Also, inspect the gas supply tubes. Make sure they are free of kinks or damage. Any compromise in these lines is a serious safety risk. Your careful inspection ensures your heater is safe to operate after cleaning. This proactive approach prevents future issues.
Reassembly and Testing
Once burners are clean and inspected, reassemble them. Follow your disassembly steps in reverse order. Carefully put the burner assembly back into place. Secure it with bolts or clips. Make sure it sits firmly.
Reconnect any wires or tubes you detached. Double-check that all connections are snug. Refer to your photos or notes if you need help. Proper connection is important for safe operation. Take your time to ensure everything is correct.
Replace the heater’s access panels. Secure them with the screws you removed earlier. Do not overtighten the screws. This can strip the threads. Ensure all panels are tightly closed. No gaps should be present.
Now, it is time to test. First, turn the gas supply back on. Slowly open the valve. Listen for any hissing sounds. A hissing sound indicates a gas leak. If you hear a leak, turn off the gas immediately. Do not proceed. Call a professional.
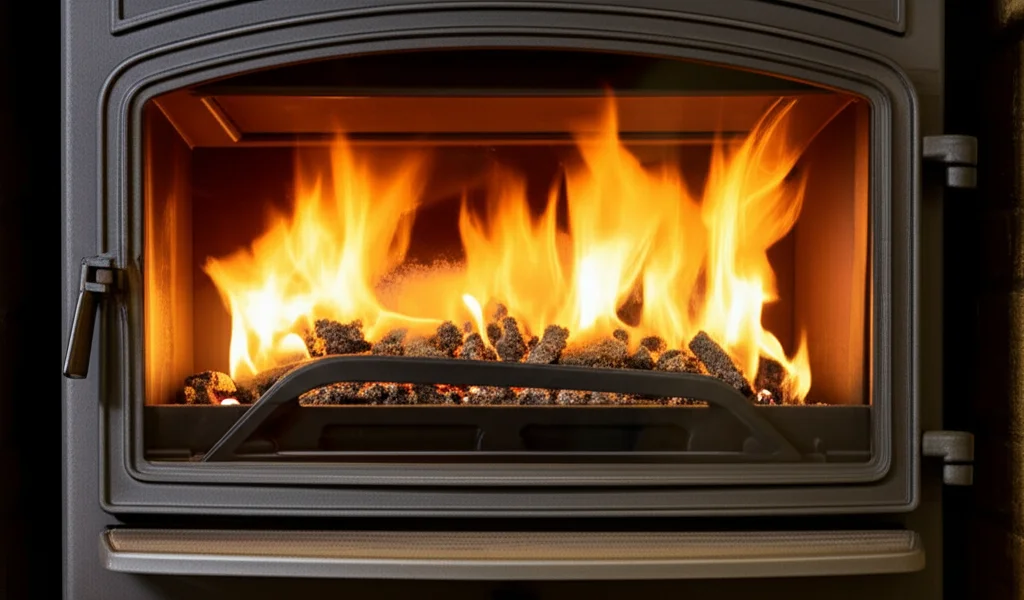
If no leaks are present, restore electrical power to the heater. Turn on the thermostat. Set it to a temperature higher than the room temperature. Observe the burners. They should light evenly. The flames should be a steady blue color. Yellow or orange flames indicate incomplete combustion. This means a problem still exists. If you see yellow or orange flames, turn the heater off and call a professional. Your successful cleaning helps ensure your heater runs safely and efficiently.
When to Call a Professional for Heater Maintenance
While DIY cleaning is beneficial, some tasks require professional expertise. Knowing when to call a technician is important. It ensures your safety and the longevity of your heater. Do not hesitate to seek help if you are unsure.
If your heater continues to produce yellow or orange flames after cleaning, call a pro. This indicates a combustion issue. It could be due to a larger problem than simple dirt. Carbon monoxide can be a byproduct of incomplete combustion. This situation is dangerous.
If you smell gas, even faintly, contact your gas company or a professional HVAC technician immediately. Never try to find or fix a gas leak yourself. Evacuate your home and do not use any electrical switches or phones. Gas leaks are emergencies.
Strange noises like banging, grinding, or squealing also warrant a professional visit. These sounds often mean a mechanical problem. It could be a failing motor or a loose component. Early intervention can prevent more costly repairs. Similar issues, like sediment in a water heater, often require professional help or specific tools. You can learn more about general appliance maintenance, such as how to clean sediment from water heater.
Finally, consider annual professional servicing. A qualified technician can perform a thorough inspection. They check all components. They ensure optimal performance and safety. They can identify minor issues before they become major problems. Regular professional maintenance complements your DIY cleaning efforts. It keeps your heater in top condition for years.
Preventative Measures for Long-Term Heater Health
Cleaning your gas heater burners is one step. Regular maintenance ensures your heater lasts longer. It also keeps your home warm and safe. Simple habits prevent future issues.
First, change your air filter regularly. A dirty filter restricts airflow. This makes your heater work harder. It also reduces efficiency. Check your filter monthly. Replace it every one to three months. A clean filter protects your burners from dust buildup.
Keep the area around your heater clear. Do not store flammable materials near it. Ensure proper clearance for ventilation. This allows the heater to draw in enough air. Blocked airflow can affect burner performance. It can also create fire hazards.
Consider installing carbon monoxide detectors in your home. Place them near sleeping areas. Also put one near your heater. These detectors provide an early warning. They can save lives. Test them regularly to ensure they work.
Schedule annual professional maintenance. Even if you clean the burners, a technician offers a deeper check. They can calibrate settings. They inspect gas lines and electrical components. This thorough check ensures peak performance. It also verifies safety. These preventative measures keep your gas heater running efficiently. They protect your home and family. A well-maintained heater provides reliable warmth for years.
Frequently Asked Questions
How often should I clean my gas heater burners?
You should aim to clean your gas heater burners annually. Do this before the heating season starts. If your home is particularly dusty, you might need to clean them more often. Regular cleaning maintains efficiency and prevents dangerous buildup.
What are the signs that my gas heater burners need cleaning?
Common signs include yellow or orange flames instead of blue, a noticeable decrease in heating efficiency, strange odors, or a flickering flame. Soot accumulation around the burners is also a clear indicator. Address these signs promptly to ensure safety and performance.
Can I use water to clean gas heater burners?
No, do not use water on gas heater burners. Water can cause rust and damage delicate components. It can also lead to incomplete drying, which creates safety hazards when the heater is re-ignited. Stick to dry cleaning methods like brushing, vacuuming, and compressed air.
Is it safe to clean gas heater burners myself?
Yes, it is safe if you follow all safety precautions. Always turn off the gas supply and electrical power first. Ensure good ventilation. If you are uncomfortable or unsure at any point, stop and call a professional technician. Safety is paramount.
What happens if I don’t clean my gas heater burners?
Neglecting burner cleaning leads to reduced heating efficiency, higher energy bills, and potential safety risks. Blocked burners can produce carbon monoxide, a dangerous gas. They can also cause premature wear and tear on your heater components, leading to costly repairs.
Can a dirty burner affect my indoor air quality?
Yes, a dirty burner can negatively impact indoor air quality. Incomplete combustion from clogged burners can release soot and harmful gases, including carbon monoxide, into your home. Regular cleaning ensures cleaner air and safer operation.
Conclusion
You have learned how to clean gas heater burners effectively. This DIY task offers significant benefits. It boosts your heater’s efficiency. It also enhances the safety of your home. We covered essential safety steps. We discussed the tools you need. Then, we walked through the detailed cleaning process. Remember to always prioritize safety. Disconnect gas and power before you start. Use the right tools for gentle cleaning. Inspect all parts carefully for damage.
Regular maintenance extends your heater’s life. It ensures consistent, reliable heat. If you encounter issues beyond simple cleaning, call a professional. Annual servicing complements your efforts. It keeps your heating system in top condition. Take control of your home’s comfort and safety. Start cleaning your gas heater burners today. Your efforts will result in a warmer, safer home for years to come.
- gas heater
- burner cleaning
- home heating
- DIY maintenance
- heater efficiency
- gas appliance
- safety

Todd Martin
Senior Writer
With over 15 years of experience in home renovation and design, I started HEG to share what I’ve learned with homeowners who want to create spaces that are both beautiful and functional. I’ve always believed in a hands-on approach, and over the years, I’ve picked up practical solutions that actually work. Through HEG, I aim to make home improvement more approachable, sharing real tips that help you create a home you truly love.