· Todd Martin · Home Maintenance · 21 min read
How To Clean Gas Can
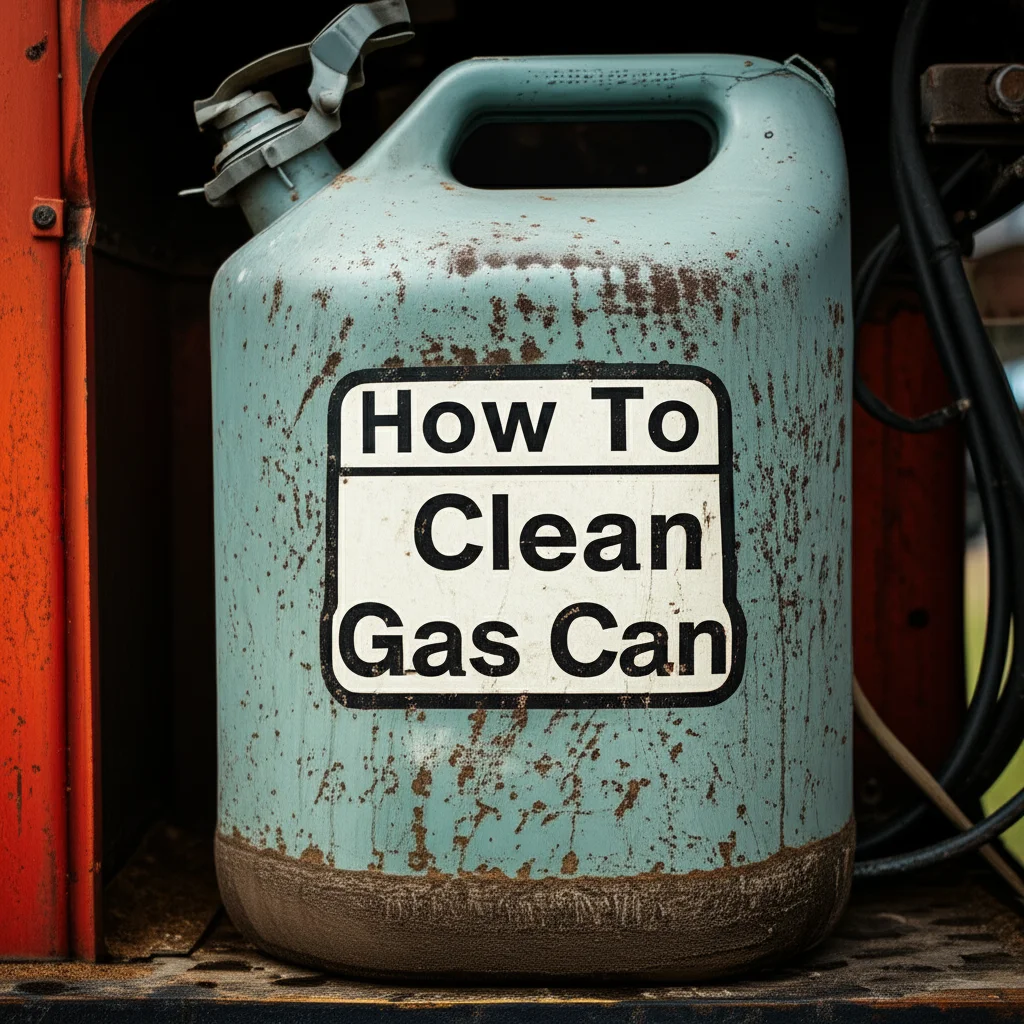
Clean Your Gas Can Safely and Effectively
A gas can seems like a simple container. We fill it with fuel, pour it into our lawnmower or generator, and then store it away. But over time, gas cans can accumulate residues. Old fuel leaves behind varnish. Water can condense inside, leading to rust. Cleaning your gas can is not just about appearances; it is about protecting your valuable equipment. A dirty gas can introduces contaminants into your engine. This can cause poor performance or even damage. This guide will walk you through the proper steps to clean a gas can thoroughly and safely, ensuring your fuel stays pristine.
Takeaway:
- Prioritize safety: Work outdoors, wear PPE, and eliminate ignition sources.
- Empty the can completely and dispose of old fuel properly.
- Use simple cleaning agents like dish soap or vinegar for most residue.
- Rinse thoroughly multiple times to remove all cleaning agents.
- Ensure the can is completely dry before storing new fuel.
To clean a gas can, first, empty all old fuel and dispose of it safely. Then, rinse the can with warm water multiple times. Next, wash the interior with dish soap and water, scrubbing with a brush. Rinse again thoroughly until all suds are gone. Finally, allow the can to air dry completely upside down in a well-ventilated area to prevent rust and mildew.
Why a Clean Gas Can is Essential for Fuel Purity
Have you ever wondered what happens to the fuel inside your gas can after weeks or months? Gasoline does not last forever. It degrades over time. This degradation leaves behind sticky residues and varnish. These contaminants settle at the bottom of your can. If you pour new fuel into a dirty can, you transfer these harmful substances directly into your equipment.
This can affect your engine’s performance. Fuel filters can clog. Carburetors might foul. Fuel injectors can become less efficient. This leads to costly repairs or a shorter lifespan for your tools. A clean gas can ensures that only pure fuel reaches your engine. This helps your equipment run smoothly and reliably. It also extends its service life. Regular cleaning prevents these issues before they start. It saves you money and hassle in the long run.
Protecting Your Engine from Contamination
Tiny particles or degraded fuel components can cause big problems. Your engine is a precise machine. It needs clean fuel to operate correctly. A dirty gas can introduces grit, rust, or old fuel varnish into your fuel system. This directly impacts how your engine performs. Spark plugs can get fouled. Fuel lines might get restricted. Your engine may struggle to start or run rough.
I always think of my lawnmower. It is an investment. I want it to last many seasons. Pouring clean fuel from a clean can makes a difference. It ensures optimal combustion and reduces wear on internal components. This simple act of cleaning your can protects the heart of your machinery. It keeps everything running as it should.
Preventing Odors and Maintaining Can Integrity
Beyond engine health, a clean gas can is just more pleasant to handle. Old fuel leaves a strong, lingering odor. This smell can permeate your garage or shed. It makes storing the can inside difficult. Cleaning eliminates these unpleasant smells. It also helps preserve the can itself. Moisture can accumulate inside a dirty can. This leads to rust, especially in metal cans.
Rust particles can then mix with your fuel. This further contaminates it. Cleaning removes this moisture and any existing rust. It also allows you to inspect the can for damage. You can spot cracks or leaks early. This maintains the can’s integrity. A well-maintained gas can lasts longer. This means you do not have to buy new ones as often. It is a win-win situation for your nose, your budget, and your equipment.
Essential Safety Measures for Cleaning a Gas Can
Safety is not just a suggestion; it is a requirement when handling fuel. Gas is highly flammable. Its vapors are explosive. Before you even think about cleaning your gas can, you must prioritize safety. Taking shortcuts can lead to serious accidents. Always work in a well-ventilated area. This means outdoors is best. Never clean a gas can indoors or in an enclosed space. The fumes can build up quickly.
Keep all sources of ignition far away. This includes open flames, sparks, and even hot surfaces. Do not smoke near the cleaning area. Turn off any pilot lights nearby. Ensure no electrical equipment is sparking. Static electricity can also ignite vapors. Grounding yourself before handling the can can prevent this. These precautions protect you and your property. They are non-negotiable steps in the cleaning process.
Choosing the Right Location
Selecting your cleaning spot is critical. As I mentioned, outside is always the best choice. A concrete driveway or a patch of gravel works well. Avoid grassy areas where spills could harm plants. A gentle breeze helps disperse any lingering fuel vapors. This minimizes the risk of inhalation and ignition. Make sure children and pets are not in the vicinity. They should stay clear of the work area.
Consider the weather too. A calm, sunny day is ideal. Strong winds can blow fumes into unwanted areas. Rain can mix with fuel spills. This makes cleanup harder. I always pick a spot away from my house and any other buildings. This creates a safe buffer zone. Proper location prevents accidental exposure and fire hazards.
Personal Protective Equipment (PPE)
Protecting your body is vital. Gasoline can irritate your skin. Its fumes can harm your respiratory system. Wearing the right personal protective equipment is a must. I always put on sturdy gloves first. Neoprene or nitrile gloves work best. Standard rubber gloves may not hold up to gasoline. They can degrade quickly.
Safety glasses or goggles protect your eyes from splashes. A respirator or mask designed for organic vapors is also highly recommended. This prevents you from inhaling harmful fumes. Long sleeves and pants offer additional skin protection. Old clothes are a good idea. You do not want to ruin your favorite shirt. Having a fire extinguisher nearby is also a smart move. You hope you never need it. But it is better to be prepared for any emergency.
Gathering the Right Tools and Materials
Before you begin the cleaning process, make sure you have everything ready. This prevents interruptions. It also ensures a smooth and efficient cleaning job. You do not want to be running inside looking for supplies while working with fuel. Most of the items you need are probably already in your home. Some are basic cleaning supplies. Others are for safety.
Having everything laid out makes the job safer too. You can focus on the task. You will not be distracted. This preparation step is just as important as the cleaning itself. It sets you up for success. I always gather my supplies first. This way, I know I have all I need.
Here is a list of what you will need:
- Protective Eyewear: Safety glasses or goggles.
- Gloves: Neoprene or nitrile gloves are best.
- Respirator or Mask: Rated for organic vapors.
- Soap: Dish soap or a mild detergent.
- Water: Plenty of warm water.
- Brushes: A long-handled bottle brush or a stiff bristled brush.
- Funnel: For pouring and disposal.
- Empty Container: A larger container for old fuel or rinsing water.
- Absorbent Material: Old rags, newspapers, or cat litter for spills.
- Fire Extinguisher: For safety.
- Optional: White vinegar, baking soda, or specialized fuel system cleaner.
Step-by-Step Guide to Emptying and Initial Rinse
The first crucial step is to empty the gas can completely. You must remove all residual fuel. Even a small amount of old gas can contaminate new fuel. It can also pose a fire risk during cleaning. Always do this outdoors. Use a funnel to transfer any remaining fuel. Pour it into an approved storage container. Never pour gasoline down a drain or onto the ground. This pollutes the environment. It also creates a severe fire hazard.
If the fuel is still good, you can use it in your equipment. If it is old or contaminated, you must dispose of it properly. Check with your local hazardous waste facility. They will tell you how to handle old fuel. This initial emptying is vital. It prepares the can for cleaning. It also reduces the amount of flammable material you are working with.
Safe Fuel Disposal
Proper disposal of old fuel is paramount. Do not simply throw it away. Old gasoline contains harmful chemicals. It is considered hazardous waste. Many communities have designated collection sites. These are often at transfer stations or recycling centers. Some auto parts stores also accept old motor oil and fuels. Call ahead to confirm their policies.
I always put old fuel into a clearly marked, approved container. I label it “Waste Fuel” with the date. This prevents accidental use. It also makes sure others know what is inside. Responsible disposal protects our environment. It also keeps our communities safe. Never mix gasoline with other liquids like oil or antifreeze. Each requires different disposal methods. Learn how to clean up a gas spill effectively if an accident occurs during this step.
The First Water Wash
Once the can is empty, it is time for the initial rinse. This helps remove any lingering fuel residues. It also begins to flush out loose dirt or debris. Pour a small amount of warm water into the can. About a quart or two is usually enough for a standard five-gallon can. Secure the cap tightly. Then, shake the can vigorously for a minute or two. The water sloshes around, picking up fuel remnants.
After shaking, carefully pour out the dirty water. Again, do this outdoors. Do not pour it down the drain. This rinse water will contain traces of gasoline. It also needs proper disposal. You can collect it in another designated container. Let it evaporate in a well-ventilated area, away from ignition sources. The remaining residue will be non-hazardous. Repeat this water rinse several times. Continue until the water you pour out looks relatively clear. This preliminary step makes the deep cleaning much more effective.
Effective Methods for Deep Cleaning Your Gas Can
After the initial rinse, you are ready for the deep clean. This is where you tackle the sticky residues and odors. There are several effective methods you can use. The best choice depends on how dirty your can is. It also depends on what materials you have on hand. Always work with warm water. Warm water helps break down fuel residues more effectively. Never use hot water, as it can create more flammable vapors.
Be patient with this step. It might require a bit of scrubbing. The goal is to remove all the old fuel film and any sludge. This ensures a truly clean interior. Remember, a clean can means clean fuel. Clean fuel means a happy engine.
Dish Soap and Hot Water Method
This is perhaps the simplest and most common method. Dish soap is excellent at cutting through grease and oil. It works well on gasoline residues too. I often use this method for moderately dirty cans. Pour a generous amount of liquid dish soap into the can. Use about 1/4 to 1/2 cup for a five-gallon can. Then, fill the can about one-quarter full with warm water. Secure the cap tightly.
Shake the can vigorously for several minutes. Think of it like shaking a cocktail. You want the soapy water to reach every interior surface. If you have a long-handled bottle brush, insert it. Scrub the inside walls. Pay special attention to the bottom and corners. These areas tend to accumulate more sludge. After scrubbing, let the soapy solution sit for 15-30 minutes. This allows the soap to break down stubborn residues. Finally, pour out the soapy water. Rinse the can repeatedly with clean water until no suds remain. You can learn how to clean diesel out of a gas can using similar methods.
Vinegar Solution for Odors
Vinegar is a natural deodorizer and mild acid. It works wonders on lingering gasoline odors. It can also help loosen light rust or mineral deposits. After the soap and water wash, if a strong odor persists, try a vinegar rinse. Pour undiluted white vinegar into the can. Fill it about one-quarter full. Secure the cap. Swirl the vinegar around to coat all interior surfaces.
Let the vinegar sit in the can for several hours. For very stubborn odors, you can even leave it overnight. The vinegar will absorb and neutralize the gasoline smell. After soaking, pour out the vinegar. You can often reuse this vinegar for other cleaning tasks. Rinse the can thoroughly with clean water multiple times. Ensure all traces of vinegar are gone. The slightly acidic nature of vinegar can cause issues if not fully rinsed. This method leaves your can smelling much fresher.
Using Detergent and Agitation
For exceptionally dirty cans, or those with significant varnish, a stronger detergent might be needed. Some people use laundry detergent or a degreaser. These products have more aggressive cleaning agents. Pour your chosen detergent into the can. Follow the product’s instructions for dilution. Generally, a small amount mixed with warm water is sufficient.
The key to deep cleaning is often agitation. You can add a handful of small pebbles, nuts, or even a short length of chain into the can. These act as abrasives. Secure the cap tightly. Then, shake the can vigorously for a prolonged period. The abrasives will scrub the interior walls. They dislodge stubborn grime and varnish. Be careful not to use anything that could scratch the can’s lining excessively. After agitation, pour out the dirty solution. Remove the abrasive materials. Rinse the can thoroughly, as described before, until the water runs clear and no residue is left. This method can be very effective for neglected gas cans.
Ensuring Complete Drying for Long-Term Storage
Cleaning your gas can is only half the battle. The drying process is just as important. Any lingering moisture inside the can can lead to rust. Rust then contaminates your fresh fuel. It can also create a breeding ground for mold or mildew if the can is stored empty. This is especially true for metal gas cans. Plastic cans are less prone to rust but can still develop mildew from moisture.
A thoroughly dry can ensures that your next batch of fuel remains pure. It also prevents internal corrosion. This prolongs the life of your gas can itself. Do not rush this step. Patience here saves you headaches later. I always take my time with drying. It is a critical part of maintaining the can’s integrity and the quality of your fuel.
Air Drying Techniques
The best way to dry a gas can is through air drying. After rinsing it clean, remove the cap. Turn the can upside down. You can prop it up on blocks or use a stand. This allows any residual water to drain out. Place the can in a well-ventilated area. Outdoors, in a sunny spot, is ideal. The sun’s warmth helps evaporate the moisture. A gentle breeze also aids the drying process.
Leave the can to dry for several days, if possible. I often leave mine for at least 24-48 hours. This ensures complete dryness. You might want to rotate the can every few hours. This exposes different internal surfaces to the air. You want to avoid any condensation. It also helps to prevent water from pooling in corners. Make sure the opening faces downward. This allows gravity to do its job.
Speeding Up the Drying Process
Sometimes, you need to dry your gas can more quickly. There are a few methods to speed up evaporation. After the initial draining, you can use a clean, lint-free cloth. Wipe down the interior as much as you can reach. This removes the bulk of the water. For hard-to-reach areas, a shop vac on its “blow” setting can help. Direct the airflow into the can. This forces air circulation and pushes out moisture.
Alternatively, you can use a small fan. Position the fan so it blows air directly into the can’s opening. This constant airflow speeds up drying significantly. Some people use a hairdryer on a cool setting. Never use a hot setting, as residual fumes could ignite. A cool airflow is safe and effective. Even after using these methods, I still recommend letting the can air dry for a few hours. This final ensures complete dryness. Your can will then be ready for new fuel.
Troubleshooting Stubborn Odors and Residues
Despite your best cleaning efforts, some gas cans just seem to hold onto a persistent odor or a stubborn film. This is especially true for older cans or those that held degraded fuel for a long time. Do not despair. There are a few additional tricks you can try. These methods focus on absorbing smells and breaking down tough residues. Remember to maintain all safety precautions while trying these advanced techniques.
Patience is key here. It might take several applications or extended soaking times. My goal is always a can that smells clean. This means no lingering fuel aroma. A truly clean can will prevent any contamination of new fuel. It also makes the can more pleasant to store and handle.
Tackling Persistent Fuel Odors
If your can still smells like gasoline, it means tiny fuel molecules are clinging to the plastic or metal. Baking soda is an excellent natural odor absorber. After cleaning and rinsing, add a generous amount of baking soda to the can. Use about 1/2 to 1 cup for a five-gallon can. Then, add a small amount of warm water to create a slurry. Swirl it around to coat the interior.
You can also simply fill the can with dry baking soda. Leave it open in a well-ventilated area for several days. The baking soda will absorb the odors. For even stronger odors, some people use activated charcoal. You can buy activated charcoal at pet stores (for aquariums) or garden centers. Place a few charcoal briquettes (without lighter fluid) inside the can. Cap it loosely and leave it for a week or more. The charcoal absorbs the volatile organic compounds. Afterward, rinse the can thoroughly.
Another effective odor removal method is using cat litter. Non-clumping clay cat litter works best. Fill the can about one-quarter full with dry cat litter. Secure the cap and shake vigorously. The cat litter acts as an absorbent. It also provides abrasive action against interior walls. Let the cat litter sit inside the can for a few days to a week. It will absorb the odors and any remaining moisture. After this time, empty the cat litter and dispose of it. Rinse the can thoroughly with clean water.
Removing Sludge and Varnish
Old fuel leaves behind a sticky, tar-like residue called varnish or sludge. This is particularly difficult to remove. Simple soap and water might not be enough. For these tough cases, you might need a stronger solvent or a dedicated fuel system cleaner. Products designed to clean carburetors or fuel lines can be effective. Pour a small amount of the cleaner into the can, following the product’s instructions for dilution and contact time.
Always test a small, inconspicuous area first. Some harsh solvents can damage plastic cans. Metal cans are generally more resilient. After adding the cleaner, you can re-introduce those small pebbles or a chain. Shake the can vigorously. The abrasives help scour the stubborn sludge from the walls. Let the cleaner sit for the recommended time. Then, pour it out and dispose of it properly. You may need to repeat this process. After cleaning, rinse the can extremely thoroughly. Any residue from strong cleaners can damage your engine. Always ensure it is completely clean and dry before storing new fuel. Also, if you need to clean up gas that has spilled on concrete, there are specific methods to address how to clean gas off concrete effectively.
Maintaining Your Gas Can and Knowing When to Replace It
Cleaning your gas can is not a one-time event. Regular maintenance helps prolong its life. It also ensures your fuel remains clean over time. A little proactive care goes a long way. Consider cleaning your gas can at least once a year. If you frequently store fuel or notice your can getting dirty, clean it more often. Always empty your can completely after each use. Avoid letting fuel sit in it for extended periods. This prevents the formation of varnish.
Store your gas can properly when not in use. Keep it in a cool, dry, well-ventilated area. Avoid direct sunlight. UV rays can degrade plastic cans. They can also accelerate fuel degradation inside. Storing it away from heat sources is crucial for safety. Following these simple maintenance tips will keep your gas can in top condition. This ensures it is always ready to safely store your fuel.
When to Consider a New Can
Even with the best care, gas cans do not last forever. They are exposed to harsh chemicals and environmental factors. Knowing when to replace your can is important for safety and fuel integrity. Inspect your can regularly. Look for any signs of wear or damage.
Here are signs it is time for a new gas can:
- Cracks or Leaks: Any visible cracks, especially around the seams or spout. Leaks are dangerous. They release flammable vapors.
- Rust: For metal cans, significant rust on the inside or outside. Rust flakes can contaminate fuel.
- Deformation: If the can is warped, bulging, or otherwise misshapen. This can be due to pressure changes or degradation.
- Fading or Brittleness: Plastic cans can become brittle or discolored from sun exposure. This indicates material degradation.
- Persistent Odor: If, after multiple cleaning attempts, the can still has a strong, lingering fuel odor. This suggests deep saturation of the plastic or material.
- Damaged Spout or Cap: A faulty spout or cap prevents a proper seal. This allows vapors to escape and contaminants to enter.
If you spot any of these issues, it is safer to invest in a new gas can. Properly dispose of the old one at a hazardous waste facility. Do not try to repair a damaged gas can. The risks outweigh the benefits. If you need to clean a fuel tank on different equipment, you might find similarities in the process of how to clean a gas tank on a lawn mower.
Frequently Asked Questions
Can I use bleach to clean a gas can?
No, you should never use bleach to clean a gas can. Bleach, when mixed with gasoline residue, can create dangerous, toxic fumes. It also corrodes metal and can degrade plastic over time. Stick to safer cleaning agents like dish soap, water, or vinegar for effective and safe cleaning.
How often should I clean my gas can?
The frequency depends on usage. If you use your gas can regularly and empty it often, an annual cleaning is usually sufficient. If fuel sits in it for long periods, or if you notice residue, odors, or rust, clean it more often. A good rule is to clean it whenever you switch fuel types or prepare it for long-term storage.
What if my gas can smells like old fuel after cleaning?
If a strong odor persists, try a baking soda paste or a full can of dry baking soda left for several days. Activated charcoal or non-clumping cat litter can also absorb stubborn odors over a week or two. Thorough rinsing and complete air drying are critical to remove all remnants of the smell.
Is it safe to store water in a gas can after cleaning?
It is not recommended to store water in a gas can, even after cleaning. Traces of fuel can still contaminate the water, making it unsafe for many uses. Also, storing water can promote rust in metal cans or mildew in plastic ones if not dried properly afterward. Use dedicated water containers for water storage.
What’s the best way to dispose of old fuel from a gas can?
The best way to dispose of old fuel is through a local hazardous waste collection facility or a recycling center that accepts fuels. Some auto repair shops or marinas also offer disposal services. Never pour old fuel down drains, onto the ground, or into regular trash, as it is a serious environmental hazard.
Conclusion
Cleaning your gas can is a simple yet crucial task. It extends the life of your power equipment. It protects your valuable tools from harmful contaminants. By following the steps outlined in this guide, you ensure that your fuel remains pure. Remember, safety always comes first when handling gasoline. Work in a well-ventilated area, wear proper protective gear, and keep ignition sources away.
Taking the time to clean your gas can prevents costly engine repairs. It also removes unpleasant odors. It ensures your can is ready for reliable fuel storage. A clean gas can is a sign of a responsible homeowner. It contributes to both safety and efficiency around your home and garden. Make it a regular part of your maintenance routine. Your engines will thank you for it.
- gas can
- fuel storage
- cleaning tips
- safety
- petrol can
- can cleaning

Todd Martin
Senior Writer
With over 15 years of experience in home renovation and design, I started HEG to share what I’ve learned with homeowners who want to create spaces that are both beautiful and functional. I’ve always believed in a hands-on approach, and over the years, I’ve picked up practical solutions that actually work. Through HEG, I aim to make home improvement more approachable, sharing real tips that help you create a home you truly love.